

I am soooo exciting to share this card, I had so much fun making it. It all started with this photo, and the monkey. The monkey had to be blue and yellow and it was for my beautiful grand daughters 2nd birthday, and the rest of it just fell into place as I was making it. It’s funny how that happens some times. I just found the perfect patterned paper and I just happened to have perfectly matching cardstock (from 2 different companies). I bought the little mirrors a while ago and finally had a reason to use them, and posing Jinx the Monkey in all the funny poses actually made me laugh.
As you read the words on each page think of the “Happy Birthday” song. I don’t know if it’s just me but I remember this swap in lyrics from when I was a child
This is why the monkey had to be blue and yellow, it belong to my son when he was three , and now it’s a favourite stuffed friend for this little cutie.


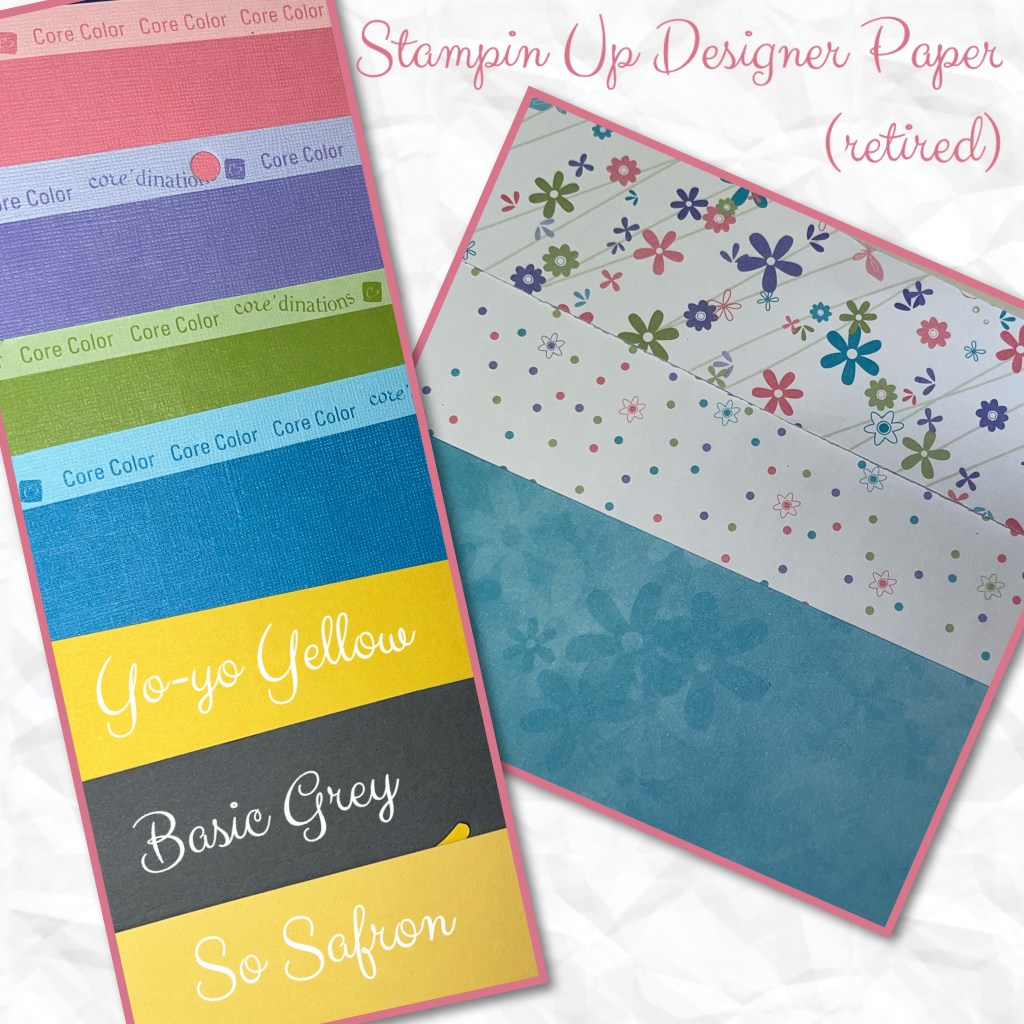
The paper in this card is allll from my stash. I started with the Core Color Blue and and the Yo-yo Yellow (retired) for Jinx the Monkey and then found the patterned paper which is from Stampin’Up circa 2006. The other Core Color cardstock happens to match the patterned paper perfectly. The So Safron card stock is what I used for the card base. Basic Grey was used on the monkey.
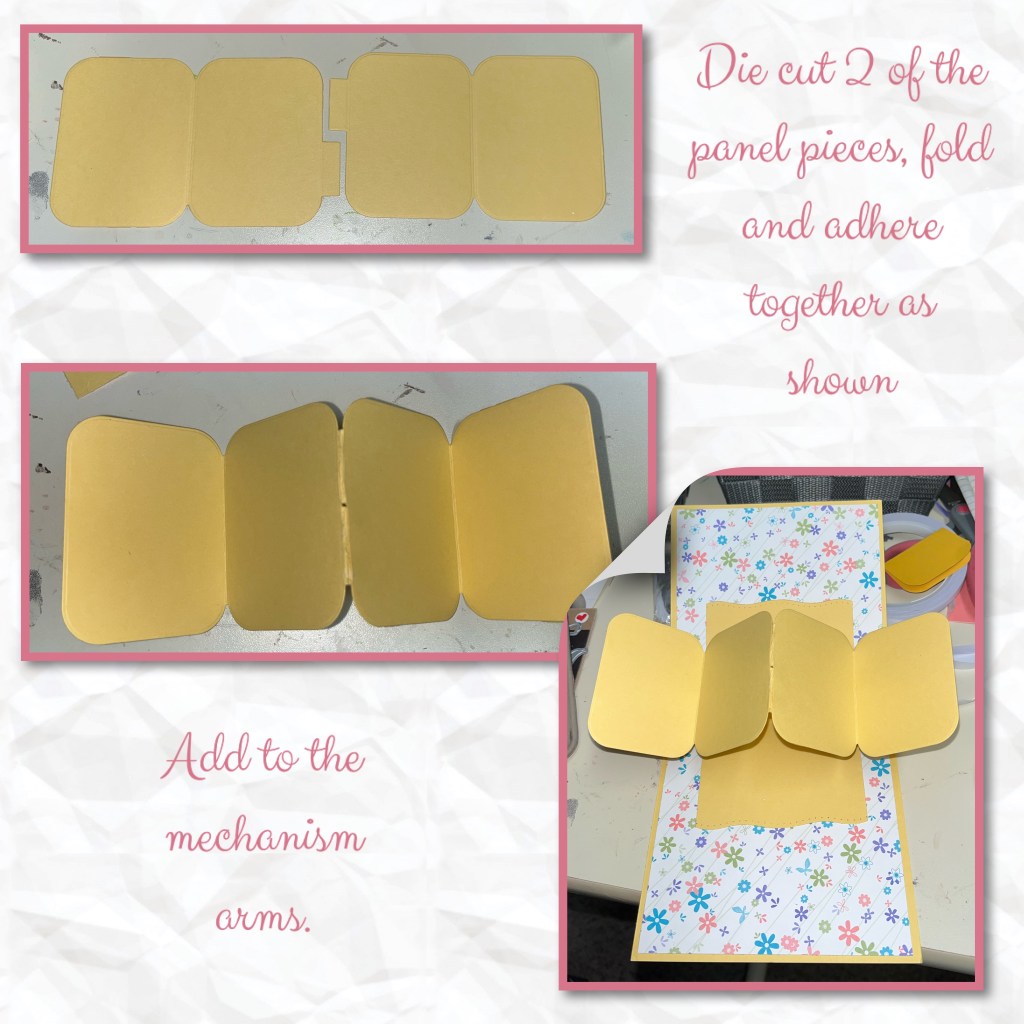
I knew I was going to use Karen Burnistons Twist Panel Pop Up die set so I die cut the panels, Jinx’s the Monkey (sorry he is retired) and leaves and flowers from the Flower Pot Pop Up, and the Flip Frame Pop up die sets.

I love the wow factor of the Twist Panel Pop up die set. I only give a brief description of how to create the mechanism because Karen has an amazing must see VIDEO on how to assemble this card. My card has different dimensions than the one in the video, I have it listed below.
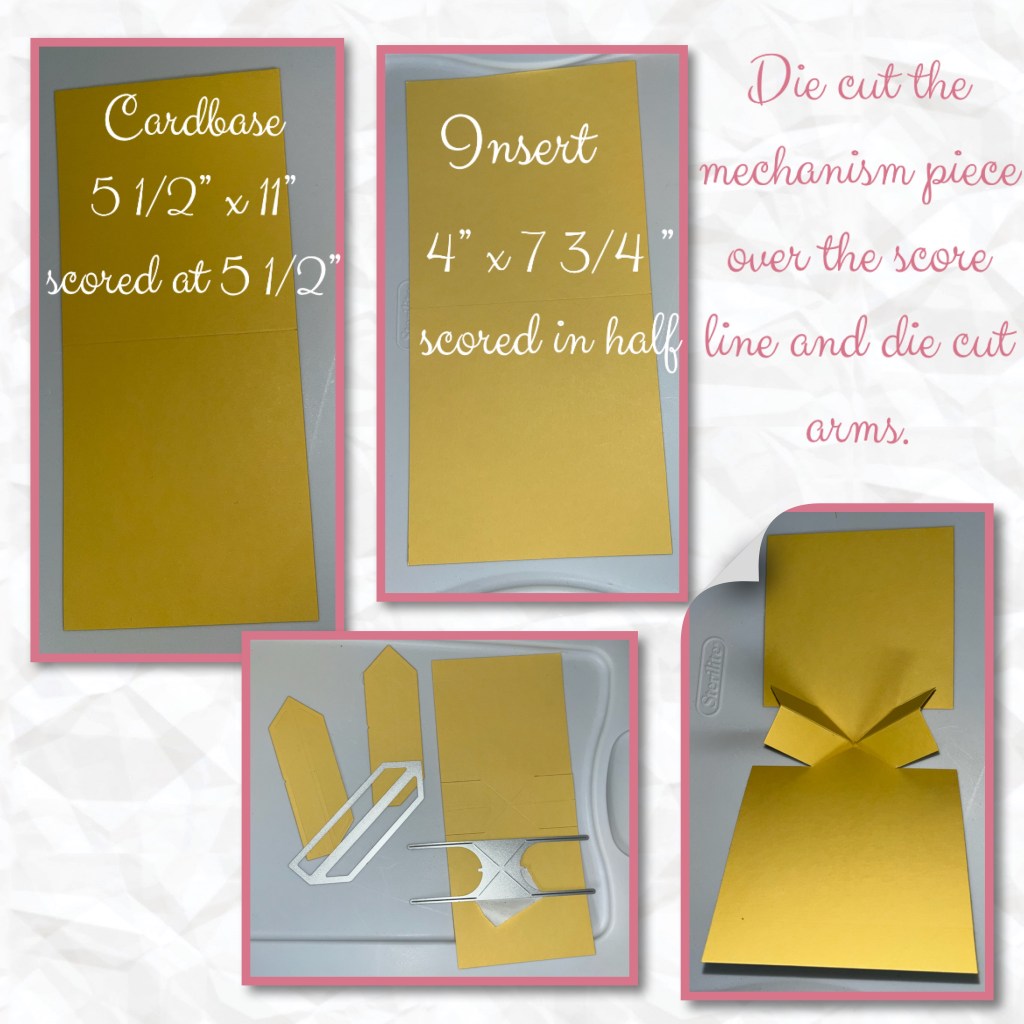
I cut the insert with a wave die but then covered it later. I made a few changes as I was going along. Below shows making the “main” card base.
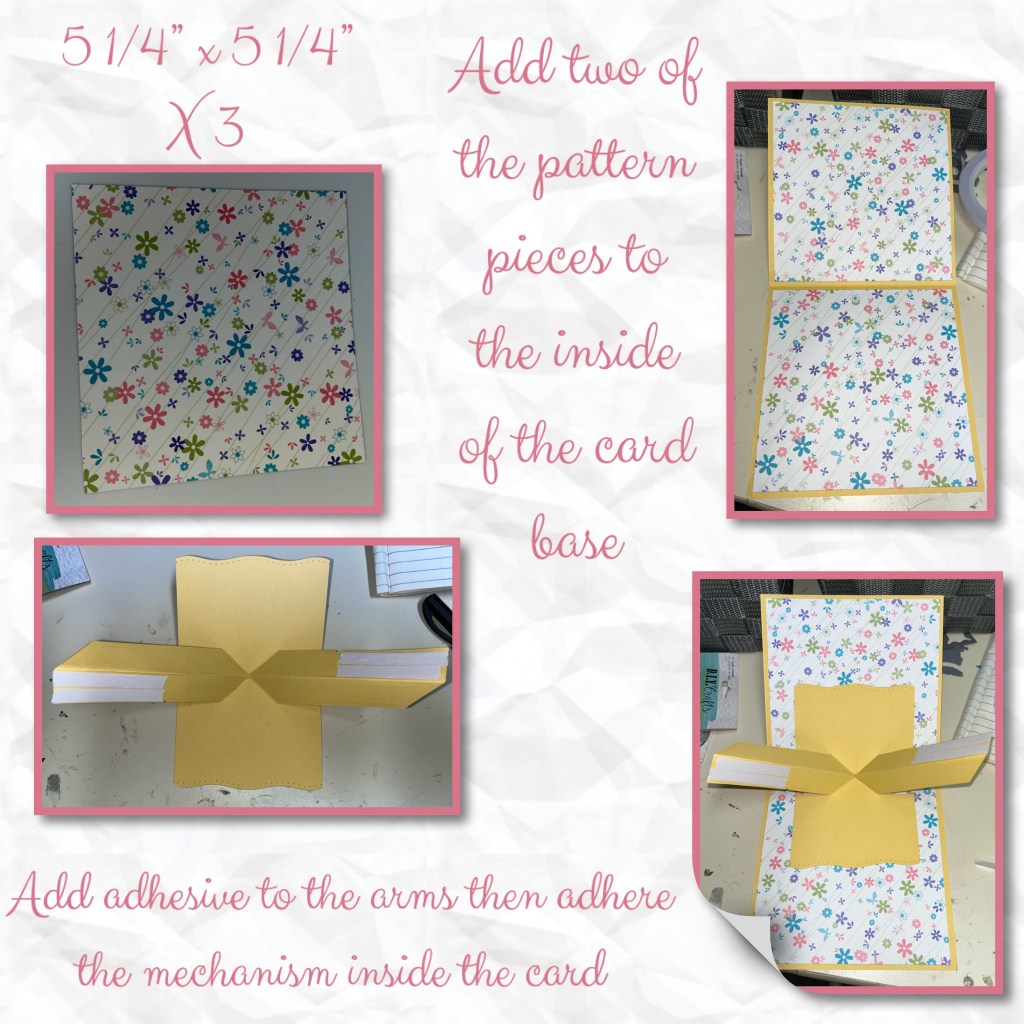
Now add the twist panels
So this is where I missed a photo. The front page of the card opens from the right to the left, then the inside opens up. Below is how I added the front page of the card. If I had to do it again I would have left myself a wider edge to adhere to the back of the card.
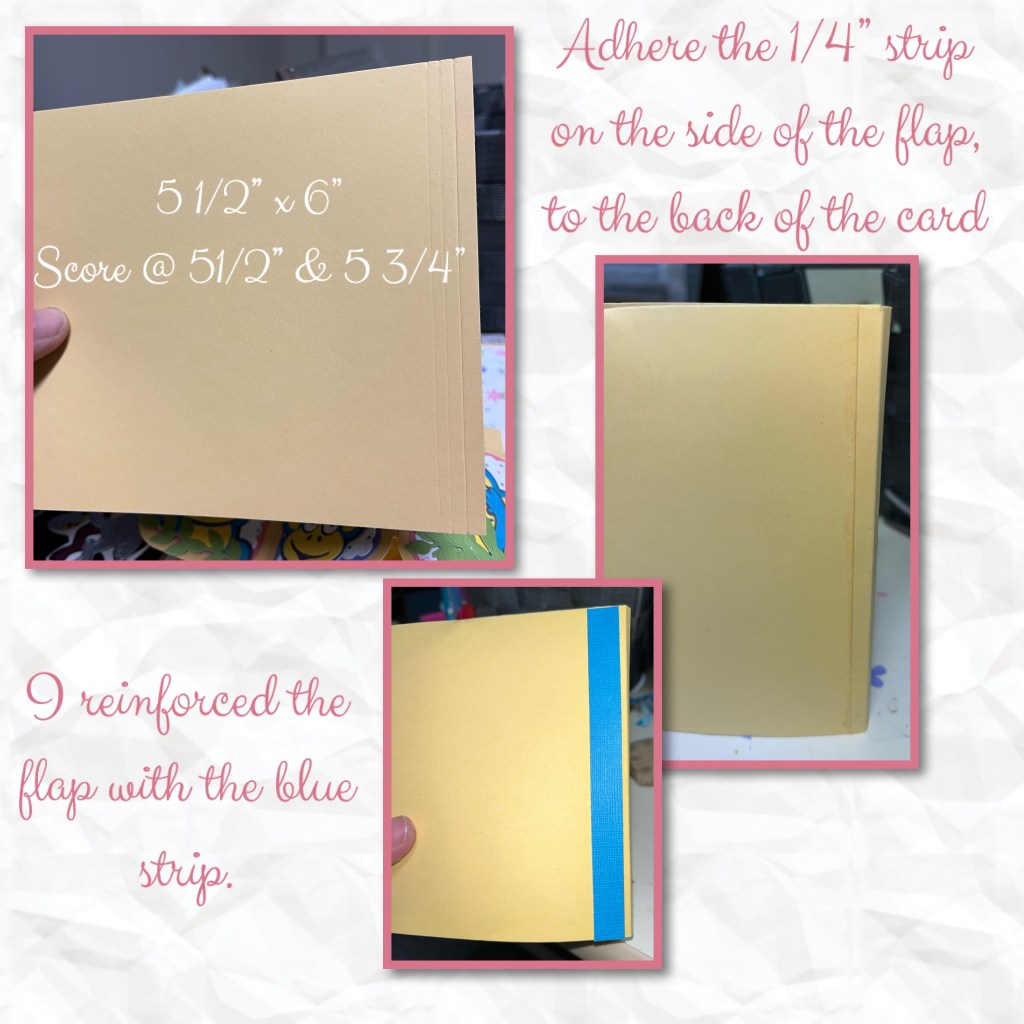
I seriously had so much fun decorating this card that I didn’t take as many photos along the way. I used the die cut shapes that I had cut earlier, random letter dies from my stash and the 2 Little Circle mirrors that I got from the dollar store.

And Voila, a bright and funny birthday card fit for a two-year-old.
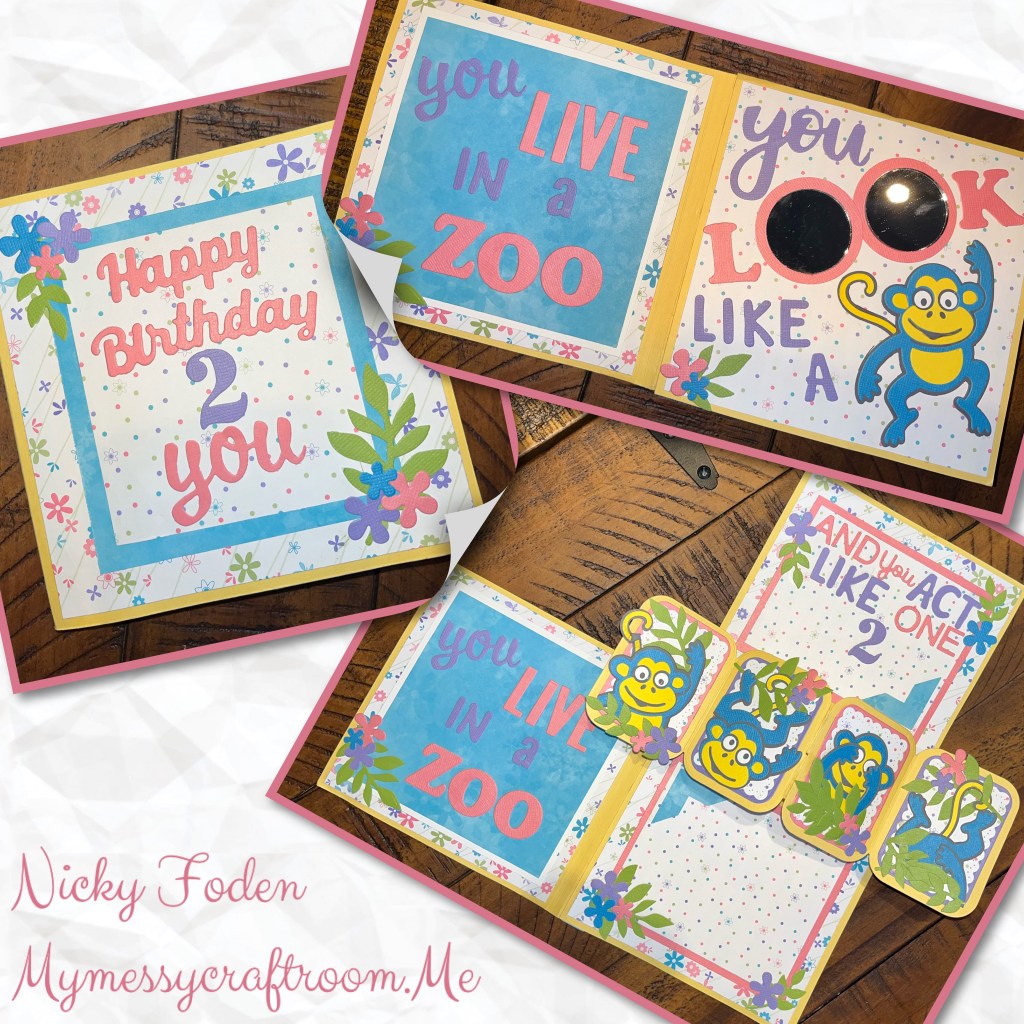
Each page close up


To see some other Twist Panel cards please check these out
Mother’s Day Twist panel Pop up
Please check out my FACEBOOK page, feel free to join if you would like to share your own crafty creations. You can also see my cards on my INSTAGRAM page
