
Hello Crafty friends,
Welcome to our Karen Burniston Products – KB Riley LLC December Release Blog Hop. The Design Team have come together with Karen today for a fun blog hop to celebrate the release of 11 new dies. Sneak peeks of the new release started last week, and the dies are available to order NOW!

This release includes:
• 2 new charm die sets
• 1 new stand alone die set
• 2 new Tiny House Add-Ons sets
• 2 new Pop-up die sets
• 1 new Woven Box Basket die set
• 2 new Crosshatch die sets
• 1 new Box die set
Dies are available to order now on the website.
GIVEAWAY:
To celebrate the release Karen Burniston and each of the Karen Burniston – KB Riley LLC Design Team members will be giving away a $25 Gift Certificate to some lucky person who comments on our blog posts, so make sure you join the hop and comment on everyone’s blog post. Winners will be randomly chosen from ALL of the blog hop comments received on our blog posts by Monday, 19th December 2022. Lots of chances to win some goodies, so just leave a comment on this post or any other blog hop posts to enter! Don’t forget to leave some way for us to contact you, in case you are a lucky winner!
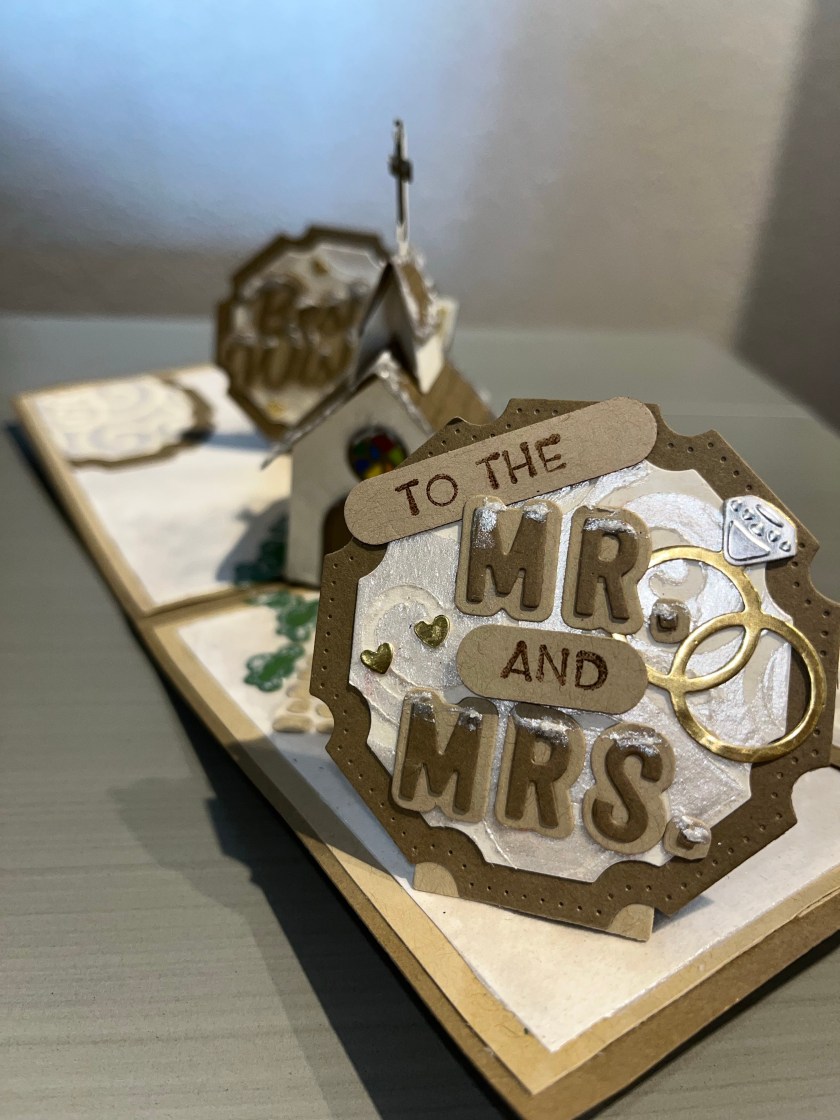
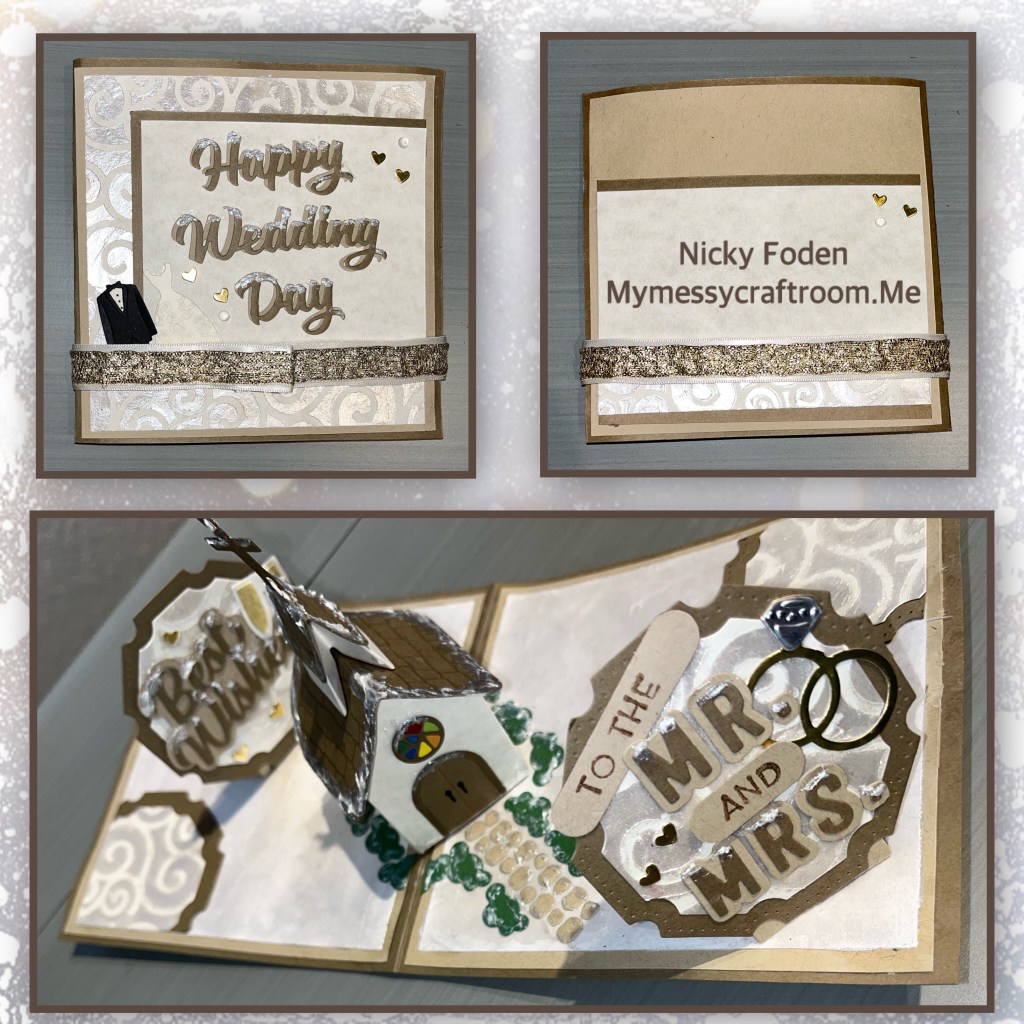
For my card I decided to use the Church and School Tiny House add on, the Wedding Charms and the new and highly addictive Bam Box.

All the fun is in the reveal, to see this card in action please check out my FACEBOOK page, feel free to join if you would like to share your own crafty creations. You can also see a video of this card on my INSTAGRAM page.
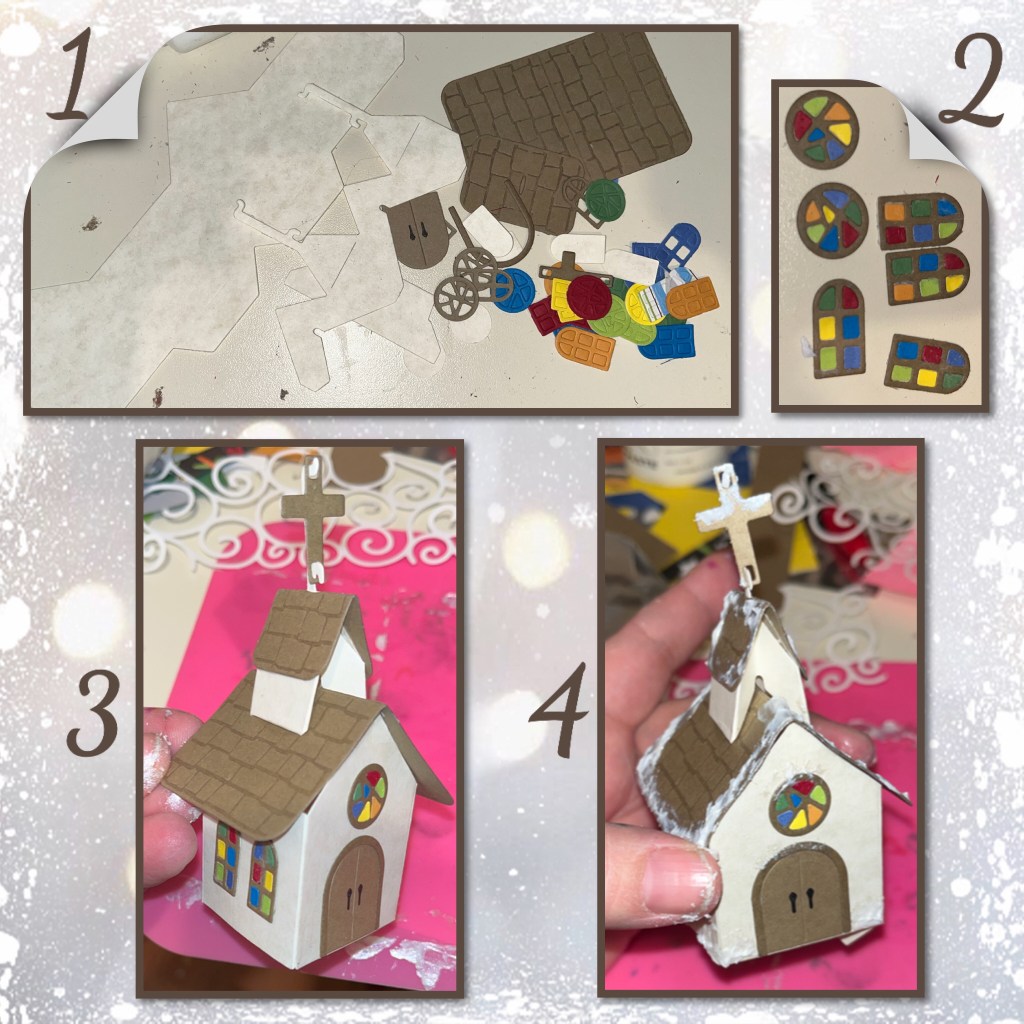
1- I die cut all of the pieces for the church. I found a cream-coloured marble cardstock for the church, I used the stamp feature when die cutting the roof, and multiple colours for the windows.
2- I wanted the windows to be very vibrant so I diecut them from multiple colours of cardstock. I could have just coloured them in but I like this look. After I assembled them I put the left over pieces in a baggy for the next time.
3- I assembled the Tiny house into a Church. (Karen will make an assembly video and I will update when she does)
4- I added Pearlescent Embossing Paste as snow
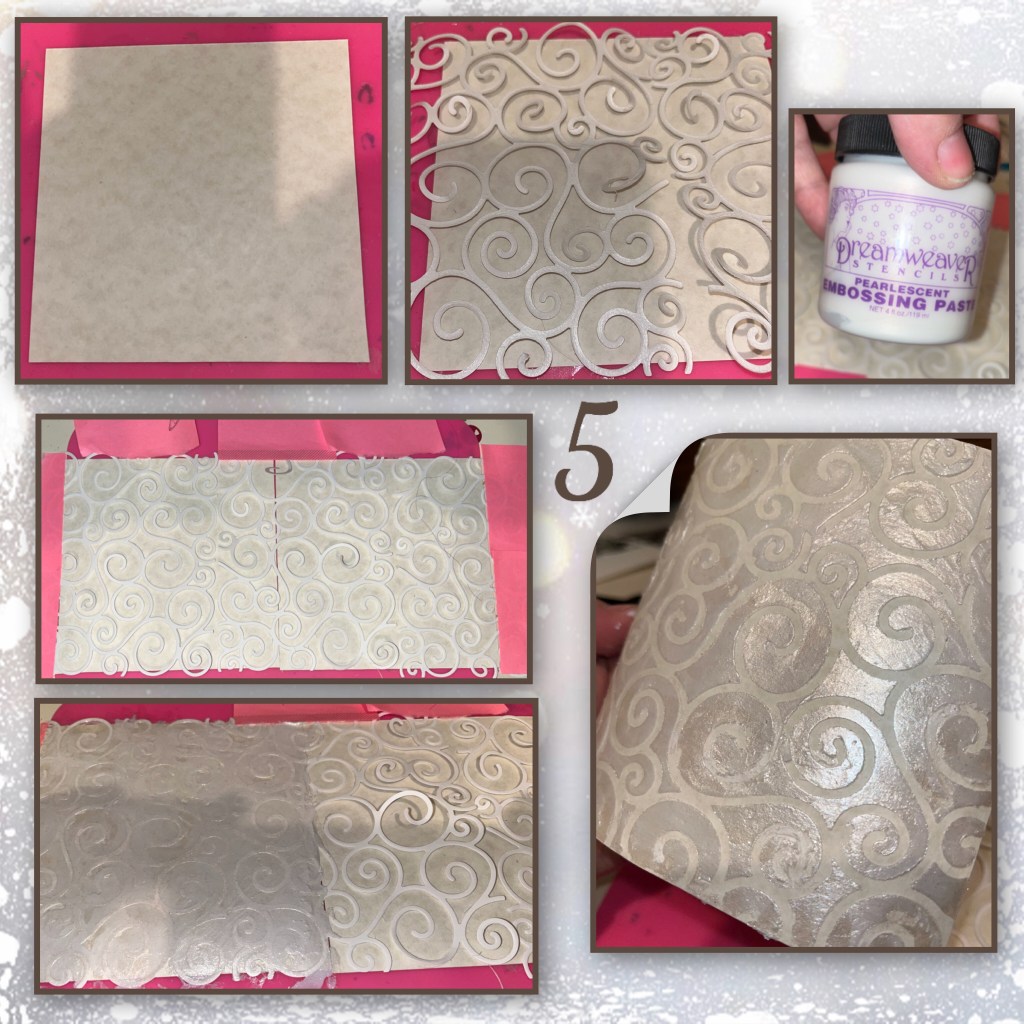
I originally wanted to have the inside panels a pretty swirly pattern with the Pearescent Embossing powder but it didn’t turn out like I thought
5- I cut the inside panels to 5” x 5”, diecut a few back grounds from the Swirls Pattern Plate, and laid them over the panels. I covered the panels and swirls with the embossing paste, then pulled off the swirls. This is where I discovered the problem. It worked for the most part but because the swirls were cut from cardstock some sections didn’t come off and made a bit of a mess.
Oops missed 6
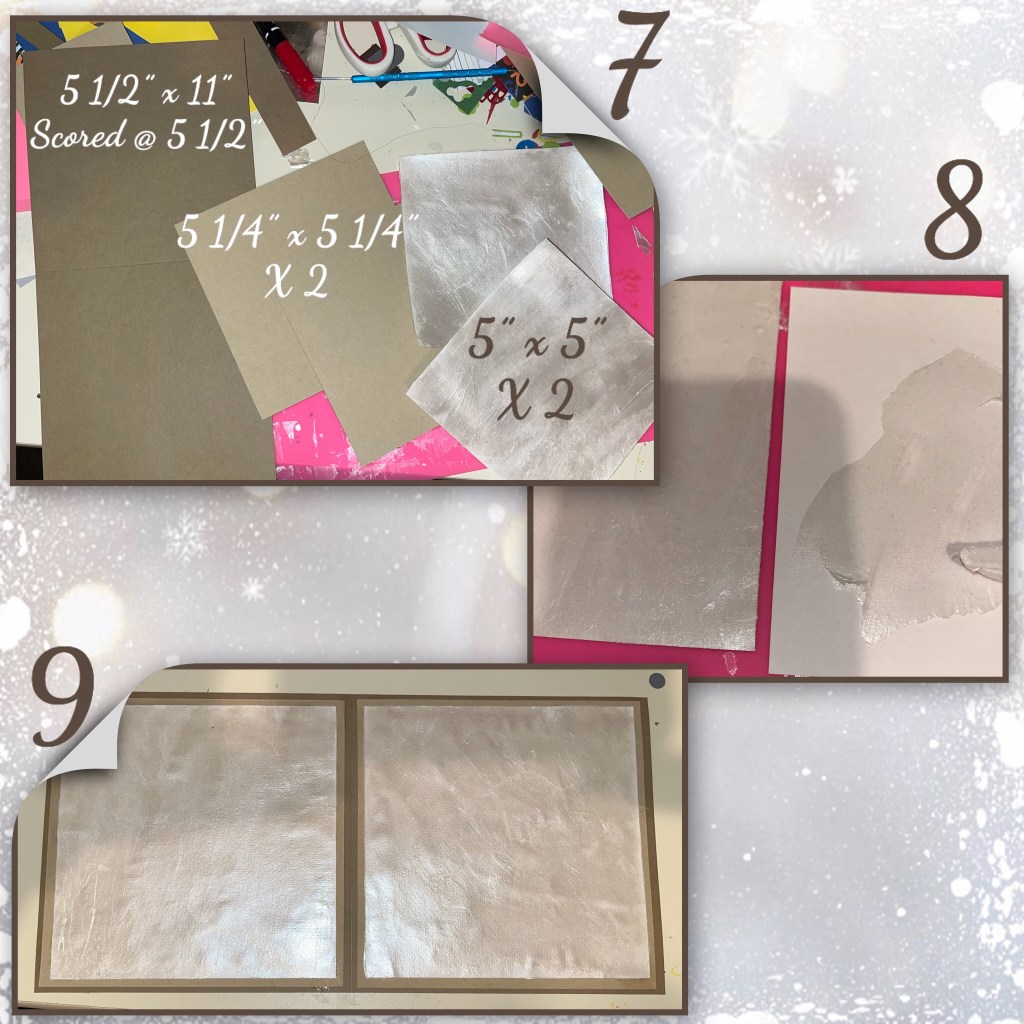
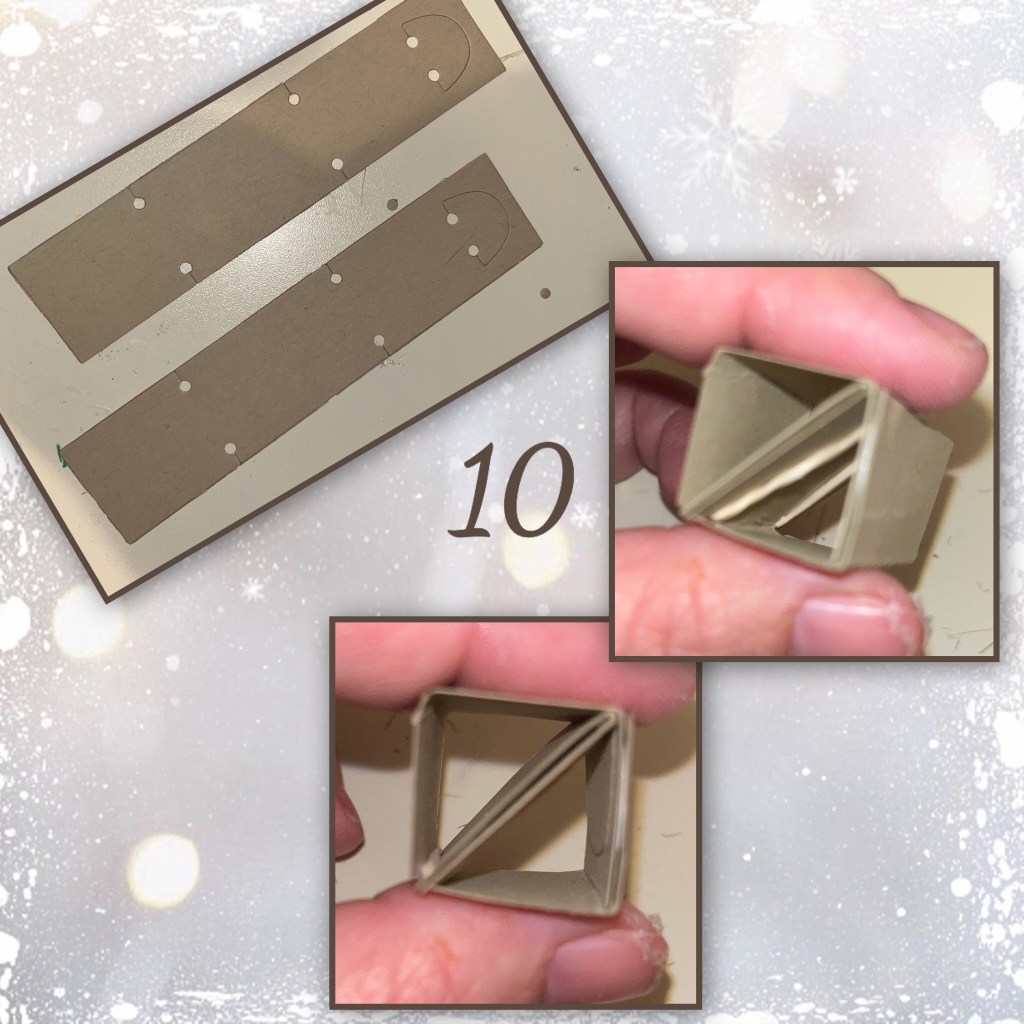
7-9- I cut the card base, and inside panels as shown. The 5” x 5” panel I decided to cover with a thin layer of the Embossing paste. I really wanted it to look like a snowy scene.
10- I diecut and assembled 2 Bam Boxes (Karen has an assembly video which will update to her website soon)
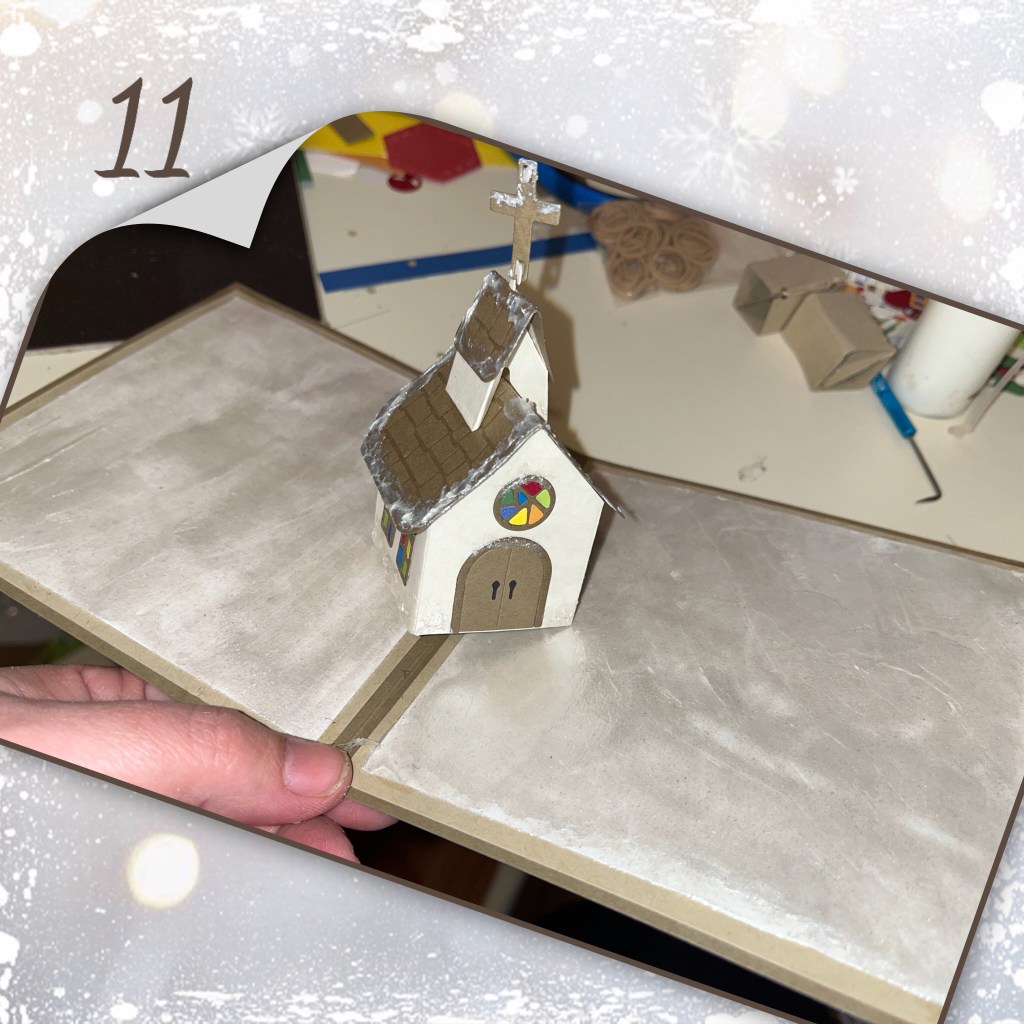
11- Add the church to the card
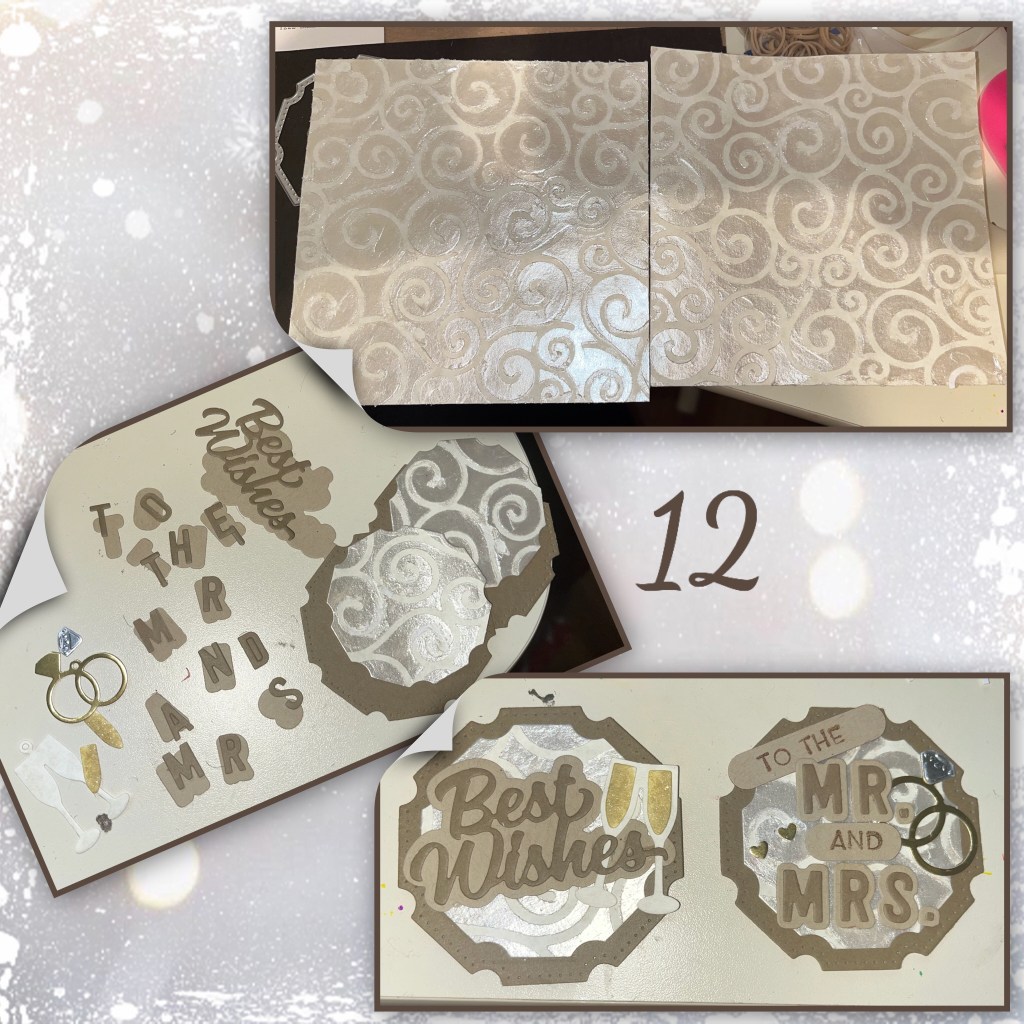
12- I didn’t want to waste the swirl panels that I made so I diecute them with the circles from the Bam Box set. I also die-cut bigger circles from the darker cardstock. I diecut the Wedding Charms, “Wedding Wishes”, and “to the Mr and Mrs” it didn’t all fit on the circles so I stamped “to the” “and”. I assembled as shown.
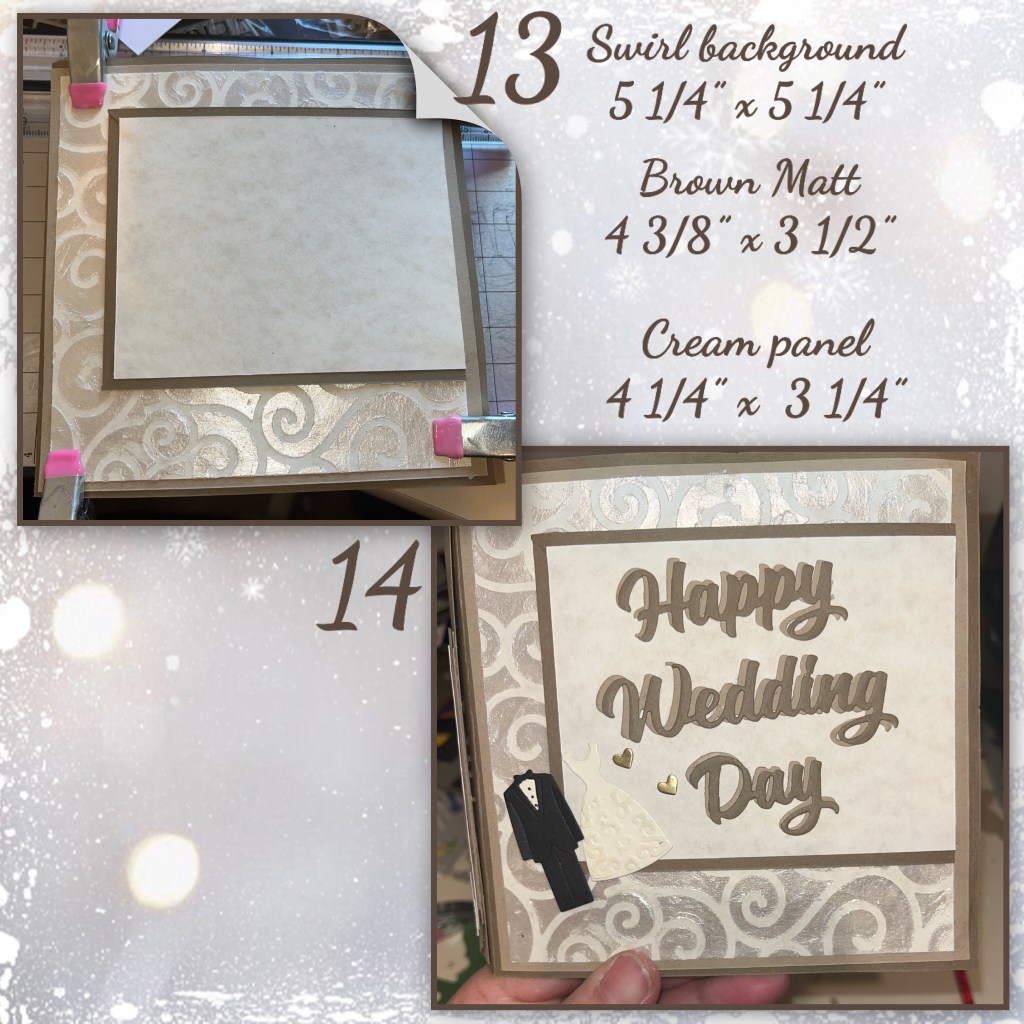
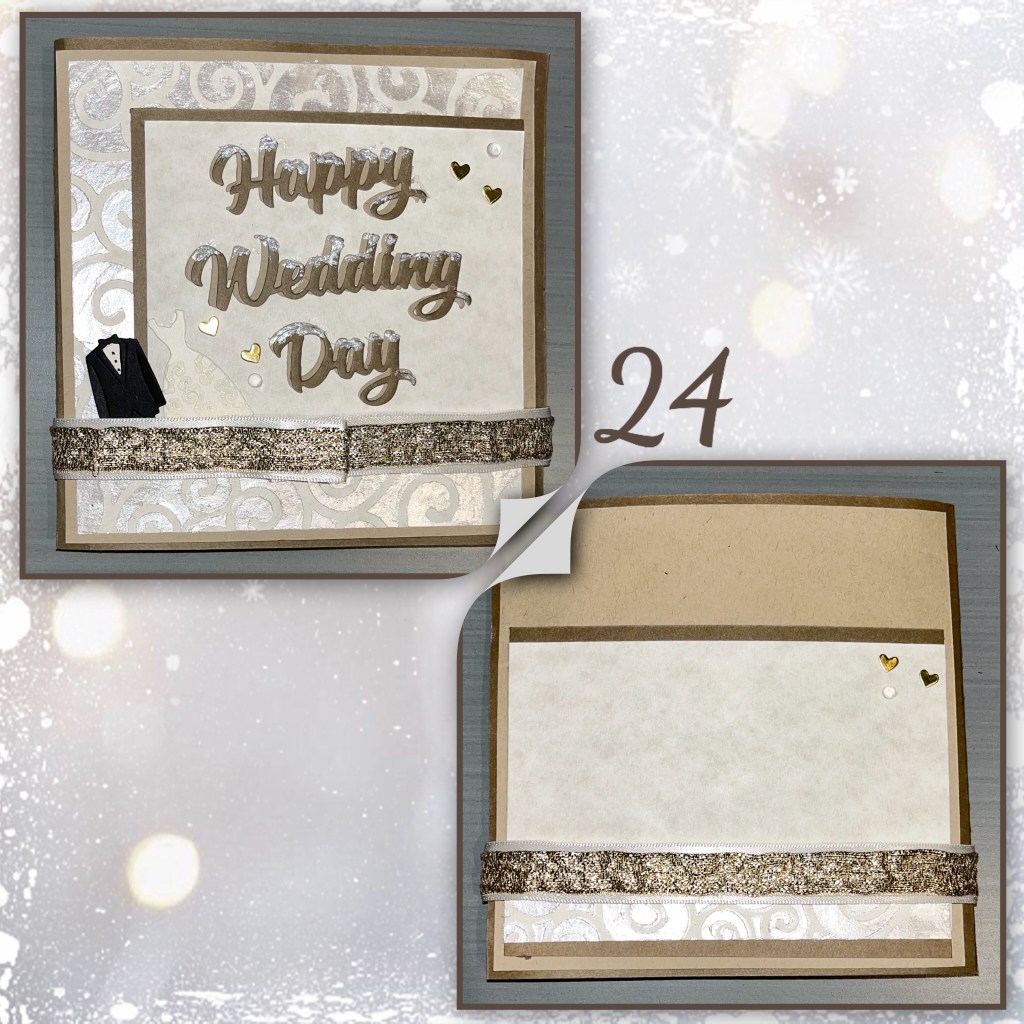
13- I assembled the front panel as shown, using some of the swirl paper.
14- I added “Happy Wedding Day” and the bride and groom, and added them to the card front. I added a few gold hearts.
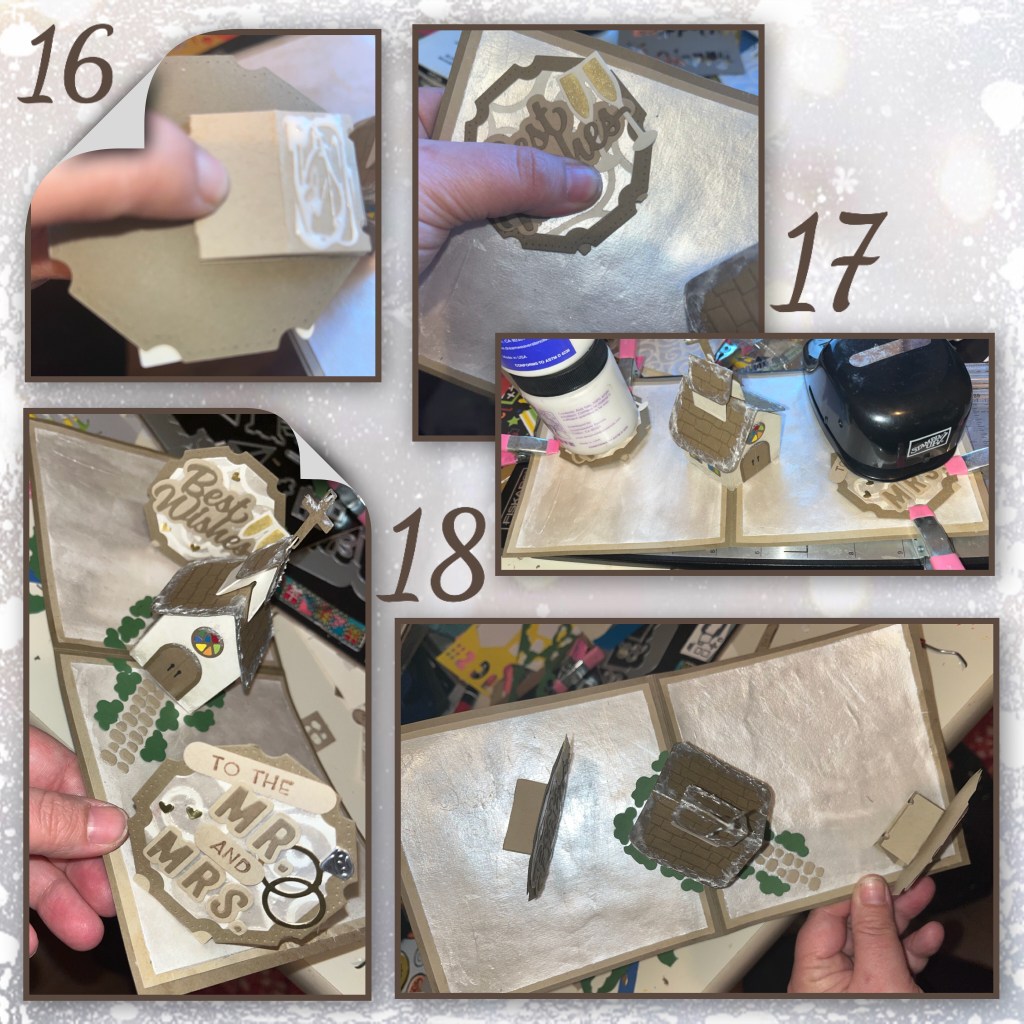
15- I assembled the back with the pieces shown below. The panel is actually a pocket.

16- I added the circles to the Bam Boxes and added one to the back left corner and one on the front right corner
17- I used some weight to hold it down until the adhesive set.
18- I used the clouds from the Castle Pop up as shrubs around the church, I added the sidewalk from the Tiny House dieset.
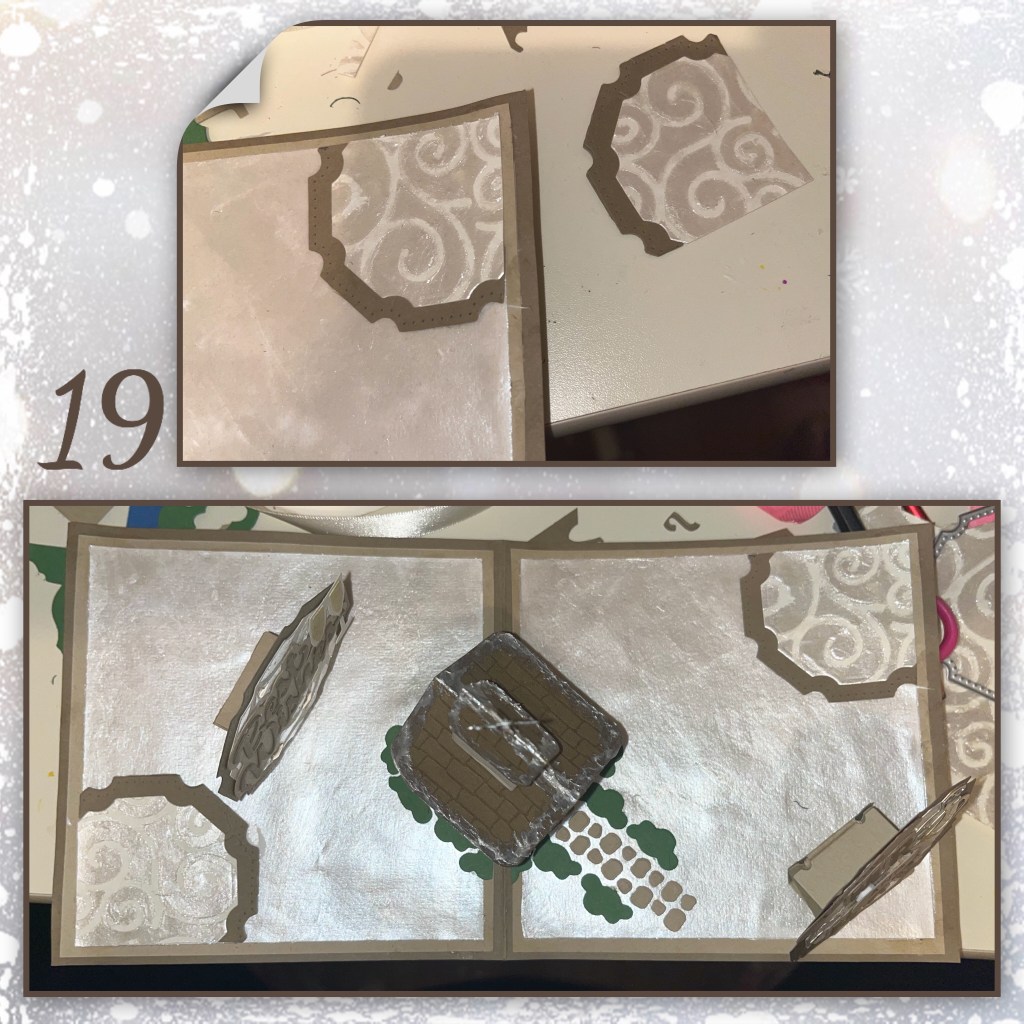
19- to fill in some of the space I used the circles from the Bam Boxes to make corner pieces to match the pop ups.
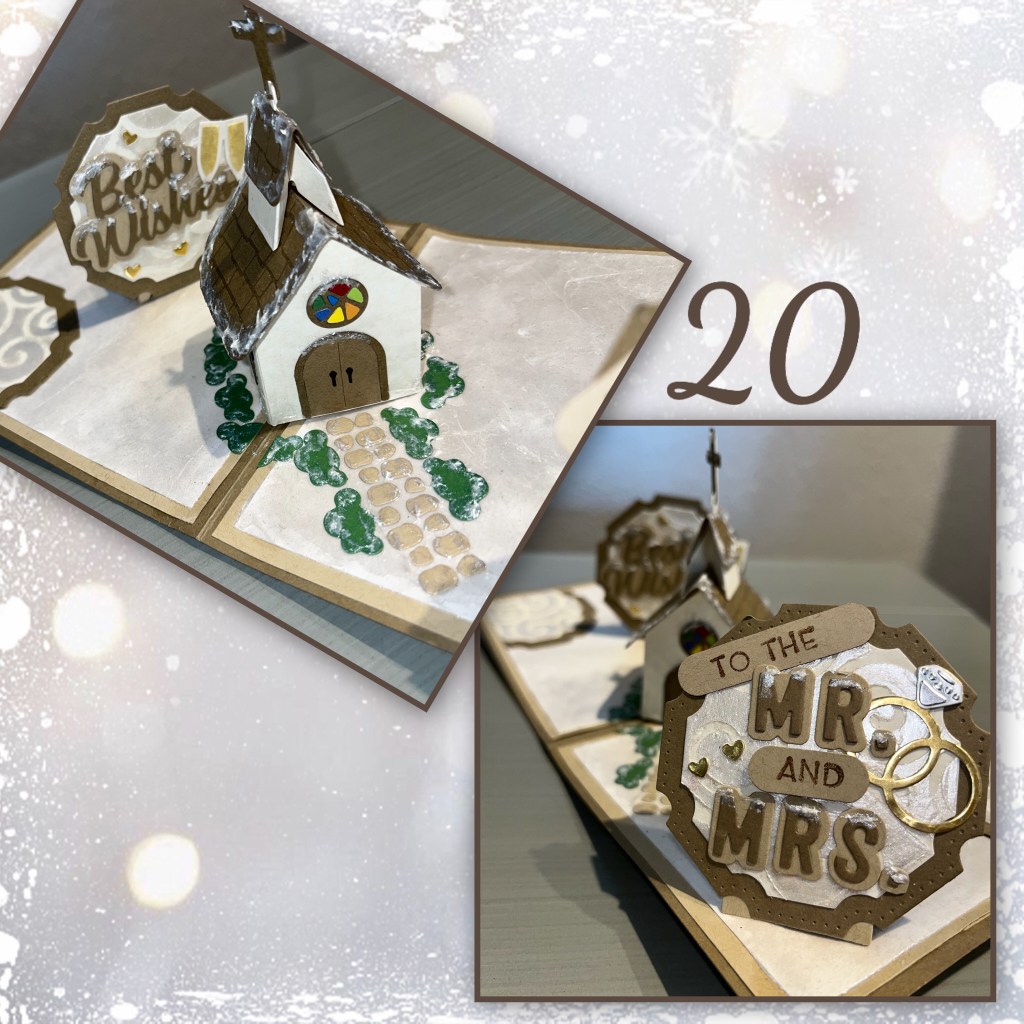
20- I added the Embossing paste to the shrubs, sidewalk, and the words.
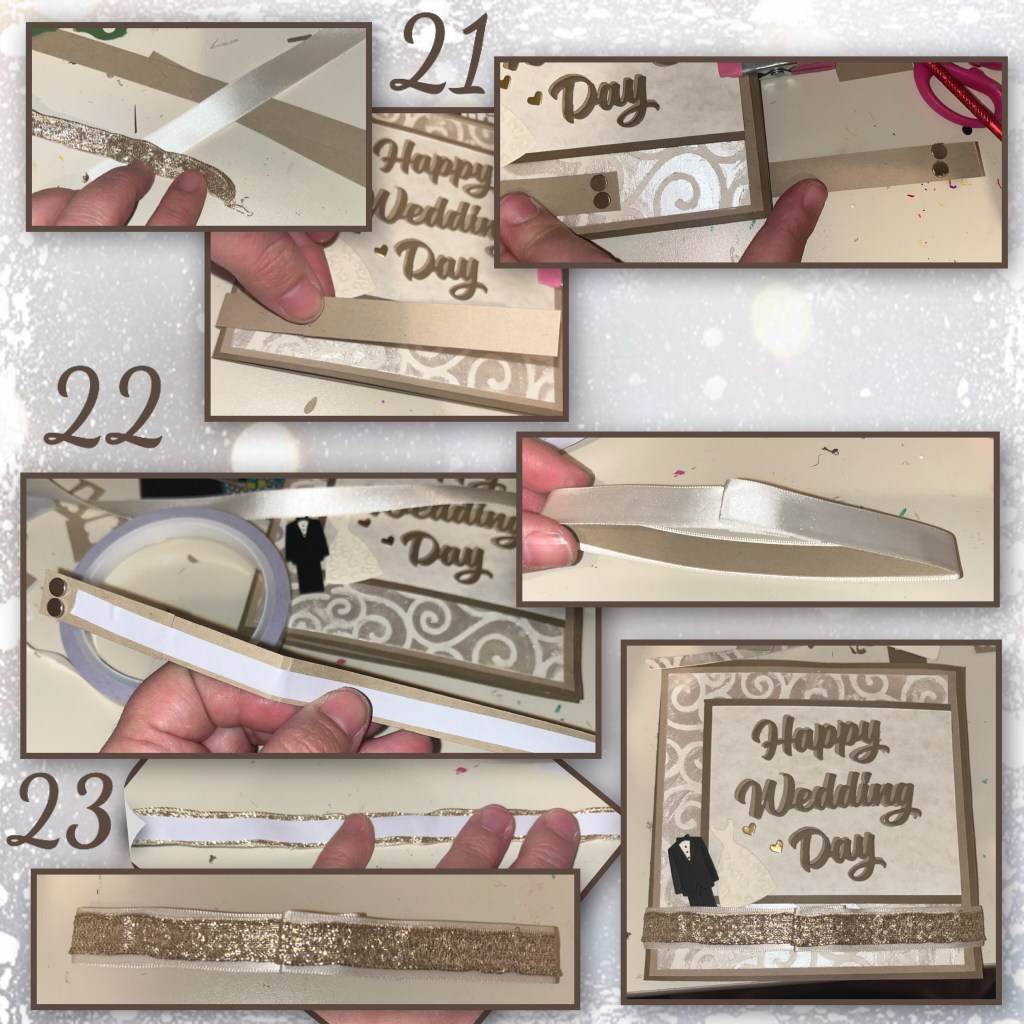
21- the Cream ribbon is 3/4” wide and the gold ribbon is 3/8”. I cut the card-stock band long enough to wrap around the card with about an inch over lap and slightly narrower than the ribbon. I added some small magnets as a closure.
22- 23- I added the cream ribbon to the card-stock band, then the gold ribbon to the cream ribbon.
24- I added more snow to the greeting and some gold hearts and clear bubbles.
Links for the rest of the design team
Nicky Foden> you are here
Diesets used are
Church and School Tiny House add on
Word set 12- Anniversary Happy Wedding
Castle Pop up Clouds as shrubs

What a great wedding card! That Bam box is so versatile!,
LikeLiked by 1 person
Lovely card with so many wonderful details. Thanks for the step by step instructions. vrc(at)prodigy(dot)net
LikeLiked by 1 person
Nicky you so captured winter with this lovely church and wedding card creation – always a delight to see what creative idea you come up with – thanks so much for sharing – have a blessed day!
LikeLiked by 1 person
and forgot my contact info – here it is Gail Jean Scott utb01@att.net
LikeLiked by 1 person
Love the church and sentiment! Beautiful card!
deniseb777ATgmailDOTcom
LikeLiked by 1 person
Thank you for the indepth tutorial!
LikeLiked by 1 person
Love this church. I don’t have any of these pieces but because of your card I want all the pieces to this set. Its elegant and I love the stained glass windows.
LikeLiked by 1 person
Nicky it can’t get better than this. What a stunning card, especially for a winter wedding. A bit of sunshine through the stained glass window and the beauty just flows on… Love the little church reminds me a little of the one I go to here, even the snow on the tips of the roof, just stunning. Your details here are appreciated x
LikeLiked by 1 person
What a fun card, great job!
LikeLiked by 1 person
NIcky if it was perfect it wouldn’t be handmade! I love your card and tutorial.
LikeLiked by 1 person
Wow, this is stunning
LikeLiked by 1 person
What a beautiful wedding card. The details are stunning, I especially like the stained glass window on the church.
LikeLiked by 1 person
This card is stunning!!
LikeLiked by 1 person
Beautiful wedding card
LikeLiked by 1 person
I love the look of your wintery church. So pretty.
LikeLiked by 1 person
Absolutely GORGEOUS! I LOVE the frosted edges! meghan.kennihan@gmail.com
LikeLiked by 1 person
Love you title to your page, that is how my craftroom alway looks like. I love your card, and love the colors you used.
LikeLiked by 1 person
Love the wedding card using the Church and School Tiny House add on, the Wedding Charms and the new Bam Box dies!
LikeLiked by 1 person
I need to start working on the tiny house ones!! I love the church.
LikeLiked by 1 person
What a great wedding card! I love the colors. It matches the themes of many weddings i have seen lately. I love all the details on your card. Thank you for sharing your creativity!
LikeLiked by 1 person
A very unique Wedding card for a special couple.
Cbu
LikeLiked by 1 person
Beautiful card! Thank you for the step by step directions.
LikeLiked by 1 person
Beautiful card – I love the colors!
Sue Stutzman esbjstutz@aol.com
LikeLiked by 1 person
Very creative! Thank you for the directions! They are very helpful.
LikeLiked by 1 person
Beautiful card
LikeLiked by 1 person
Lovely card Nicky!
LikeLiked by 1 person
Such a beautiful card
LikeLiked by 1 person