
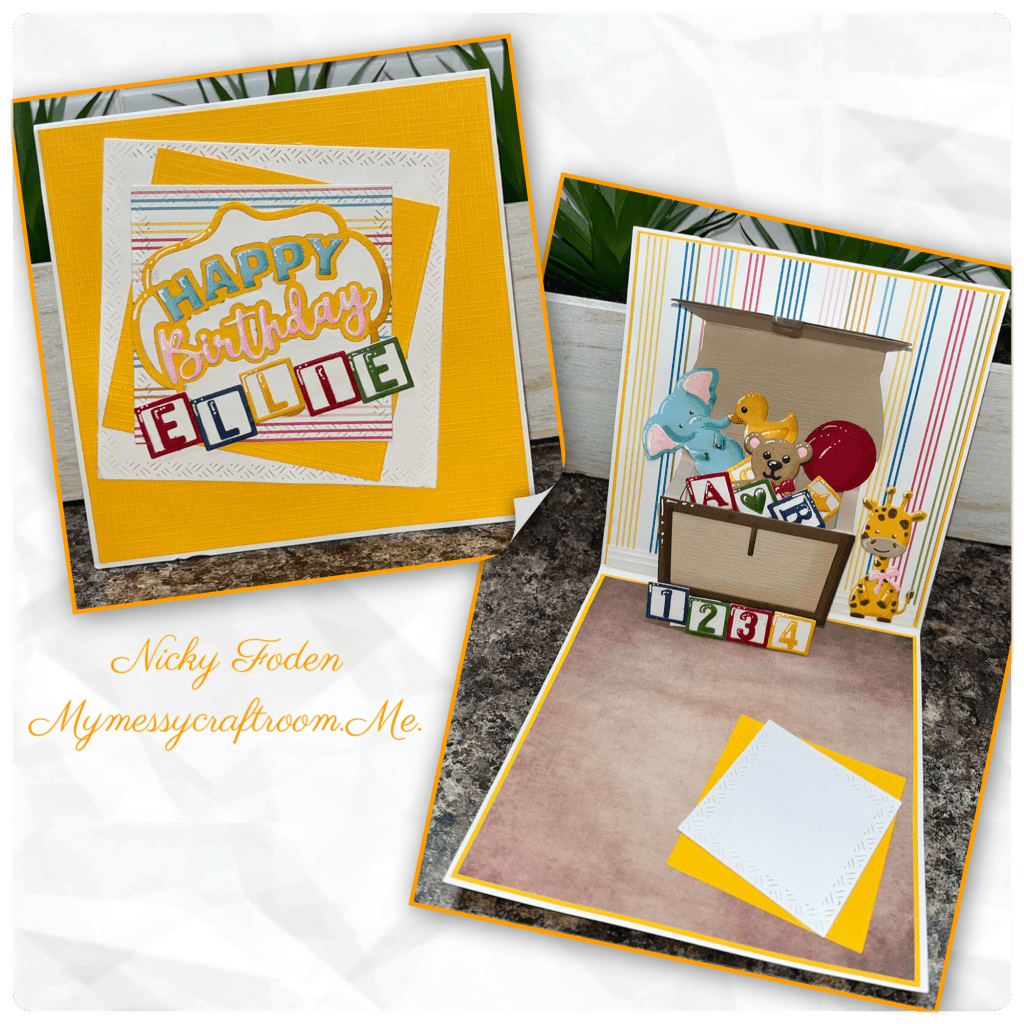
How cute is this card, I was originally not sure what I was going to make for this months design team challenge, which is “box or blocks”. But then I remembered that I recently purchased the Treasure Chest dieset and I thought that it would make a great toy box, and then when choosing toys I decided to add the blocks, so I covered both options for this months challenge.
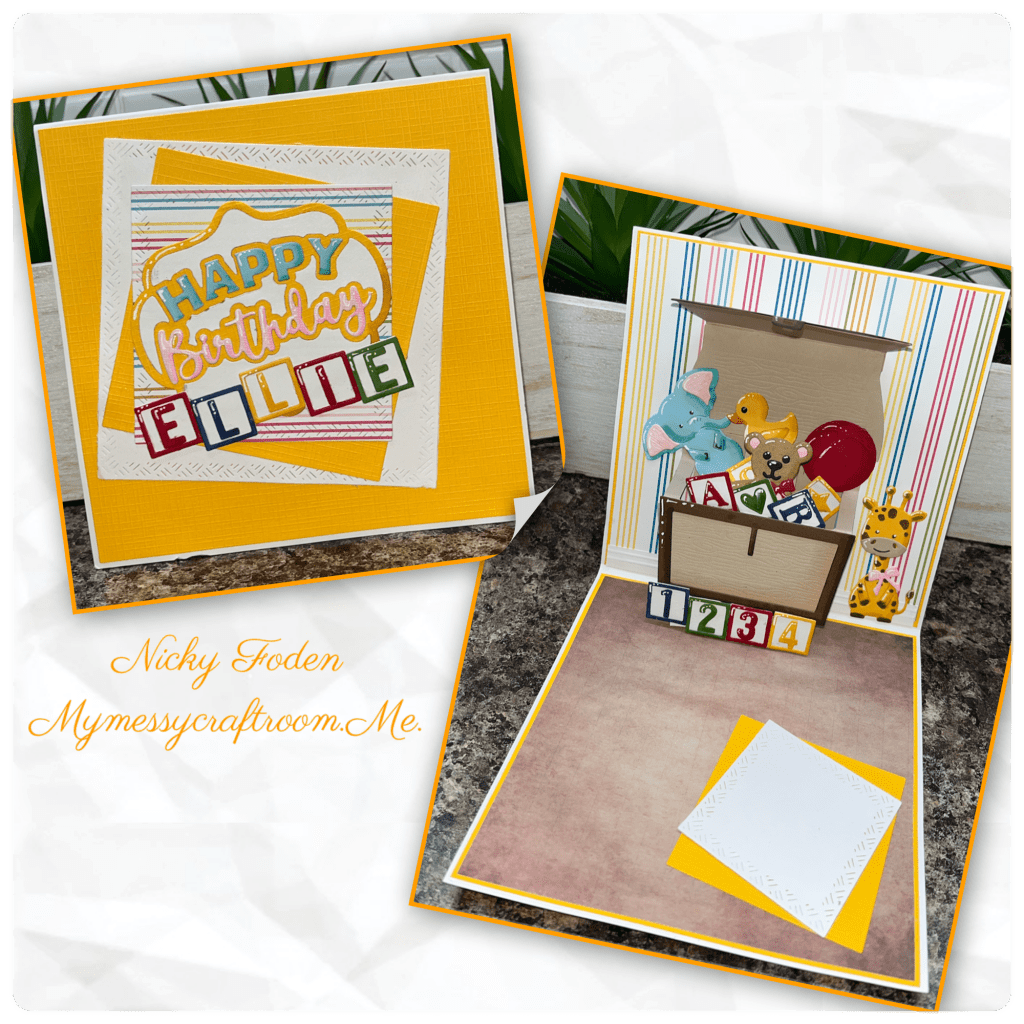
All the fun is in the reveal, to see this card in action please check out my FACEBOOK page, feel free to join if you would share your own creations. A video of this card on my INSTAGRAM page.
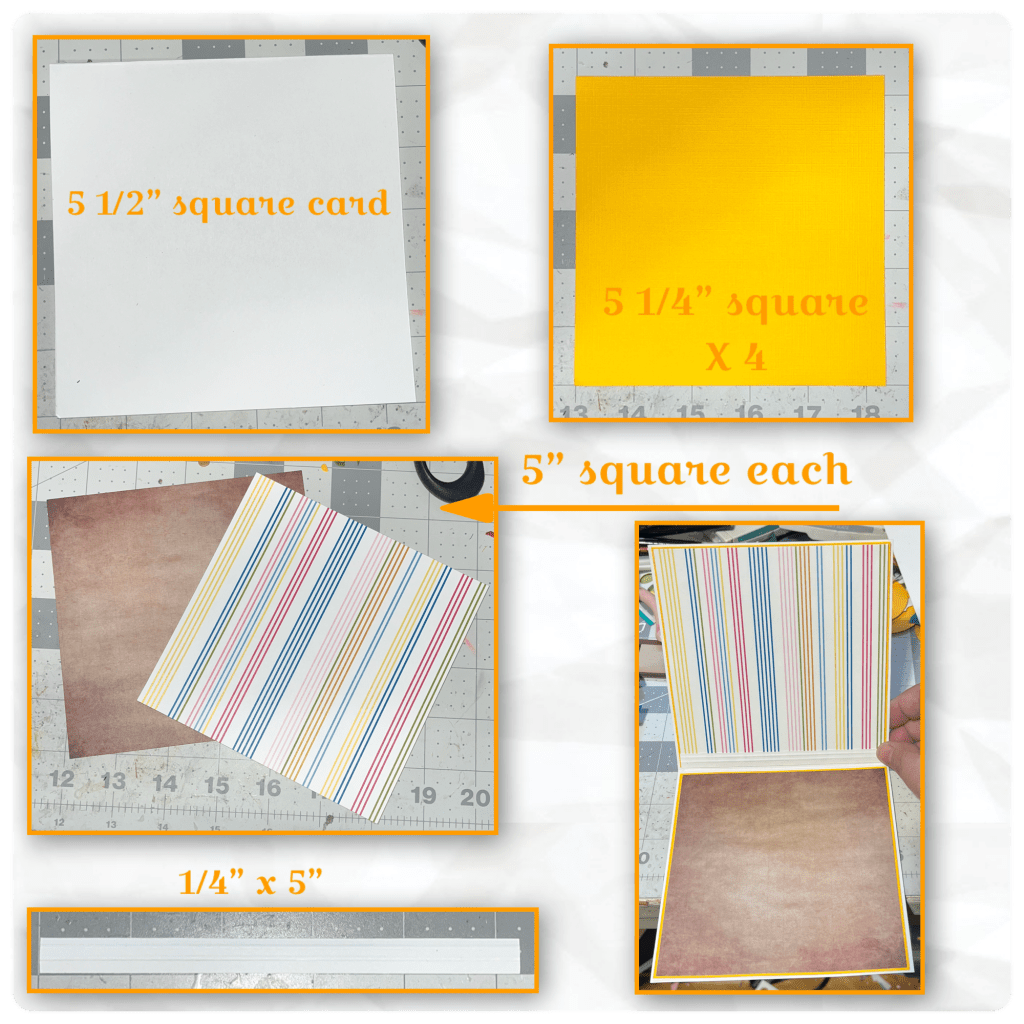
I made a white square card with yellow panels cut to the dimensions shown below. I wanted the inside to look like a room so I cut a piece of paper that I thought looked like a floor, and one I thought that would make a cute wall paper to the dimensions shown below. I also cut a strip of white and added a couple of score lines across it to make it look like a base board. I added all the pieces as shown.
I cut and assembled the Treasure Chest and added it to the Parcel Pop up (Karen has a video tutorial on Treasure Chest page at the link ⬆️ ). I started making the toys. The bear is from the Love is in the Air charms, the balls is from the Beach Charms. The duck and the blocks are from the Baby Charms, I changed out some of the letters and numbers using the Mini Alphabet and Numbers. I added shading with alcohol markers, and highlights with a white Gelly Roll pen.

I wanted more toys so I used the giraffe and elephant from the Safari Animals. Make sure when adding the elements to the back not to glue everything tight, there needs to be some wiggle room so the mechanisms opens and closes.

I cut three squares as shown using the squares from the Squares Crosshatch, I also created the Happy Birthday Lorna Add on, and more blocks and letters to make the “Ellie” I added shading with a alcohol markers, and highlights with a white Gelly Roll pen.
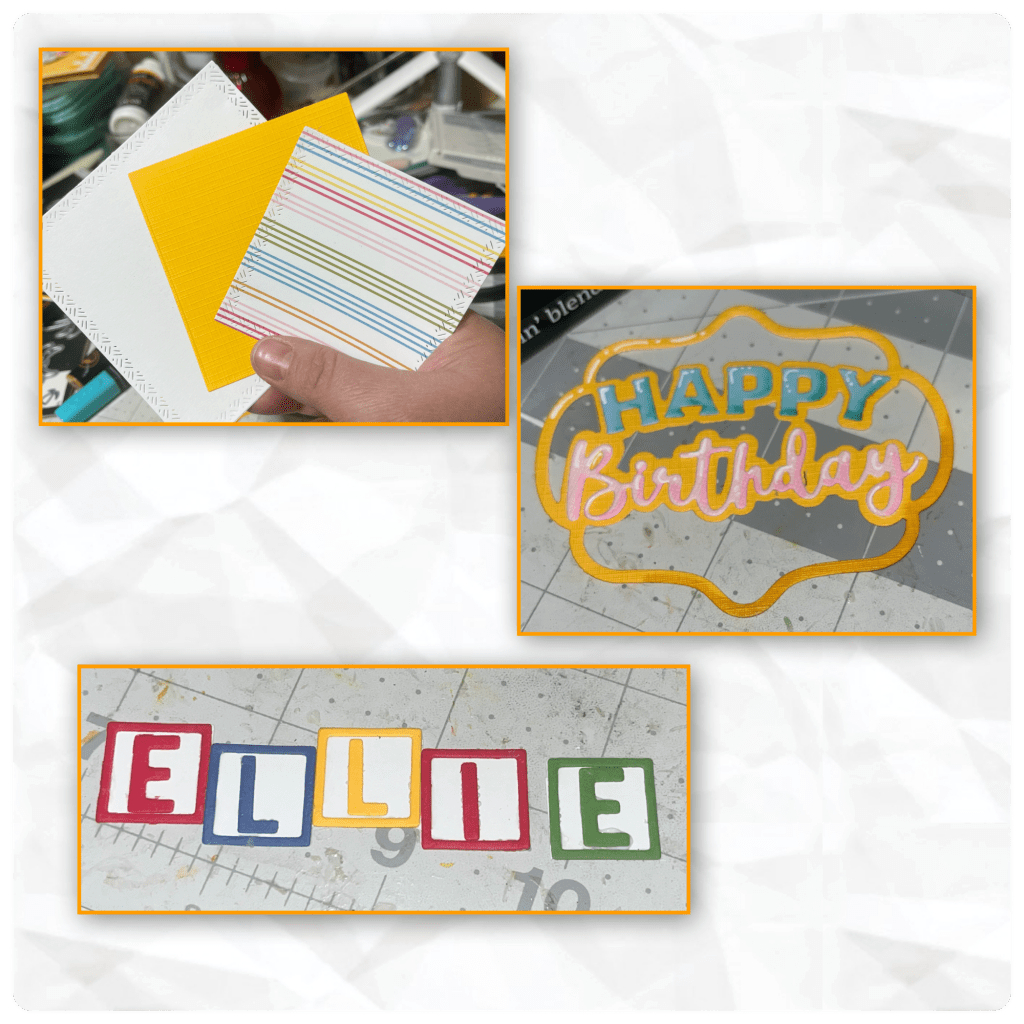
When I first laid the Happy Birthday I found it a bit busy so I cut the Label die again from white and filled in the negative space with the white pieces. I am much happier with this look. I added all the pieces to the card front as shown.

I cut a couple of the smaller Crosshatch Squares and layered as shown as for a place to sign.

Other Tools used


That card is absolutely adorable! Thanks for sharing!
I’ve never done more than 5 of the same card.
LikeLiked by 1 person
Love it.
LikeLiked by 1 person