

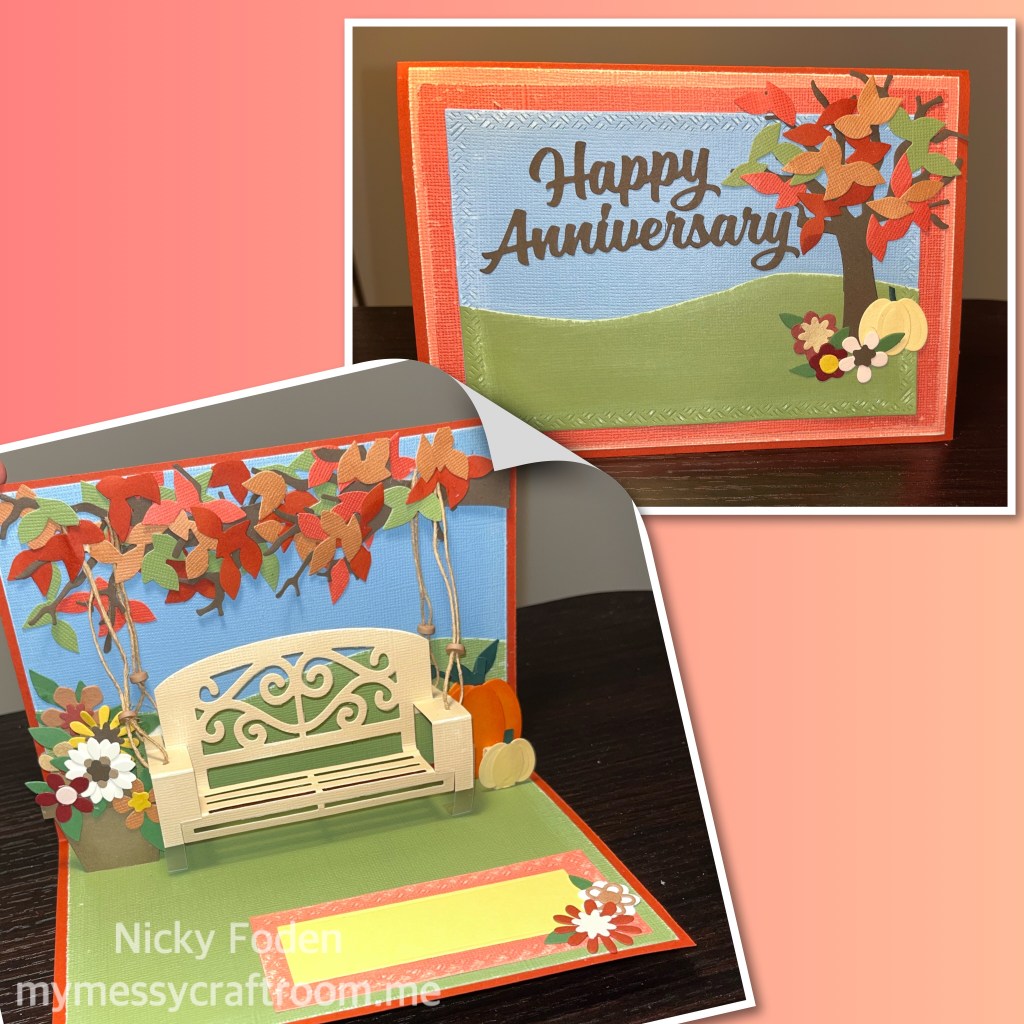
Yay, its that time again, it’s the Karen Burniston October Designer challenge, and this month’s challenge is to make either a Halloween card or a Fall-themed card and I went with a fall-themed card. I have a co-worker who needed an anniversary card, and he also was requesting a card with fall colours, there was also talk of there possibly being a wooden bench swing for a gift so I challenged myself to make the Karen Buriston Garden Bench popup into a swing, and the results turned out better than I thought it would.

Supplies are listed at the bottom
All the fun is in the reveal, to see this card in action please check out my FACEBOOK page, feel free to join if you would like to share your own crafty creations. You can also see a video of this card on my INSTAGRAM page.
I went digging through my stash to find some fall colours. The colour I liked the most was very thin, so I added several layers to help thicken it up
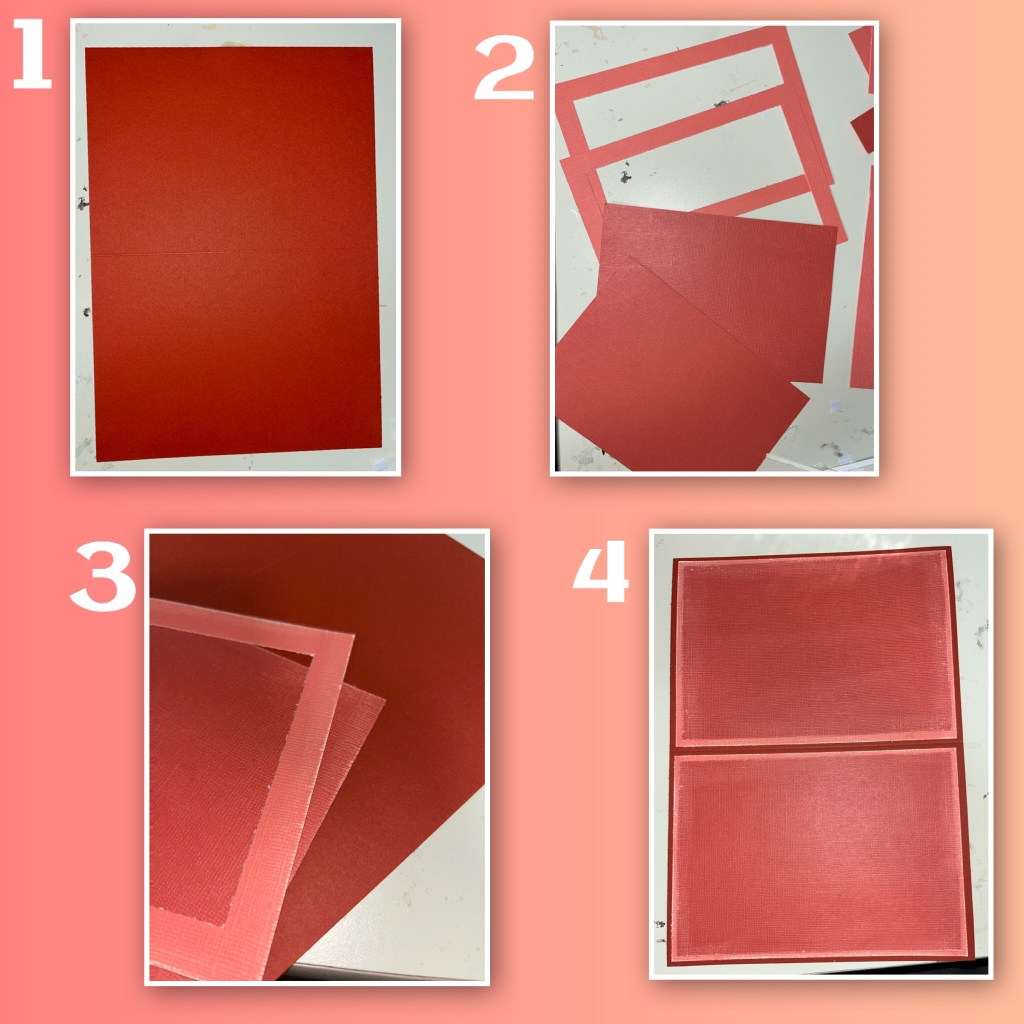
1- Darkest colour cut to 10”x7” scored at 5” to make. 5”x7” card
2- the medium and lighter shade are both Core Color card stock, the lighter colour I cut into a 6 3/4” x 4 3/4” frame (I needed the extra pieces to cut leaves) , the medium shade I cut to a 6 1/2”x 4 1/2” rectangle.
3- I used an Emory board file to rough up the edges.
4- add the layers to the card, this will be the front and back.
5- the blue and green cardstock are both from Core Color, both were cut to 6 3/4”x 4 3/4”
6-7-oops they are number wrong in photo- I also cut a hill to fit, and I roughed up the edges. Add the pieces as shown

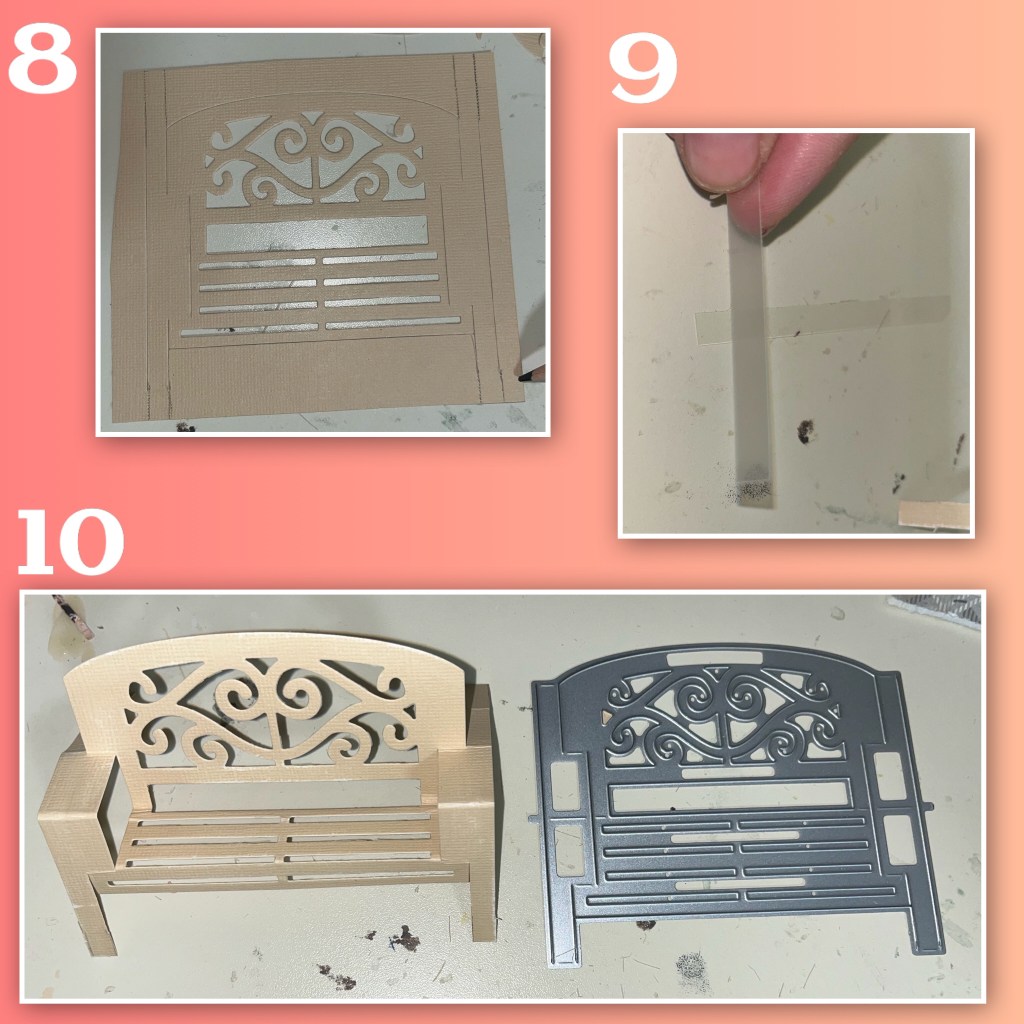
******important step depending on if you are using the “Orginal Garden Bench” when it was released through Elizabeth Craft Design OR if you are using her new release of the “Garden Bench” the difference is the original Garden Bench was meant to be cut into the card and then popped up, the new die set is cut out then added to the card. I have the original Garden bench but altered it so it would work like the new release. If you have the new one you won’t have to add the extra length to the legs that I did below
8- die cut the garden bench from a light tan cardstock, if you have the older die set, draw the lines up from above the arms, and down both legs. Keep in mind, where the die cut ended is where you will score, the extra length creates the tabs that will be used to adhere the bench to the card.
9- cut 2 acetate strips the width of the front legs
10- Fold the bench
Now you need to replace the front legs with acetate legs
10- 11- using the legs on the bench as a reference fold the acetate
13- adhere the new legs behind the original legs to make sure everything is straight and the fold is in the right place
14- trim off the original leg
15- what it looks like with both legs replaced.

16- so I followed Karen Burnistons direction with how to install the new bench thinking it would be the same. I folded the bench into the fold then adhered the top then the bottom but adding adhesive to the tabs that I had made. In theory, this should have worked. So I’m not sure if the measurements of both benches are slightly off or if I misjudged the tabs but it didn’t fold right so I had to pull the top tabs off, then folded the bench down into the closed position keeping the bottom attached. Re-added adhesive to the top tabs then closed the card so the tabs would now attach in the correct position
17-oops I have a couple of spots I will have to cover later
18- 19- I also accidentally added an extra fold in the arms of the bench. So I cut two thin strips and adhered them on the underside of the arms to reinforce the bench so they don’t bend when they’re not supposed to.

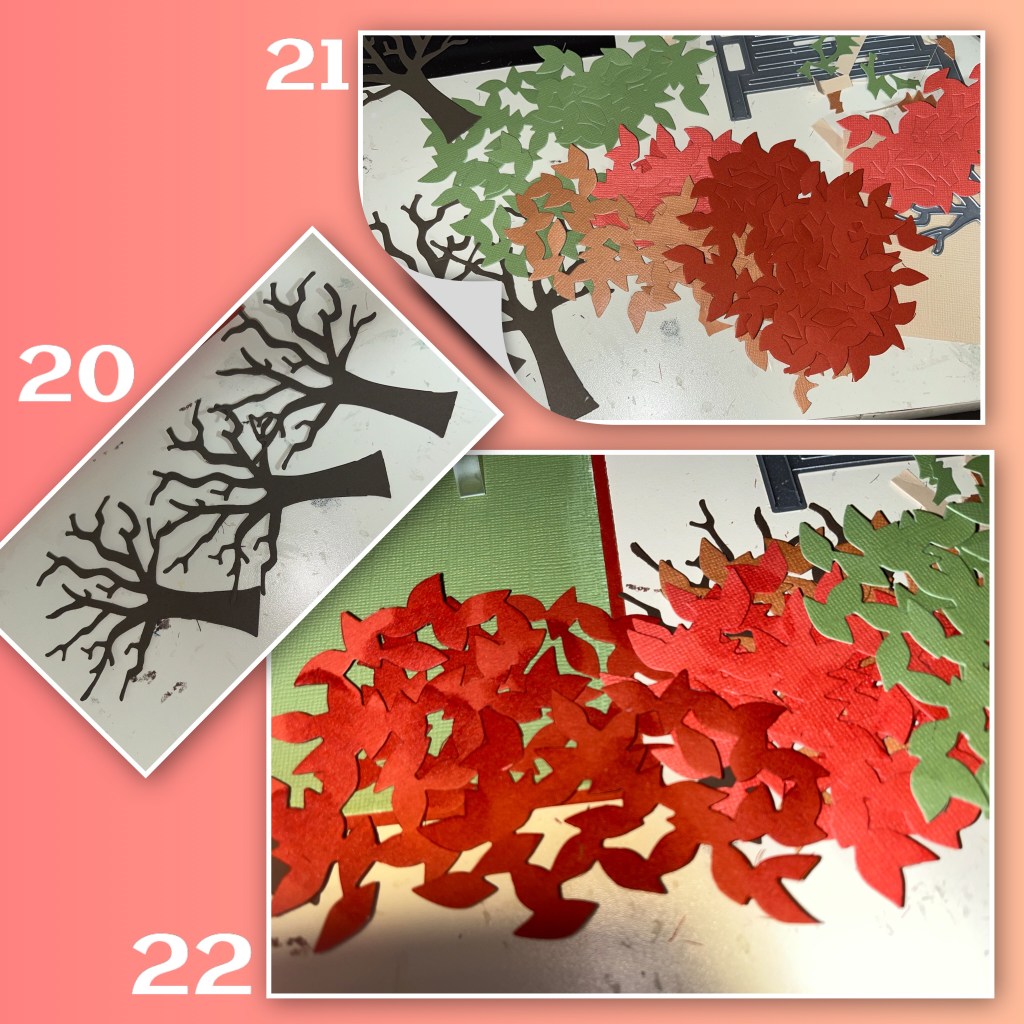
20-die cut trees from the Tree pop-up set out of dark brown card stock
21- I die cut the tree leaves from multiple colours of card stock, I used the three colours from the front of the card, the same green as the grass I also chose a yellow
22- To give the leaves shading, I used Versa Mark ink with a dauber and inked up sections of the leaves but not all of the leaves
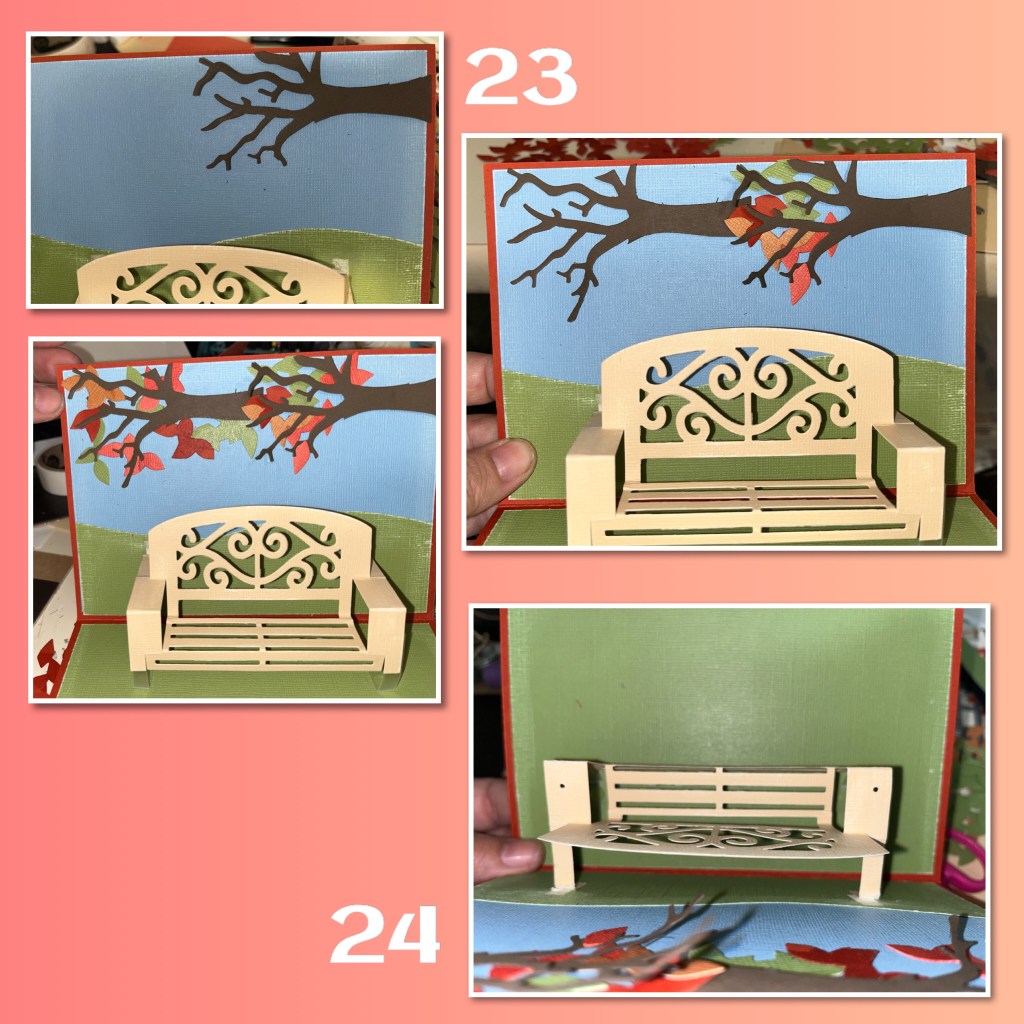
23- I started to make the branch by adding a sideways tree, leaves and then another tree, and a few more leaves
24- I used a small hole bunch to punch holes in the top of the arms of the bench.
25- I added twine through the holes and also around the back section of the arm. I also threaded the twine through some small buttons to add some interest and the keep the lines of the twine together. I also thought it would look better than if I tried to tie knots.
26- I adhered the ends of the twine to the branches, and added some leaves, I used quit a bit of adhesive and let it dry overnight. When adding the leaves I cut out little sections of each colour to mix them up.

27- I had die-cut a pile of flowers and leaves for a wedding card and didn’t use them all, so I pulled them out for this card
28- I used one of the dies from the Surpriseball pop-up to make a flower pot. I also sponged the edges to give it more dimension.
29- I cut 2 small strips and made them into a boxes.
30- I stacked them beside the bench, added flowers and the flower pot. I was careful to add the leaves in a way that it covers the ripped bit from when I had to reattach the bench.

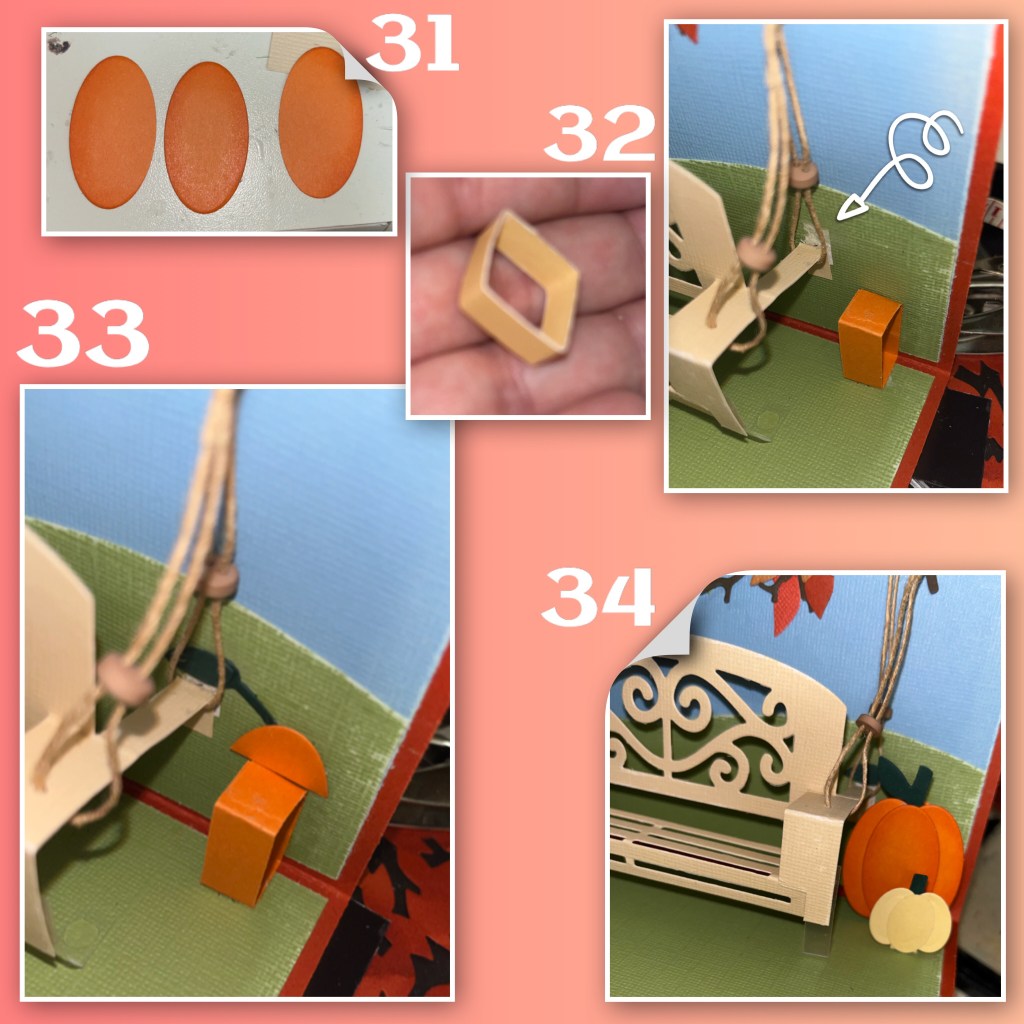
31- I punched out thee ovals and sponged the edges, when stacked together they make a pumpkin. I made one in 2 colours.
32- I made 2 more little boxes the same colours as the 2 pumpkins.
33- when adding the boxes and pumpkins I made sure to cover the other ripped section under the arm.
34- add the pumpkins with the little boxes behind to pop them out a bit.
35- I added more leaves to fill out the branches, then layered some rectangles from the Short Rectangles Crosshatch to make a place for signing. I also added a few more flowers

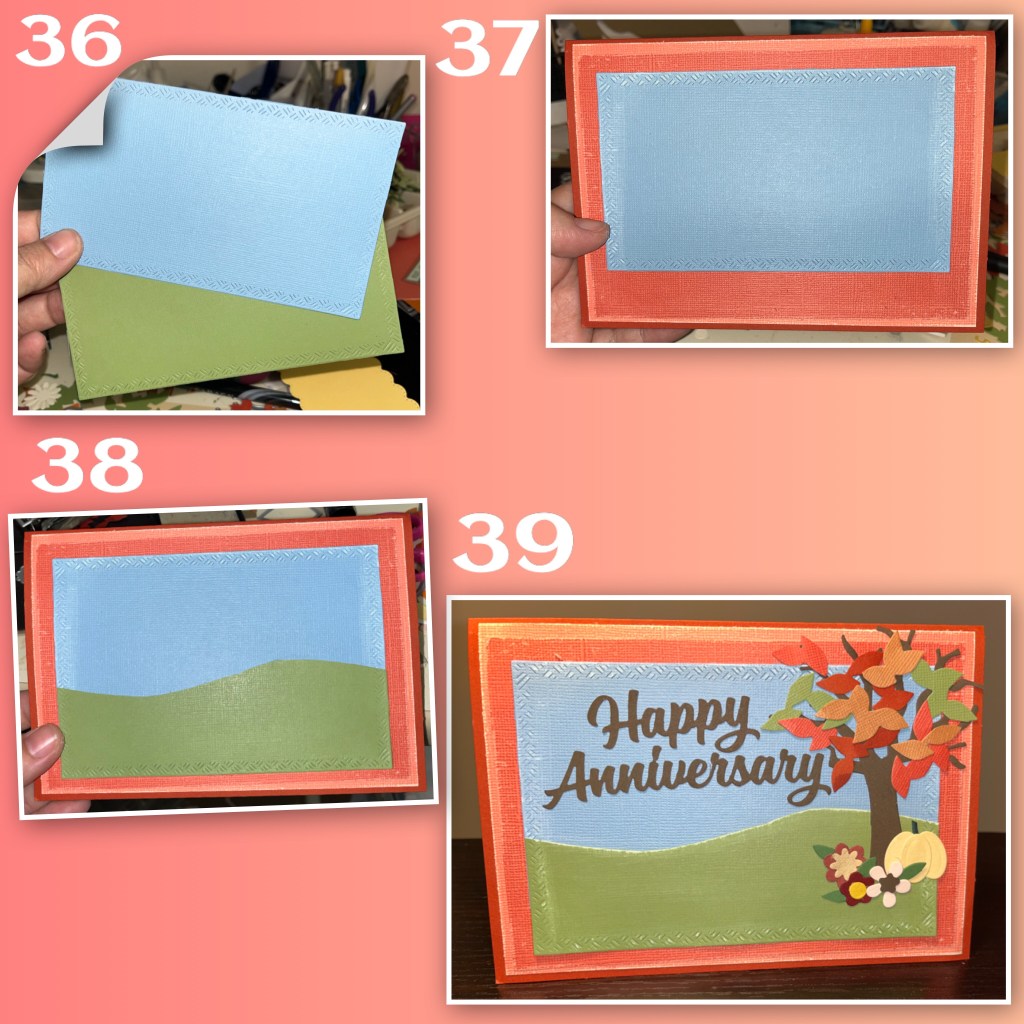
36- iused the largest rectangle from then Rectangle Crosshatch, and cut out a blue and a green rectangle.
37- I added the blue one a little higher so when I add the green the whole scene will be centered.
38- I cut the green into a hill and added it to the card base as shown
39- I added “Happy Anniversary” a tree, some flowers and a pumpkin to the front to finish it off.
To see some other Garden Bench cards please check these out
Karen Burniston Products are
The flowers are a mix from the following sets

Such a pretty and peaceful card. I love that you turned the bench into a swing. I would love to be swinging under those fall leaves. Great ideas.
LikeLiked by 1 person
Love this fall scene! Beautiful card!
LikeLiked by 1 person
What a pretty card. I love the step-by-step instructions.
LikeLiked by 1 person
I love what you did with the bench, A lot of work on this card.
LikeLiked by 1 person
Great Autumn card and scene! Thanks for the tutorial, it helps those of us challenged in making CAS cards.
LikeLike
Very pretty. Thanks for the inspiration,
LikeLiked by 1 person
You can see how much time and effort you put into the card. It’s absolutely fantastic!
LikeLiked by 1 person
You put so much thought and detail in your card! Bravo! It’s fantastic!
LikeLiked by 1 person
This is such a cute card. So much potential for different types of embellishments.
LikeLiked by 1 person
What a wonderful autumn bench and scene!!! Thank you for the step by step!
LikeLiked by 1 person