
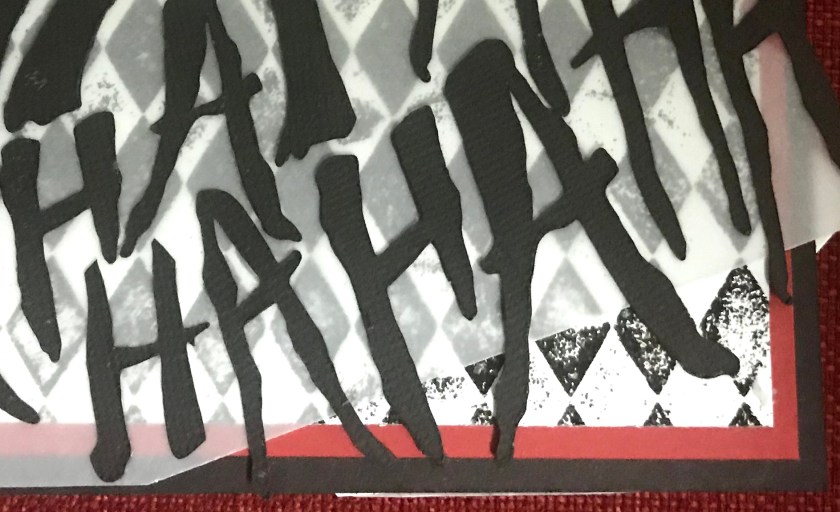
*Welcome to the weekend, and another Crazy4Challenges challenge. this weeks challenge was to focus on the Sentiment, to make the sentiment the star of the card. I had to think a bit on this one, but then it came to me when a friend asked me to make a Birthday card for her son. I know him a little and I know that he fairly recently got a tattoo of the “HA HA HA” Joker themed tattoo. We gave him a bit of a hard time about the tattoo so I thought he would get a kick out of a Joker themed card using the same kind of look as the tattoo.
I have to say this card was actually a little frustrating to make at first, as everything I was trying to do was not turning out like I had planned, so I kept putting my mistakes aside and trying again or moving on, but in the end I ended using all the mistake pieces, some extra pieces, I changed ideas as I went, and the card turned out way better for it than I thought it would.

to see the other talented Crazy4Challenges cards please check this out C4Cblog (posts Saturday Oct 5)
if you would like to see this card in action please check out my Facebook page https://www.facebook.com/groups/MyMessyCraftroom/ please feel free to join if you would like to share your own crafty creations.
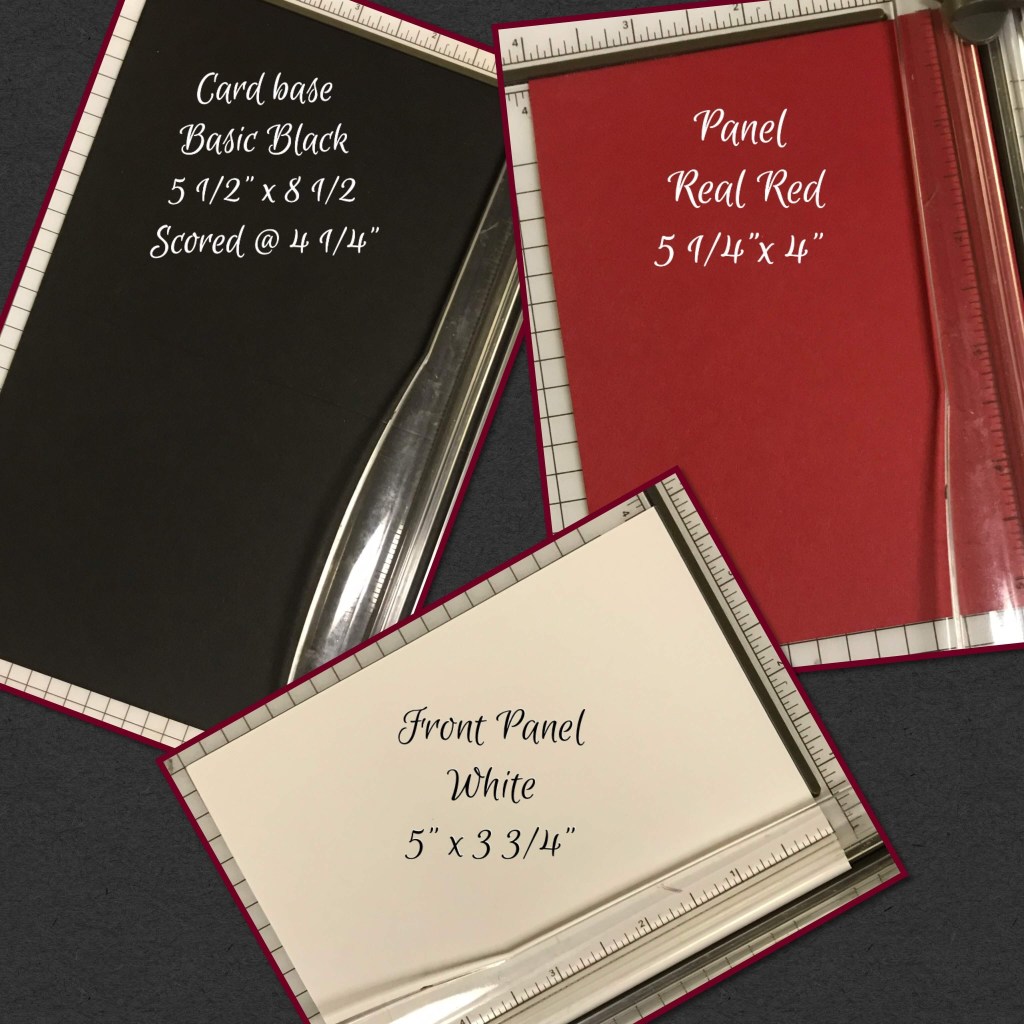
So I was keeping with a Black, White and Red colour pallet with this card, I really wanted the red to pop when I used it on the inside so I only had a little bit on the outside. The cardstock used is from Stampin Up and the colours are listed in the description below.
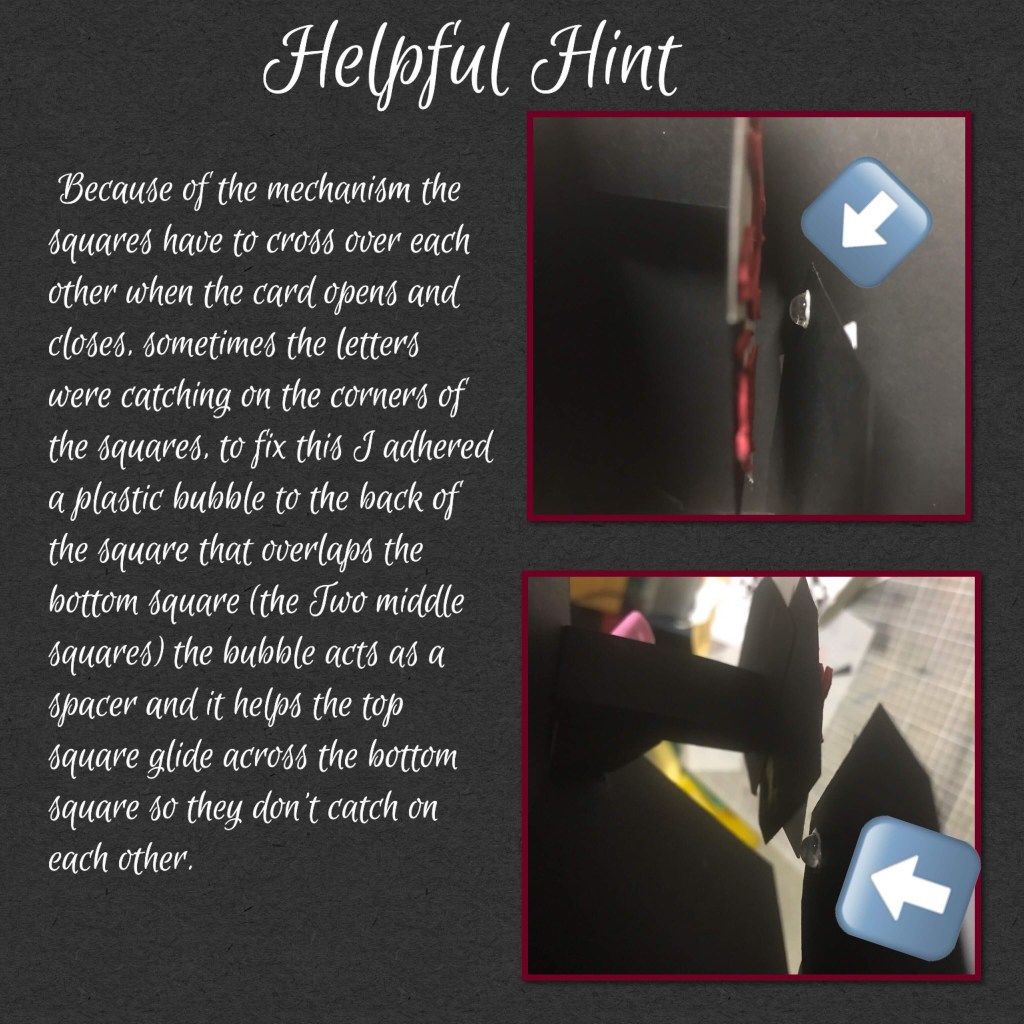
The die set used for the mechanism is the Karen Burniston Upsy Daisy die set, and I used her video to help with the assembly, I recommend checking out the video to get the mechanism correct Her video can be found on the product page linked above. (her video shows the original version of using this dieset, if you watch until the end she does a version she calls the Diamond Slide, this is closer to the card that I made, she uses 3 squares, I used 4).
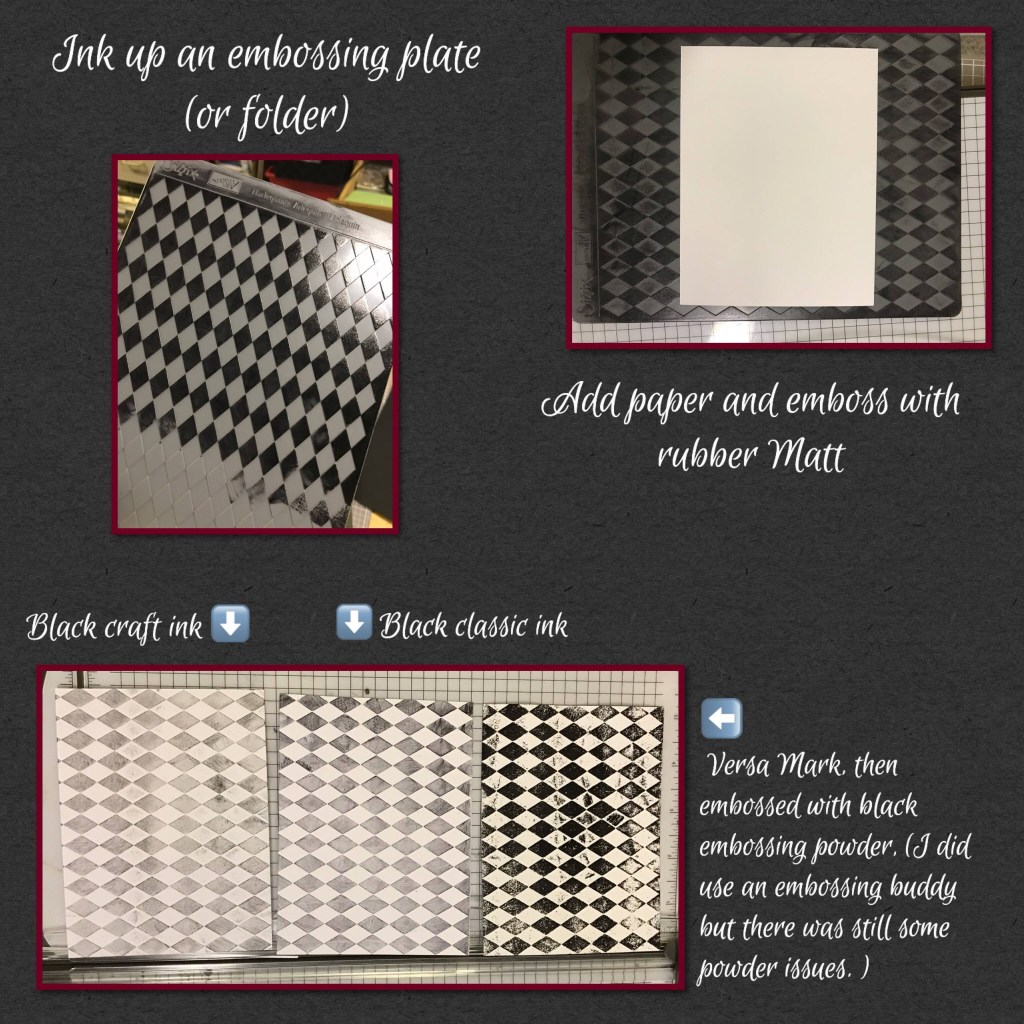
This is where my frustration began. I wanted there to be a Harlequin style background and I wanted it in Black and White. So I wanted to ink up an embossing plate with black ink, emboss, and get the desired background, well nope. First I tried Craft ink and it turned out grey, and I am out of refill, then I tried classic ink, and even with the refill added to the ink pad, it to turned out grey, so then I tried Versa Mark with Black embossing powder, and even with an embossing anti static pouch I still got black embossing powder EVERYWHERE so it wasn’t a clean image,it was BLACK but splotchy in areas, but then I thought “the font was going to be random and imperfect, so let’s use an imperfect background”. So I continued on……
Next came creating the letters, I used my Scan N Cut as follows….
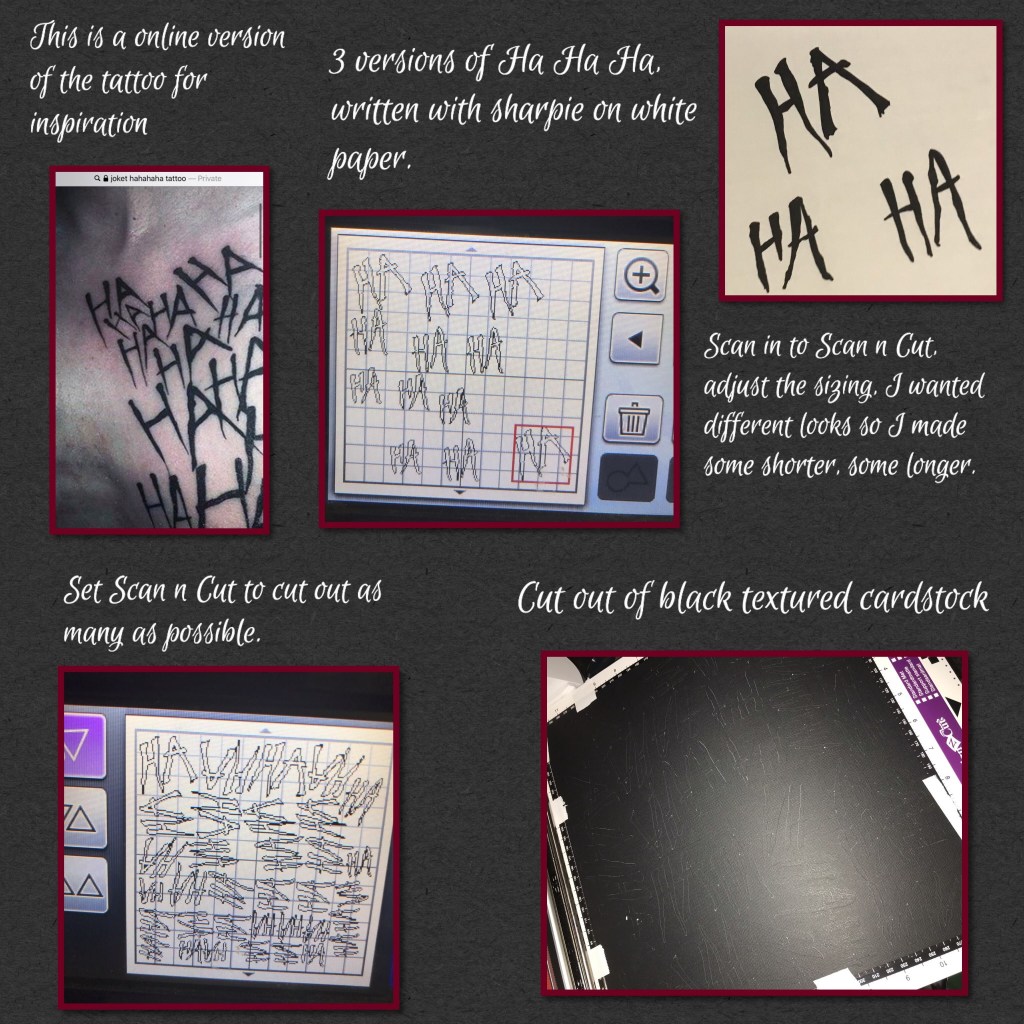
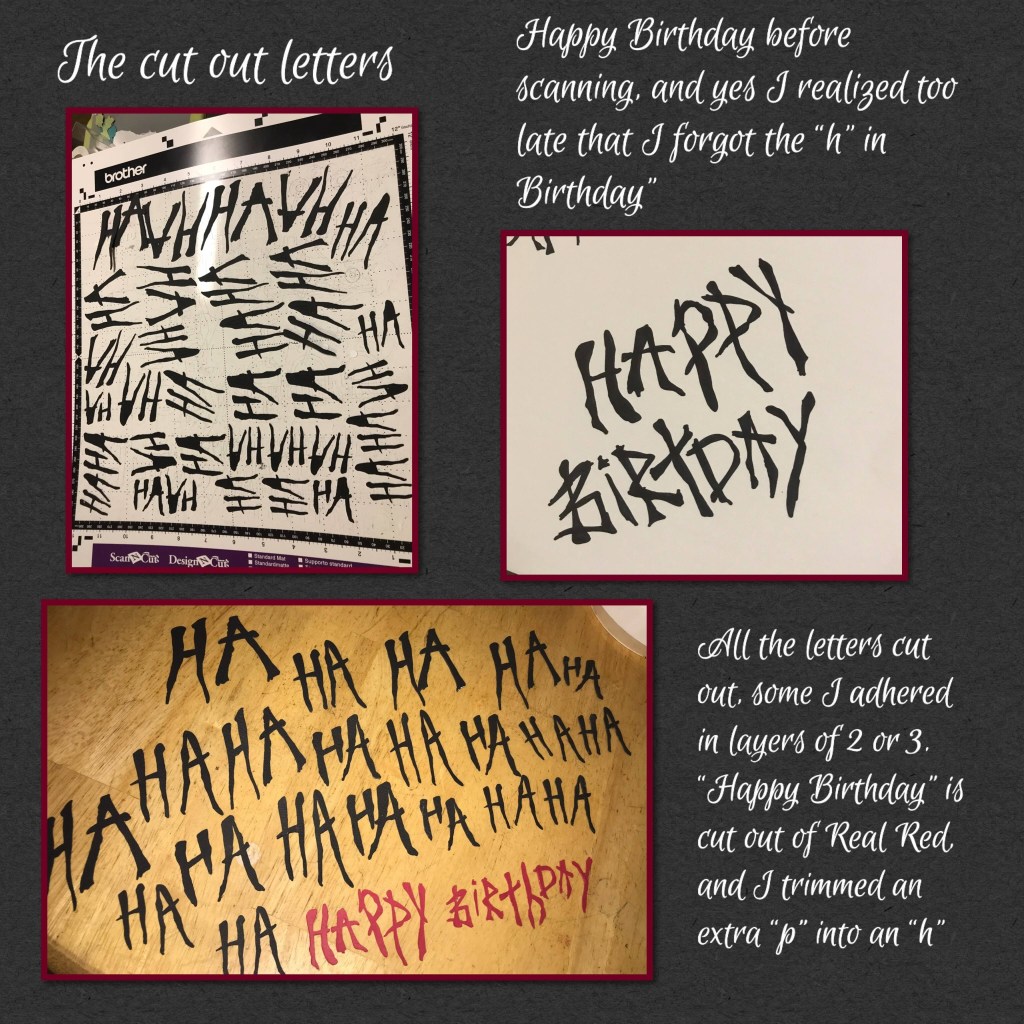
The only 12 x 12 black cardstock I had was textured. It worked out good, as when I cut out the letters and started sorting them I was able to see what was the top of the letters and what was the underside. This was beneficial as H and A look the same even when backwards but since I wanted to layer some of them and they were a variety of sizes it was easier at least know what was the top and the bottom.
I originally wanted to layer all of the letters in layers of 3 but somehow I miscounted a set, so to go along with the randomness of this card, I decided to layer some of them in 2 or 3 and some were left in singles. I didn’t know at the time, but this decision helped with another boo boo that I made. …….. If you look below you will see that I forgot the “h” in birthday, so I made the red letters in different layers as well, which freed up a “P” which I was then able to trim into an “h”
More frustration, I made the harlequin, in black and white, the letters are in black, black on black really doesn’t pop, and the letters were getting lost in the background, I really wanted the Black pattern to show but needed to mute it a bit, sooooo out came the vellum . An added unforseen bonus to using the vellum, and having it askew, it gave me a bigger surface in which to add the letters, so I was able to make them cover a bigger space, and make them more random and more spread out than I would have if I had kept it inside a regular rectangle card.

Now for the inside….. Using the dies from the Upsy Daisy dieset, I created this pop up mechanism. This is where I grabbed the first two Harlequin backgrounds that were grey, and prepared them to add to the inside.
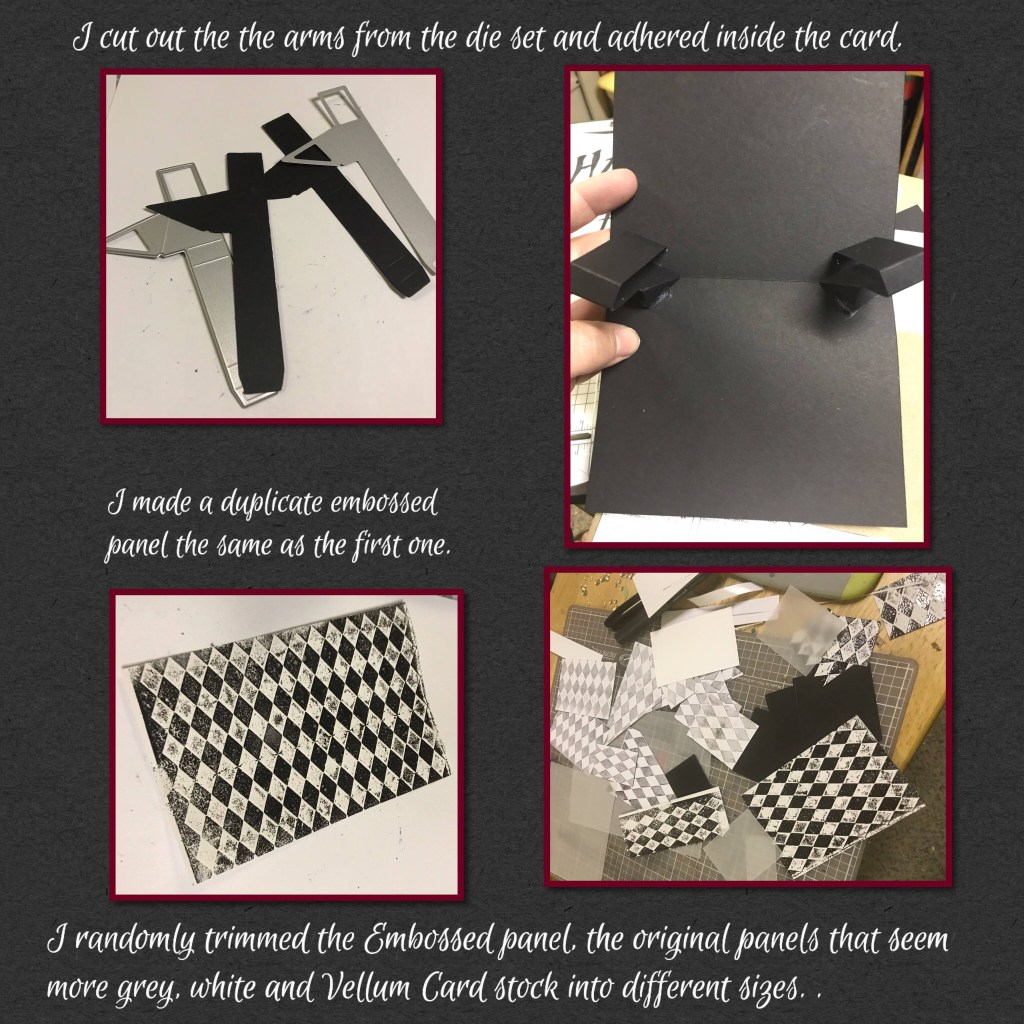
The Upsy Daisy set comes with scalloped squares which didn’t go with the feel of the card so I grabbed a square from the Spinner Square pop up dieset as they are similar in size.

I decided to use the grey patterned pieces as they would add to the randomness and the black and the red letters will pop against it.


to see some other Upsy Daisy cards, please check these out…..

5 thoughts on “Ha Ha Happy Birthday-C4C505”