
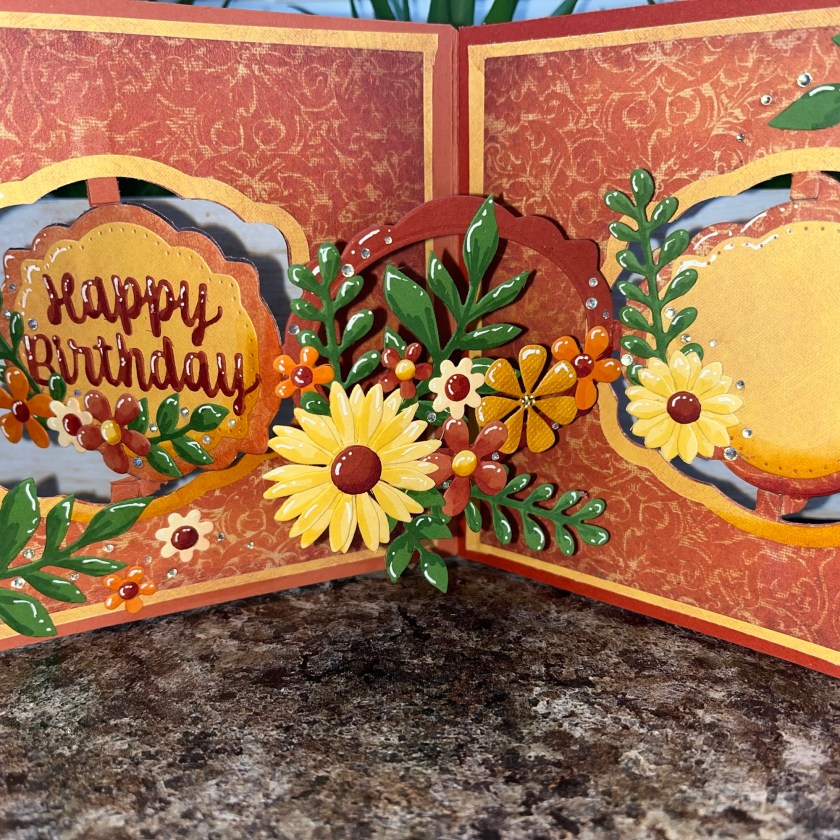
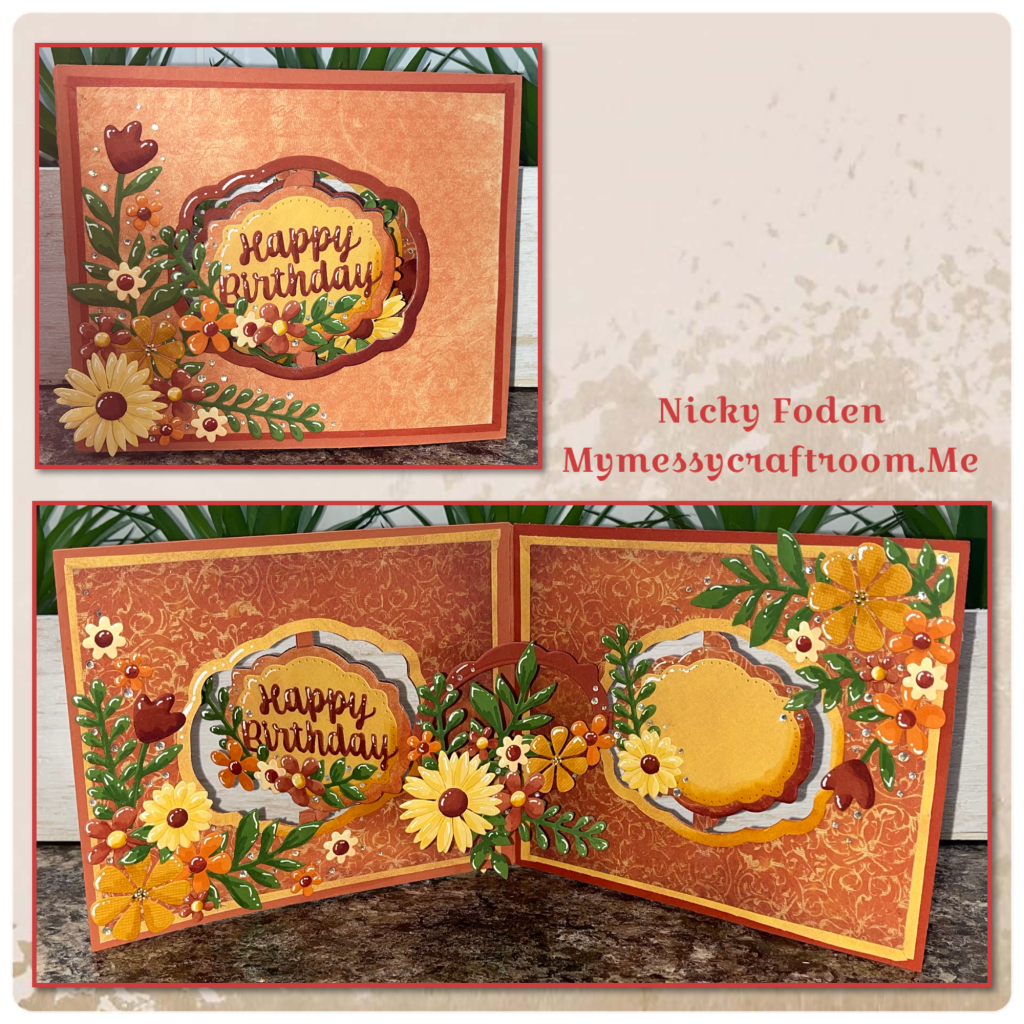
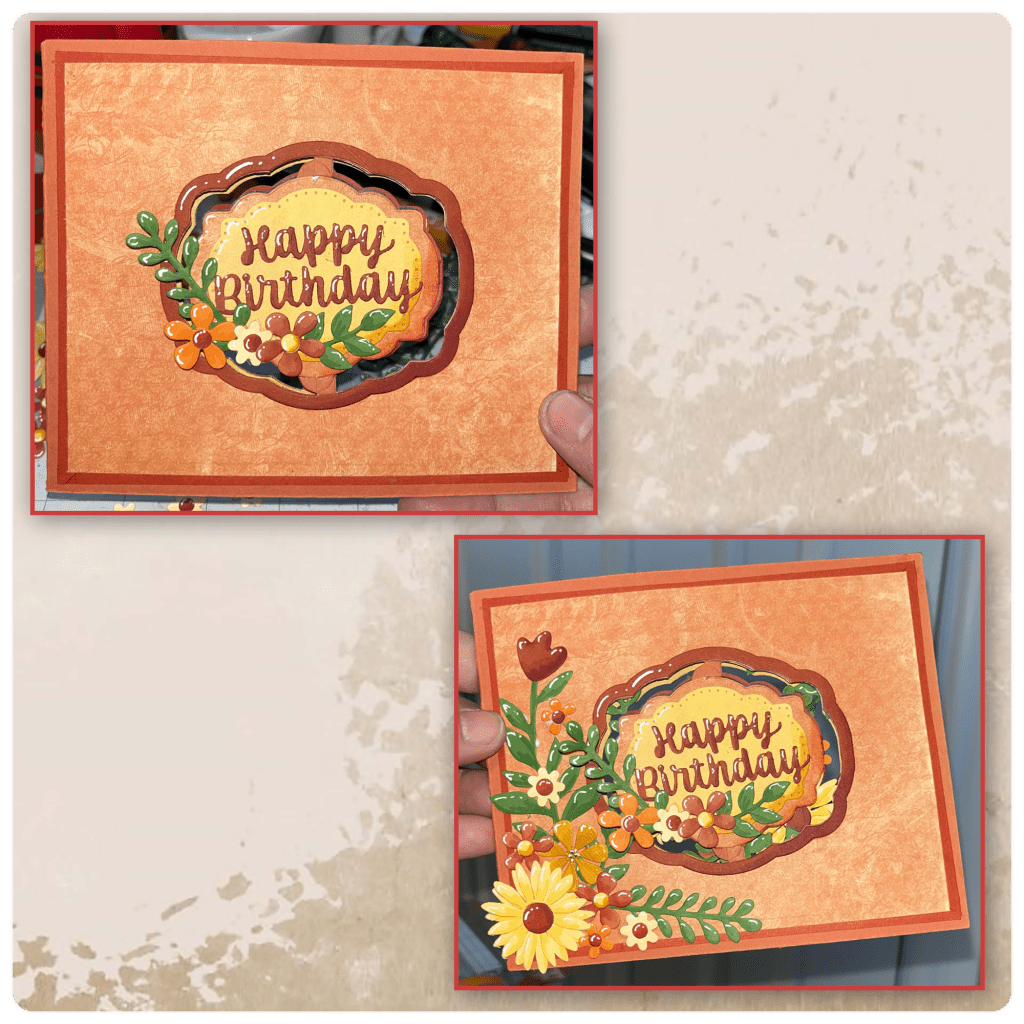
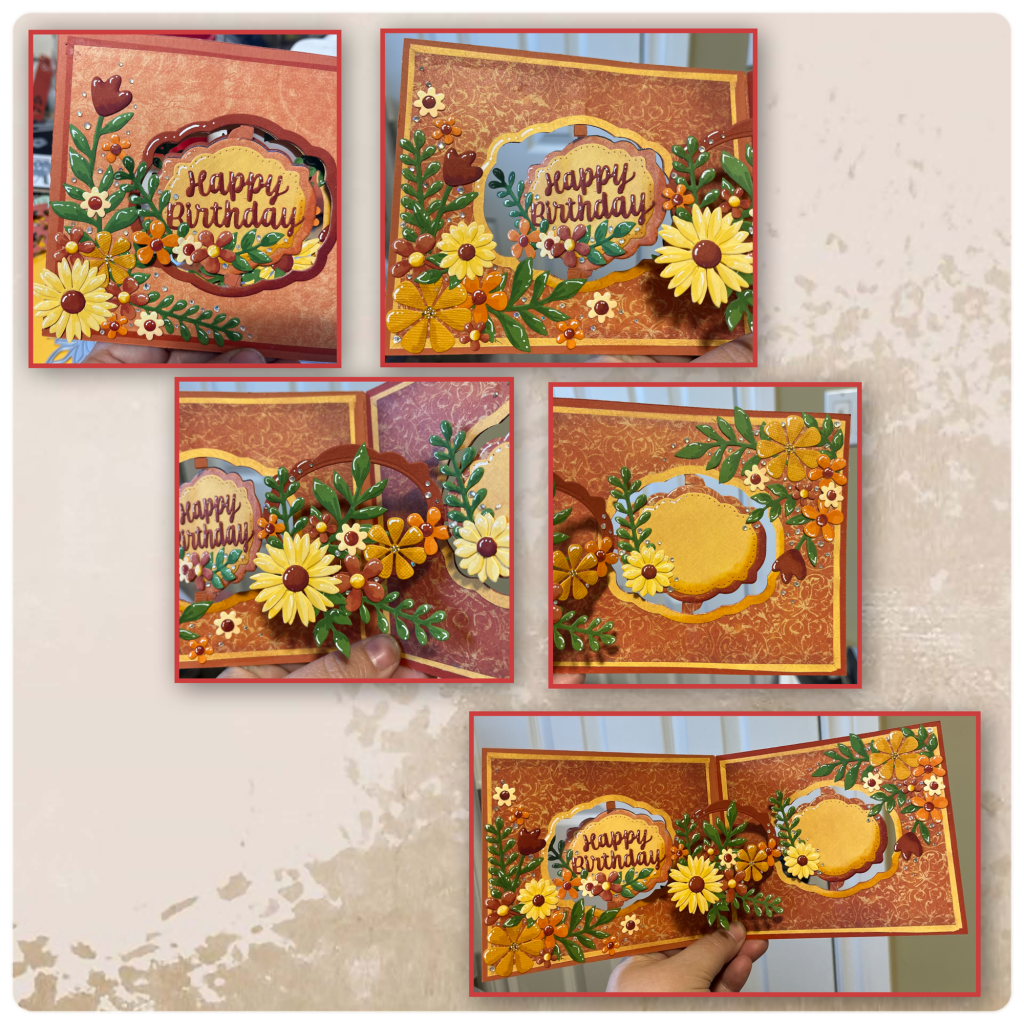
Hello crafters, I really love the look of monochromatic cards, well this one is mostly monochromatic, I added the green leaves to break up a bit of the orange and yellow, and I really love how this turned out.
All the fun is in the reveal, to see this card in action please check out my FACEBOOK page, feel free to join if you would like to share your own crafty creations. You can also see a video of this card on my INSTAGRAM page.
Believe it or not the colours I chose for this card came from this patterned paper, then I went through my stash of oranges and yellows that I thought would work.
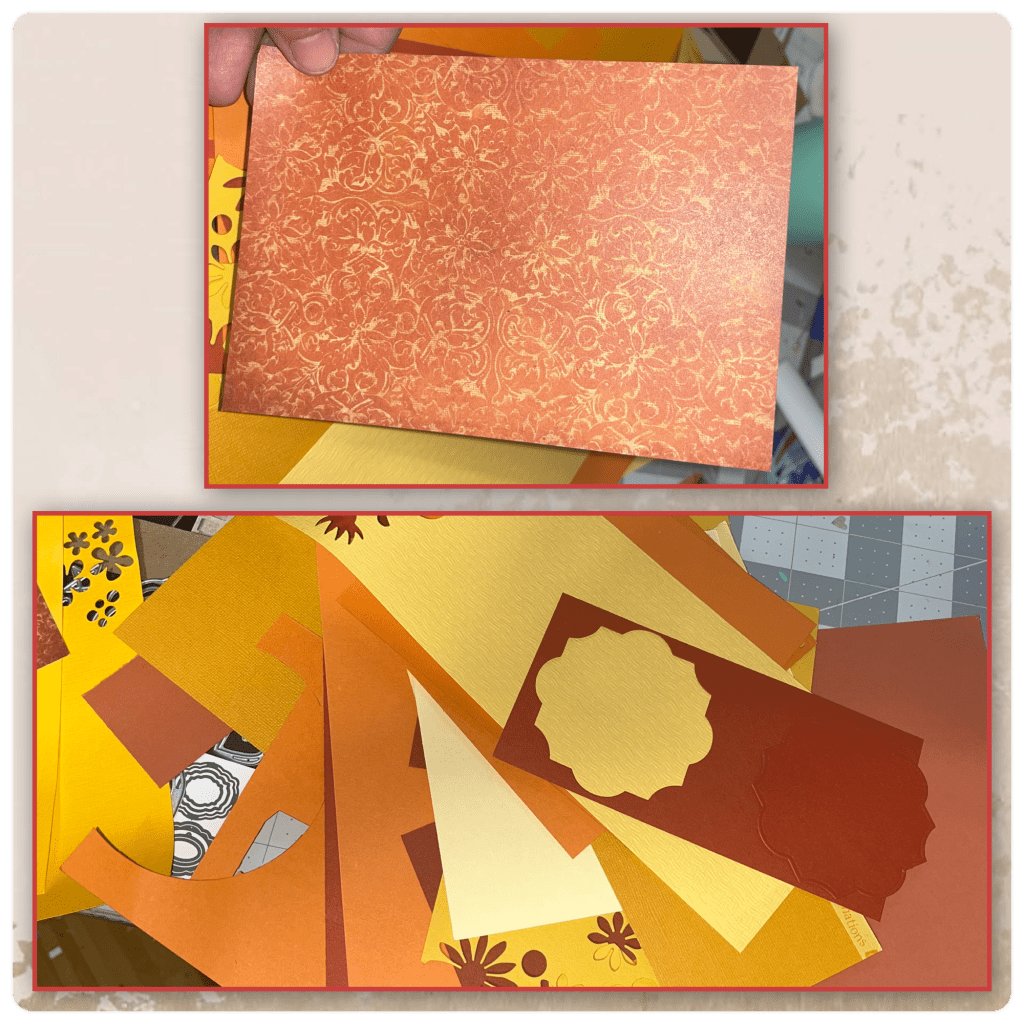
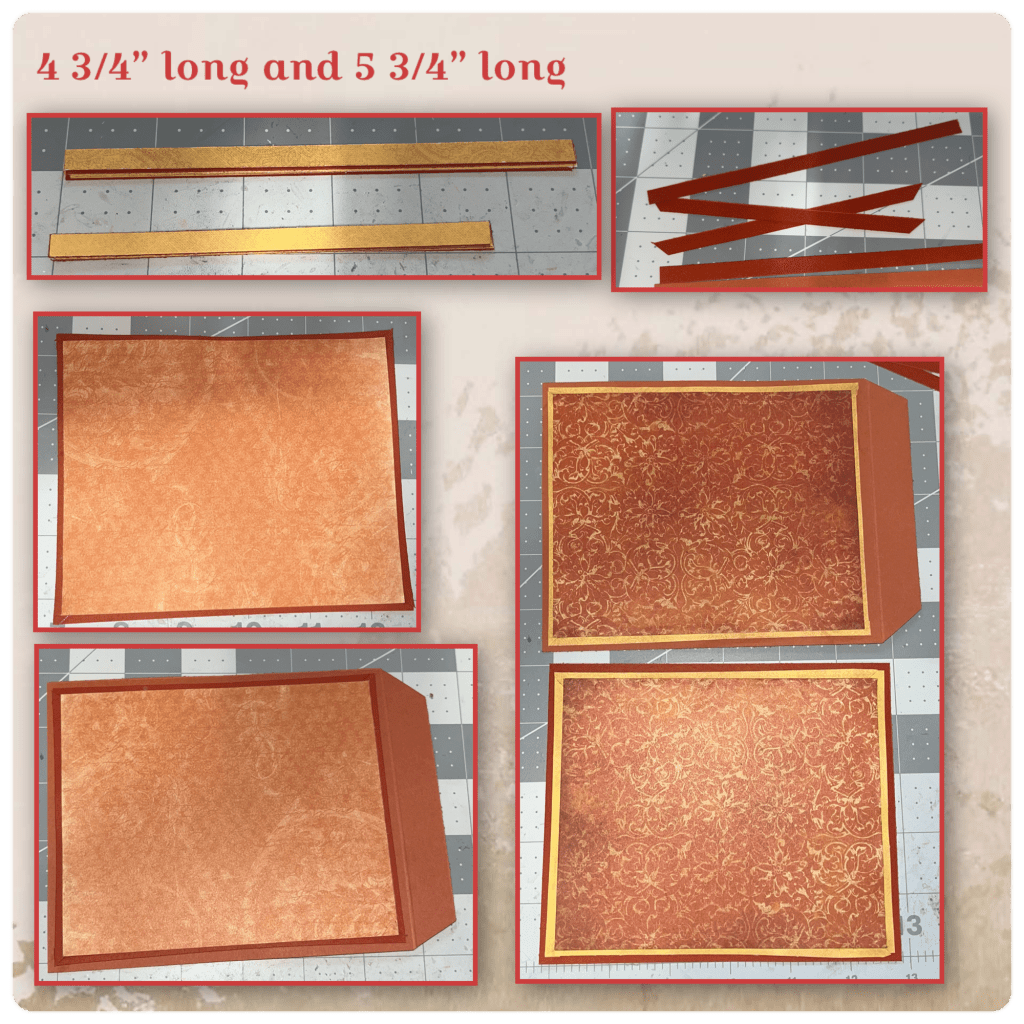
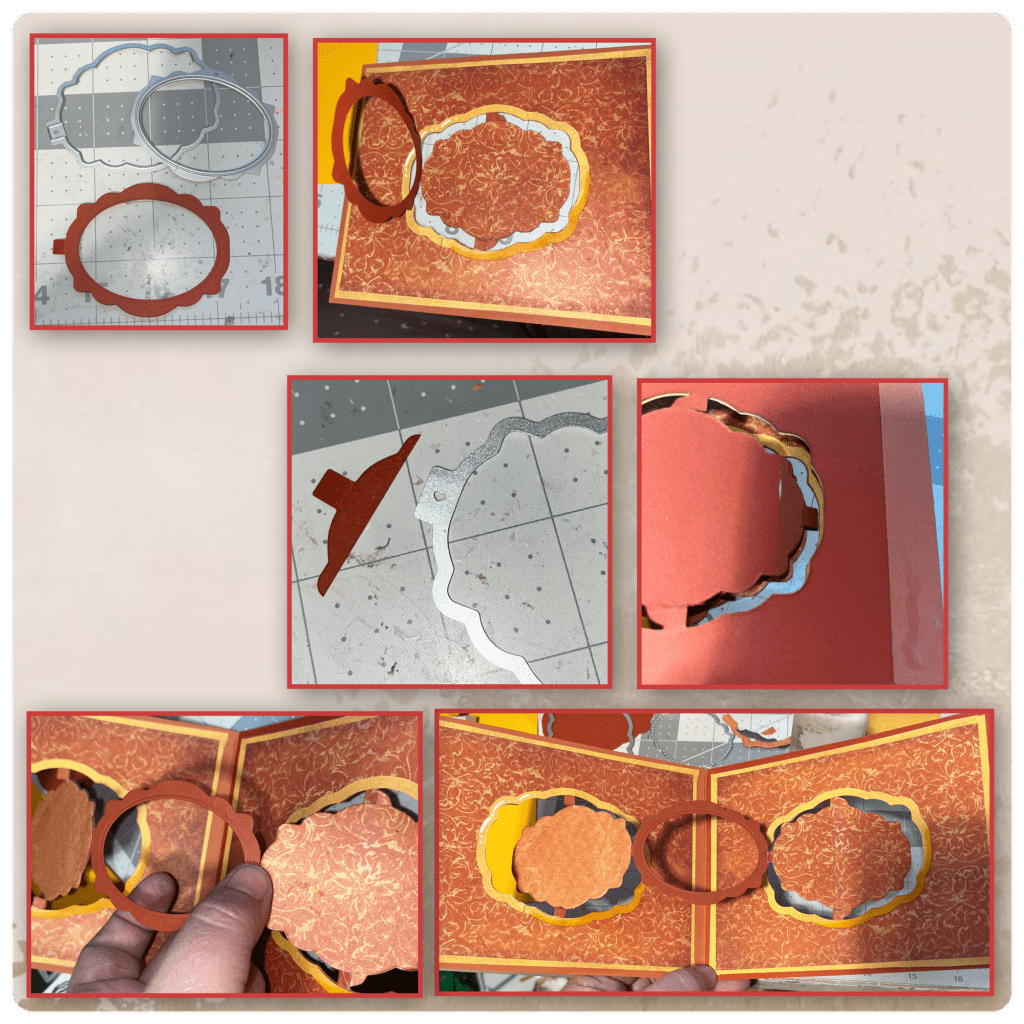
I only had 2 pieces of the paper that I liked so I found a coordinating piece for paper…..and I didn’t have enough of any one colour to make the card base so I made a creative choice to make the front of the card and the back of the card in 2 different shades. I cut the card base and the panels as shown below.
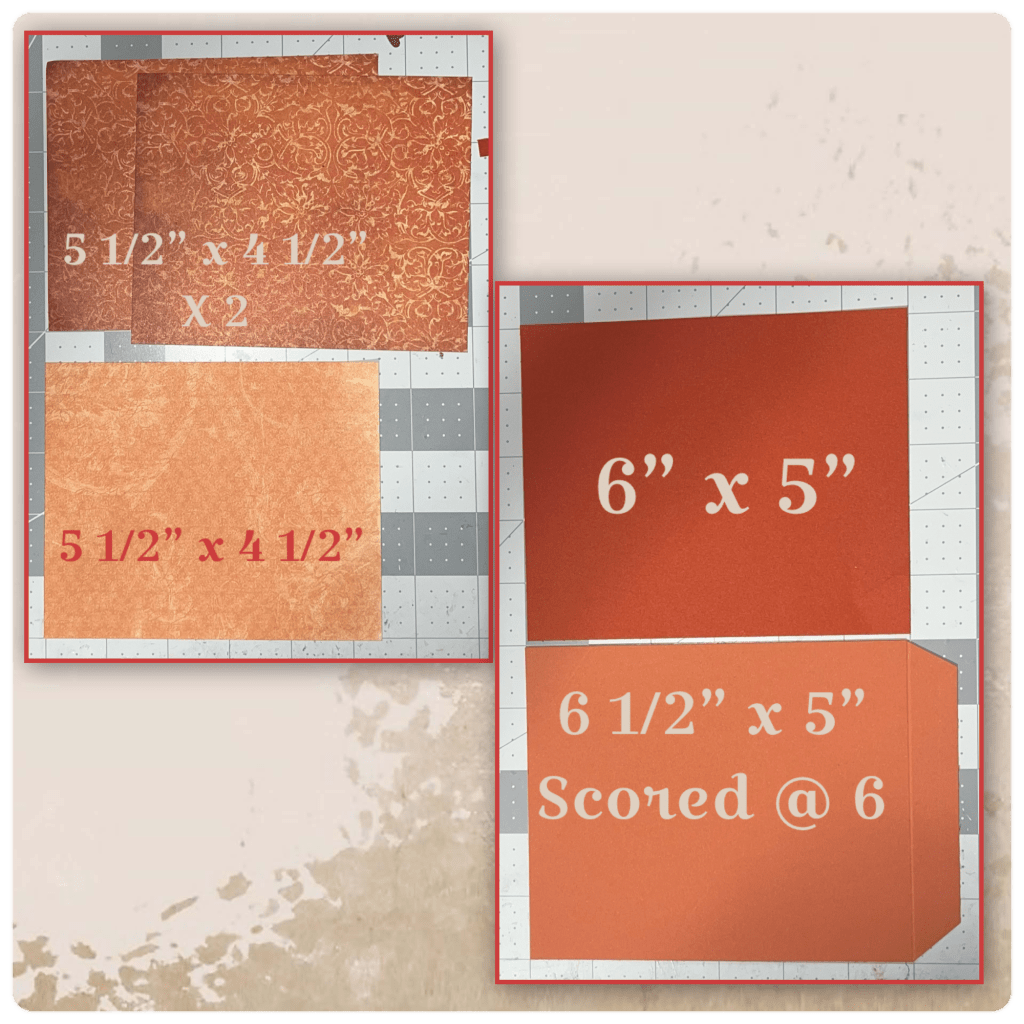
I wanted the patterned paper to have matts behind them, but I didn’t have any cardstock big enough so I cut strips to glue to the backs of the patterned paper to give the impression that they have another layer behind then. Then I added them to the card base panels.
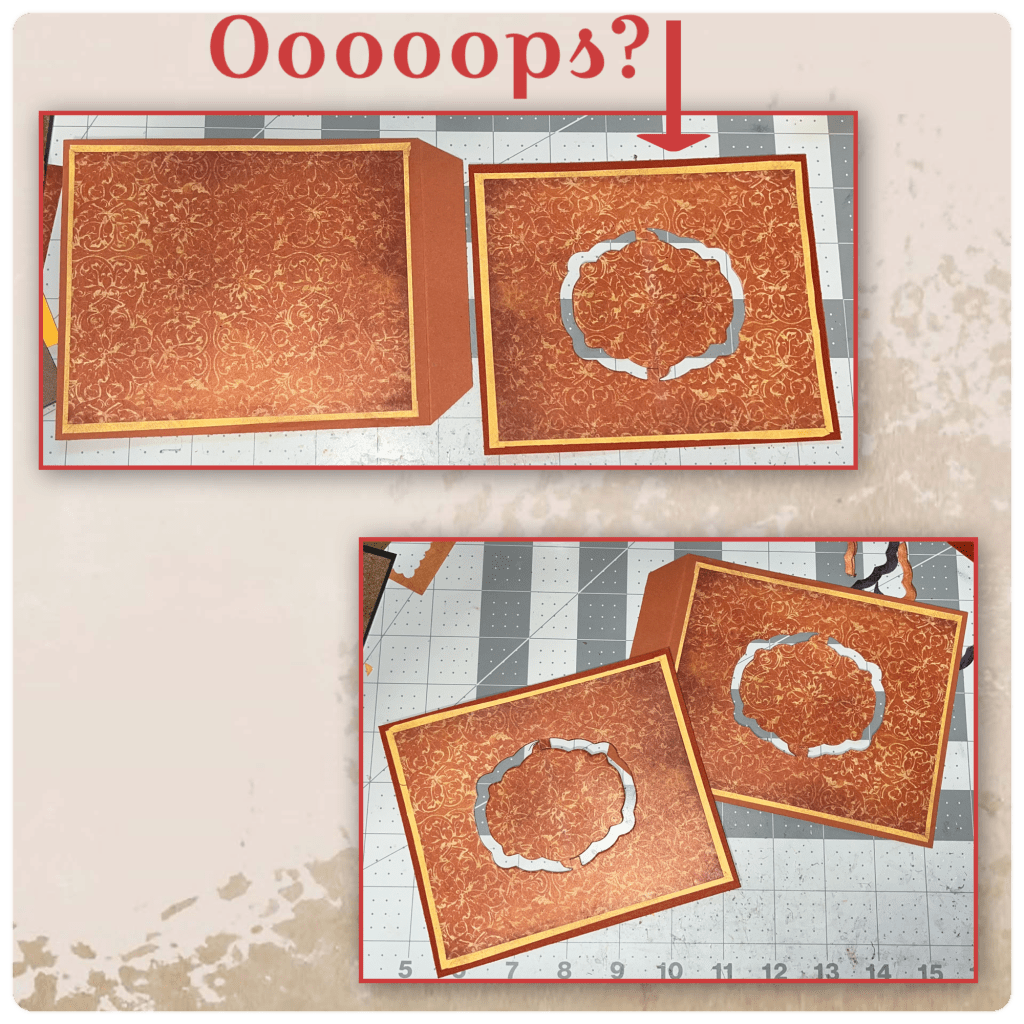
And in true fashion I made a mistake. I die cut what was supposed to be the card front with the mechanism die from the Label Charm Pop up BUT I die cut it onto the piece that is going to be the inside back piece. So I changed plans and die cut the same die on to the other pannel. Make sure they line up perfectly.
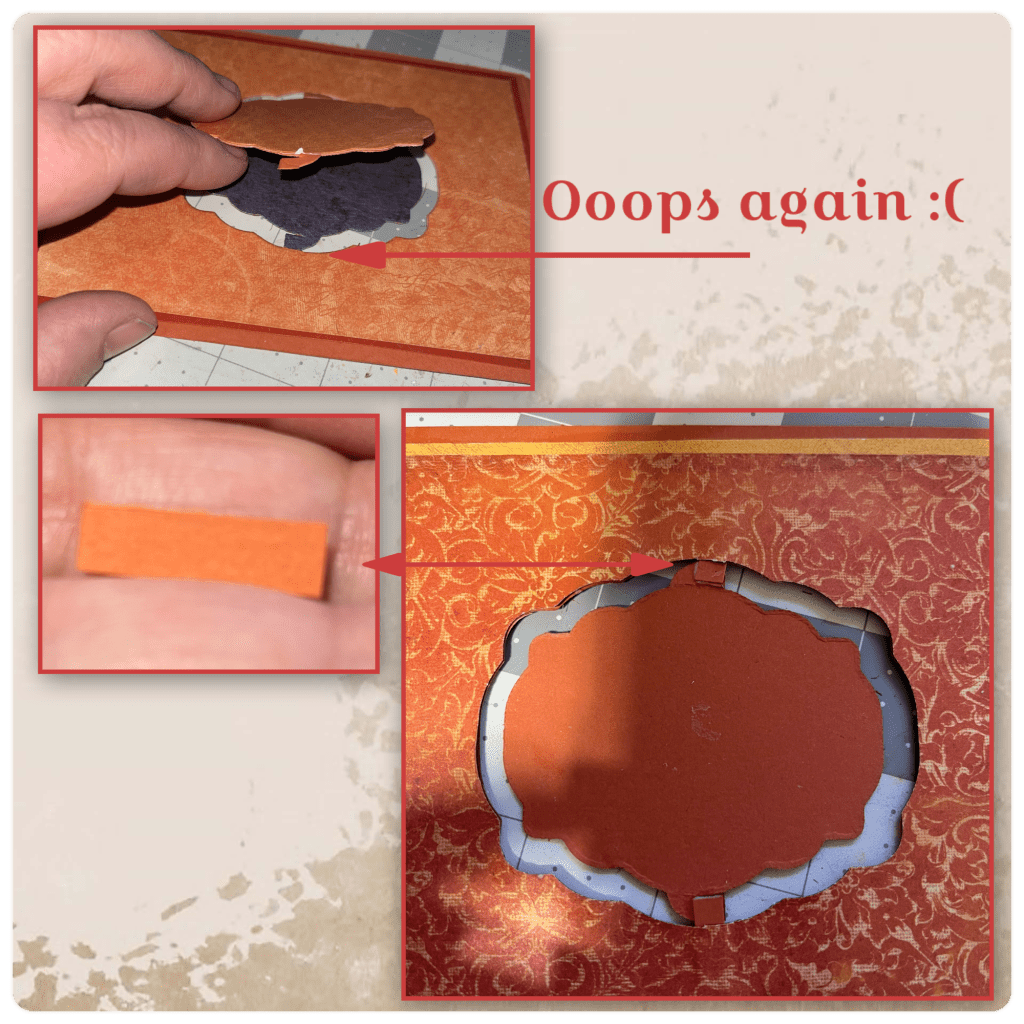
Then immediately I noticed another problem, I’m not sure how I did it but I some how ripped the bottom of the mechanism. I took of the paper centers and cut a small piece of cardstock to reinforce the part that I ripped from behind.
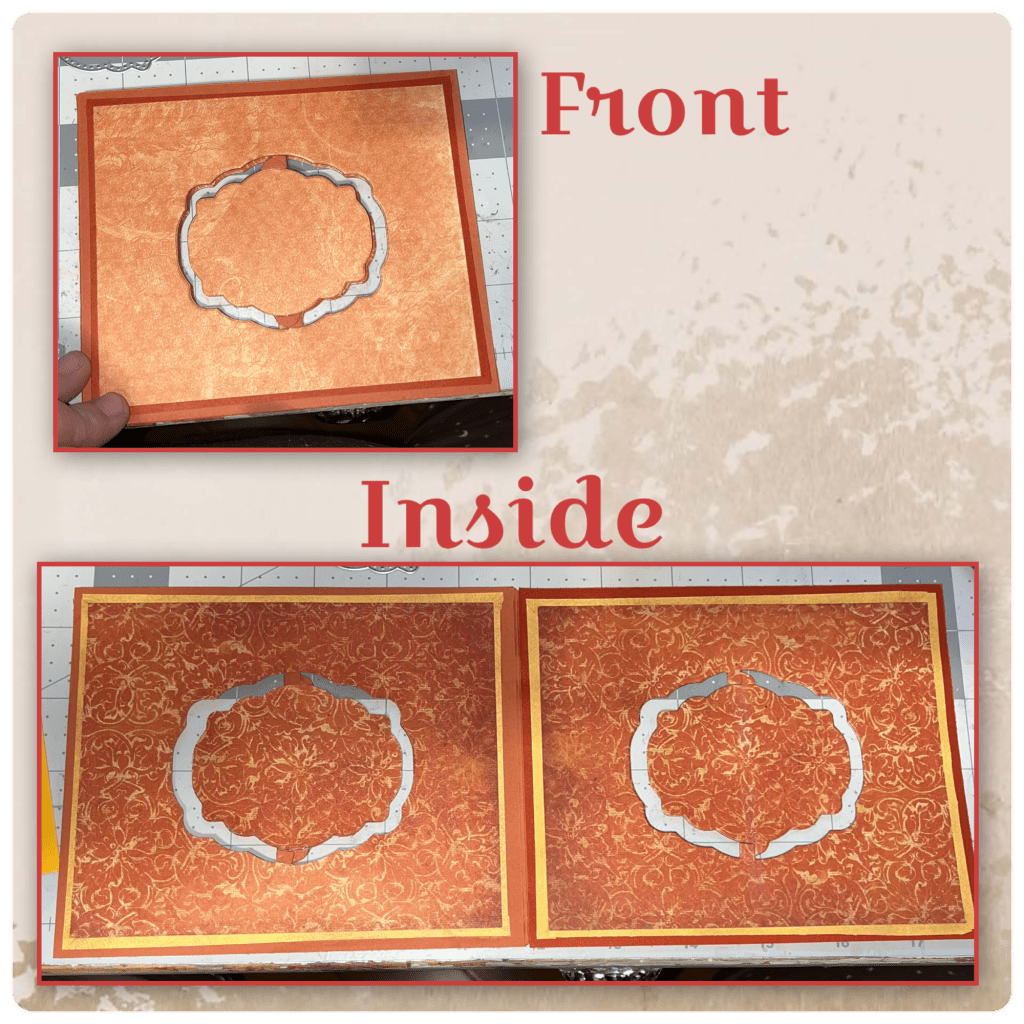
I attached the 2 pieces of the cardbase together and this is what it looks like so far.
The frames around the labels are from the Rectangles and Labels Crosshatch. I added shading to the bottom right of the frames and the labels using alcohol markers, and highlights to the top left using a white Gelly Roll pen.
Karen has a video tutorial on the product page at the link for the Label Charm Pop Up, but this is what I did because I had to change how to attach as I cut into the back. I cut the label with the tab with the piece to cut out the middle as shown and attached to the left side of label in the mechanism. I was able to tuck the tab in between the cardstock and the pattern paper. Using just the tab piece of the same die I just cut out a piece as shown and glued to to the back of the left side of the mechanism label that is on the right side of the card. Using that tab I then attached the right side of the frame label to complete the row of labels.
I cut out several flowers and leaves ( I will list the sets at the bottom.) I added shading and details with alcohol markers and a white Jelly Roll pen.
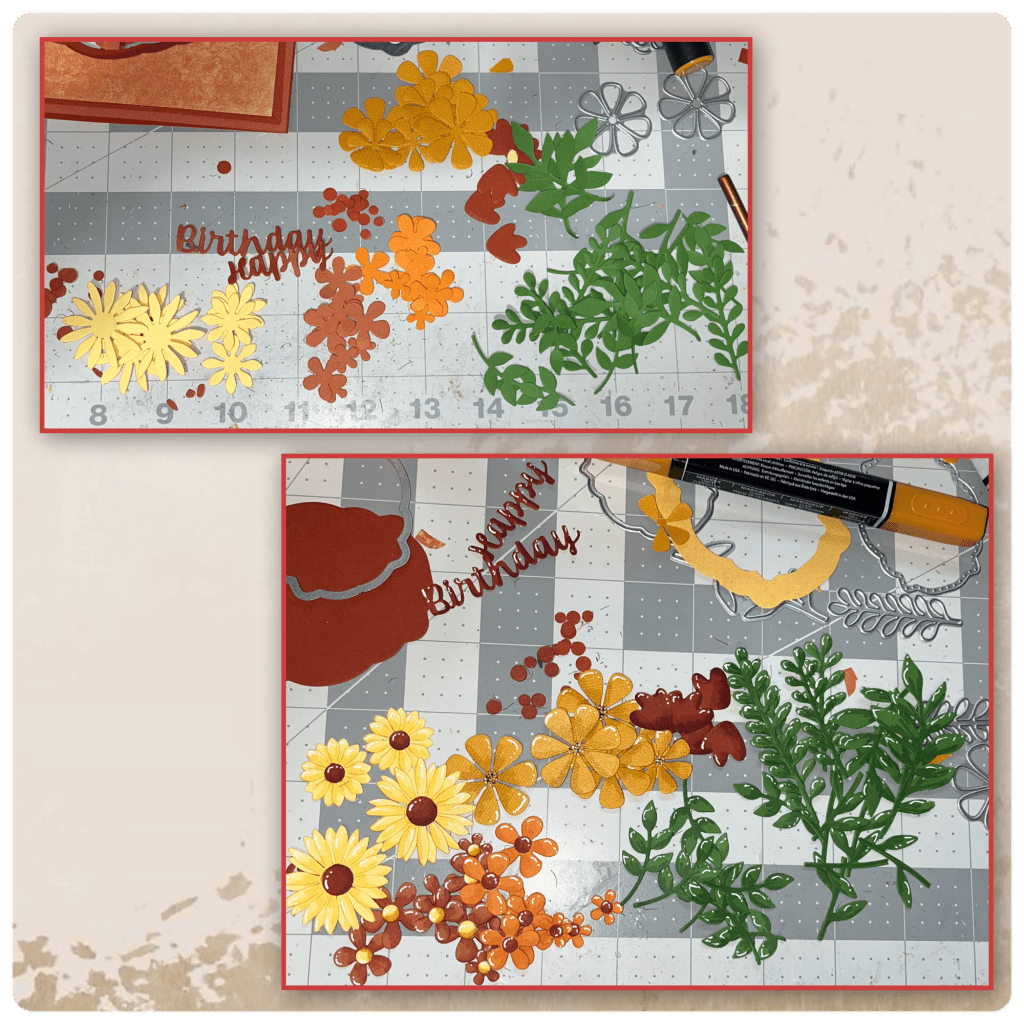
I started by adding the Happy Birthday and a few flowers to the front, making sure they don’t hinder the mechanism. I did add to the inside, then added the flowers to the left side of the front.
For the inside I added a large leaf across the space in the label to add as a support. Then I added more leaves and flowers. I continued by adding flowers and leaves to the bottom left and the top right.
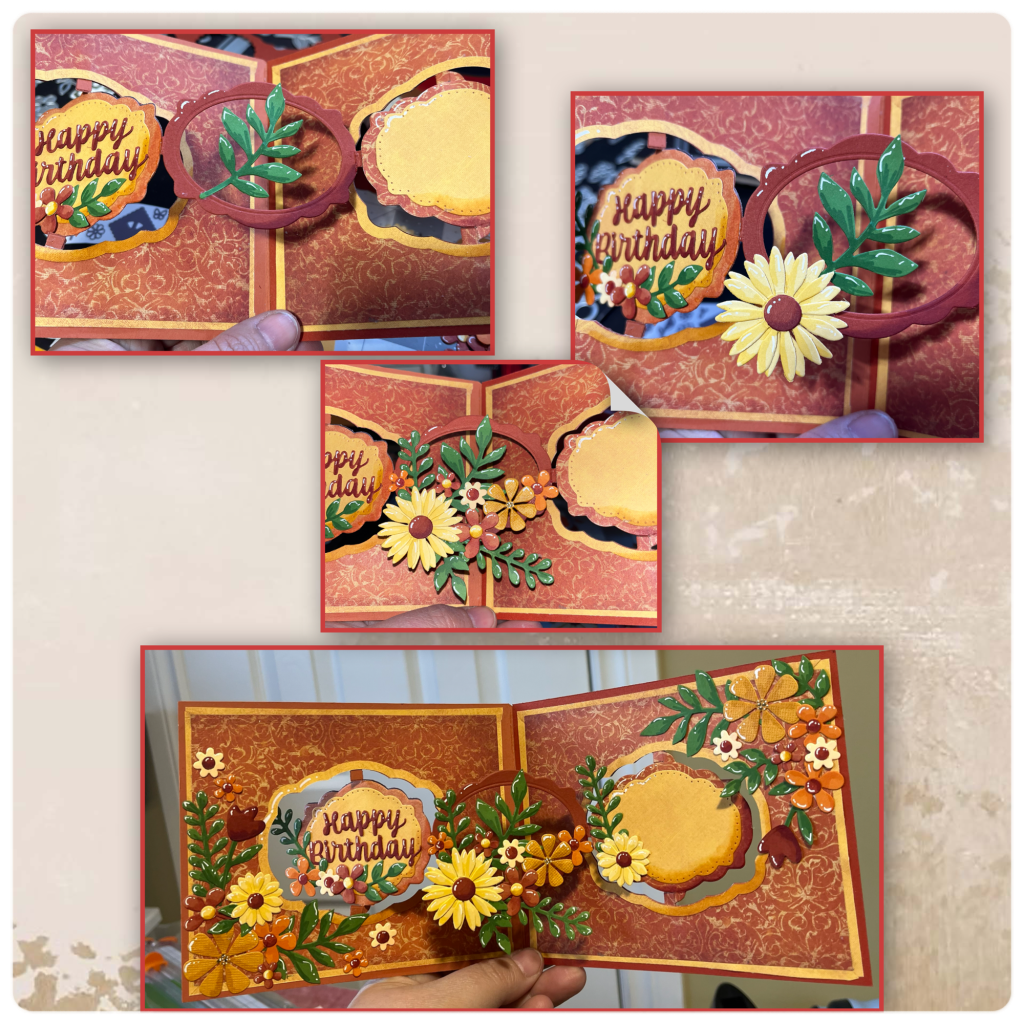
I added quite a few itty bitty gems around all the flowers.

Flowers and Foliage
Other Tools used
