
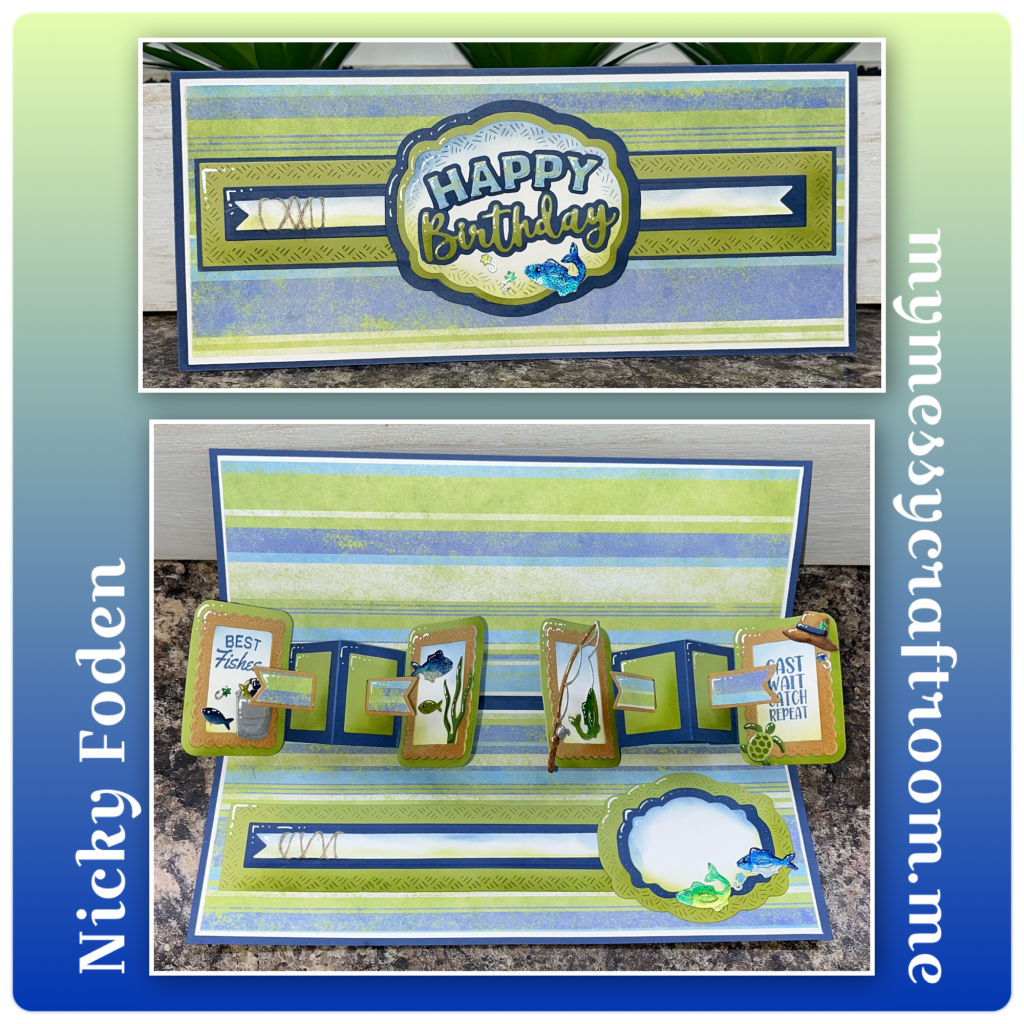
It’s been a while since I have made a slimline card, so I thought it was time, I thought I would double the fun by adding 2 Little Twist Panel Pop up mechanisms.

All the fun is in the reveal, to see this card in action please check out my FACEBOOK page, feel free to join if you would like to share your own crafty creations. You can also see a video of this card on my INSTAGRAM page.
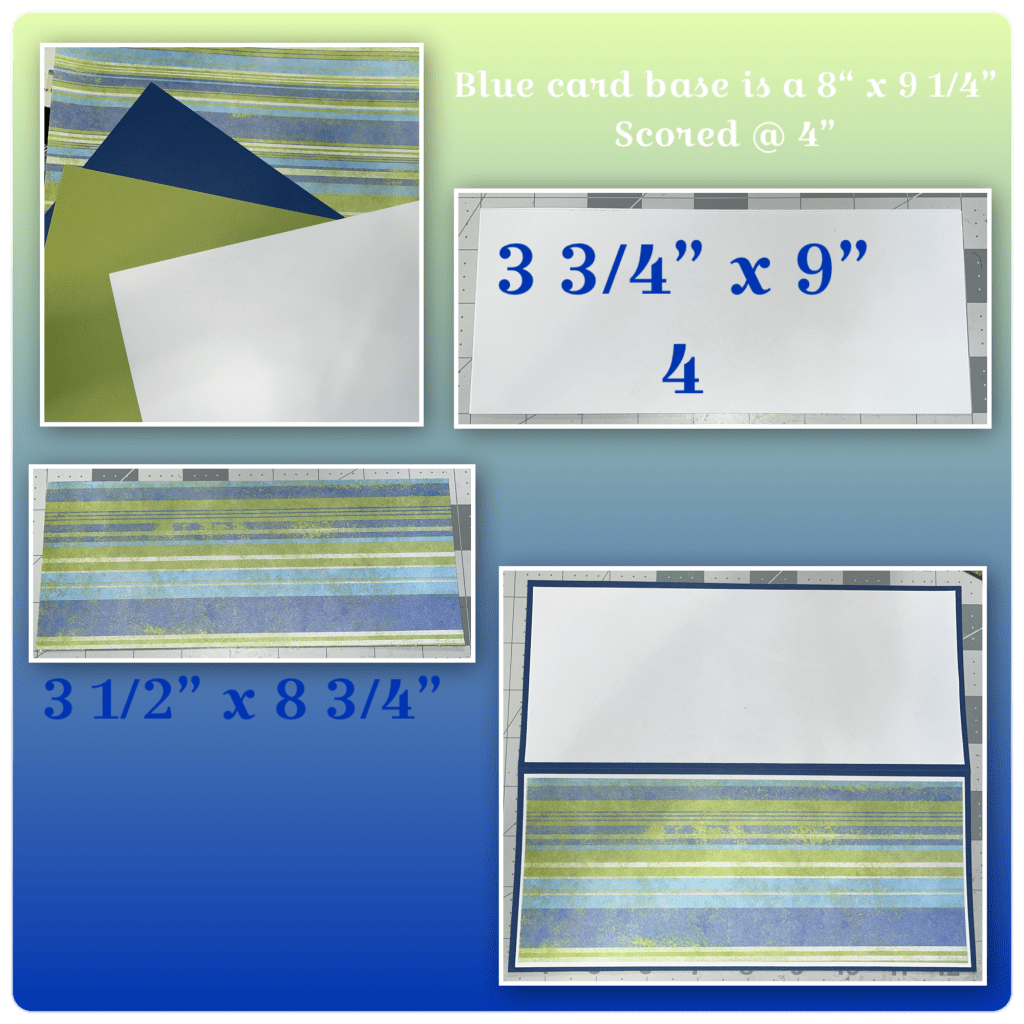
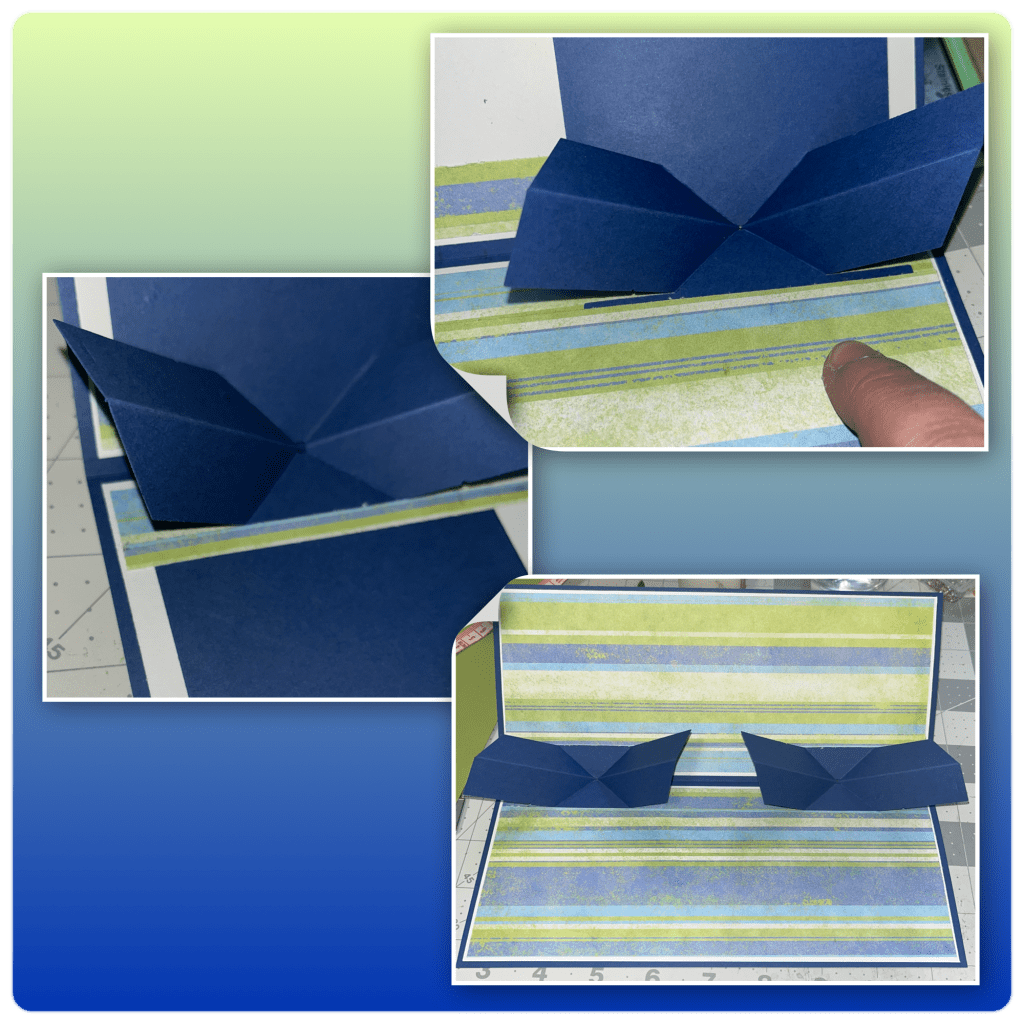
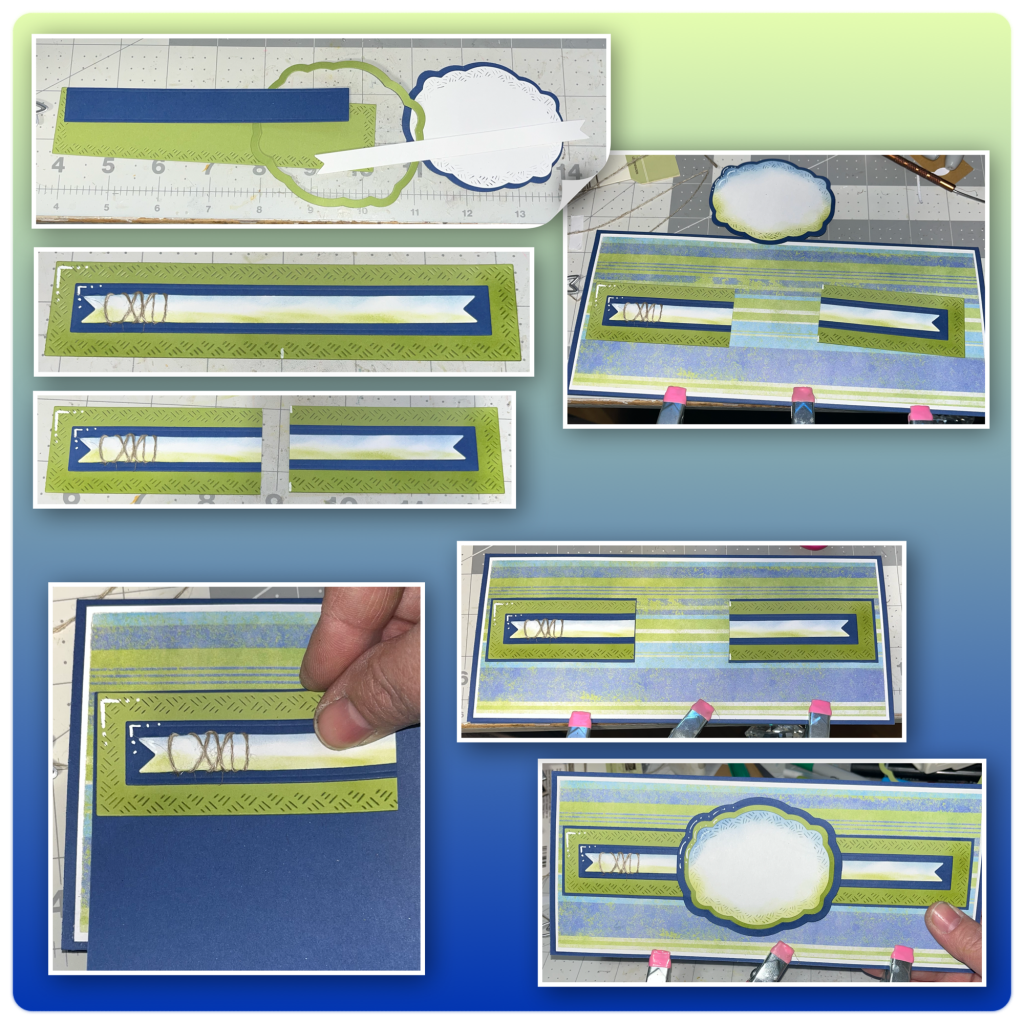
I started by going through my paper stash to find a paper that would work well for a masculine card, then found some matching cardstock. I made the card base and cut the panels as shown, The bottom photo is the card base from the outside, front and back.
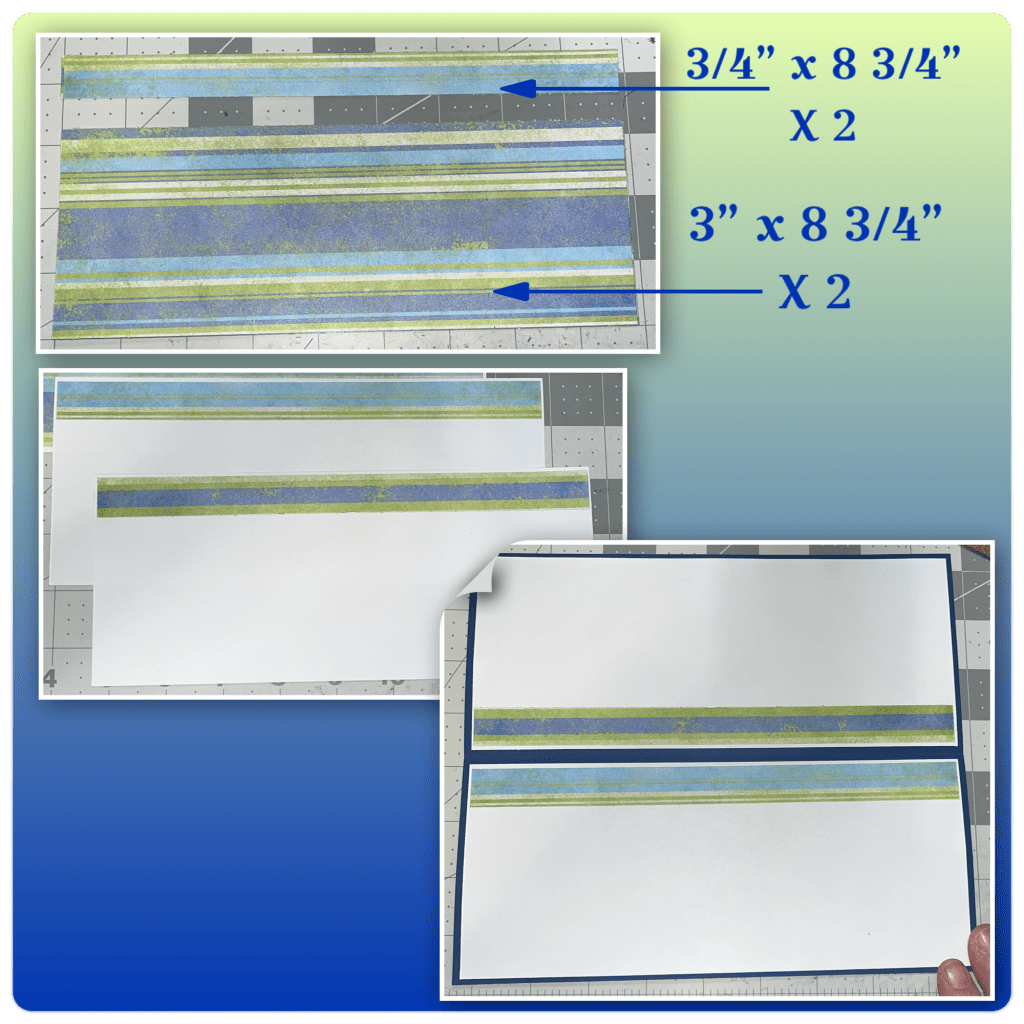
I knew that I wanted the mechanism bases to be covered with the patterned paper so I cut out the pieces as shown below, I added the skinny strips to the white card stock then added to the card base as shown.
I cut out 2 of the Little Twist Panel mechanisms and added to the card base (Karen has a video tutorial on the product page at the link ⬆️ )
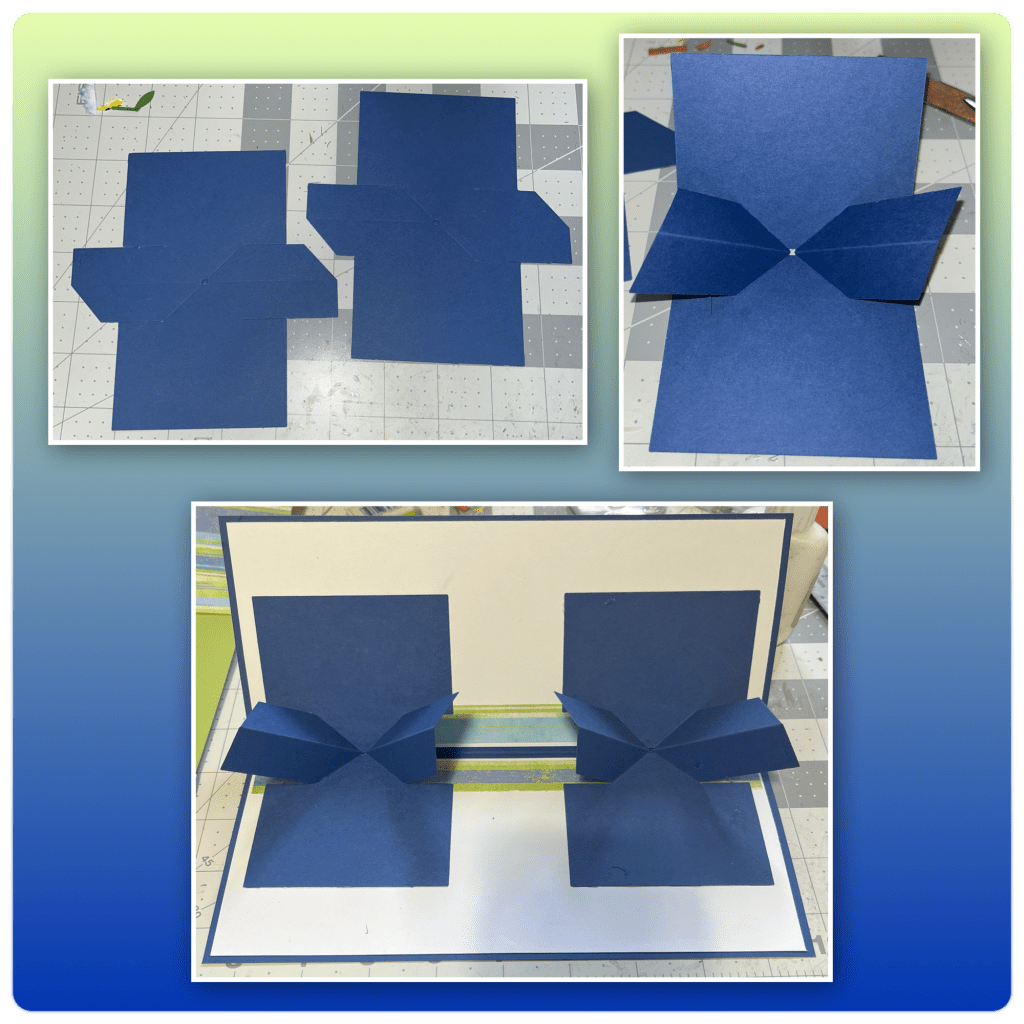
The benefit to using a striped paper with a random pattern is I can hide the mistakes. The paper didn’t line up right so it didn’t completely cover the mechanism, so I cut another small strip to fill in the gap then I added the large piece of paper.
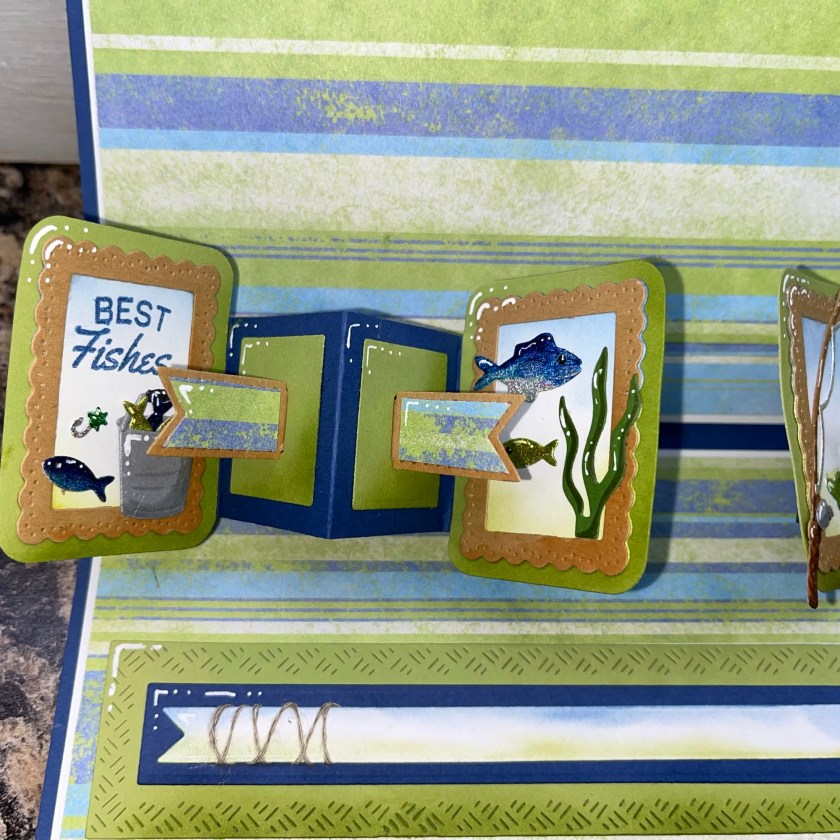
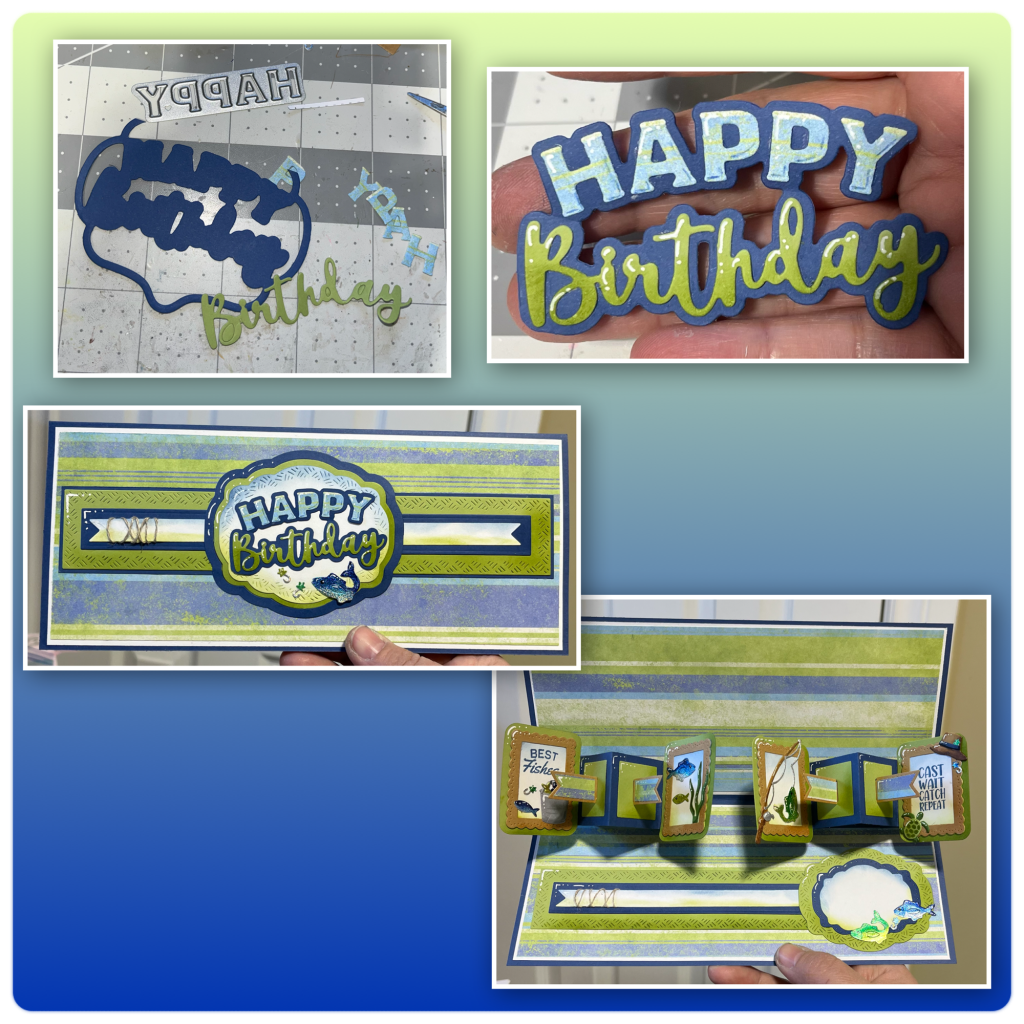
I cut out all the frames and layers as shown below. I inked the edges, and added shading to the bottom right and white highlights to the top left. I added the stamped greeting using stamps from the Fishing Phrases. To make the flags I cut them from the patterned paper and the brown, then just trimmed the edges off the patterned paper and adhered them to the brown flags.
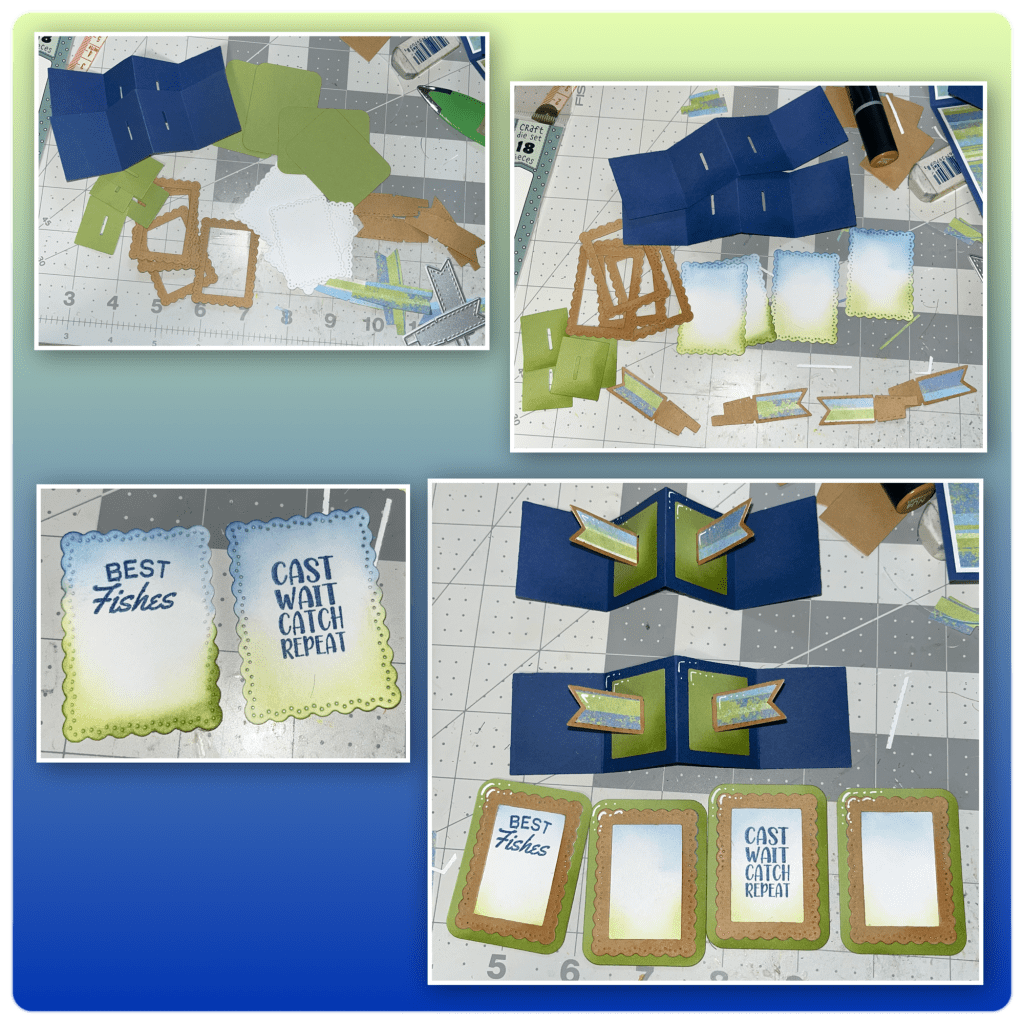
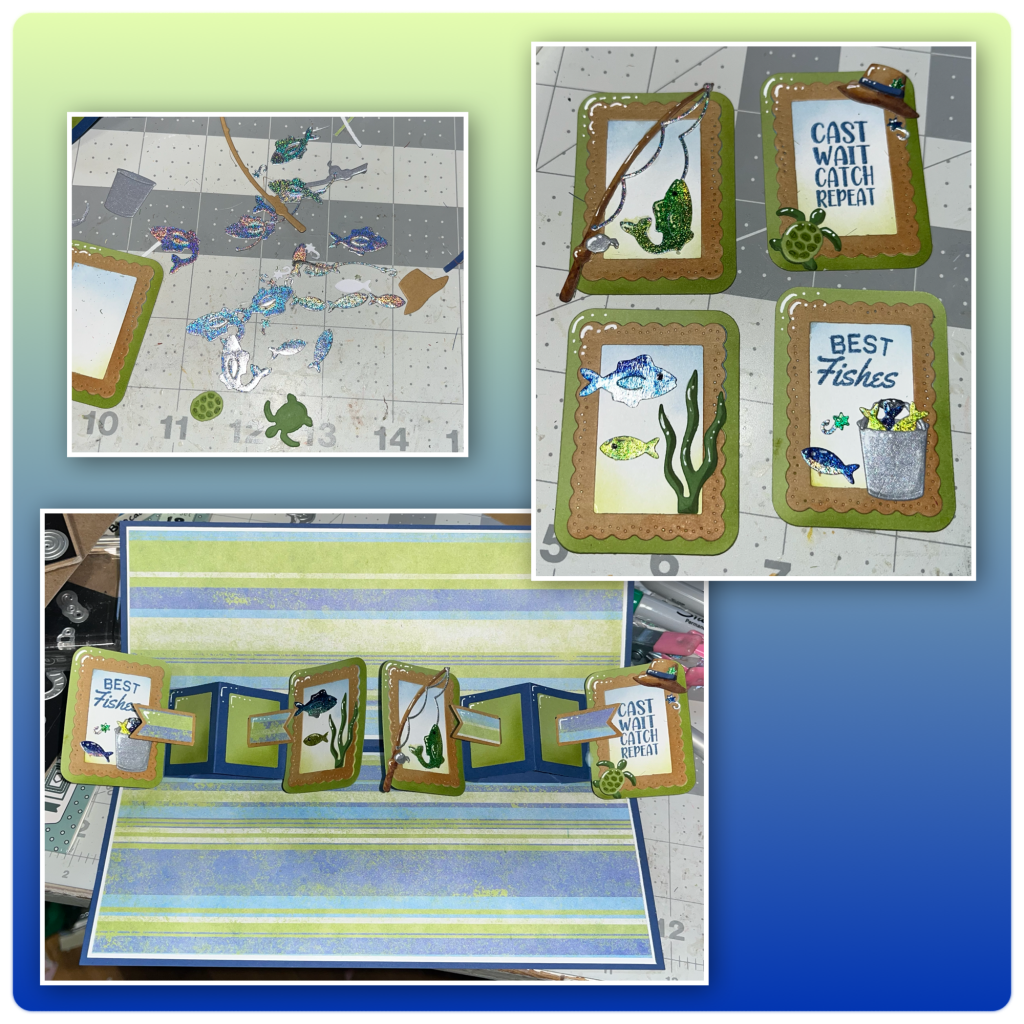
I cut out the fish and other elements from the Fishing Boat Add on, and Sea Stage Add On. I like cutting the fish from holographic paper and colouring with sharpies. I added shading and highlights to all the pieces and added them to the little panels, then to the mechanism.
I decided to make a border for the bottom using the Long Rectangles Crosshatch. To create the signature space I cut labels from the Rectangles and Labels Crosshatch and Label Charm Pop Up. I wrapped a little piece of twine as shown. I was running low on the blue cardstock so one of the labels is a little short. I added the pieces to the cardbase as shown.
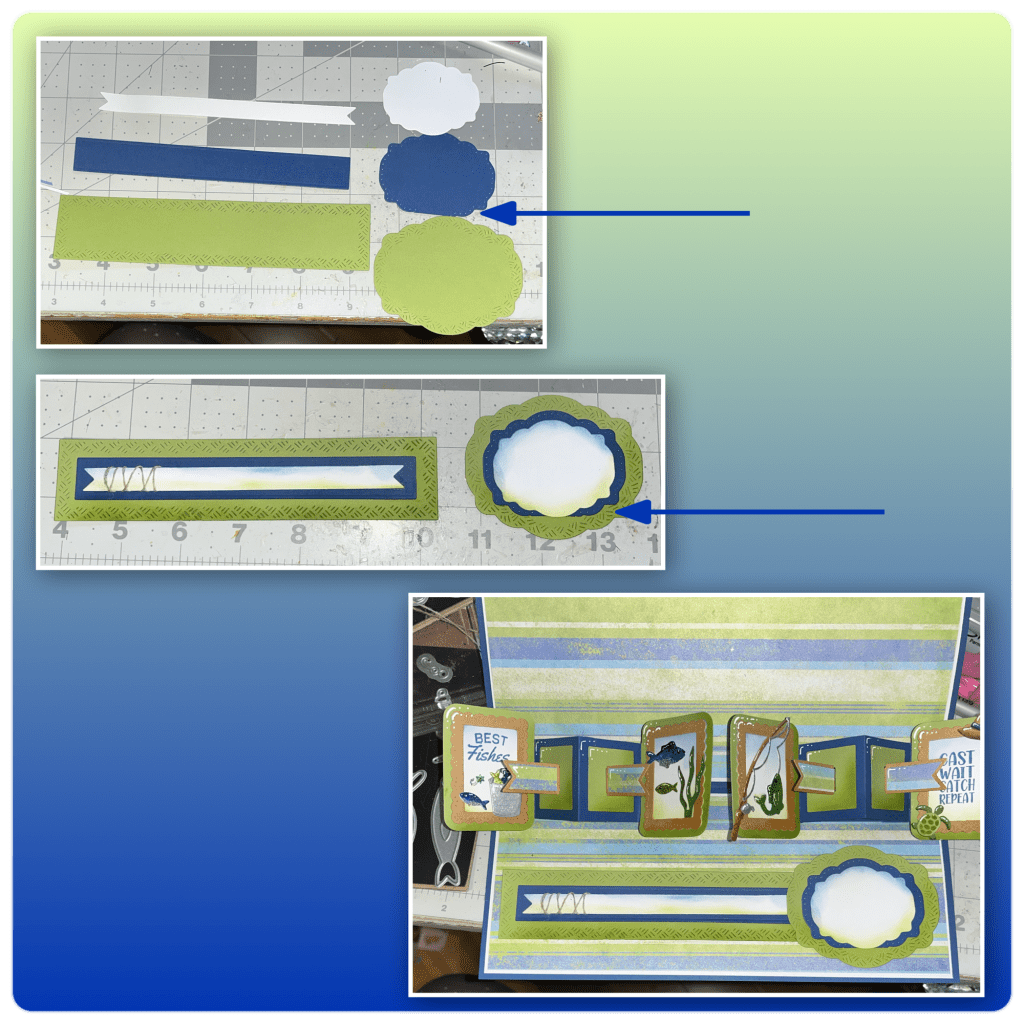
Using the same diesets I cut out a border and layered labels as shown below. I inked up the edges of the white pieces to match the pieces on the inside. I wanted a bit of a different look so I cut the long rectangle in half lf. I decided that I wanted there to be more contrast so I added a thin layer of blue then added to the card base then covered the centre with the label.
I cut the pieces from the Happy Birthday Lorna Add On as shown below. I added shading and highlights then added to the label. I added some fishy elements to the front and to the label on the inside making sure to cover the bottom of the too short blue label.
Other Tools used
