
Today is Crazy4Challenges day and it is a Sketch Challenge. I was in the middle of making Fathers Days cards and I just couldn’t come up with a Fathers Day card for this sketch, I think the bow and the scallops just had my mind leaning towards a more feminine card, then I got a call from a very dear friend who just called to see how I was doing, so I thought that I would make this card for her.
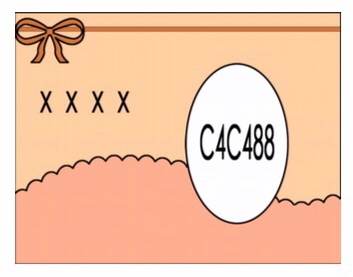
This is the sketch for the challenge
To see the cards from the other talented Crazy4Challenges ladies please check this out Craz4Challenges Sketch challenge
Click “read more” to see more
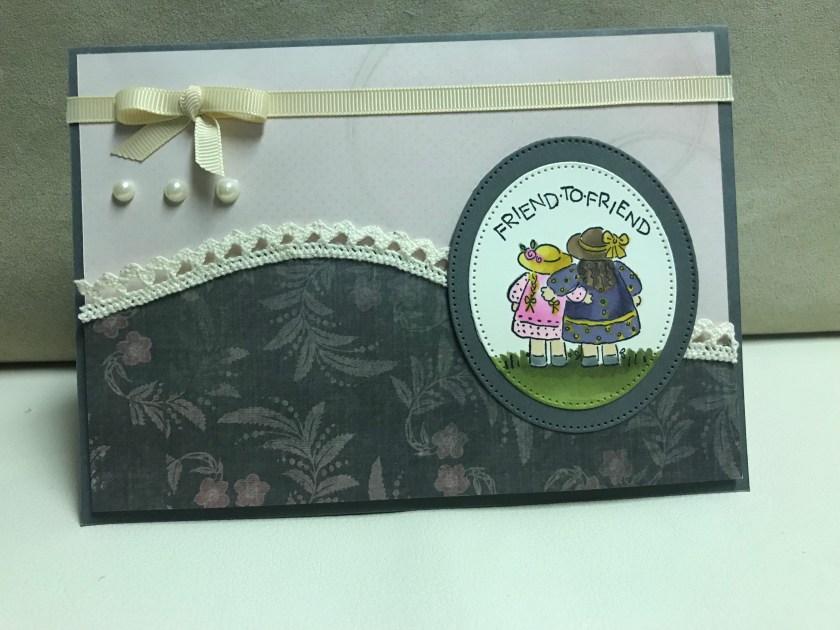
Ok, so originally I was a little stumped with this sketch challenge, because I have large wave dies, I have scallop dies, but I don’t have wavy scallop dies so I had to really think about it 🤔 and I decided to use a wave edge to cut the paper but I would trim it with a ribbon with a scalloped edge, and I also decided it would a 5″ x 7″ card.
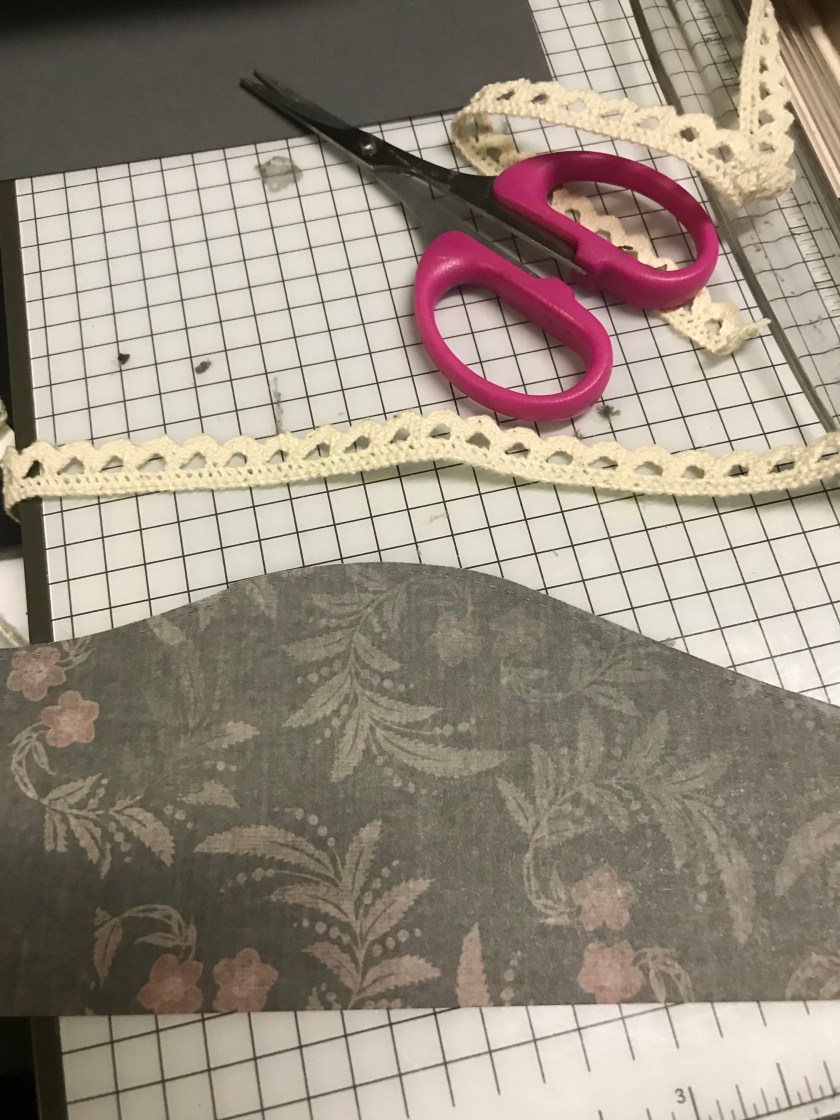
I flipped the paper upside so the large wave would be on the left side and I had to run it through the big shot with the wave die twice. The paper came from my Costco stash.

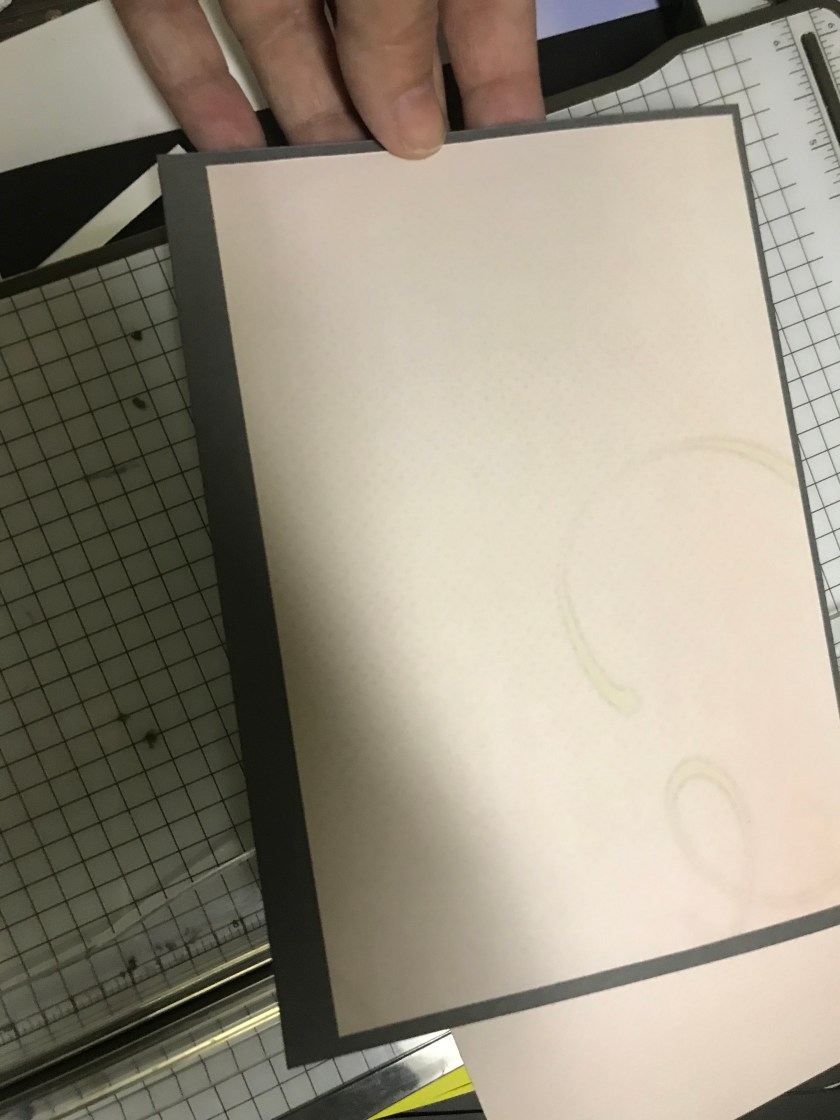
I made the card base 5″x7″ out of Basic Grey cardstock from Stampin Up . I cut a piece of pink Costco paper 6 3/4″ by almost 4 3/4″ (I didn’t go all the way to the bottom as I knew it would be coved) and adhered it to the card front
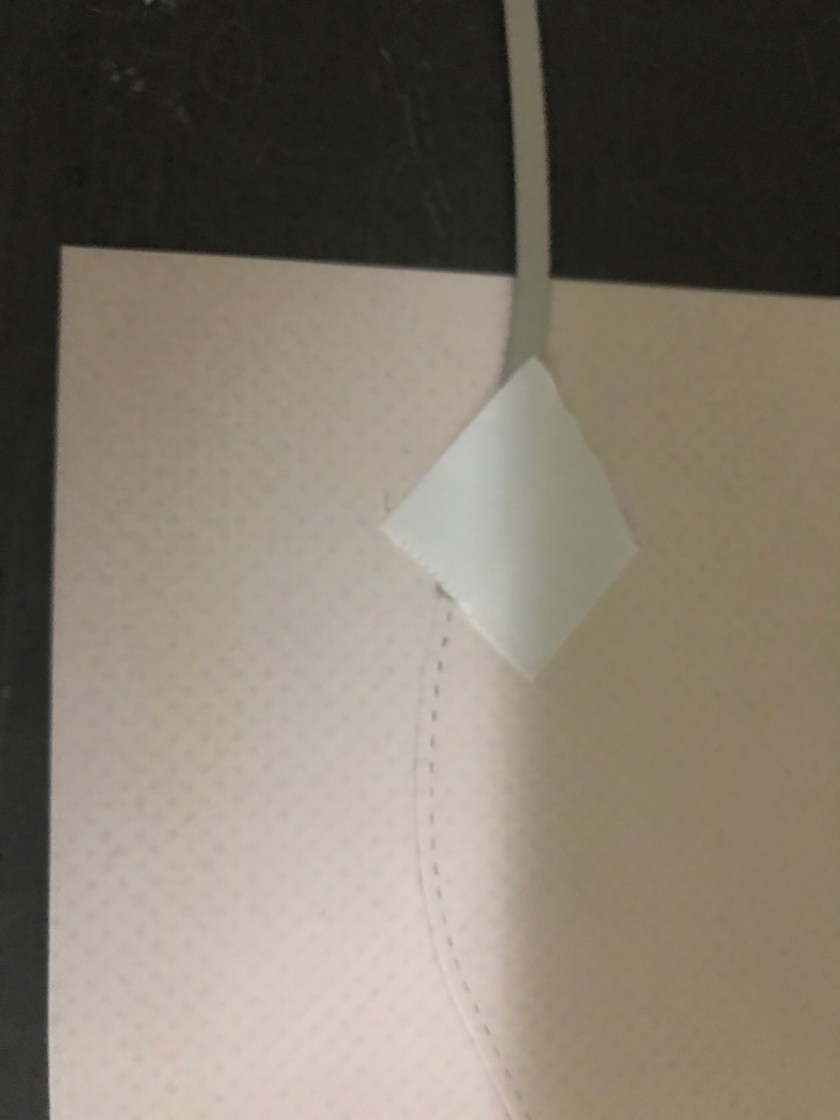
I added white fun to the back of the curved piece as I want the front of the card to have a little bit of dimension.

then added it to the bottom of the card front.

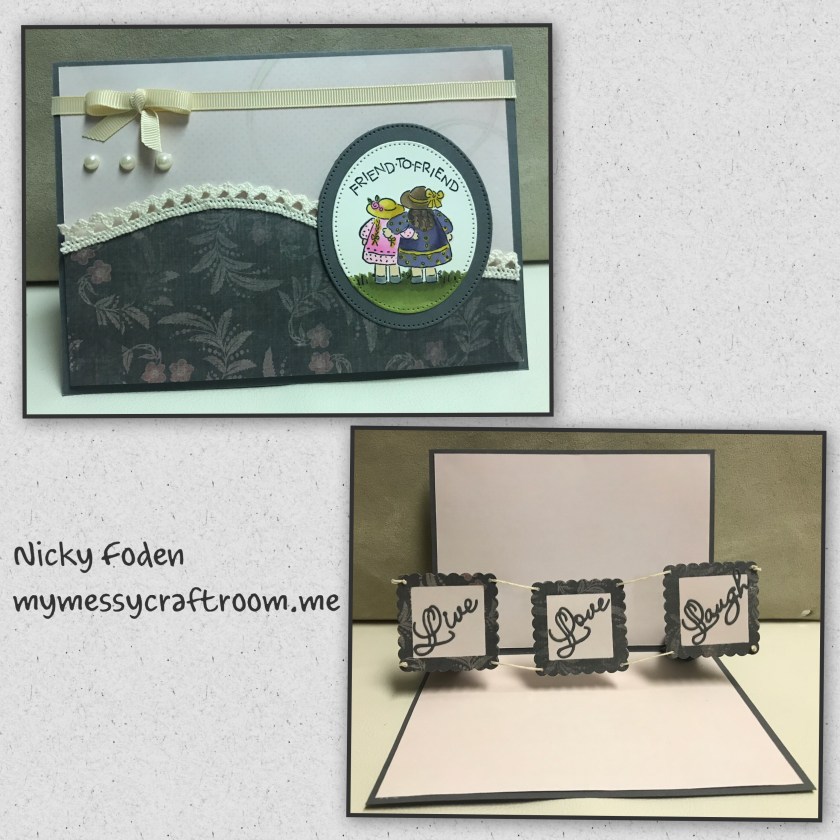
Next, I chose a REALLY old Stampin’ Up stamp and stamped it onto Very Vanilla cardstock and coloured it in with my Stampin Up Alcohol markers (colouring is not my strong suit, I kinda wish I used a different shade of pink)

Because I used fun foam under the darker wavy piece and the oval piece has to sit over half of the wavy piece and half of the background, I put dimensional adhesive on the top of the oval and sticky strip on the bottom so the oval would sit level.

I added it and piece of Very Vanilla grosgrain ribbon across the top. I added a Fork bow (not my video) to the ribbon strip, and three vanilla 1/2 pearls.

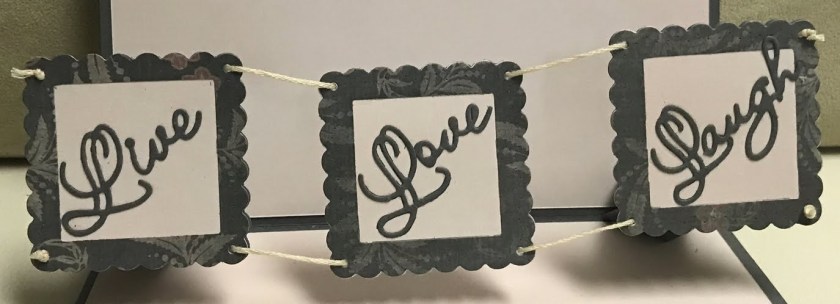
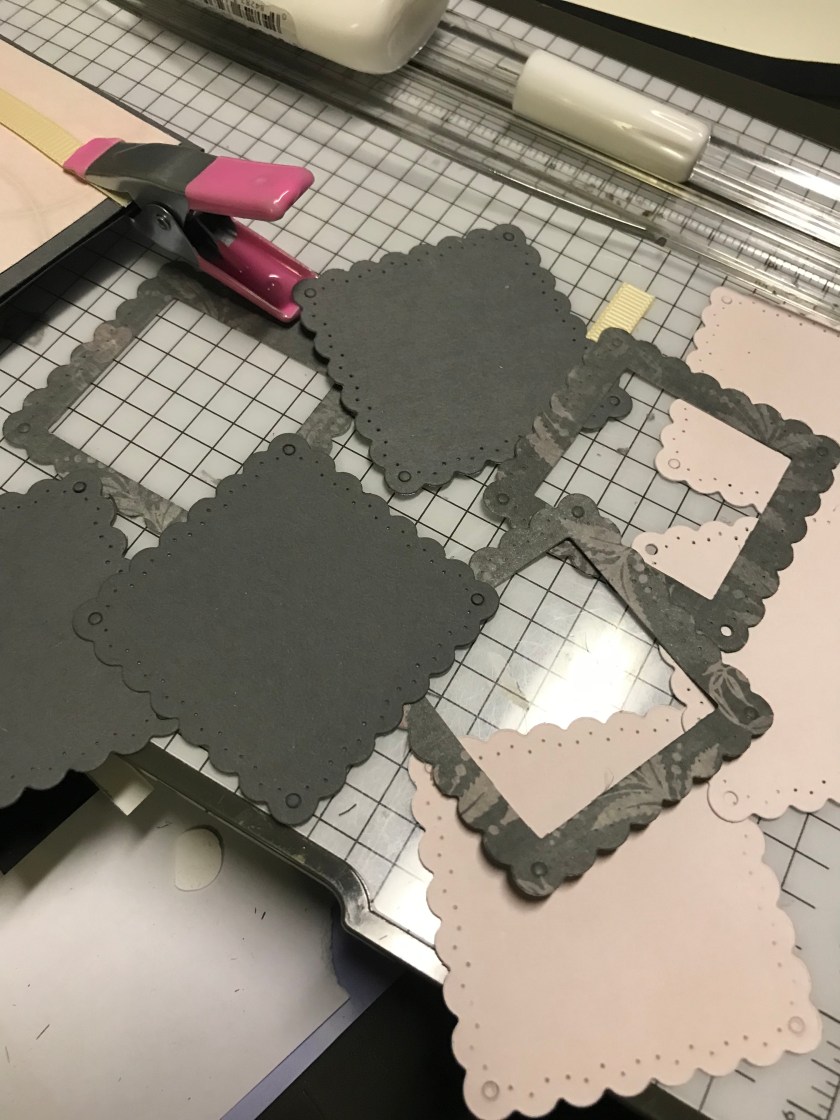
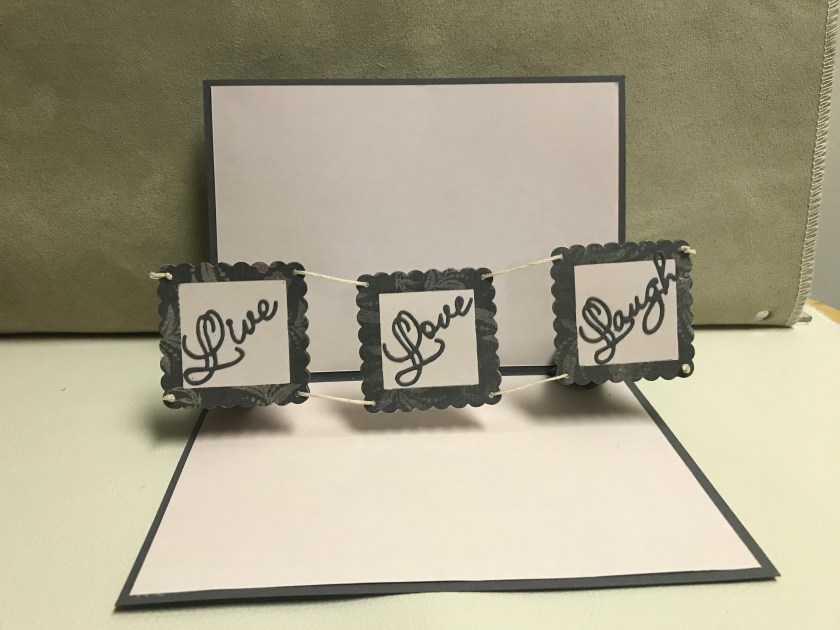
Now for the inside, because you know there has to be an inside lol. I decided to use Karen Burnistons Upsy Daisy Pop up die and I followed her video to create the mechanism. To make the hanging squares I had to cut out a few layers. I cut them out of the Basic Grey Cardstock because the other papers were way to thin. I cut out pink squares and the grey flowered paper was cut into the frames,
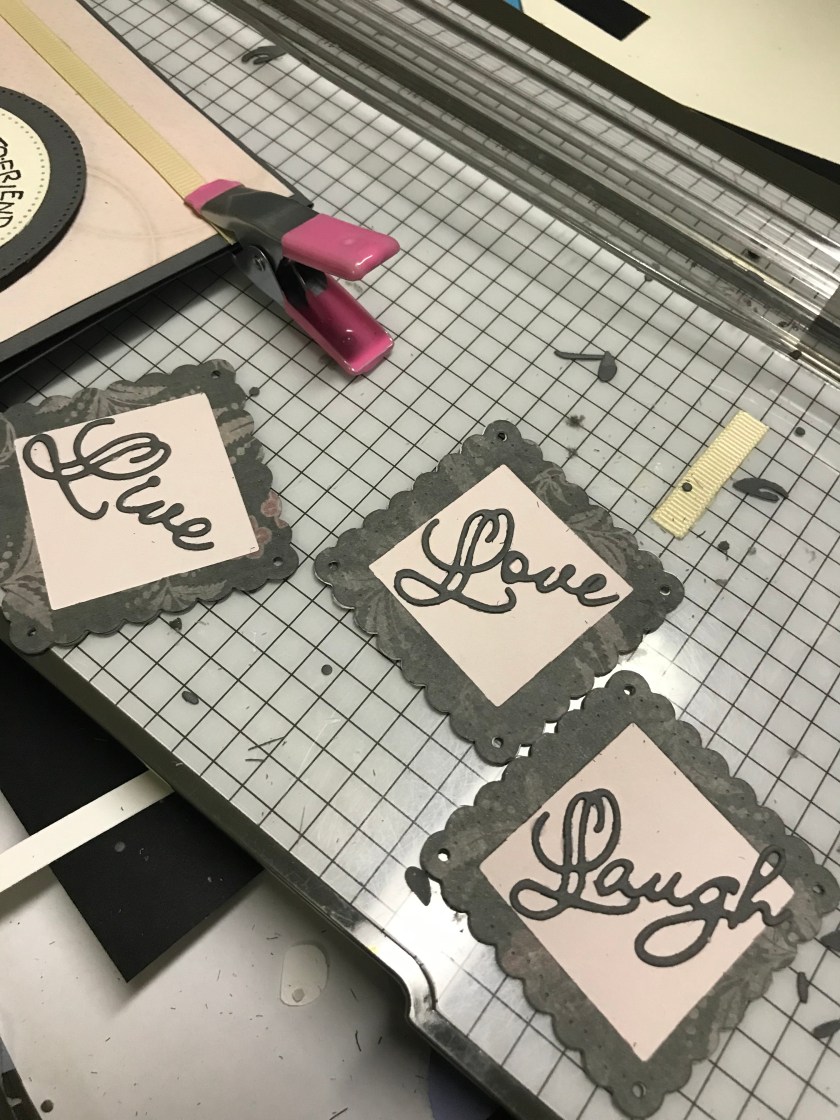
I had the words “Live Love Laugh” in my stash so I added them to the squares.
Before I added the mechanism I added pink paper to the inside of the card, I cut 2 pieces to 4 3/4″ x 6 3/4″ and glued them to the inside top and bottom, the added the mechanism and the squares as per Karens Video.

I thought about adding something else to the inside but I actually liked the clean look to not having anything else on the inside.
To see some other interactive cards
Strips & Scraps Pop Up Birthday Card
Rapunzel, Rapunzel let down your hair…..

4 thoughts on “Friend to Friend-Sketch Challenge C4C488”