
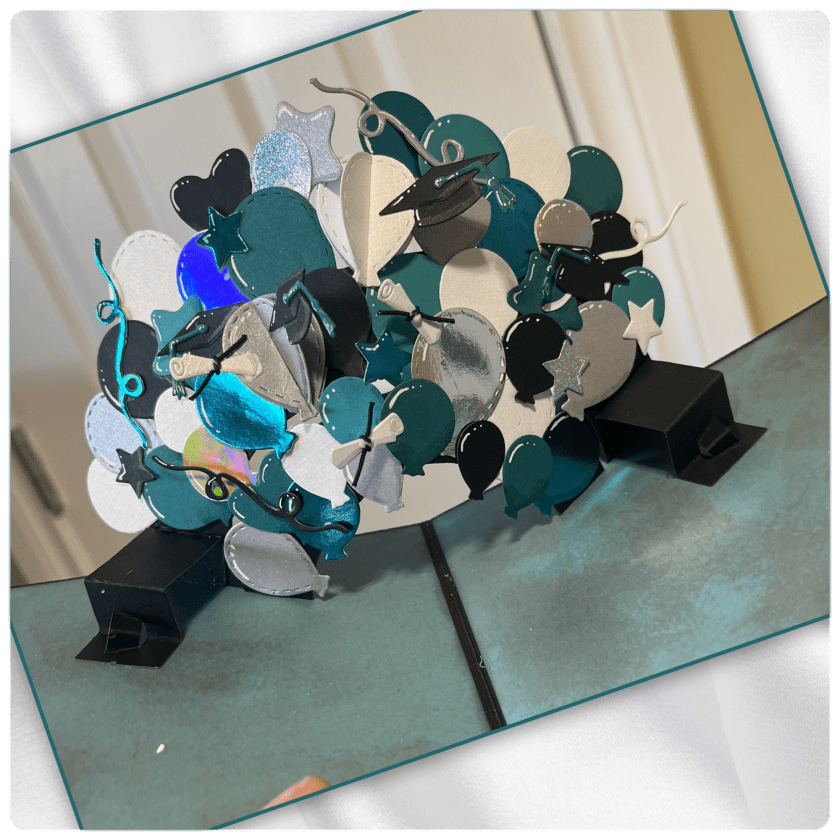
Hello crafty friends, today I am sharing a card that was inspired by Karen Burnistons Double Arch Coffee Cup Pop up. I thought it would be a fun way to make a really big Balloon arch for a graduation card. The school that this graduate attends does their graduation ceremony a bit different, it’s like they combine prom and grad at the same day, that’s why the little character on the inside is wearing more of a prom dress than the traditional cap and gown.
All the fun is in the reveal, to see this card in action please check out my FACEBOOK page, feel free to join if you would like to share your own crafty creations. You can also see a video of this card on my INSTAGRAM page.
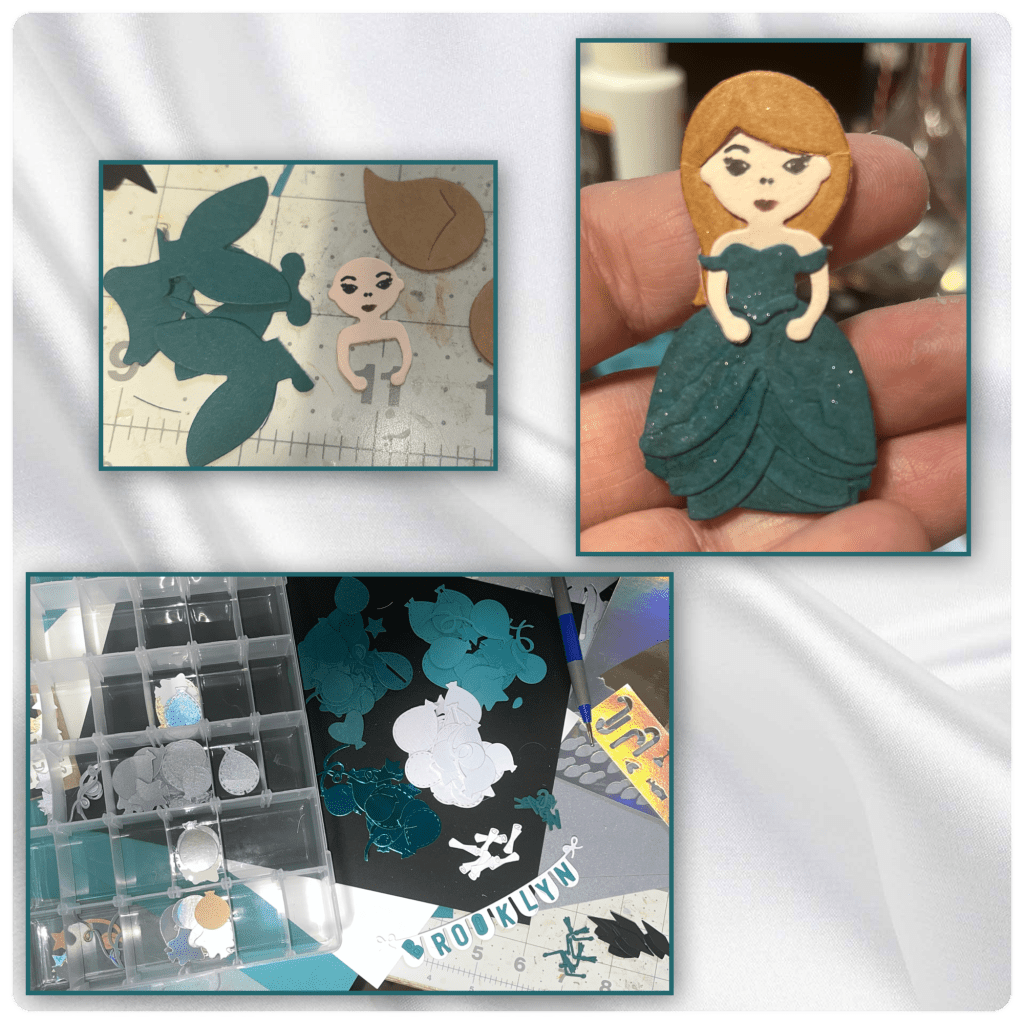
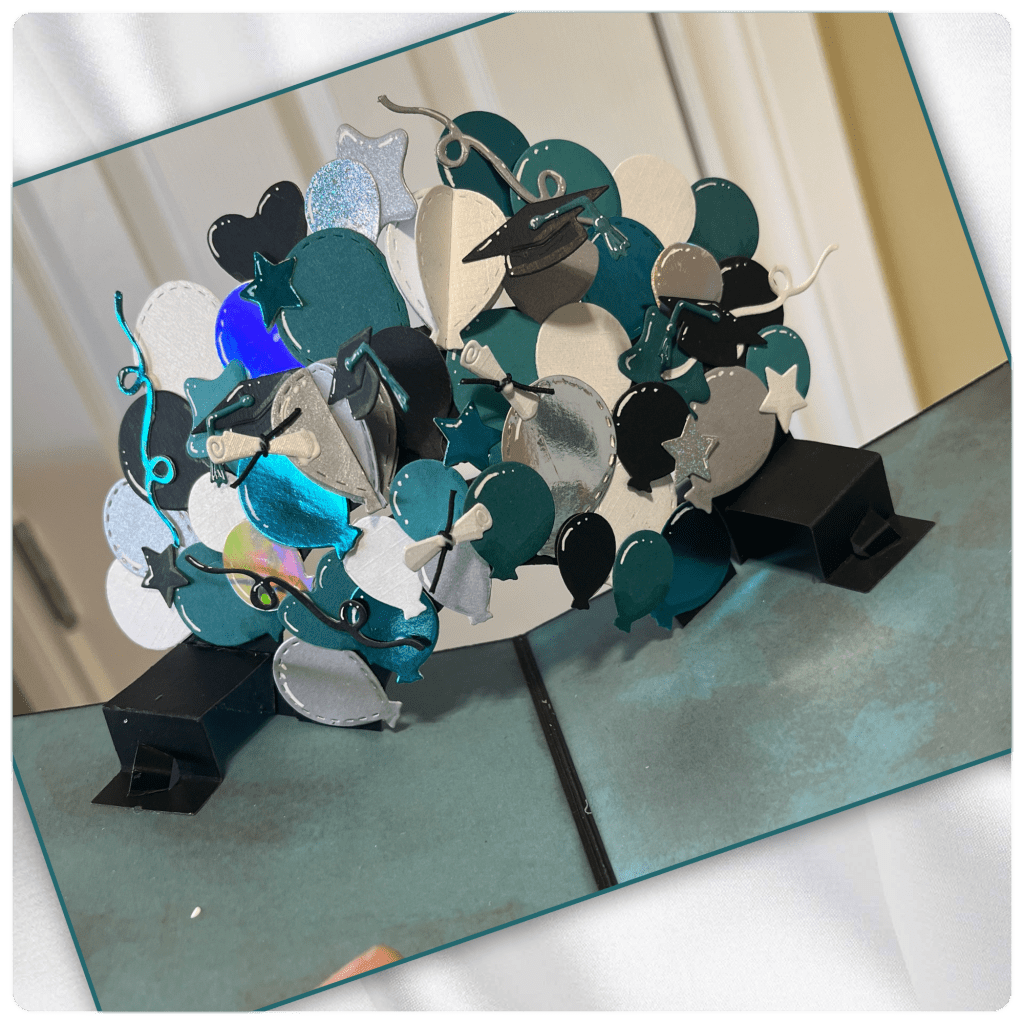
I was lucky enough to get a photo of the pretty dress ahead of time, and was actually able to get a small piece of the fabric after some alterations had been done (shown down below at a later slide). I did my best to copy the dress using pieces from the Princess and Mermaid. I cut out balloons from several colours using dies from the Balloon Collage add on, Party Balloons, and Explosion Pop up. I cut the caps, diplomas and banners from the Graduation Elements. Her name was diecut using the Mini Alphabet and Numbers.
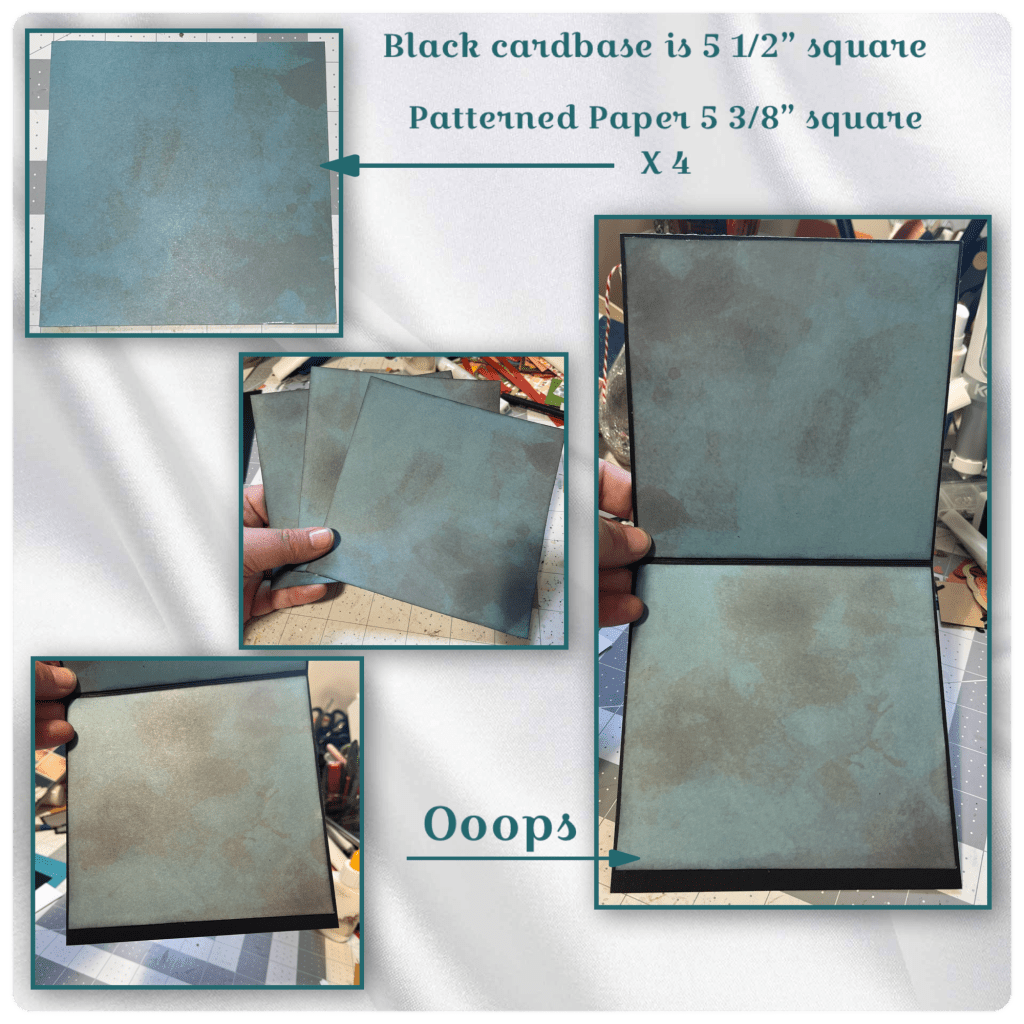
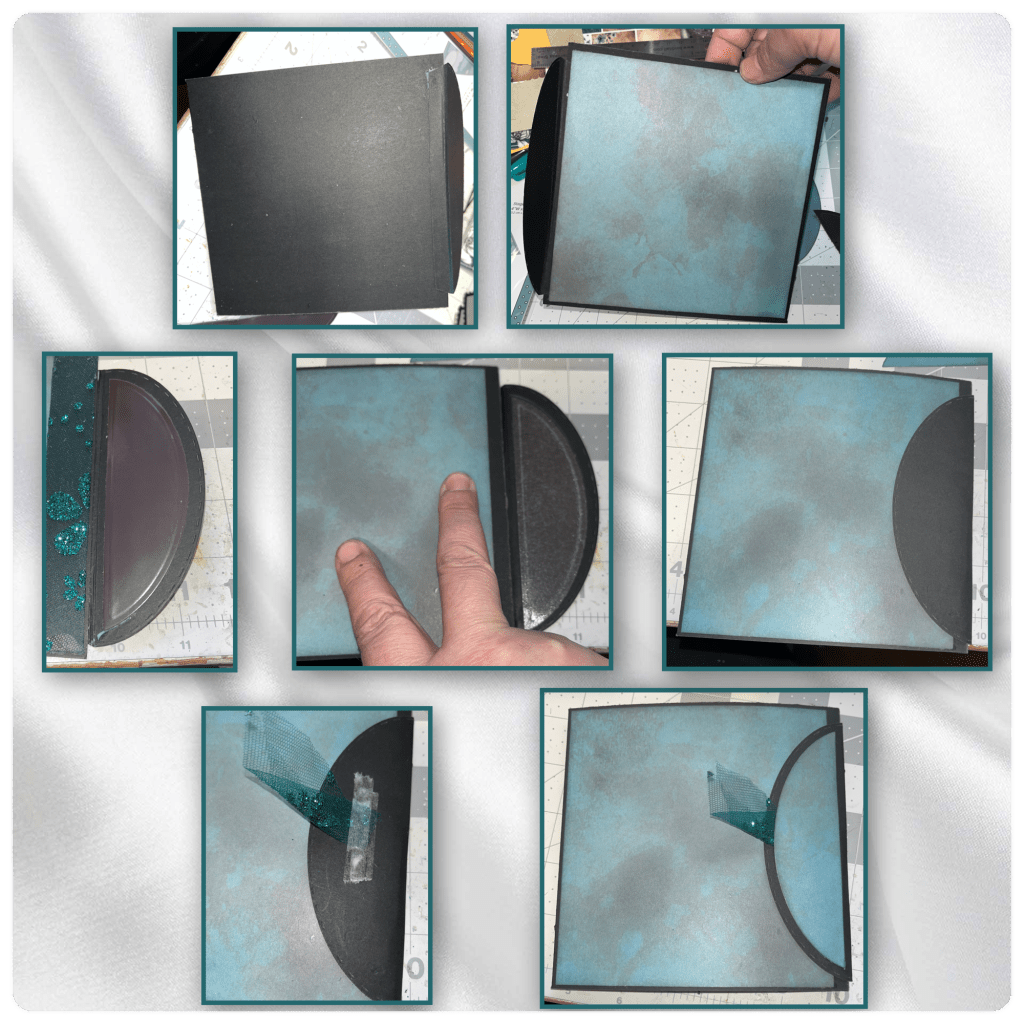
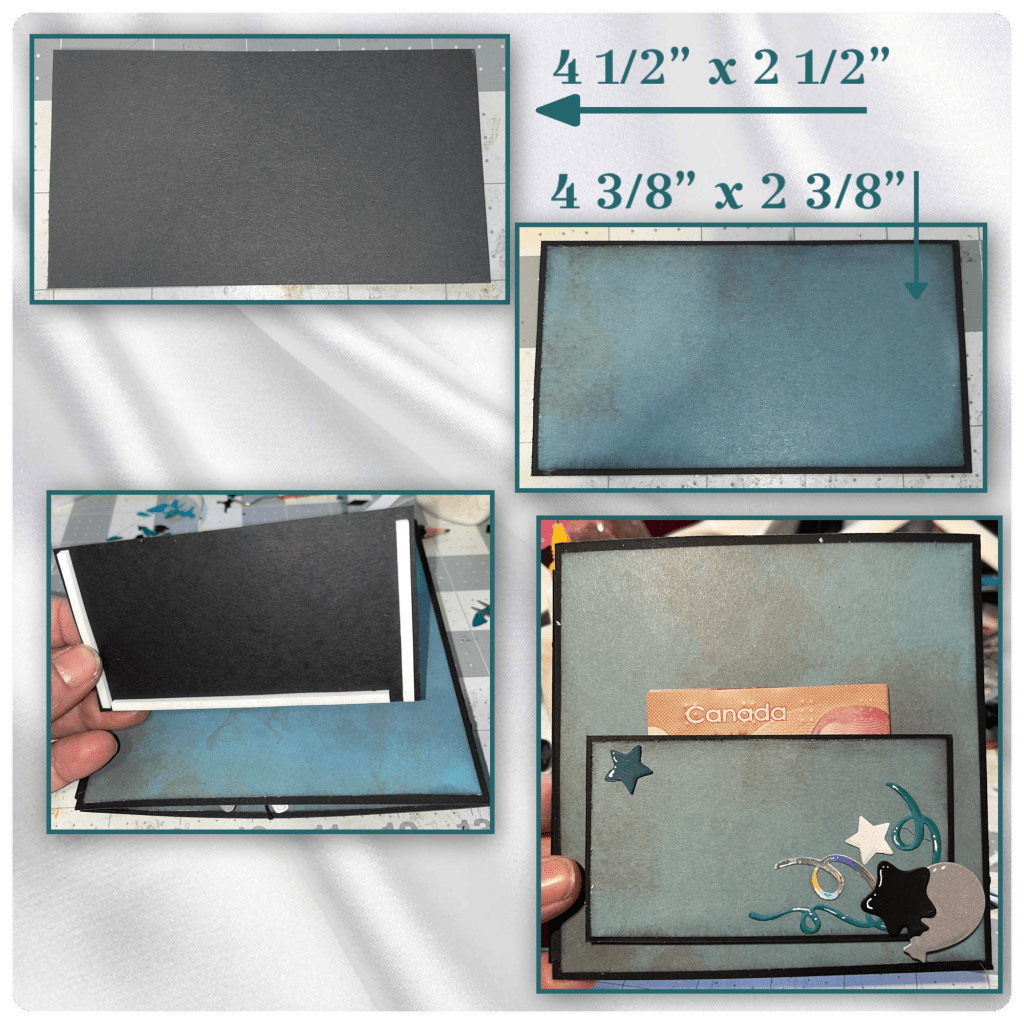
Karen’s card was 5” square but I wanted mine to be a bit bigger just in case I needed a little extra space for the balloons. So I made a 5 1/2” square card. Because the patterned paper has a white core I decided to sponge the edges with black ink. I meant to make the patterned paper square but somehow 2 of the panels are a bit shorter. I went with it because I didn’t have any more of the paper and I thought I would figure it out later lol.
I cut out the pieces of the Arch Pop up, Peacock Add on, and the Tea and Coffee Pop up, and I followed Karen’s Video, and installed them into the card.
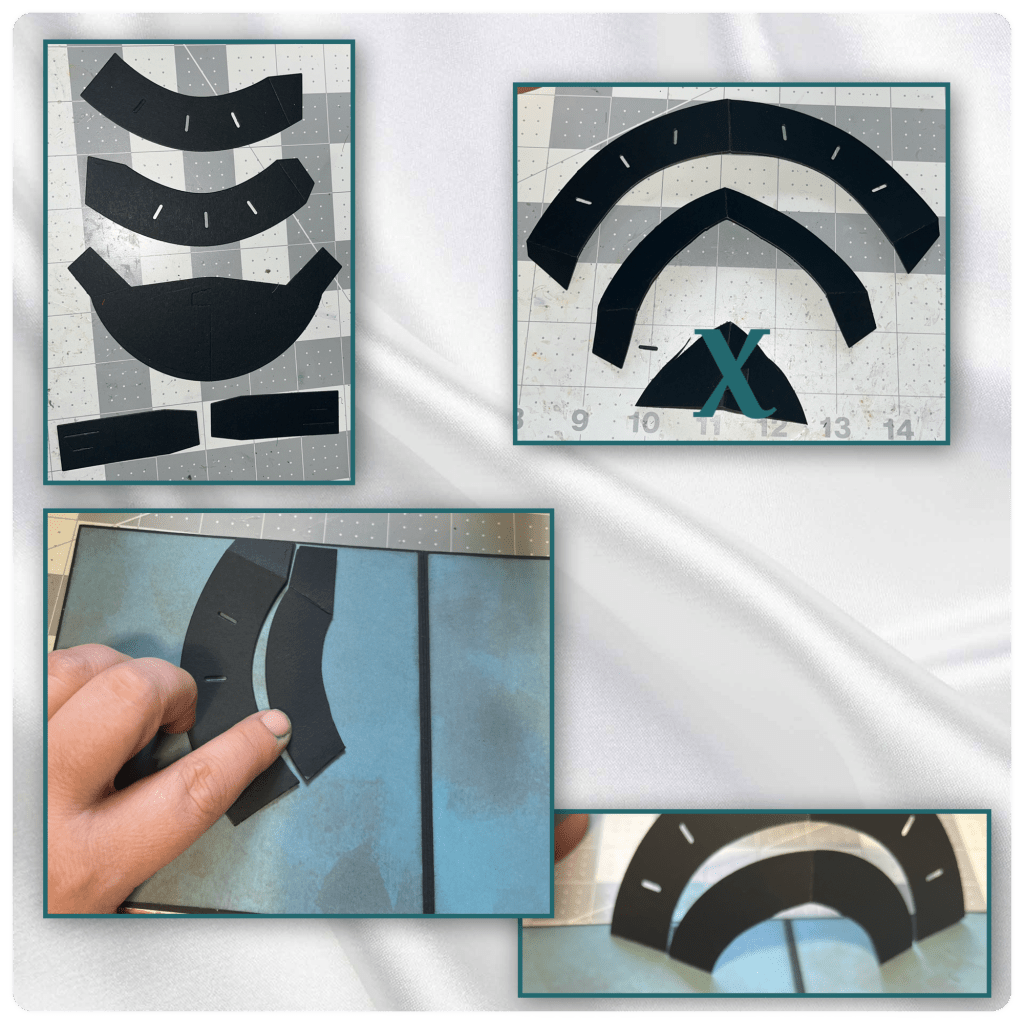
I continued on adding the Tea and Coffee pop up mechanisms.
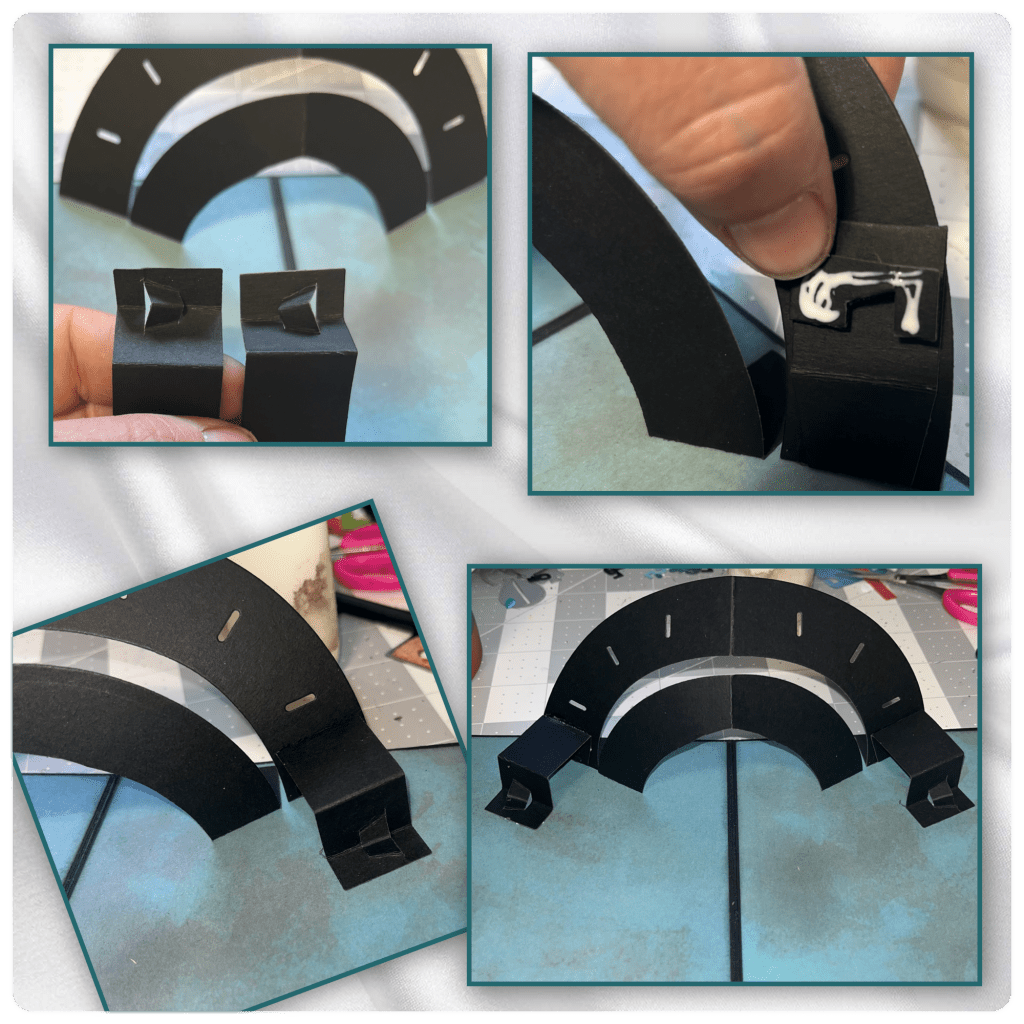
I added highlights and shading to all the pieces. Using alcohol markers and a white Gelly Roll pen. I added black string around the little diplomas. I started adding all the elements starting from the back and working my way to the front. Make sure to open and close the card to make sure there are no catch points.
Here is a close up.
Here is the fabric, I decided to wrap it around a couple of strips of black card stock to make borders for each side. Problem solved I was able to cover the too short section mentioned above.
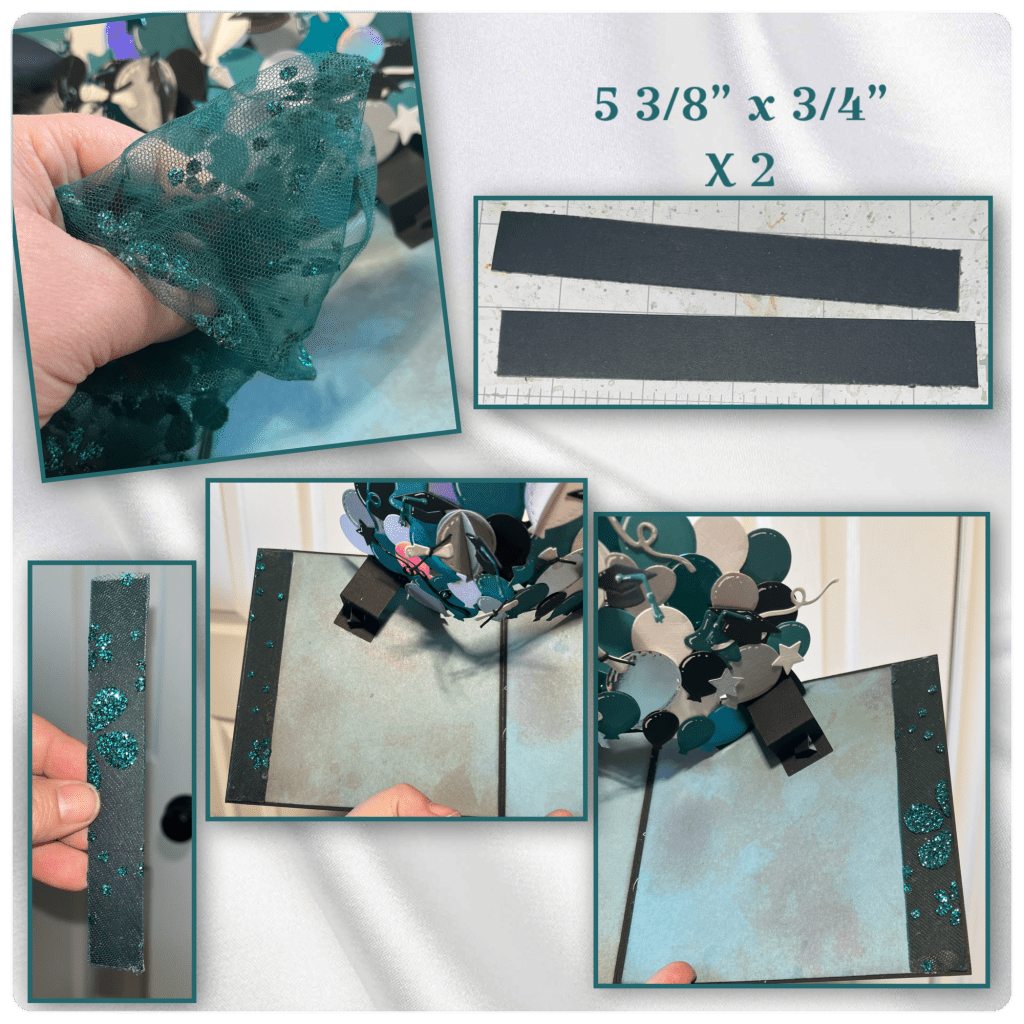
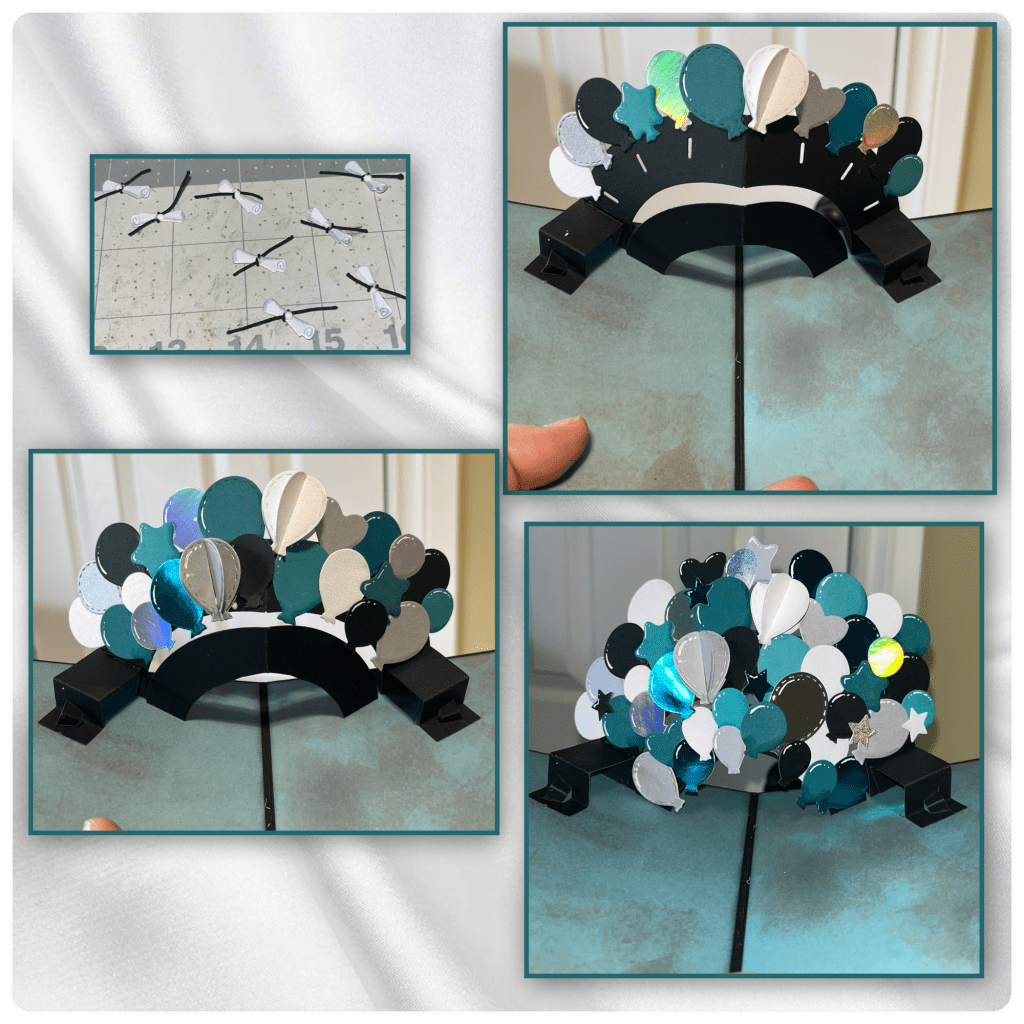
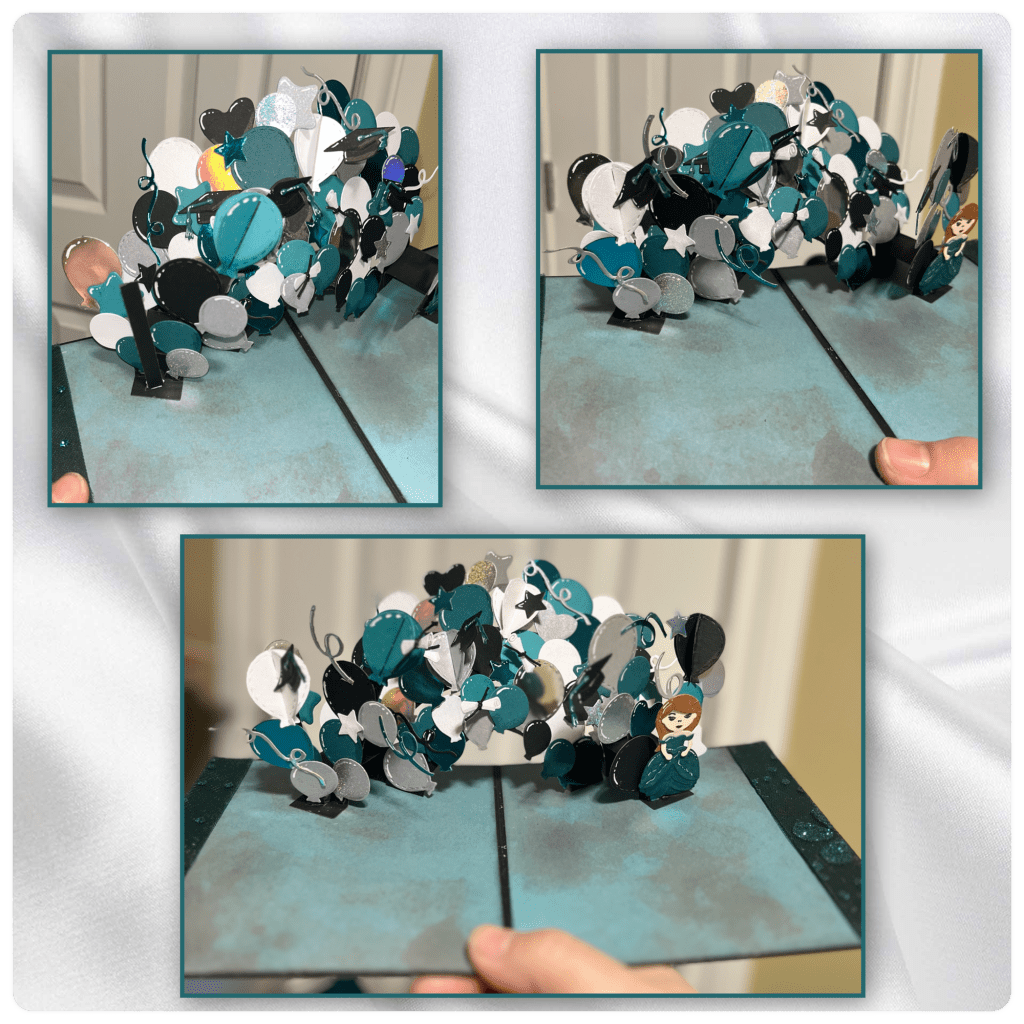
I decided to make balloon towers coming up from the front 2 pop ups. I cut several strips at different lengths and added the balloons to them. To add the little character I wanted a little more area to add the glue to so I took a little strip and fed it through the little bitty pop up, it was the width of the dress.

On the left side I added the balloons the same as on the right side but added an extra arm to the itty bitty pop up on the front and added more balloons.
To make the closure I cut out a flap from the Flap and Closure die set. I used an embossing stylus to make the fold a little wider because the card is so thick. I cut the top layer from patterned paper and cut 2 pieces of magnet sheet as shown.

I added the flap to the right side attaching it to the back then covering the back with a piece of patterned paper. I adhered one of the magnet pieces to the inside of the flap. To make sure I lined it up straight on the card I added the second magnet so it was face to face with the first, added adhesive to the back then closed the flap so the magnet will attached to the card.I added a little piece of fabric as shown, then covered with the patterned paper.
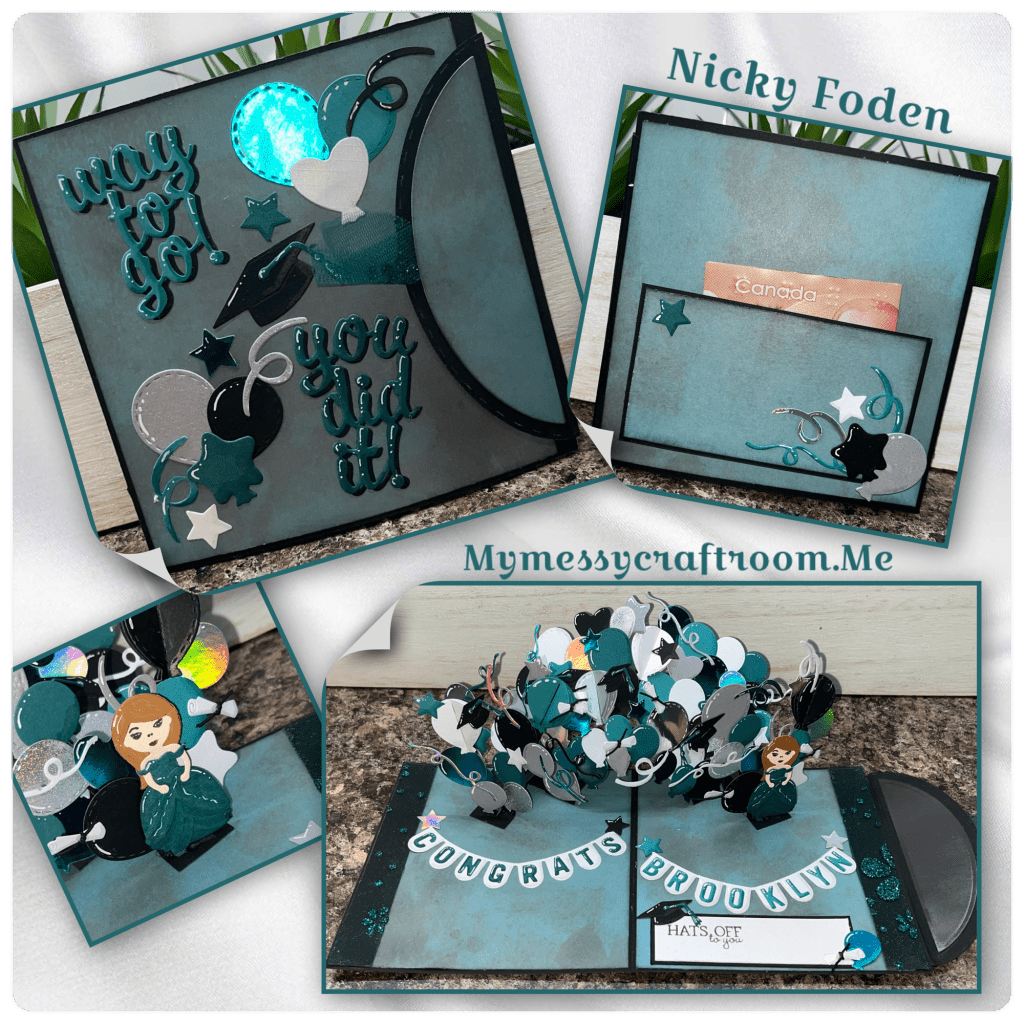
I cut 2 sets of the words from Word Set 8 Congrats, I used the black as shading, I also added shading with alcohol markers and highlights with a white gelly roll pen. I added them and and some extra elements to the front.
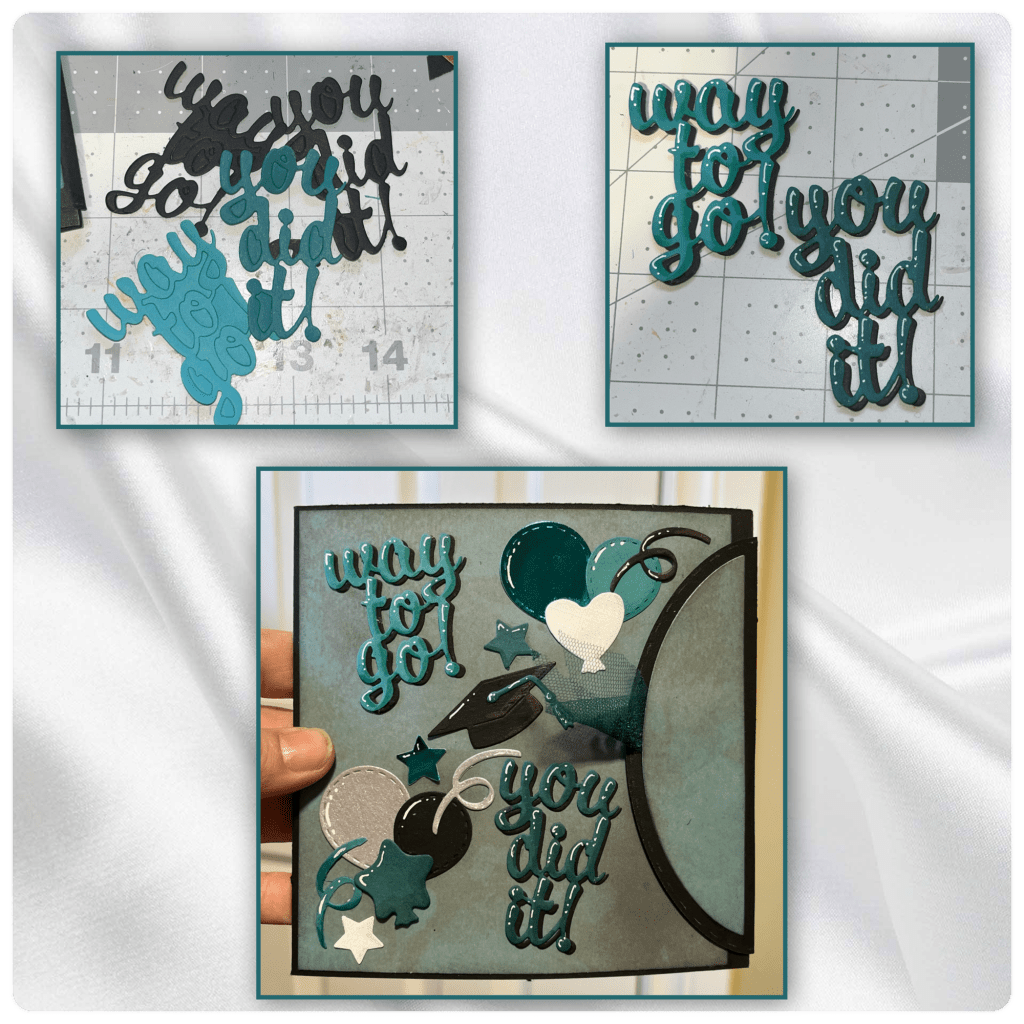
I just cut the rectangles from scrap paper and stamped the greeting from Grad Greetings Clear Stamp, I added it and the banners as shown.
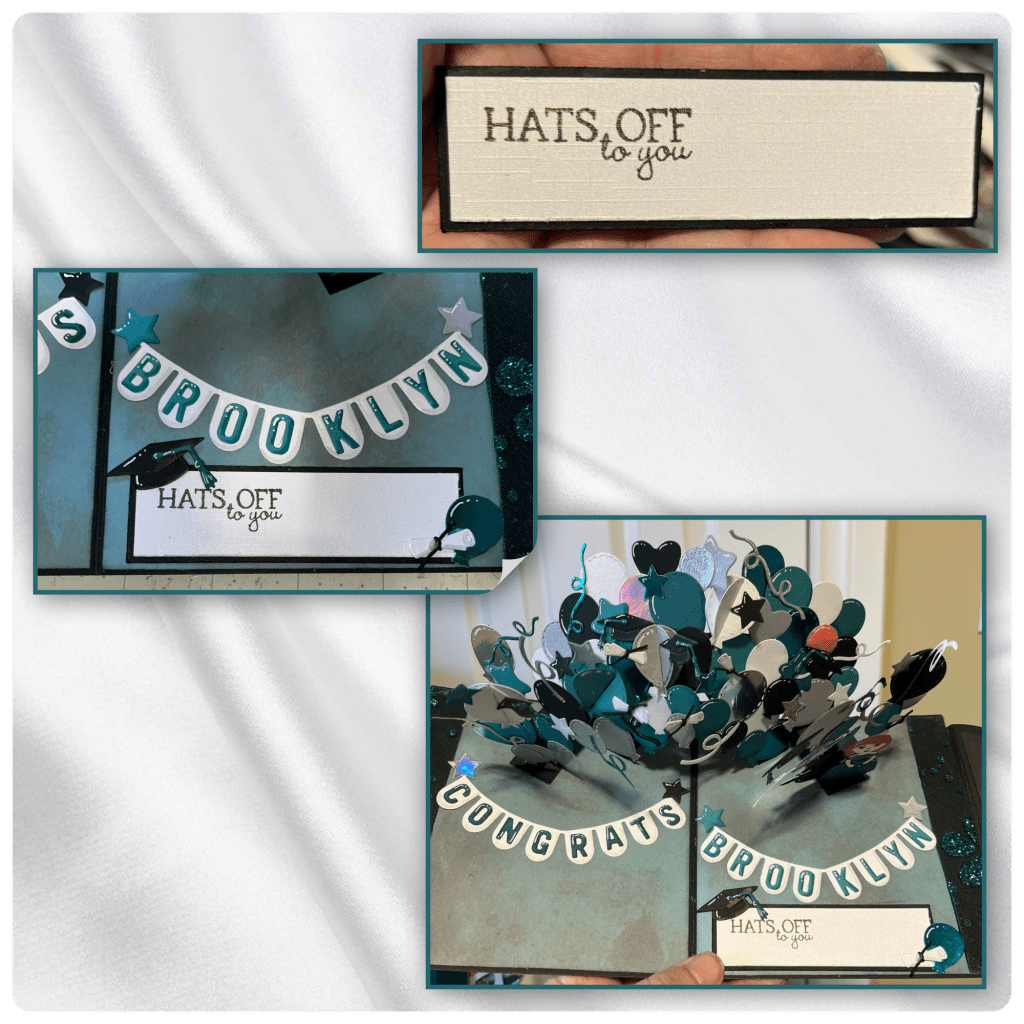
We will be gifting this graduated a bit of cash so I decided to add a pocket to the back. Dimensions below. I added the pocket using foam adhesive to give it a bit of space.

Other Tools used
