

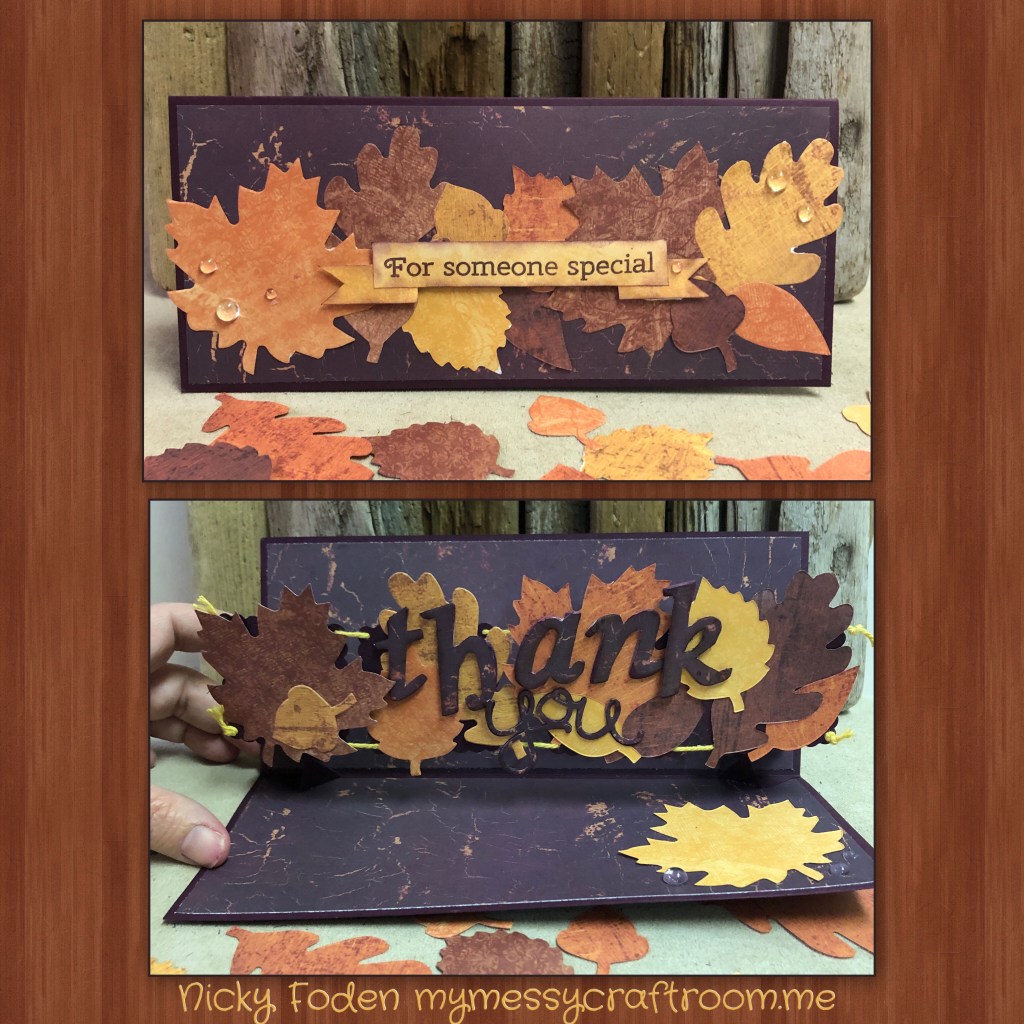
Happy weekend, I am here this weekend with another Crazy4Challenges challenge. This weeks challenge was to make a “Thank You” or a Thanksgiving giving card. Well here in Canada Thanksgiving was last month so I decided to make a Thank you card. This past week the Karen Burniston design team (I am not a design team member) posted their monthly challenge which was to make a fall themed slimline card, so I decided that I would then make a Fall themed slimline Thank you card. This is what I came up with.

All the fun is in the reveal, to see this card in action please check out my FACEBOOK page, feel free to join if you would like to share your own crafty creations. You can also see a video of this card on my INSTAGRAM page.
To see the rest of the beautiful cards by the very talented design team please check this out C4C blog
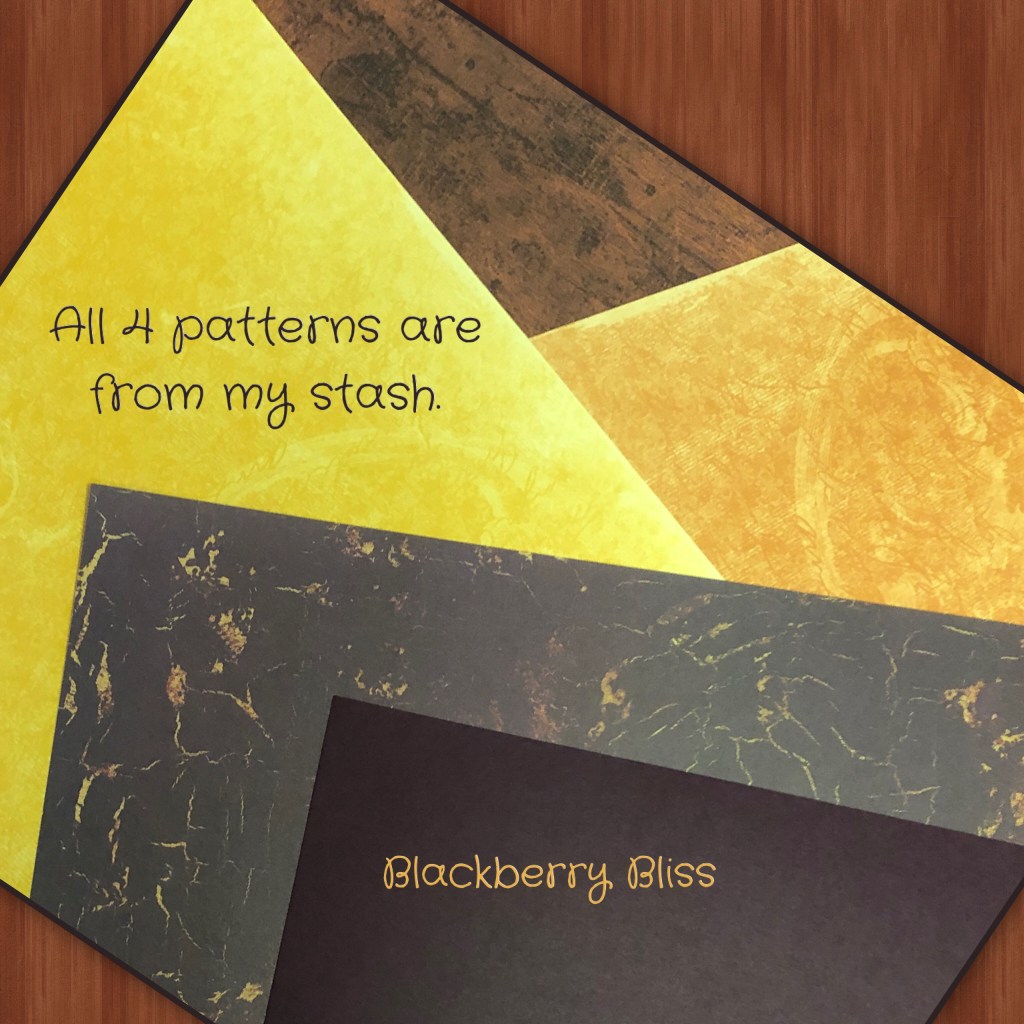
I’m a firm believer in using what you have. I have a HUGE collection of stuff I have collected over the years so for this card I pulled out some older tools and products. The paper I choose was from my stash. The yellow, orange a brown papers are double sided, the purplish paper was only printed single sided. The Blackberry Bliss cardstock is from Stampin Up and the Blackberry Bliss ink that I used later on is also from Stampin Up.
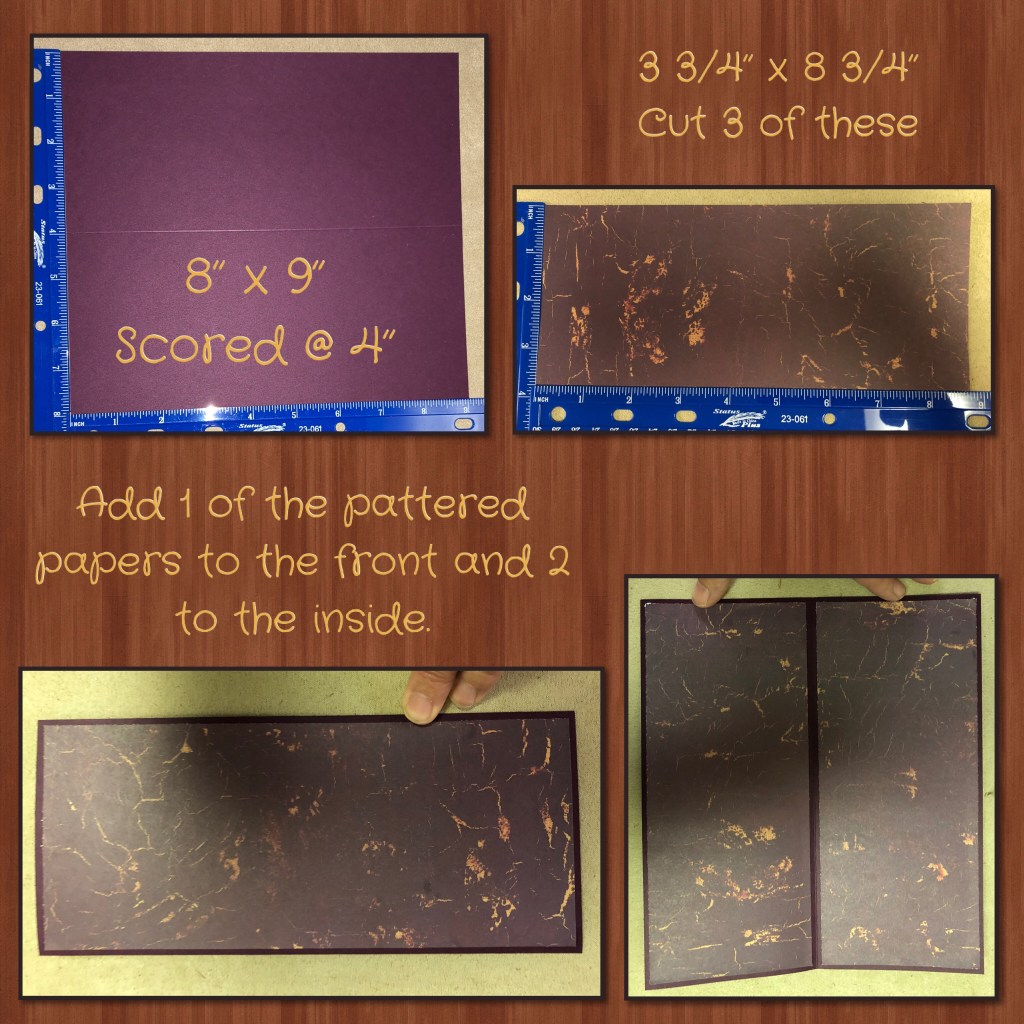
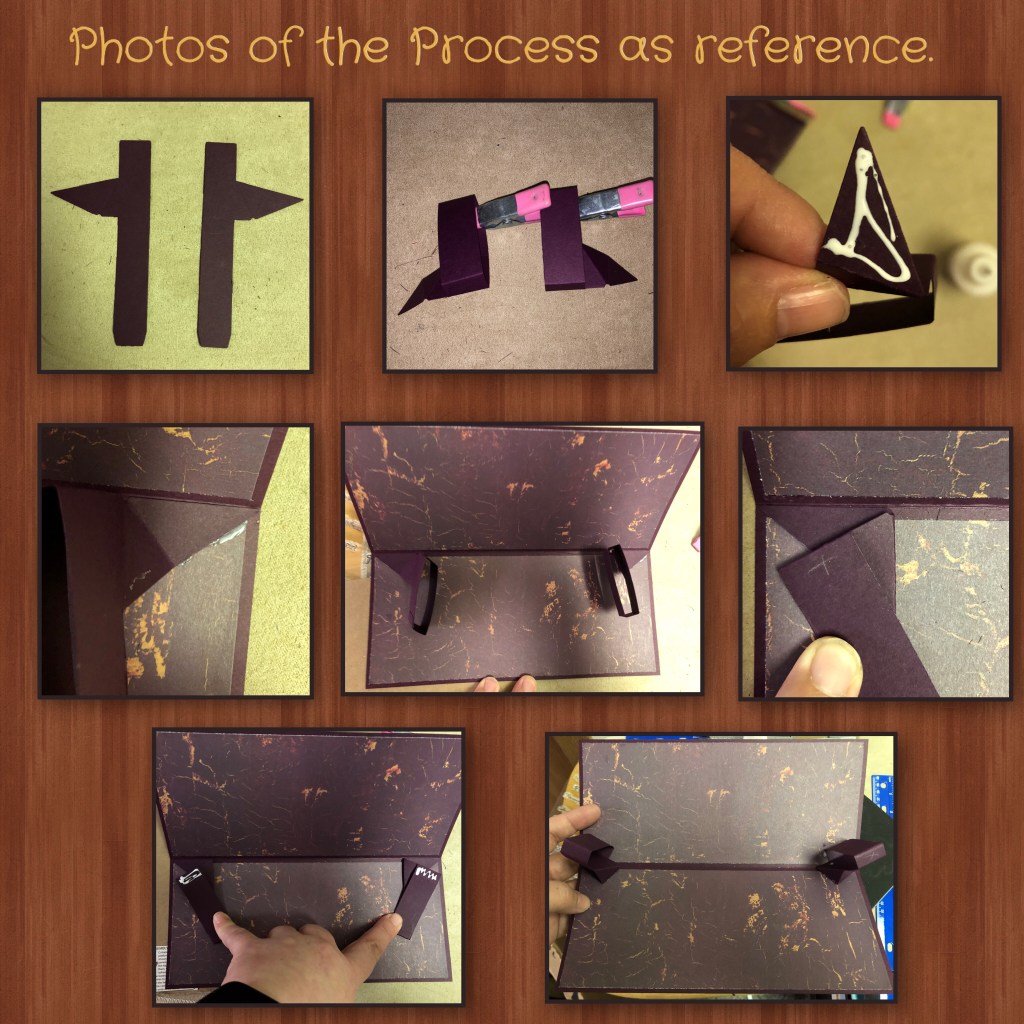
To make the mechanism I used Karen Burnistons Upsy Daisy dieset. I added photos of the process but I really recommend watching Karen’s VIDEO if you want to give it a try. Because this is a longer card I was able to fit 4 squares across as apposed to the 3 shown in the video.
I used an old Leaf Bigz die as that is what I have, but any leaf die will do. The benefit to using a Bigz die is you can cut through at least 4 pieces of paper at a time so I was able to cut through all the colours at the same time.
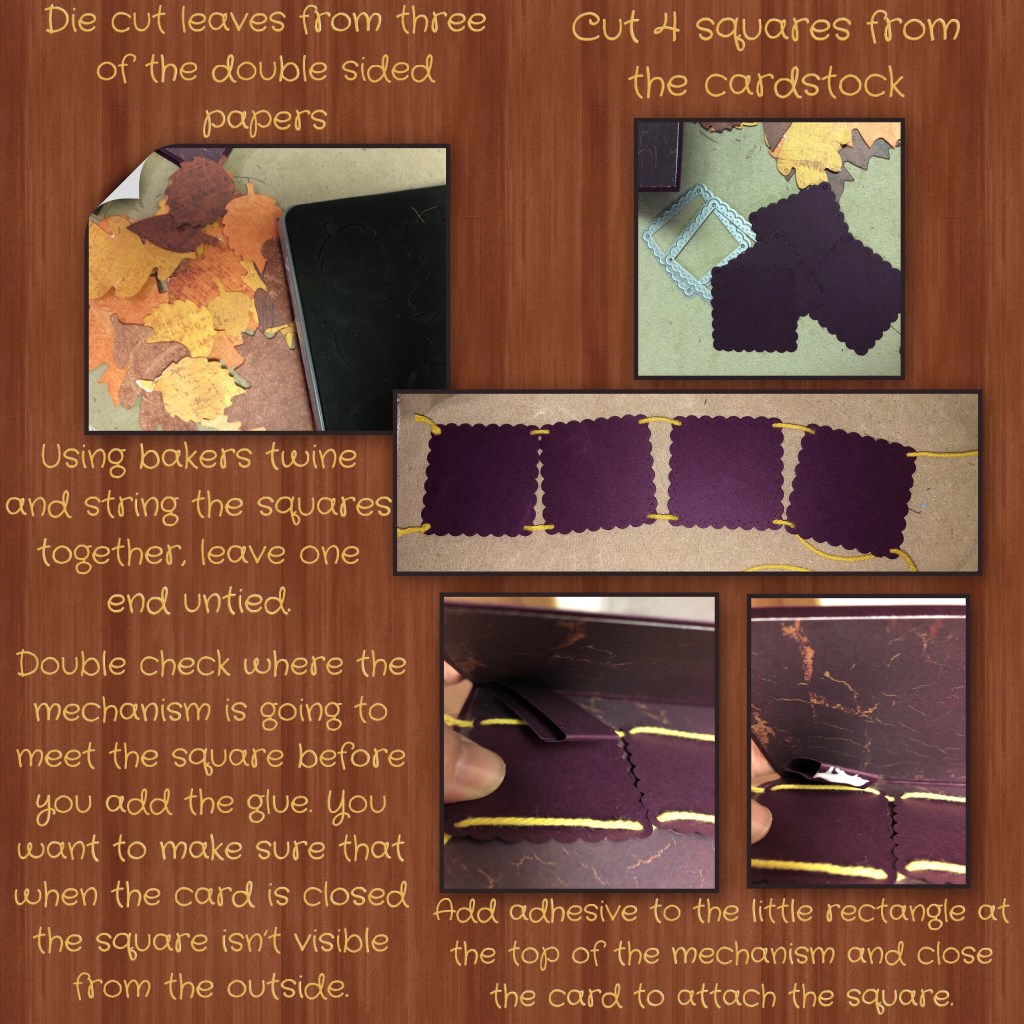
When adding the leaves make sure to ONLY adhere each leaf to only one square. The squares will move when the card opens and closes so the leaves will buckle if the are each adhered to more than one square.

The chipboard I used below I have had in my stash for YEARS, I purchased them from Stampin Up. If you don’t have chipboard you can get the same look by adhering multiple layers of card stock together until it is thick enough.
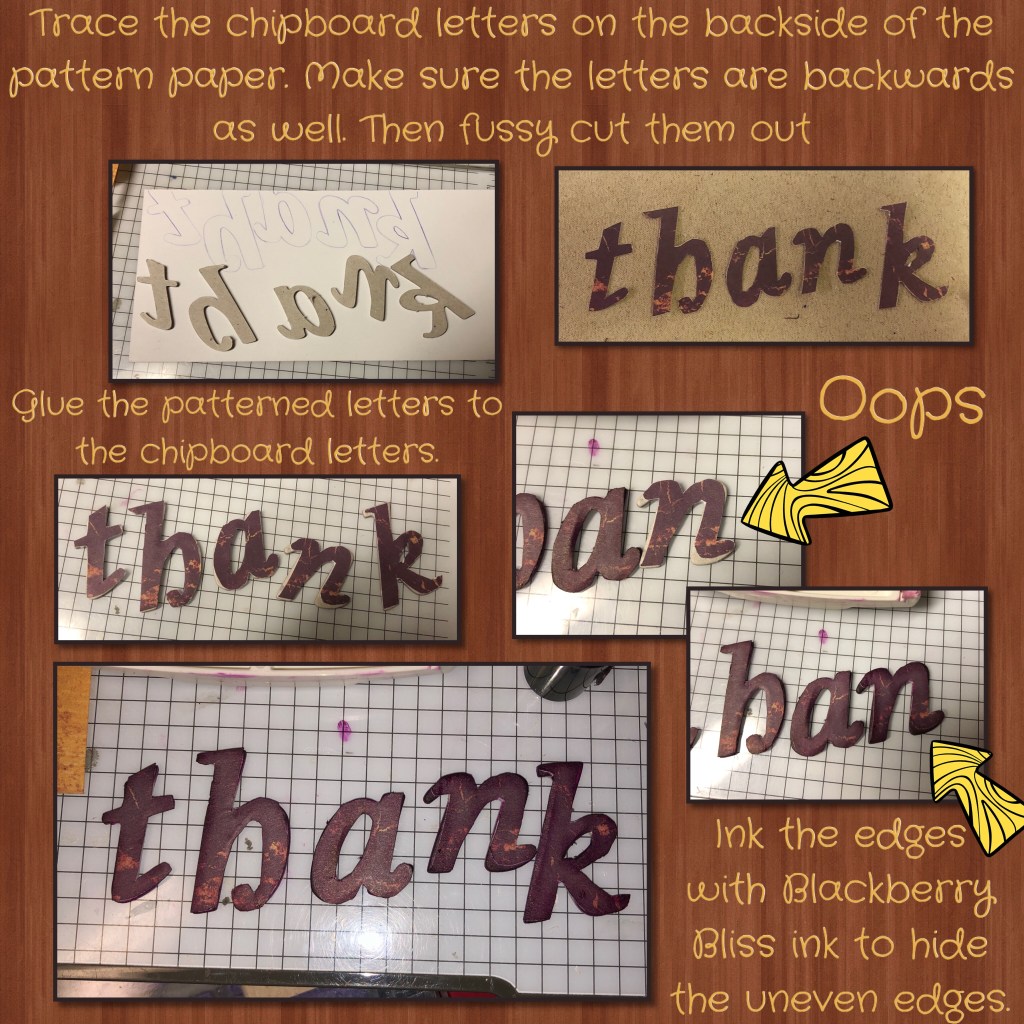
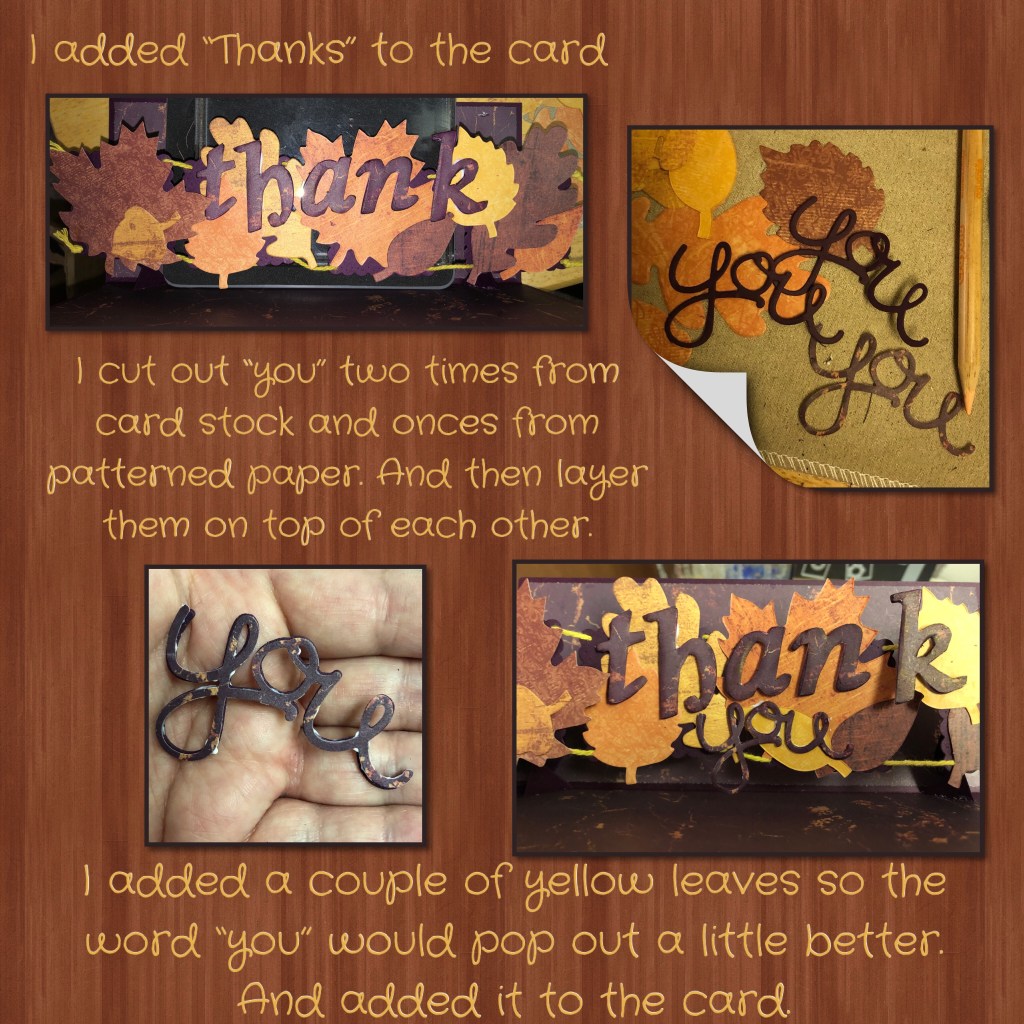
When adding the “Thank You” below make sure they are adhered to only one leaf to prevent buckling. The word “You” is only attached by the “ou” because where the “y” is, that leaf is attached to a different square so the card would have not closed without buckling if I would have completely glued it down.
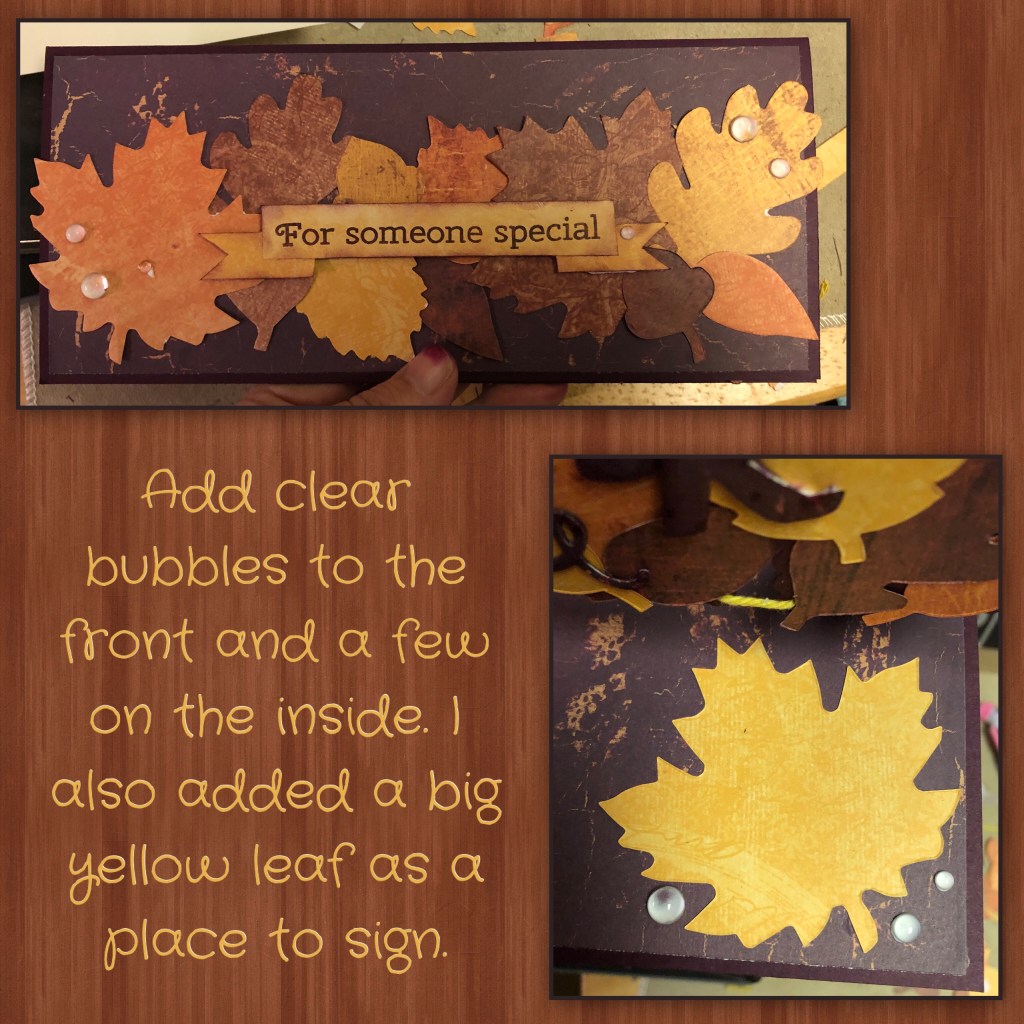
Below I clipped the card to the envelope so I would be able to see how far over the edges the leaves could go but still be able to fit in the envelope.

To see some other fun Upsy Daisy cards please check these out
