

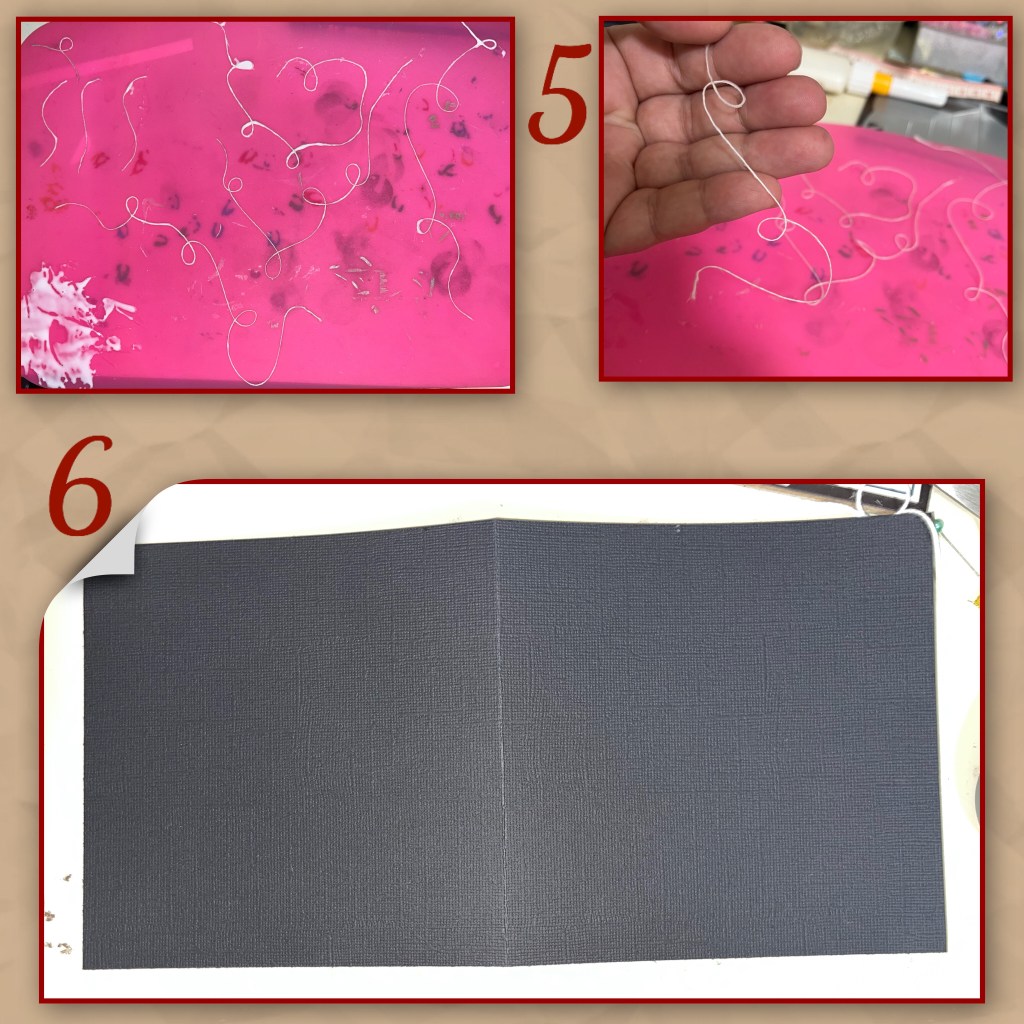
It’s September, so for those of you who enjoy stamping you may have heard that Simon Says Stamp celebrates with STAMPTEMBER. Every day in September they choose a different stamp company to collaborate with and today is the day for Riley and Company. They are limited edition stamps and this one is called It’s Your Day and is only around as supplies last. This adorable Riley and Company set features Riley the moose, Simon the dog, and all kinds of fun accessories and messages,

I joined the fun Riley and Company stamp set with Karen Burnistons Upsy Daisy die-set and this is what I came up with.


All the fun is in the reveal, to see this card in action please check out my FACEBOOK page, feel free to join if you would like to share your own crafty creations. You can also see a video of this card on my INSTAGRAM page. (Product links will be at the bottom of the post)
Colouring is not my strong suit but I gave it a go using Chameleon alcohol markers. I try my best to make the most out of a product so I cut out sections of the main image so I could use it multiple times in slightly different ways.
1-stamp and colour images
2- I hadn’t gotten all the products yet, when making the card, so I had to fussy cut all the pieces. I’m not great at fussy cutting.
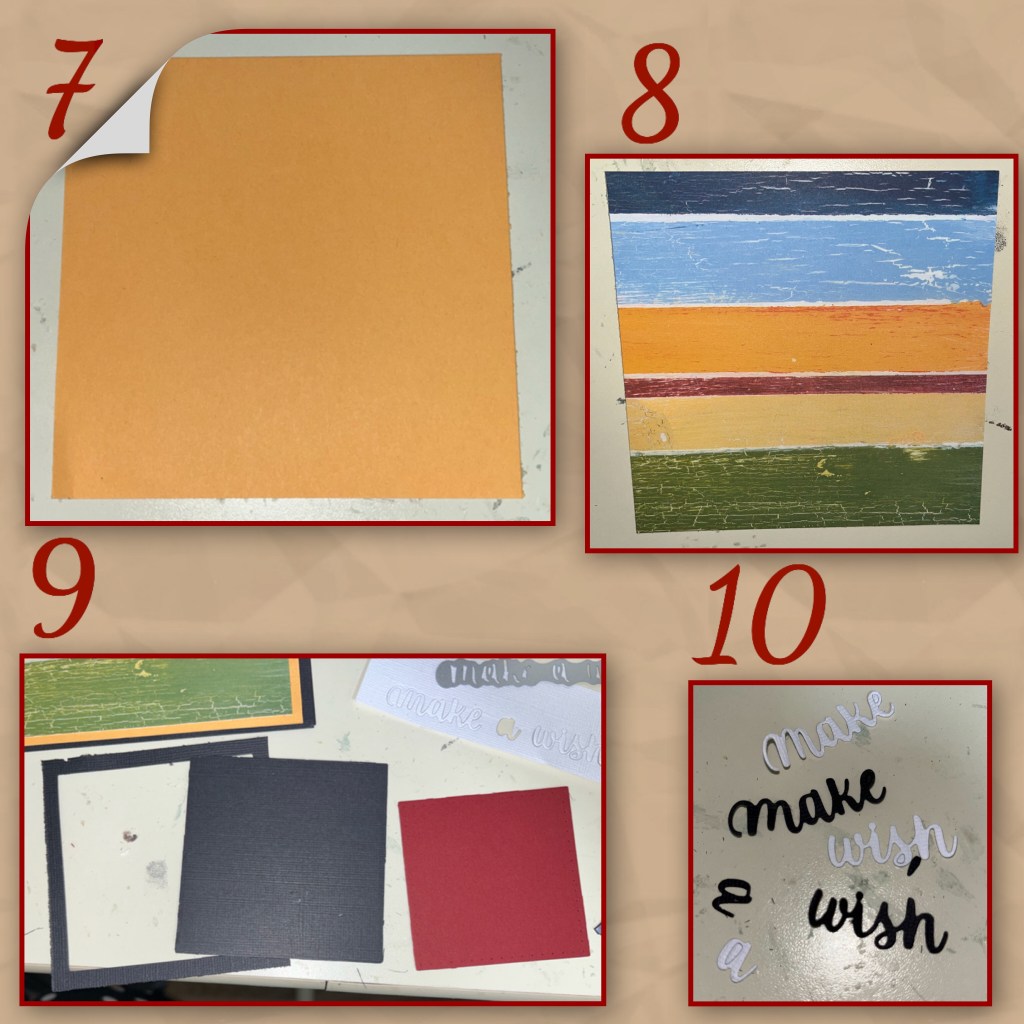
3-4-after fussy cutting I used a black marker around the edges of each image. A- has black marker B- does not
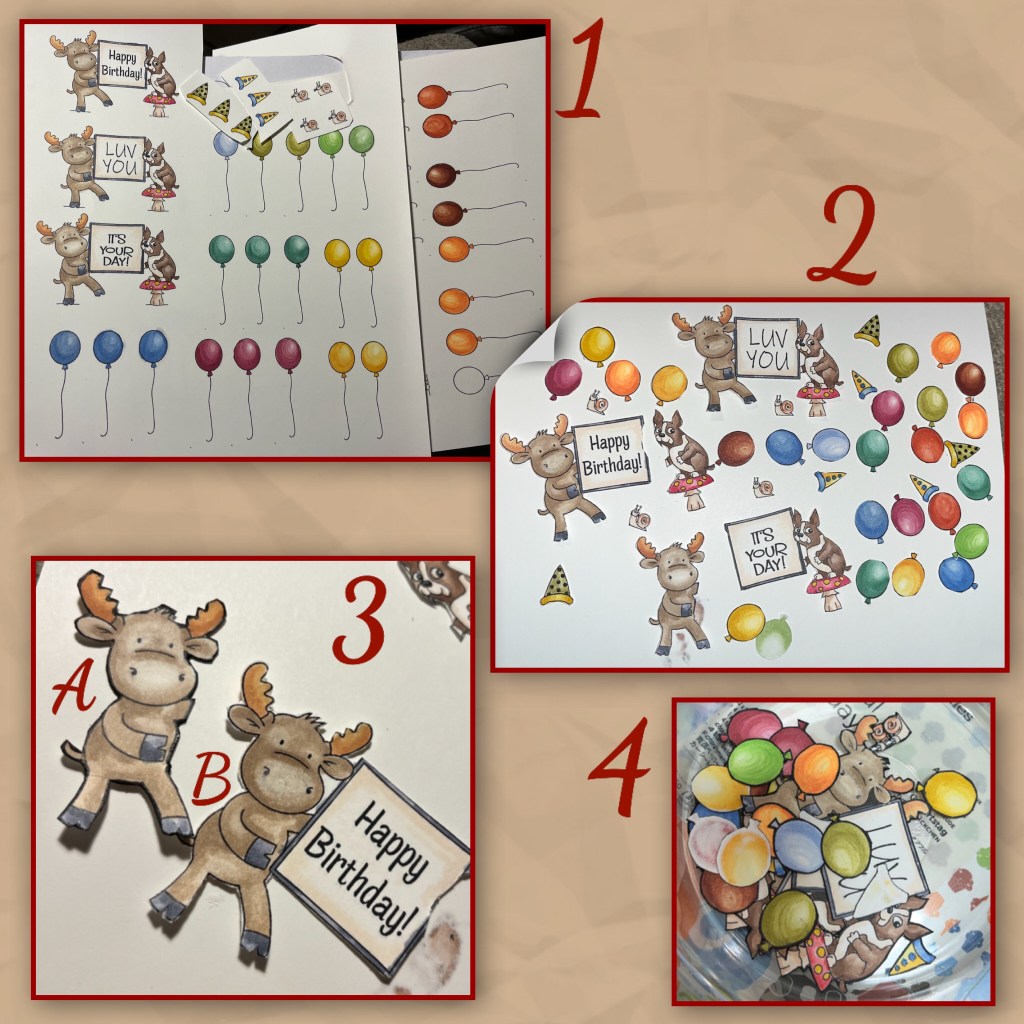
5- I took apart the strands of a piece of bakers twine, and ran it through some liquid adhesive, I laid it out to dry in twists and turns to make balloon strings. When it dries it holds its shape
6- card base is 5 1/2” x 11” scored at 5 1/2”
7- yellow layer is 5 1/4” x 5 1/4”
8- patterned layer is 5” x 5”
9- using the squares from the Spinner Square pop up, I used the largest square and cut a black square,I was going to use the large black square but then decided to use the negative piece and made it into a frame. I used the next size down to make the red square, and both squares to make a green frame (shown further down)
10-I cut “make a wish” from the Word set 2 Birthday set out of black and white card stock, but only used the white.
11- oops missed 11
12- started adding pieces to the front of the card.

13- inside layers are the same as the outside, yellow is 5 1/4” x 5 1/4”
14- patterned paper is 5” x 5”
15- add them to the inside
15- Diecut the Upsy Daisy mechanism pieces. Lay them out as shown. Make sure to keep the left on the left and the right on the right. Fold mountain folds on the score lines on the triangle side, add valley folds on the four score lines on the long strip. Do this for both pieces
17- adhere the two ends of the long strip, it should make a box. Do this for both pieces
18- what both pieces should look like looking straight down onto them.

19- adhere both mechanisms into the card as shown, right up against the fold of the card with the tips of the triangles on the outside edge of the card.
20- folding mechanism arms as shown. Add adhesive to the little rectangles on the ends. Close the card so the mechanisms adhere to the top half of the card.
21- The card should look like this.

22- Cut three of the Upsy Daisy squares. Thread white bakers twine through them top and bottom. Add adhesive to the top of the mechanism as shown, lay the square down so when the card closes it will attach to the square. Making sure it stays within the limits of the card.
23- do the same on the right side.
24- The card should look like this, tie the ends of the bakers twine in knots when you have the three squares lined up as you would like.

25- I cut three Upsy Daisy frames
26- add them to the black squares, I did them offset to give it a more whimsy look. And to match the look of the front of the card.
27- start to add the stamped images.
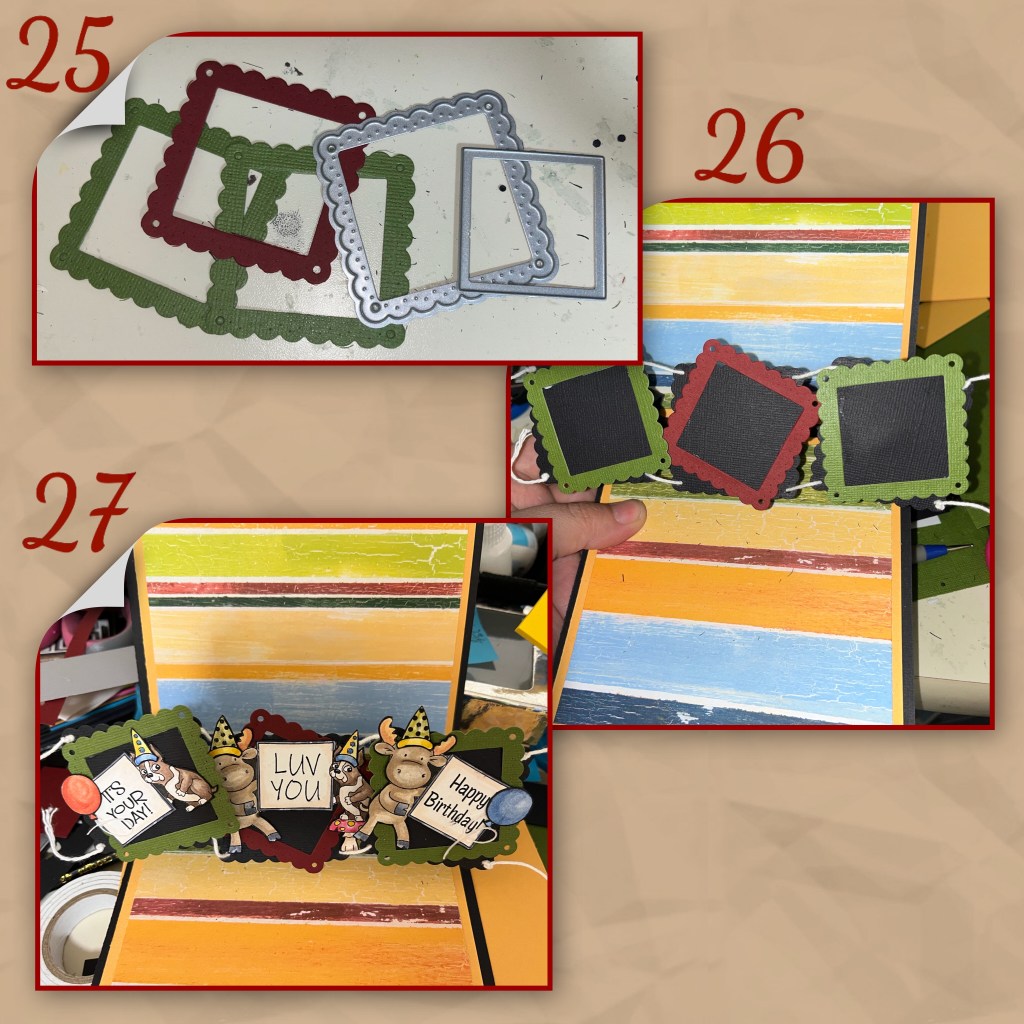
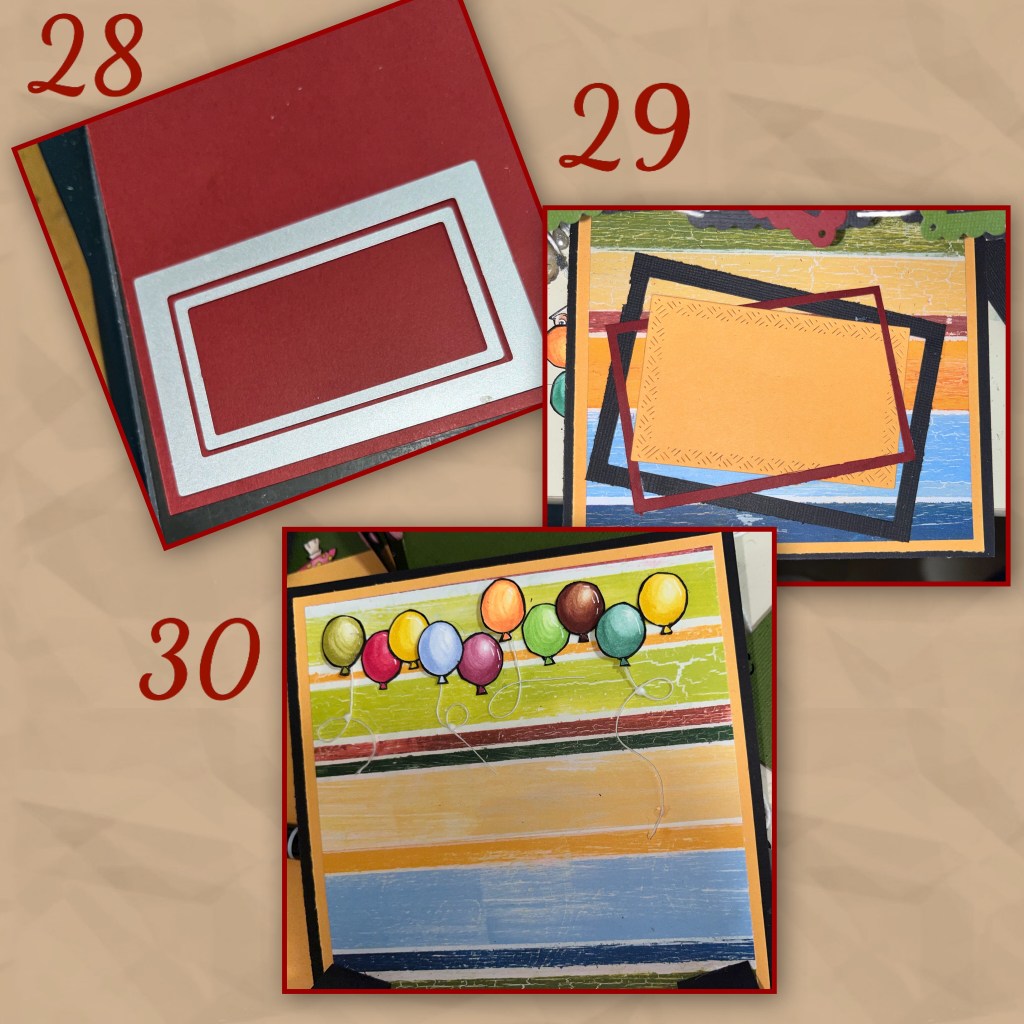
28- I cut rectangles for the inside of the card, using the same method as I did for the squares on the front. The rectangles are from the Rectangles Crosshatch dieset.
29- add them to the bottom of the inside of the card, the space will be used to write a message.
30- I added balloons to the top of the inside of the card. I thought it made a fun border.
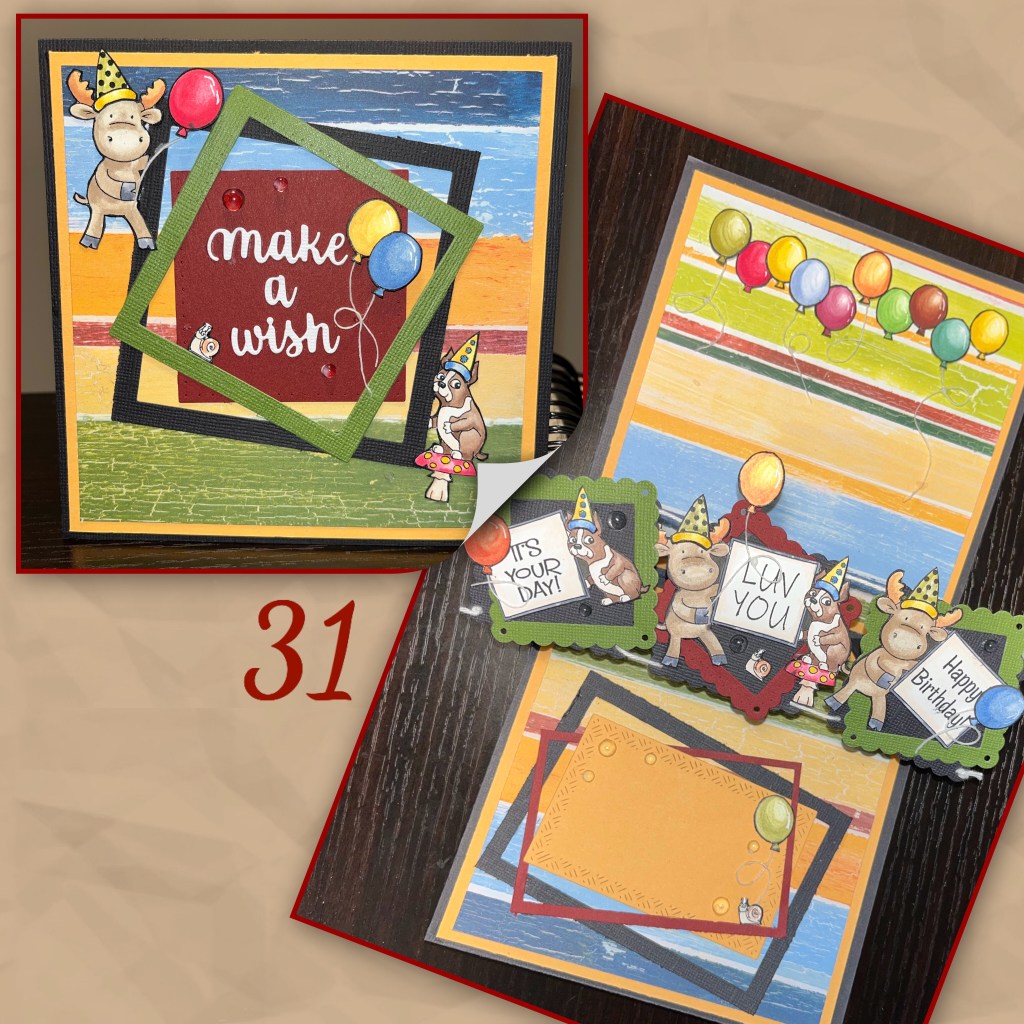
31- I added a few more decorations to the front and the inside, and some clear bubble dots to give it a little dimension.
To see some other fun Upsy Daisy cards please check these out.
Triple Flip Upsy Daisy Balloon Card
Textured Reindeer Christmas card
The Riley and Company stamp and die set can be found here
Karen Burniston products used
Spinner Square pop up die set squares

Great fun fold out card for Christmas, love it
LikeLike