
It’s Sew much fun playing with new die sets, and the new Sewing Charms are super cute. I decided to use this set on a pink monochromatic Circle Tag book card. I thought it would be cute to have the thread from the spool on the front wind all the way through from the front to the back.

All the fun is in the reveal, to see this card in action please check out my FACEBOOK page, feel free to join if you would like to share your own crafty creations. You can also see a video of this card on my INSTAGRAM page.
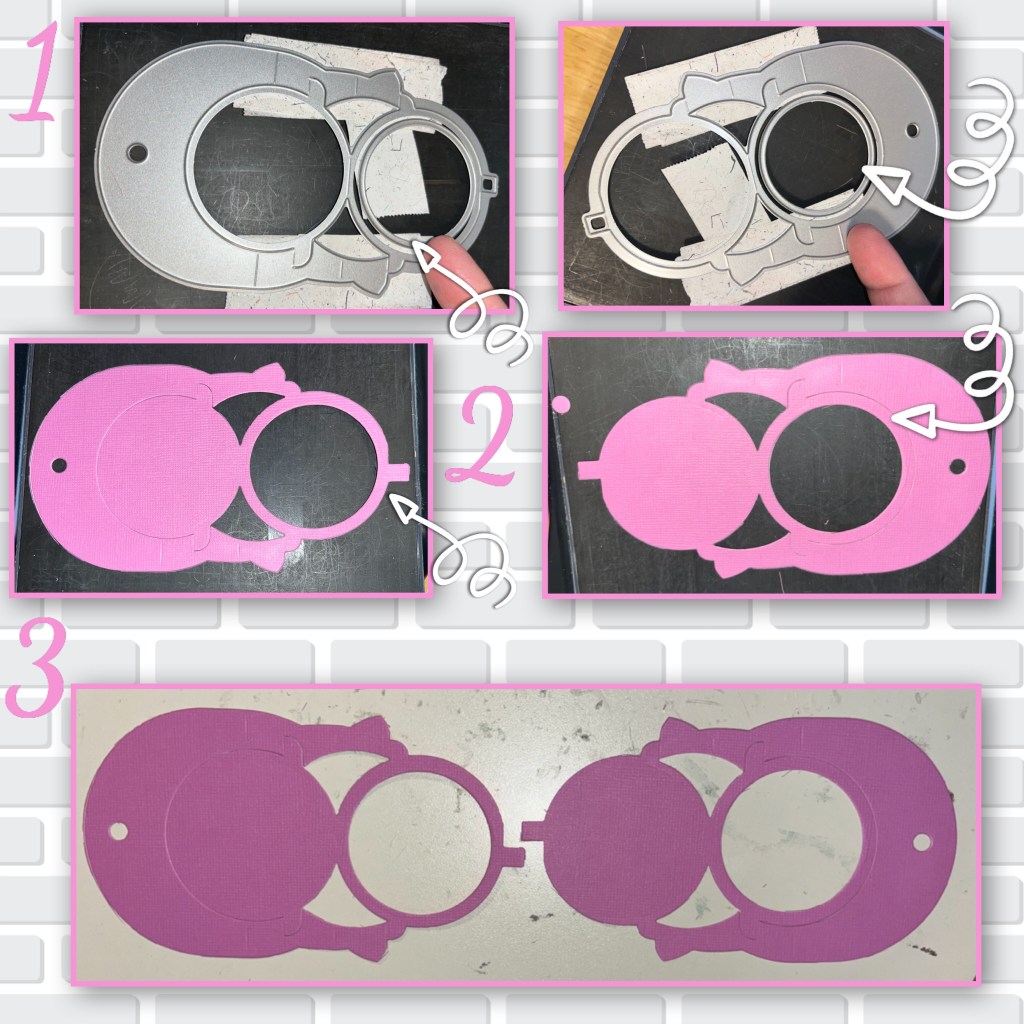
1- die cut 2 of the mechanism pieces. If you inlay a circle die then it will cut a window
2- 3- I cut the mechanisms so the window was in every other circle.
4- die-cut 2 of the tag covers in the pink card-stock, and 2 in the darker pink paper and adhere them together.
5-6- diecut the piece that joins the 2 pieces together, fold on the score lines and adhere the 2 tags together.
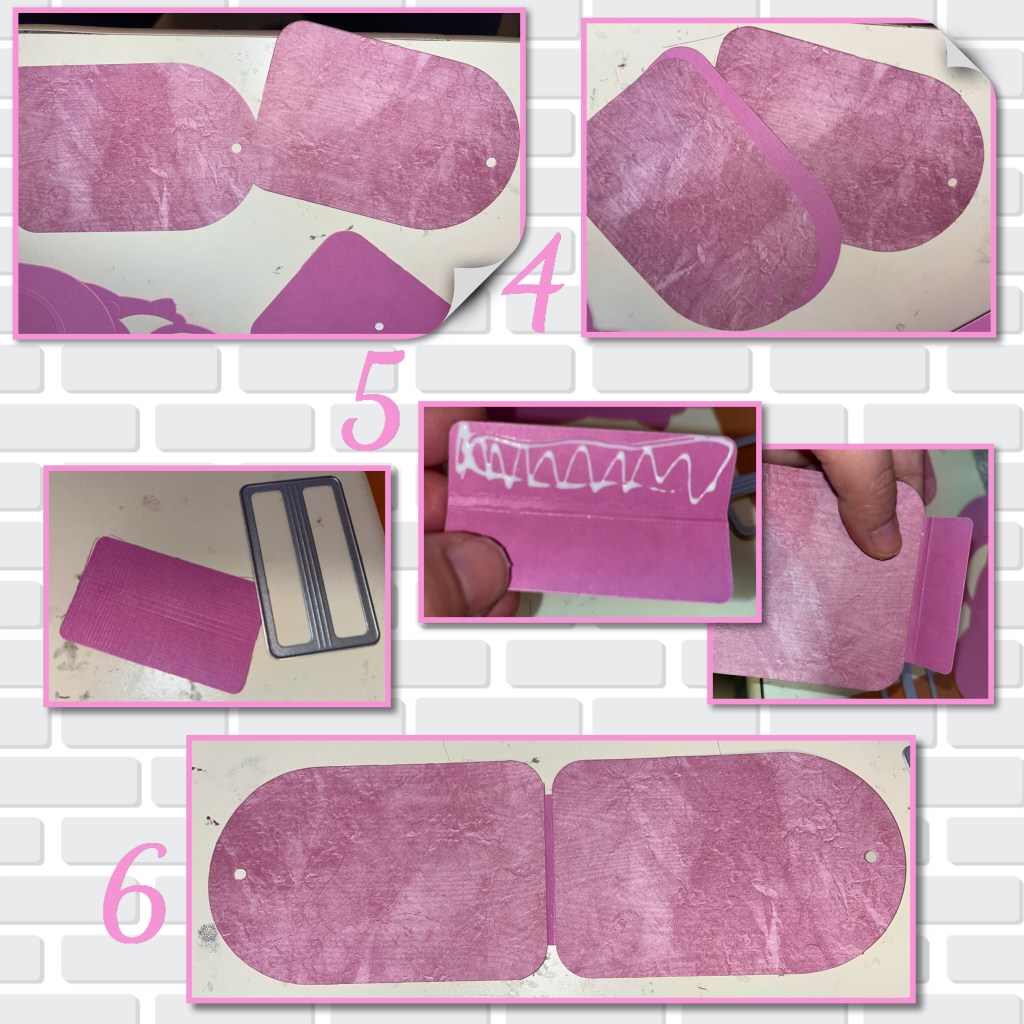
7- die cut 2 tags in the lighter shade of pink paper, add to the other side of the tags

8- diecut the piece that supports the arms, in the light shade of pink paper. I find that if I add the supports to the arms before I fold, it easier to fold on the score lines and to not make extra folds accidentally.
9- fold as shown.
10- add adhesive, only to the section as shown, add each half of the mechanism to the inside as shown.
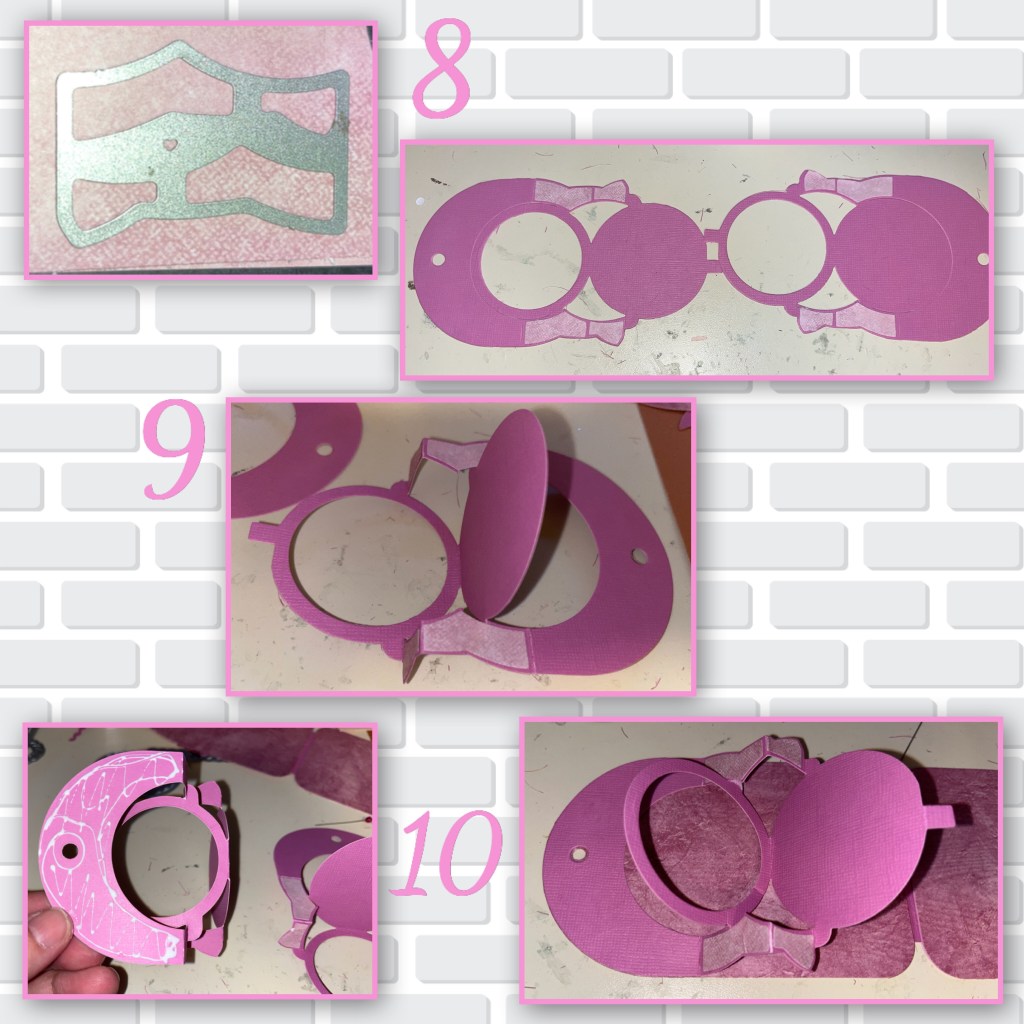
11- add adhesive to the centre tabs and join both halves of the mechanism together.
12-13- the card should look like this

13- die cut several pieces from the Circle Tagbook , and pieces from the Sewing Charms from the cardstock and paper already in use. I also used a metallic pink paper to cut some of the pieces. HINT- if you put fun-foam under the paper when cutting, you will get the embossing done at the same time as the cutting.
14- diecut the words and the shadows with the Mini Alphabet and Numbers set.

15- cut a long piece of white Bakers Twine and wrap it around the thread spool,
16- Add all the letters to the front of the card, add the spool of thread, when adding the letters wrap the twine around a few of them and then into the hole and into the inside.

17- I added a few decorations and rhinestones to the front. I thought it would be fun to make the hearts look like buttons, so I poked holes in them then added a little white pen.
18- I thought it would be fun to have the threaded needle on the back of the card. I used the Short Rectangles Crosshatch for a place to sign. I added the word Love, and some diecuts and rhinestones
19- the inside has the winding twine, and more diecuts.
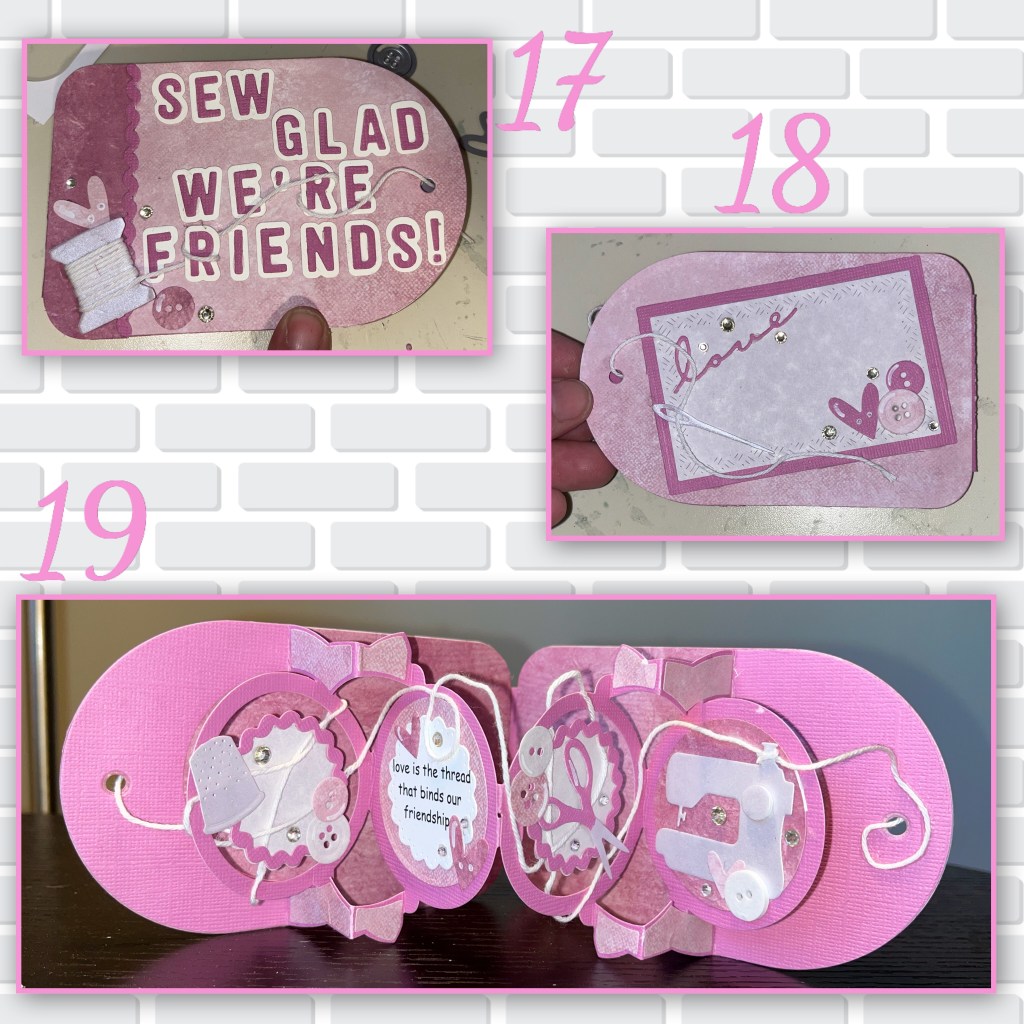
20- close up of all the sections. The quote on the inside I typed and printed onto white Card-stock.


To see some other fun card using the Circle Tag book dieset
Never More Than a Thought Away
Karen Burniston Products used
Pop n Swap the word “Love”

BRILLIANT lovely card, colours and design
LikeLiked by 1 person