

This card cracks me up 😂, I was having so much fun I made 2. This started as a birthday card for my brother who has a long-standing dislike of garden gnomes, sooo of course I had to make him a card using multiple gnomes. I was also trying to find a creative way to use the Mail Box pop up die set, and then it came to me to have the mischievous garden gnomes stealing the birthday cards from the mailbox. I thought of different ways to style them so they wouldn’t all look the same. My husband reminded me that my brother is a grown man and not to make it too childish but I knew my bro would get a kick out of it. The second one I added flowers to and few more fun details, I had a little more time to play with it.
For the first card I made my brother I wanted the inside to be a surprise so I didn’t add any gnomes to the front, I just teased with the hat.

For the second card, I added a scene to the front, and I thought it would a good idea to have a place to write a message on the back. I didn’t think to add it to my brothers card until after I signed the inside and had mailed it.

There are a lot of moving parts on this card, to see this card in action please check out my FACEBOOK page, feel free to join if you would like to share your own crafty creations. You can also see a video of this card on my INSTAGRAM page.
1-2- I diecut all the Tiny Gnome pieces in multiple colours, I had them separate until I bumped the container, so then I used and ice cube tray to keep the pieces separated. I also die cut all the pieces for the Mailbox, and some envelopes.
3- the beards, mustaches and braids have an embossing feature but I thought instead of taking the separate step of embossing, I tapped the dies in Versa Mark ink before diecutting, you get the look as if they were stamped. I did the same with the polk a dot hat.
4- to add some depth to the colours I used Versa Mark Ink and sponged the edges. The hat on the left is before the Versa Mark, the one on the right is after.
5- a look at all the colours.

6- I cut 2 pieces of Navy piece of cardstock, one is 7” x 5”, the other is 7 1/4” x 5”, score the at the 1/4” and taper the end.
7- adhere the tapered end to the back of the other piece to make a 5” x 7” card.
8- I cut 3 pieces of Blue Core Color card stock to 4 3/4” x 6 3/4”. Two for the inside one for the front. And 2 pieces of green Core Colour card stock to 6 3/4” x 1 1/2”. ALL the Core Color card-stock used in this card had the edges roughed up with an Emory board.
9- add them to the inside

10- I assembled and attached the mailbox into the card. The link to the Mailbox product page is at the bottom of the post. There is an assembly video at the bottom of that page if you need help.

11- I needed 2 trees and wanted one taller so I partially die cut one, and just trimmed the bottom as shown.
I2- I wanted a running gnome so I assembled him with a side angle profile. I added beads and 1/2 bubbles so he would glide. I realized a little later that I wanted to change his beard. The envelope comes from the Mailbox set.
13- The girl gnome hanging from the mailbox needed an arm so I cut a section from one of the hats to make an arm, The little tip of the hat I ended up using for her other arm so it looked like it was peeking out over the envelope. It can’t be seen in this photo but a little further down you will see what I mean.

14- I made an extra envelope and ran a thin thread through the bead on it and the beads on the gnome.
15- I added foam tape where the tree is going to be and trimmed a bit of the right side branches. Wrap both ends of the thread around a thin mixed of cardtock and add some glue to hold it.
16- on one end I adhered it to a couple of clumps of grass, and added foam adhesive, I adhered it right behind then pole for the mailbox.

17- the other end I adhered behind the tree, then added the tree to the foam to adhesive. Make sure you have the tension you want before adhereing it.
18- I added half bubbles to the back of the extra envelope. With just the bead it was too light and kept flipping over.
19-out of the green Core Colour card stock I die cut leaves and more clumps grass.
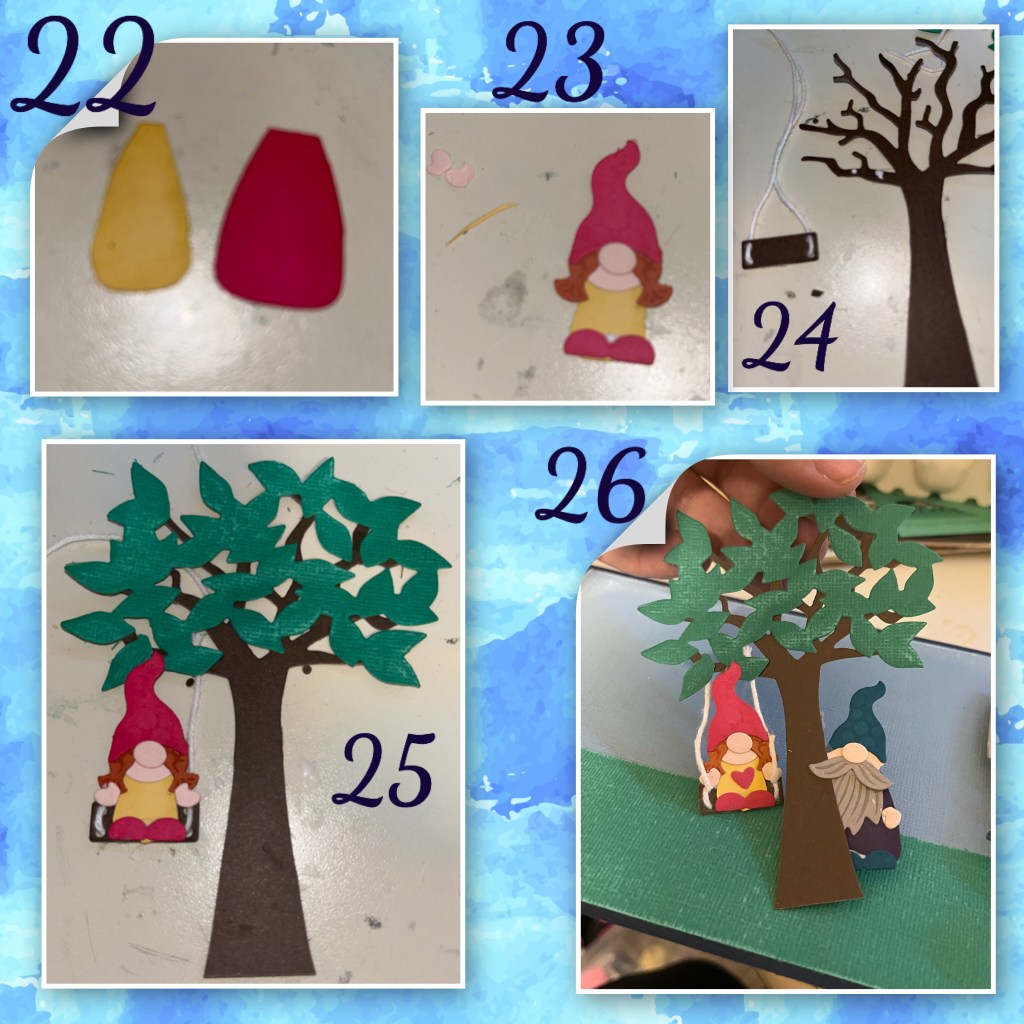
20- I added a gnome, like he is hiding behind the tree.
21- added leaves grass, and a little Gnome is now hiding an envelope behind his back.

22- 23- I wanted the little gnome on the swing to look like a child gnome. So I trimmed her body to be smaller than the others. I also made her braids shorter. The yellow body shows the piece for this Gnome, the pink body shows the regular size.
24- Using the Tree Pop up dieset I cut out the swing seat, I used some white bakers twine and added it to the tree.
25-26- I added the little girl gnome to the tree added some leaves, I also added another gnome peeking out from behind the tree.
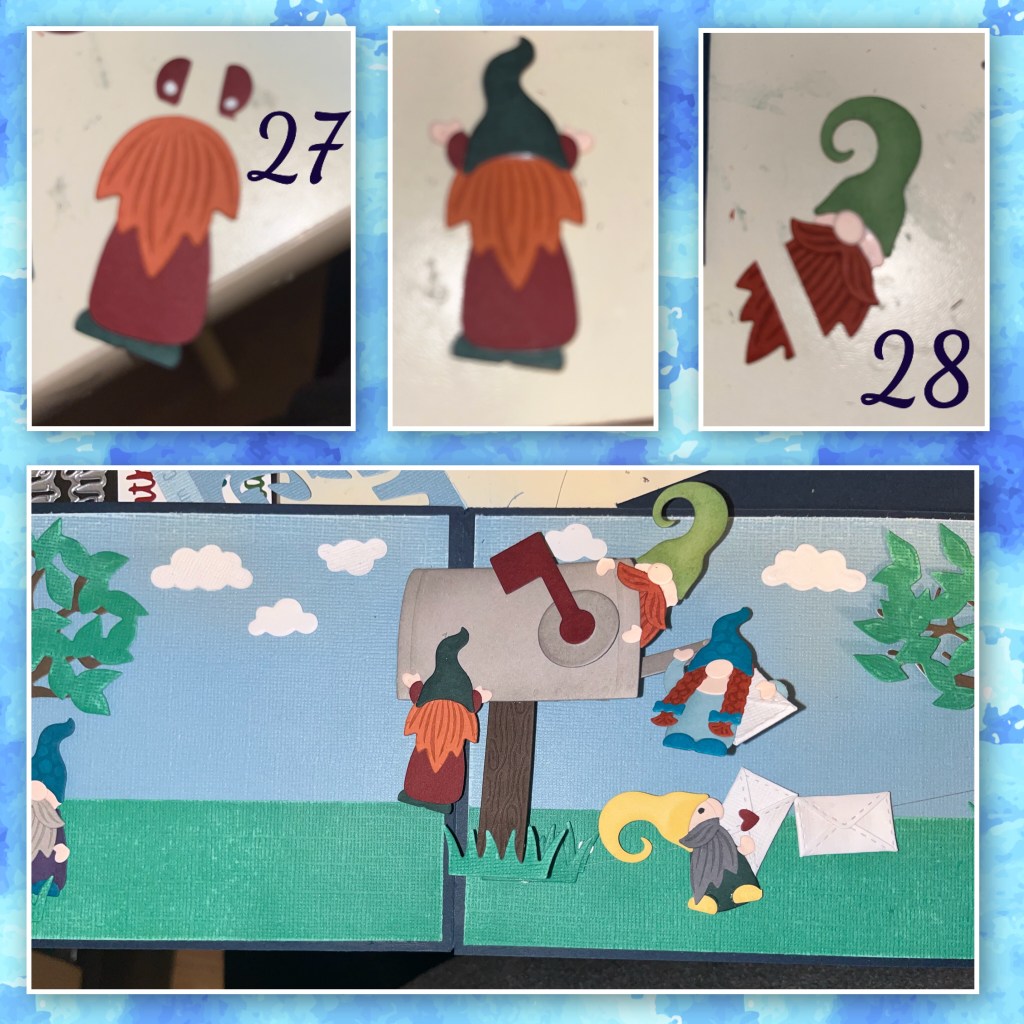
27- more mischievous gnomes on the prowl, I wanted one with a back view. So I used a beard for hair, added the hat a little lower, used the shoes to make arms, and hung him from the back of the mailbox.
28- I wanted one of them to look like he was peeking out from inside the mailbox, I had to trim his beard so he would fit without getting in the way of the inside mechanism of the mailbox. I added some little hands like he’s hanging onto the mailbox.
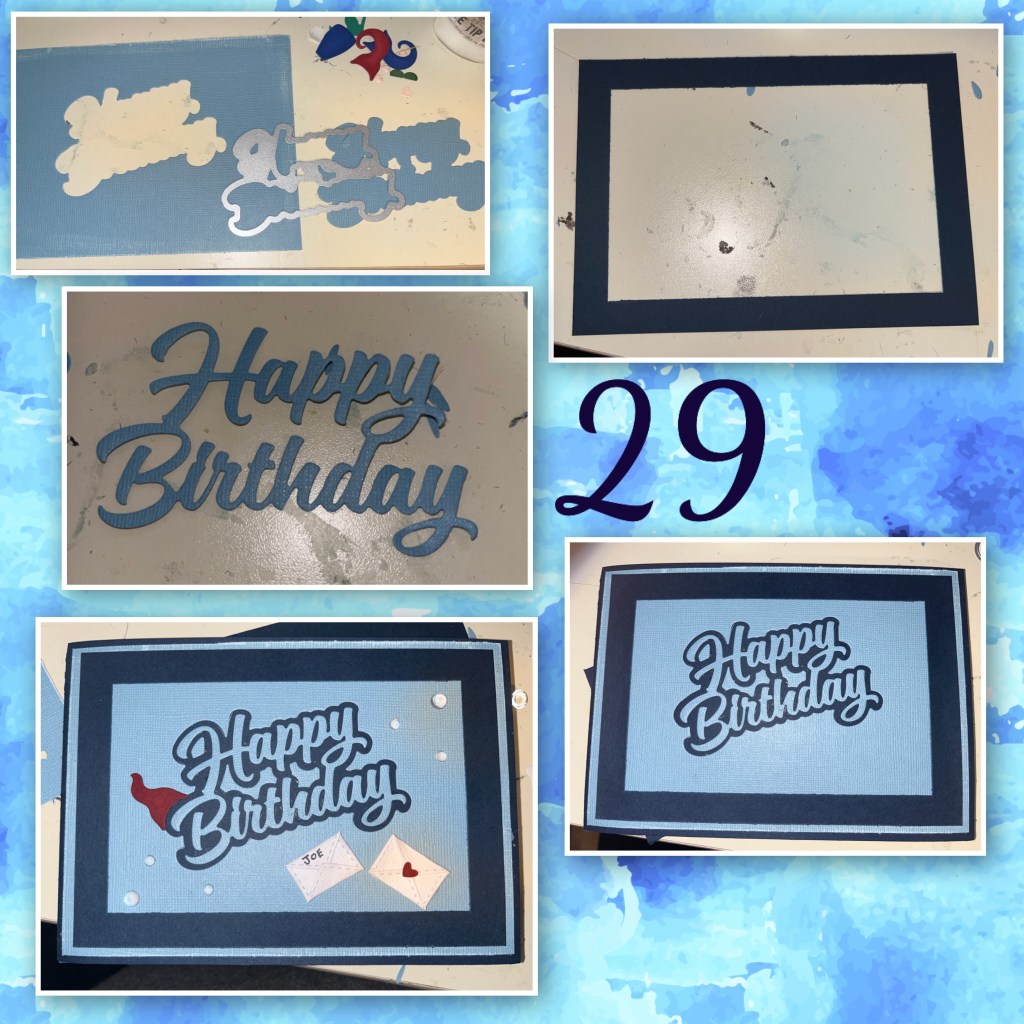
29- on the third pieces of blue Core Color cardstock I die cut the Happy Birthday Shadow out of the middle and adhered it to the card front. I cut a navy blue frame 4 1/2” x 6 1/2” and about 1/2” and added it as well. I die cut Happy Birthday and added it inside the shadow. Don’t forget the extra inside pieces to complete the look. I decorated with a hat, a few envelops and bubbles.
30- Here is a close up of all the gnomes I made for both cards. Here is where I decided to change the beard on the running gnome.


On the second card I added Flowers from multiple sets, I generally cut extras when I make cards so I just grabbed a few of those. I had a few spare Butterflies as well. I highlighted both cards with a white pen.

To see some other fun cards check these out
Karen Burniston Diesets used
Woven Basket flowers
Flower Pot Popup flowers
Flip Frame Pop Up flowers
Castle Pop up clouds
Word Set 9 xoxo
Butterfly Collage Add on Butterfly
Word Set 2 Birthday to you
