
I’ve been pretty busy (working on a really fun card for this weekends post 🤗) so I decided to post a card I made a while back (2014 😳). This is a back to basics kind of card with a little technique thrown in. If you look close I highlighted different spots on the butterflies with different colours of glitter. I found a way to colour my clearish Dazzling Diamonds glitter to match what ever colour of ink I was using. There wasn’t as many fun colours back then and even now sometimes it’s hard to find that exact match
You can follow or join me on Facebook or Instagram
Because this card was made a while back I don’t have photos of the whole process, but I will do the best I can.
All the supplies are from Stampin Up as I was a Stampin Up demo at the time.
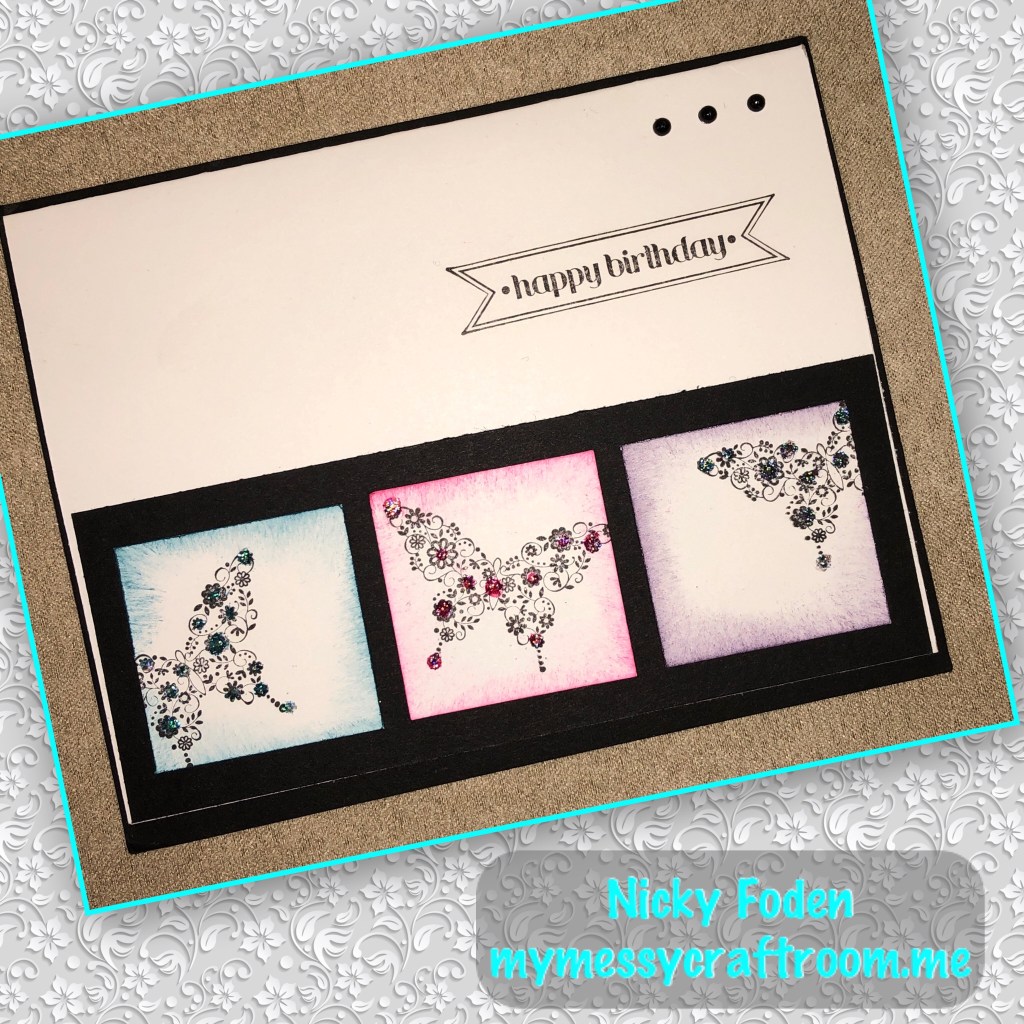
The Basic Black back panel is 5 1/2” x 4 1/4”, the black strip across the front is 2 1/8” x 5 3/8”. The Whisper White cardstock base is 8 3/8” x 5 3/8” folded in half. I wouldn’t get too hung up on the itty bitty measurements. The White card base should 1/16” shorter than black back panel on all four sides. The black strip across the front should be 1/16” shorter than the white card on the sides.
The little white squares are around 1 1/2” x 1 1/2” I stamped the butterflies with black ink on all 3 squares, stamping them each in a little bit of a different location on the square.
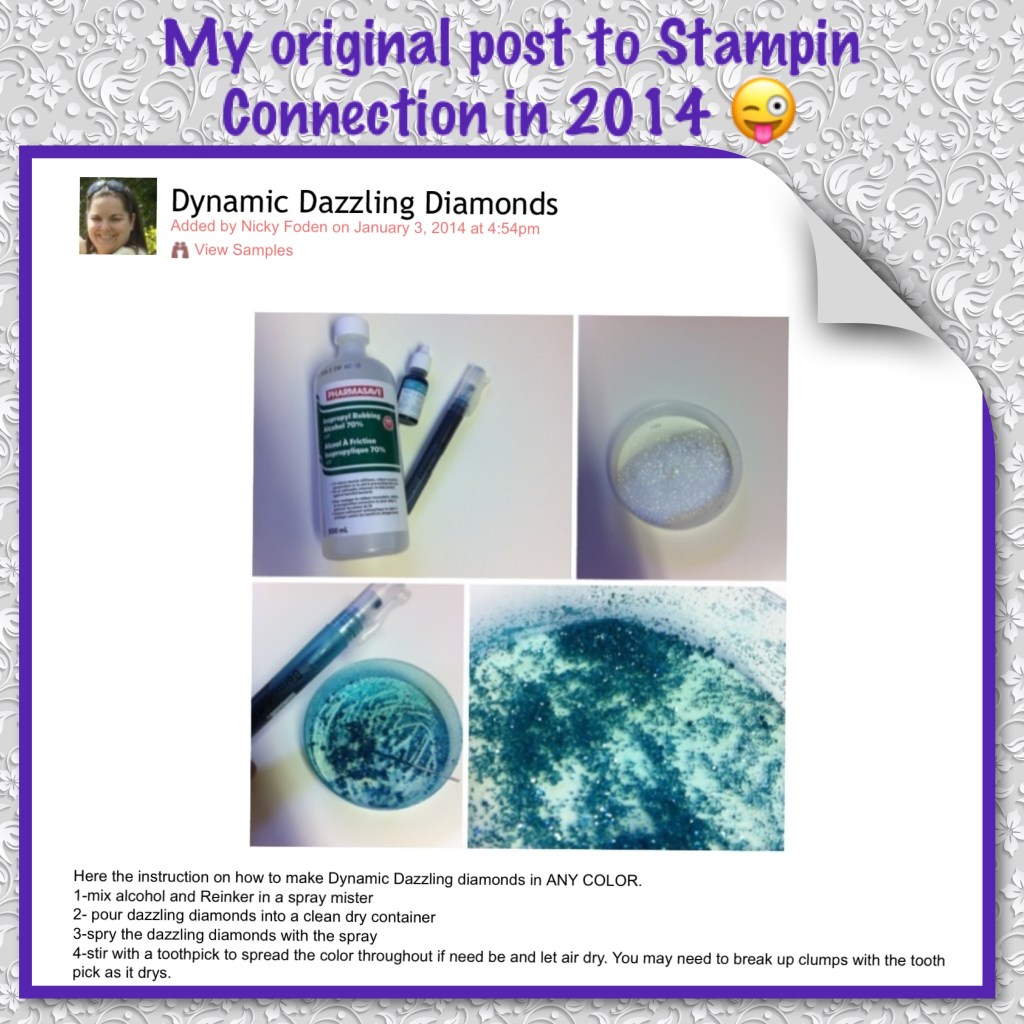
I was actually able to find my original directions so I thought I would share 😀. This is how I coloured my Dazzling Diamonds glitter ✨
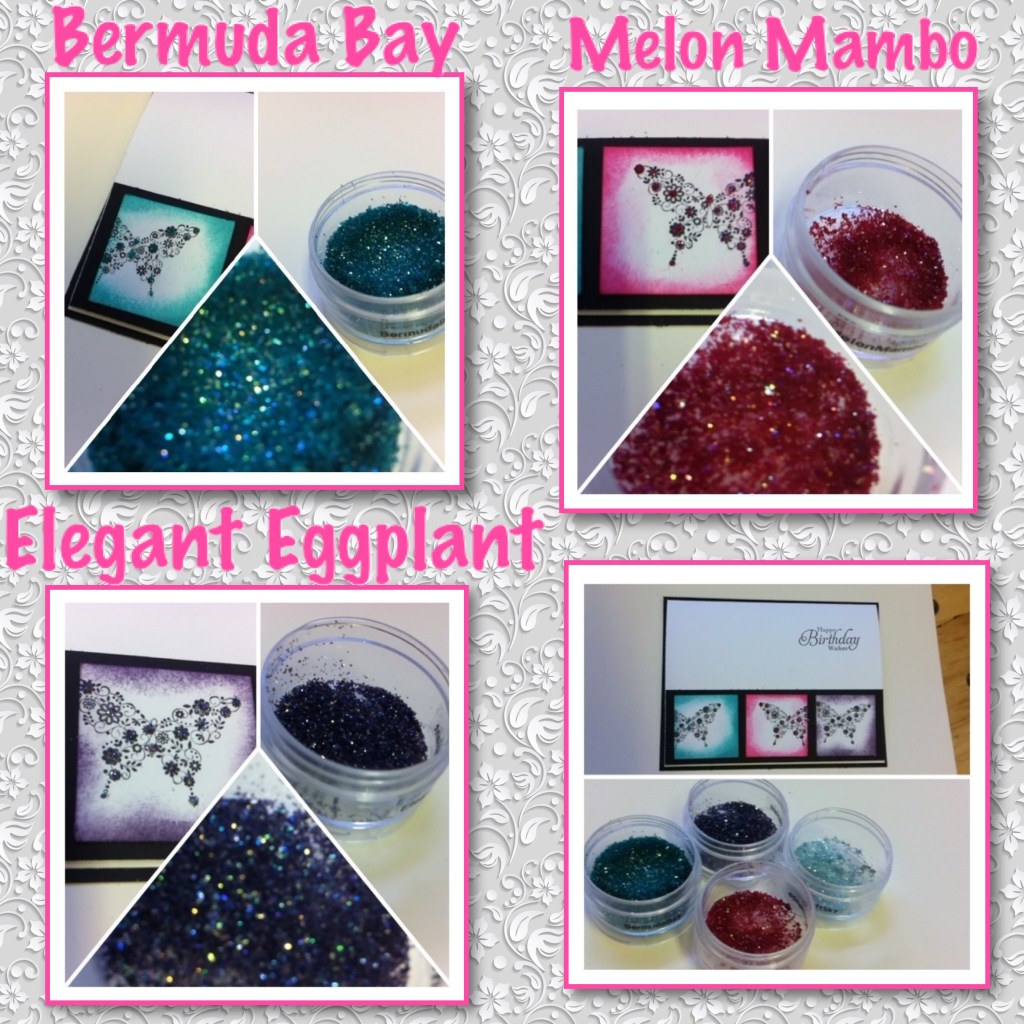
I sponged the edges of the butterfly stamped squares with three different colours, Bermuda Bay, Melon Mambo, and Elegant Eggplant. Used a liquid glue to add dots to some of the flower centres in the pattern on the butterflies then added the coloured glitter to match.


To see some other K.I.S.S. (Keep it so simple) cards please check these out.
