
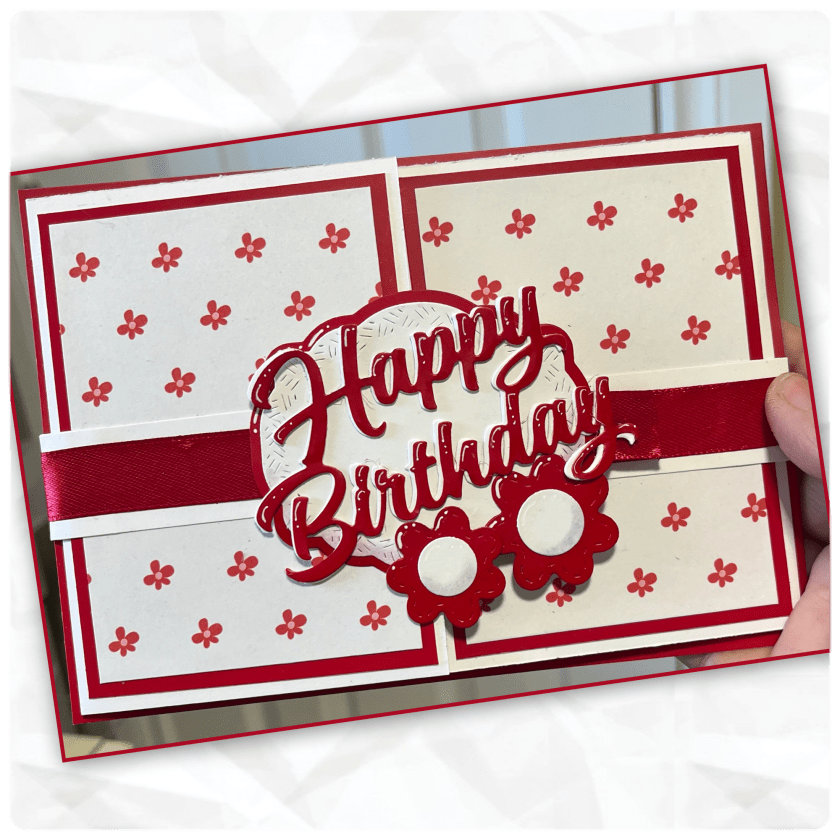
Hello crafty pals, I had a bit of fun making this card. It is the card that I made for Karen Burnistons June design team challenge. This month’s challenge is “Flag Colours” we were to use colours from our country’s flag 🇨🇦, so that meant I had to make a red and white card. This made for a bit of a challenge, as I only had smaller scraps of red cardstock. I live in a small community with no place to purchase cardstock. What’s a girl to do 🤷🏻♀️. I checked out my Dollarama hoping for the best. I had to think outside the box, or should I say bag….

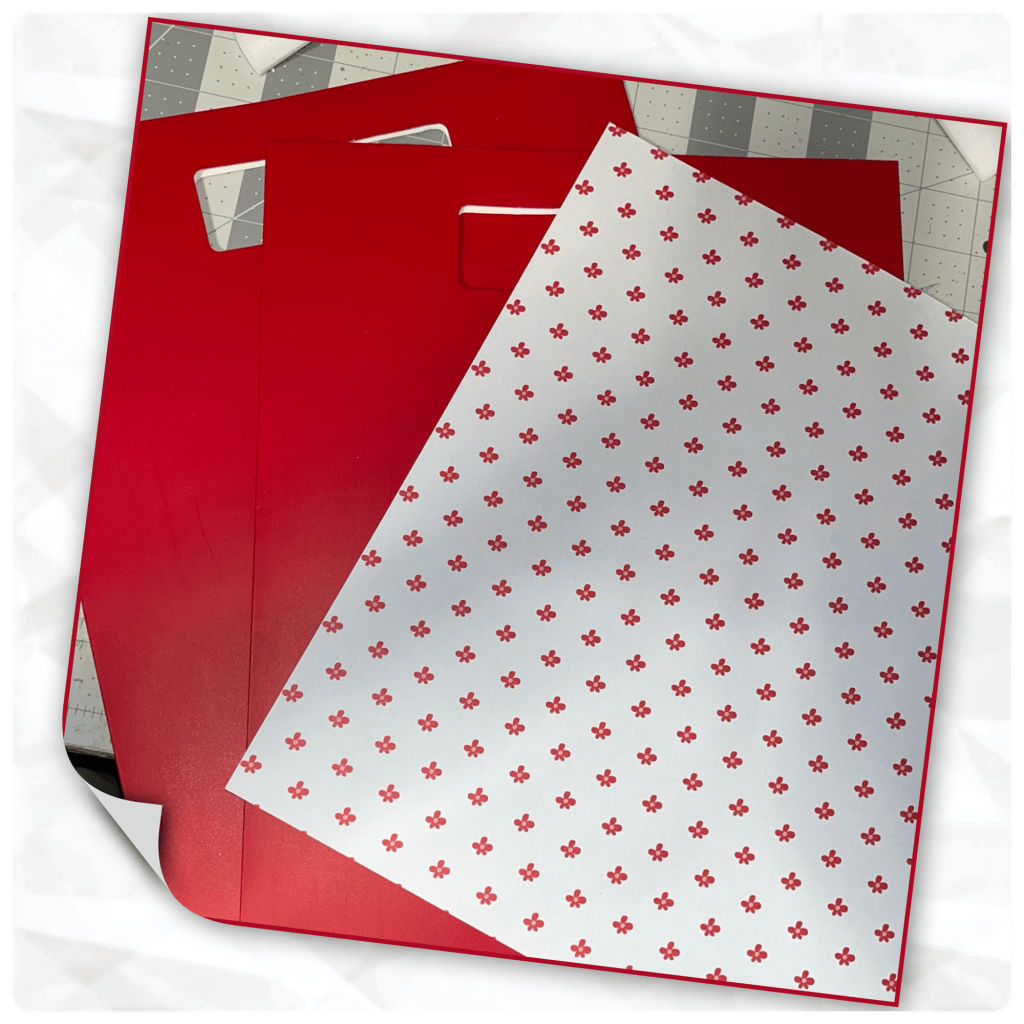
…so, I was just about to give up when a flash of red caught my eye, and low and behold I saw these bright red gift bags. Score!!!! I even found matching ribbon. Once I got home I found this red and white patterned paper in my stash. From a distance it looks like tiny maple leafs but they are little flowers.
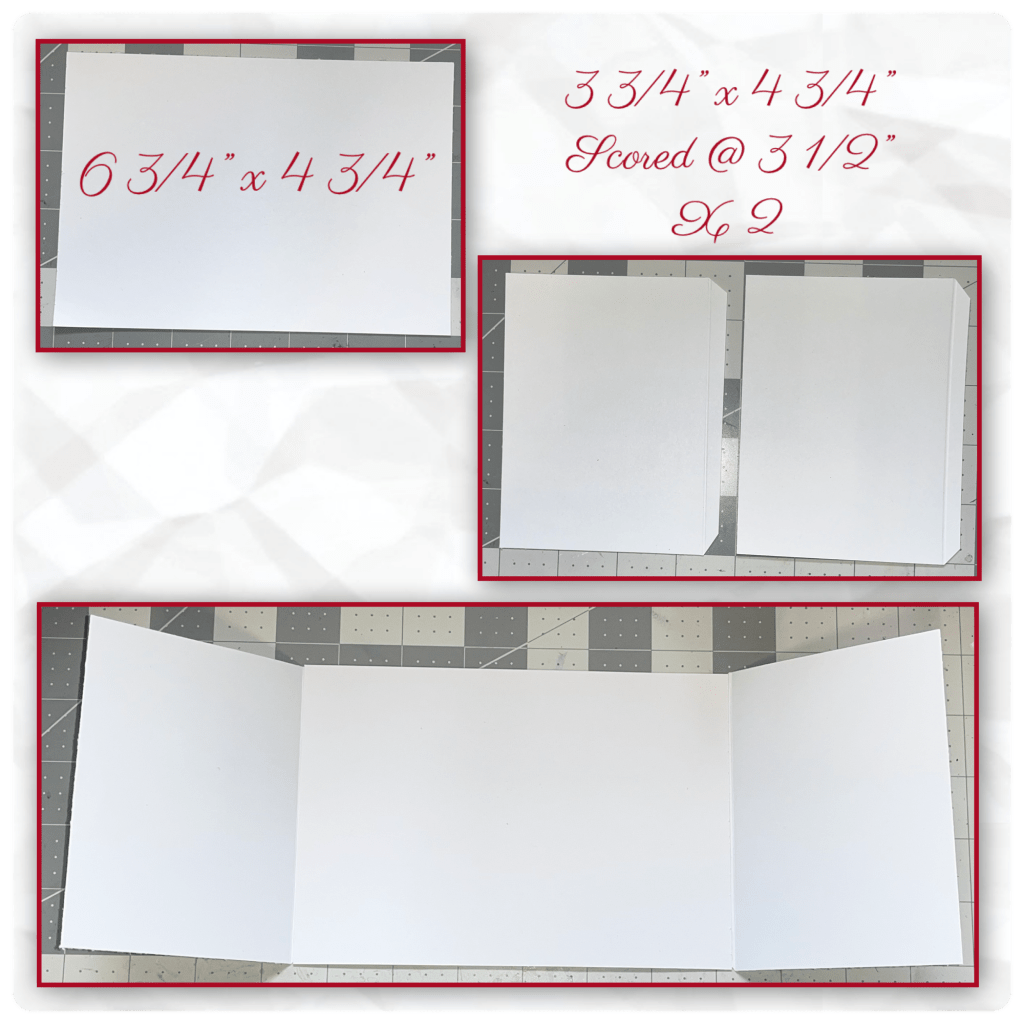
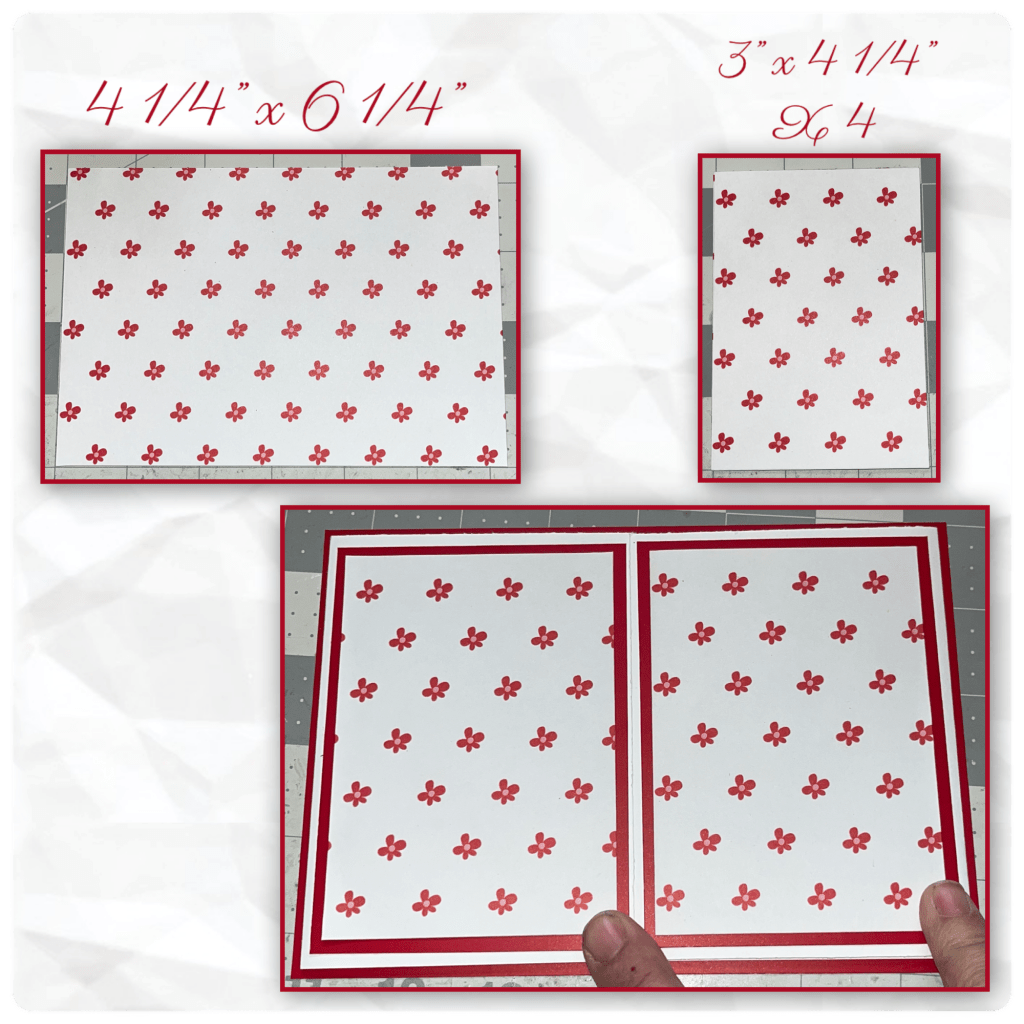
I started by making a white gate fold card using the dimensions below.
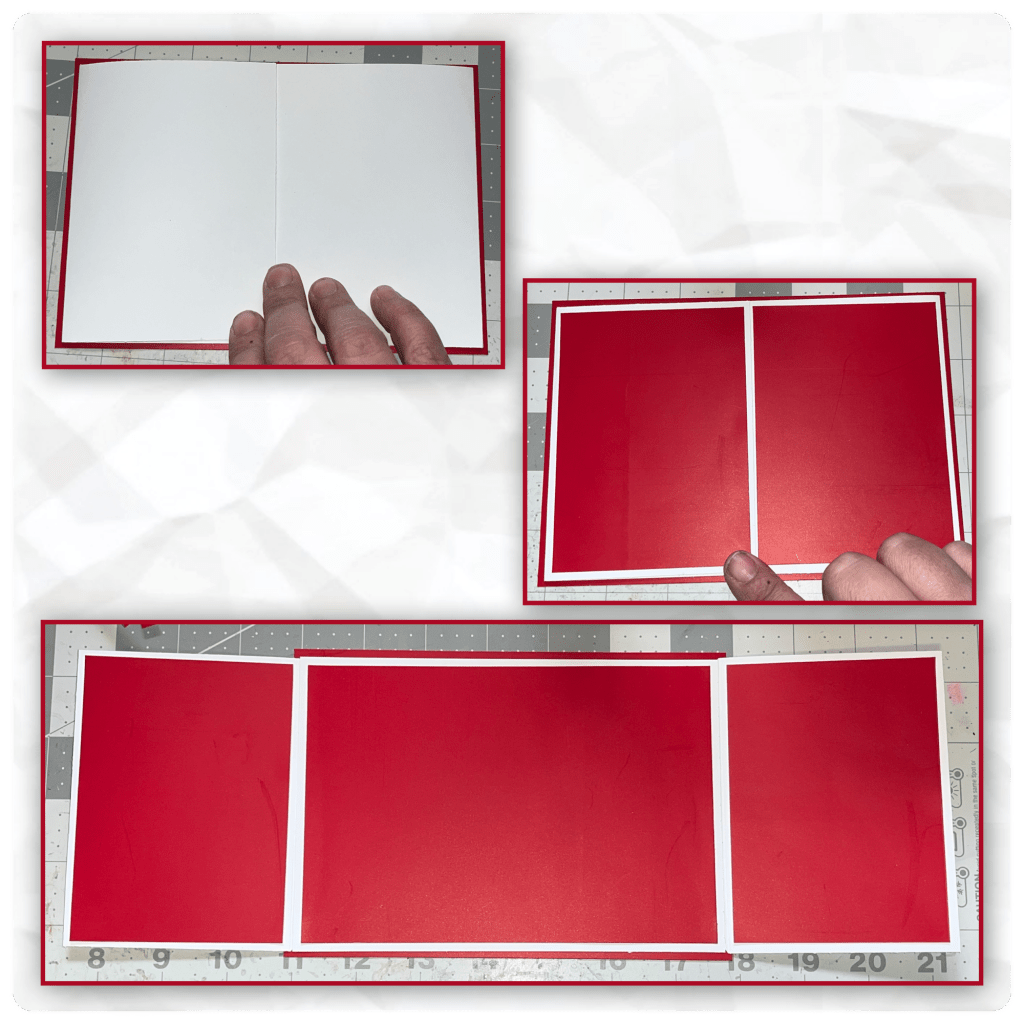
I cut out the red panels from the gift bags to the dimensions below.

I added the red 5” x 7” to the back of the card, next largest panel to the inside, and the smaller panels to the front and back of the gate folds.
I cut out patterned paper panels to the dimensions below. I added the large panel to the inside and the smaller panels on the front and back of the gate folds.
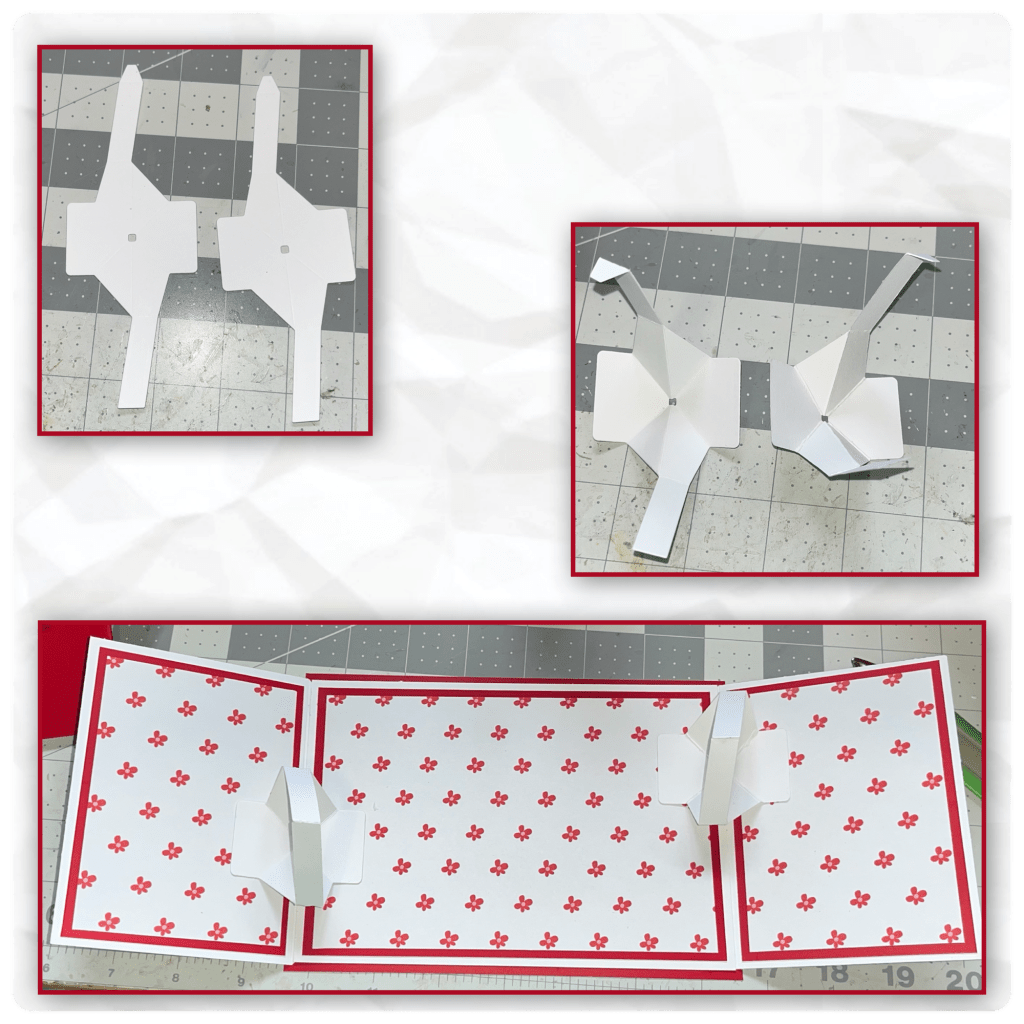
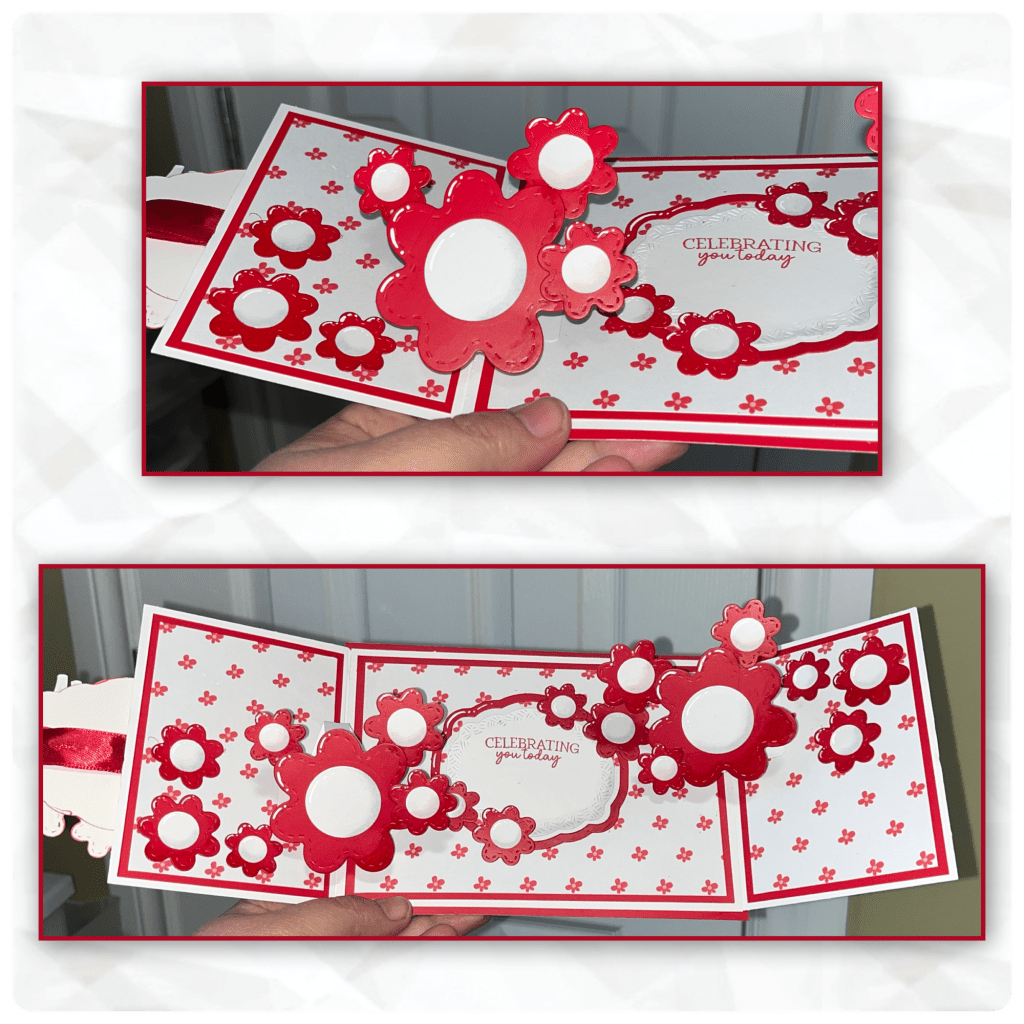
I cut 2 of the mechanism from the Twist Flower Pop up . I folded one the proper way and I folded the other one the opposite way. I attached them to the card base as shown.
I cut out and assembled the flowers from the Twist Flower Pop Up, and the Fun Flowers. Using an alcohol marker I added shading to the bottom right, and white Gelly Roll Pen highlights to the top left. I cut out the labels from the Rectangles and Labels Crosshatch and added shading and highlights. I stamped the greeting from the Stage Scenes Clear stamps with red ink. Because the red pieces are all cut from the gift bag, the core is white so I used a red alcohol markers around all the edges. It gave it a much nicer finish.
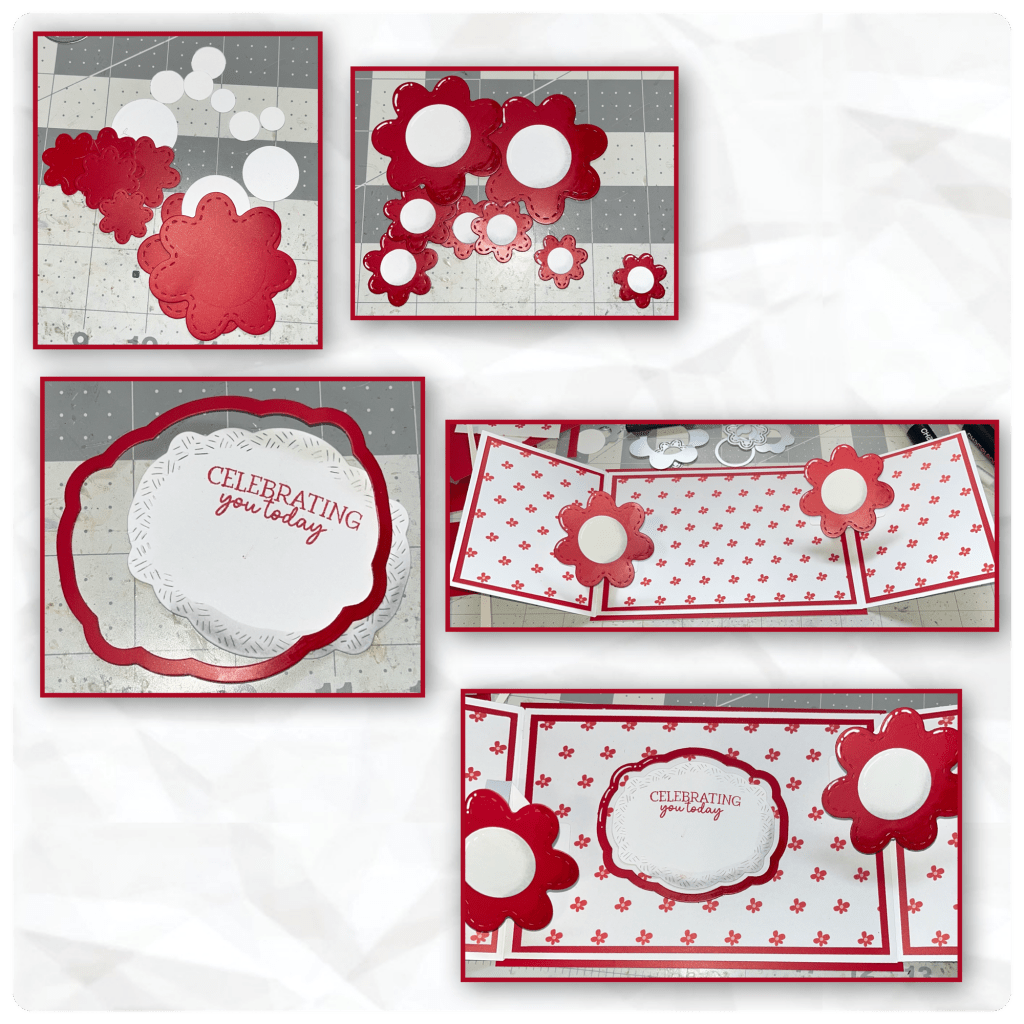
I added the flowers to the card base as shown.

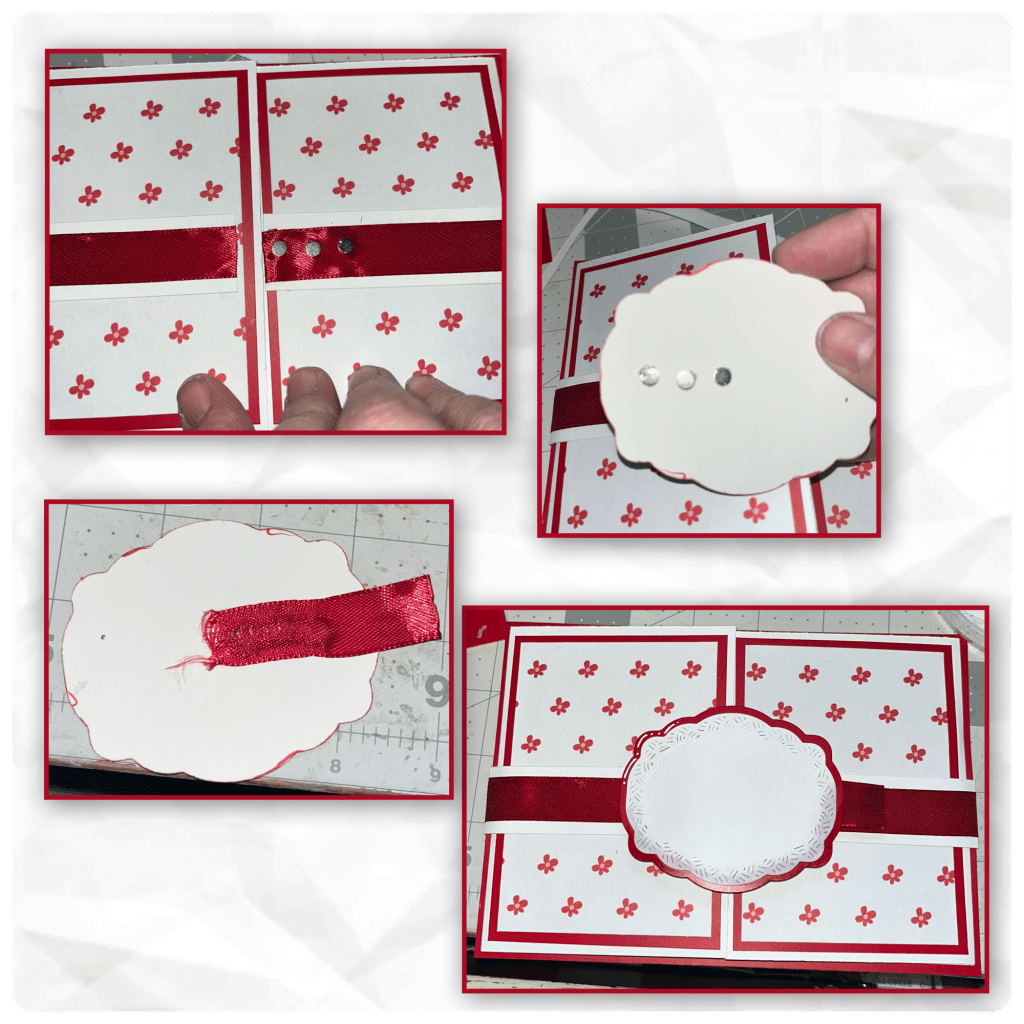
I wanted to have a closure on the front so I wrapped a band around the front, I had to use a few pieces because I didn’t have one long enough. I wrapped a piece of ribbon as well. I used sticky strip tape on the end of the ribbon and folded it over itself to keep the end from fraying. Before I glued down the right side I glued down a few small magnets. They are not very strong so I didn’t think they would hold under cardstock so a I just kept them under the ribbon.
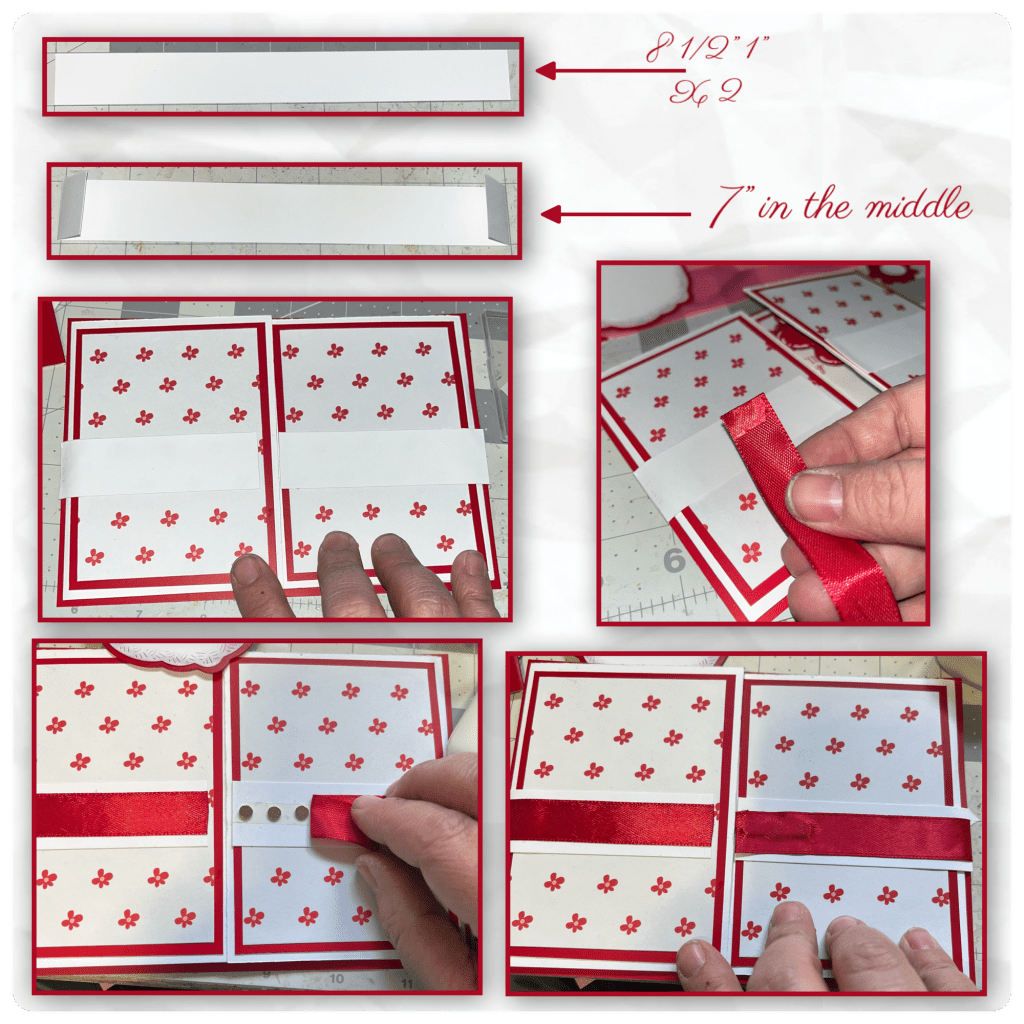
To make sure the magnets lined up correctly I placed the magnets over the magnet that are under the ribbon and added glue dots to the tops of them. I lined up the label to where it would be placed and pressed down to transfer the magnets to the label. Label pieces are from the Rectangles and Labels Crosshatch. Again, I added shading with an alcohol marker and highlights with the Gelly Roll Pen. I covered the magnets with a piece of ribbon then adhered it to the left side of the gatefold.
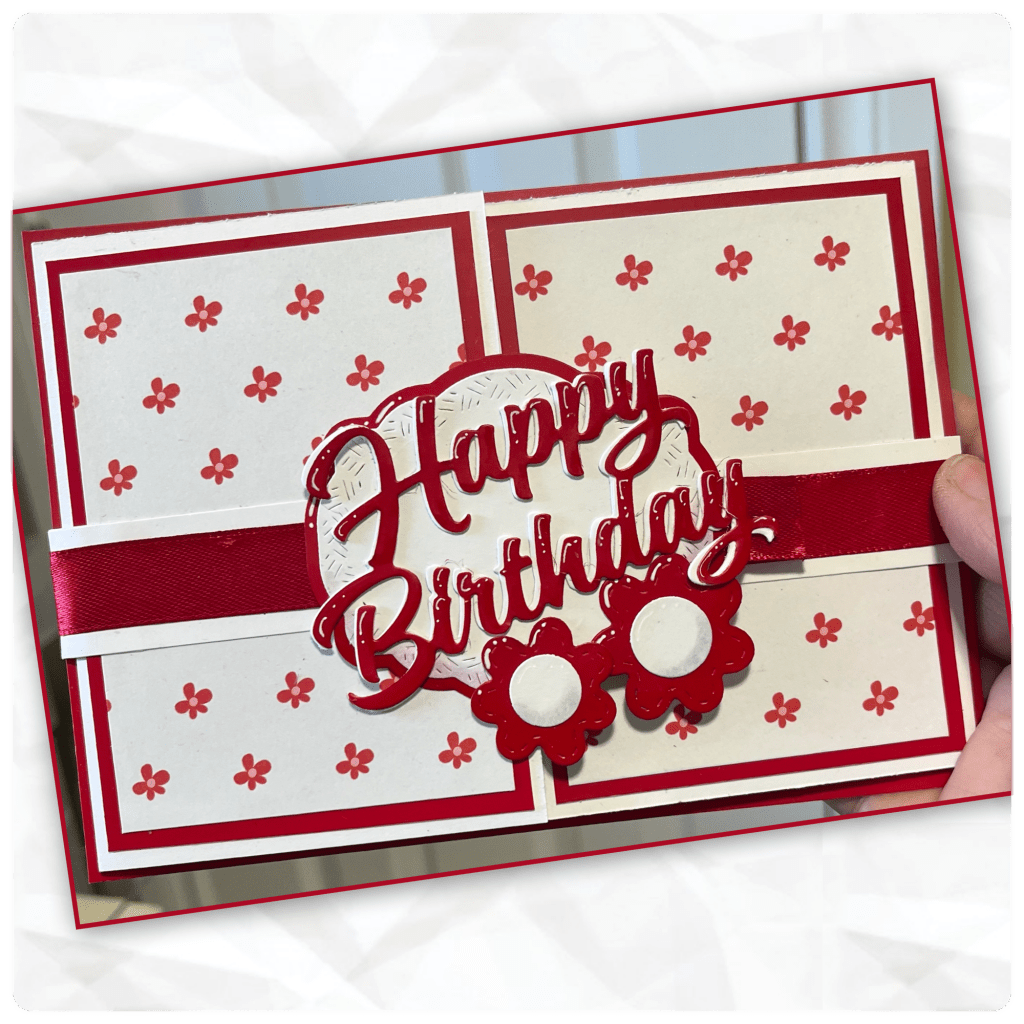
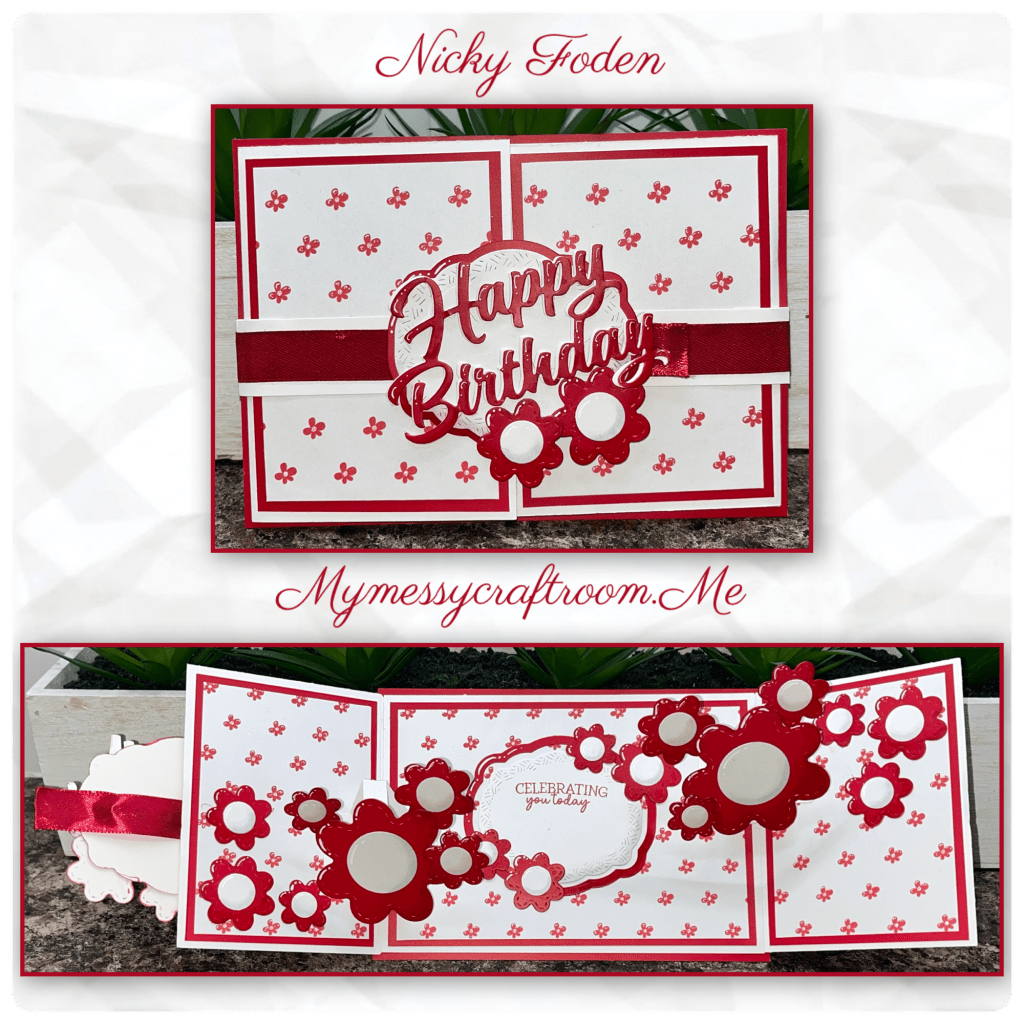
I cut the Happy Birthday from red and the Happy Birthday Shadow from white and added it to the label, then added a couple of the same flowers from the inside.
I decided to add more flowers to the mechanisms.
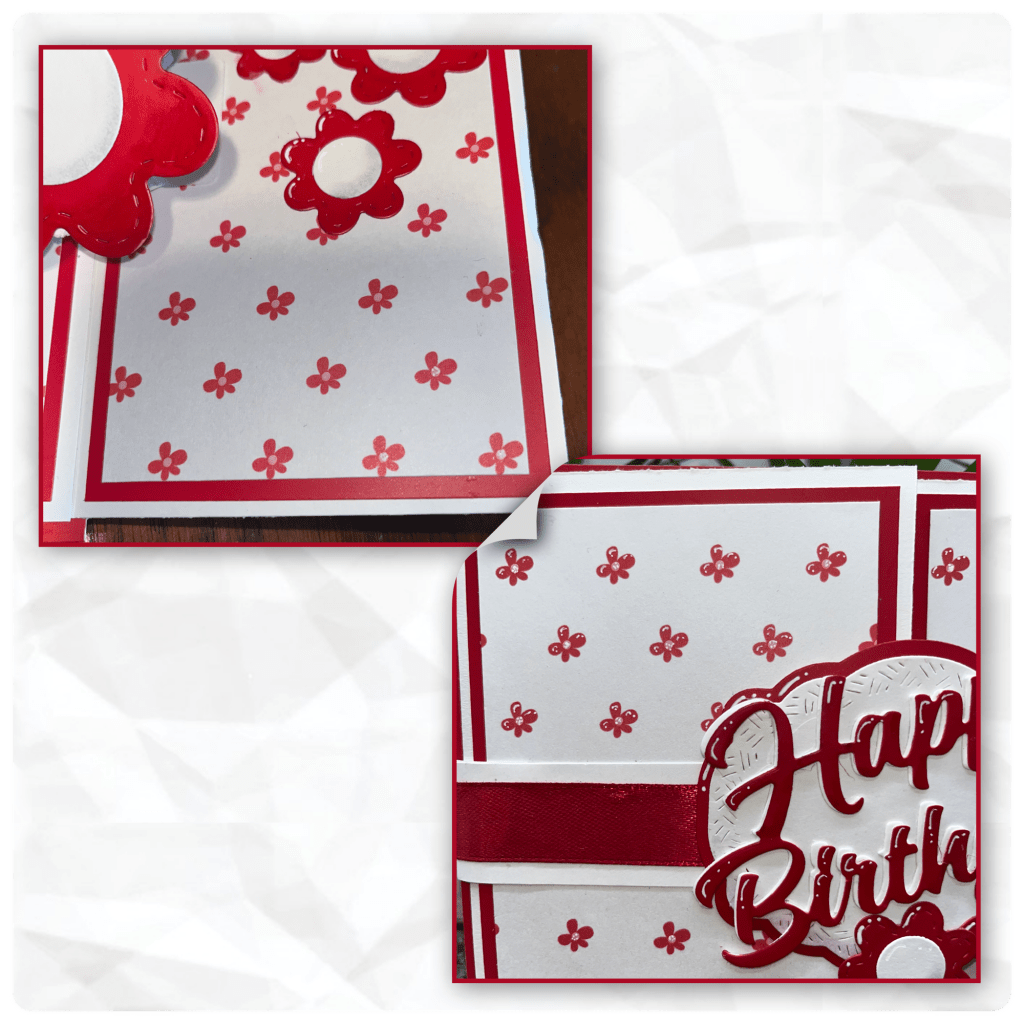
Because I added so many highlights to the red pieces I decided to add little highlights to the little flowers. On closer inspection the centre of the flowers are a pinkish colour so I added a bunch of little white pen dots to the inside to give the impression that they are white.
Other Tools used
Gelly Roll White Retractable Pen
All the fun is in the reveal, to see this card in action please check out my FACEBOOK page, feel free to join if you would like to share your own crafty creations. You can also see a video of this card on my INSTAGRAM page.

always interesting to visit your blog this is fabulous
LikeLiked by 1 person