
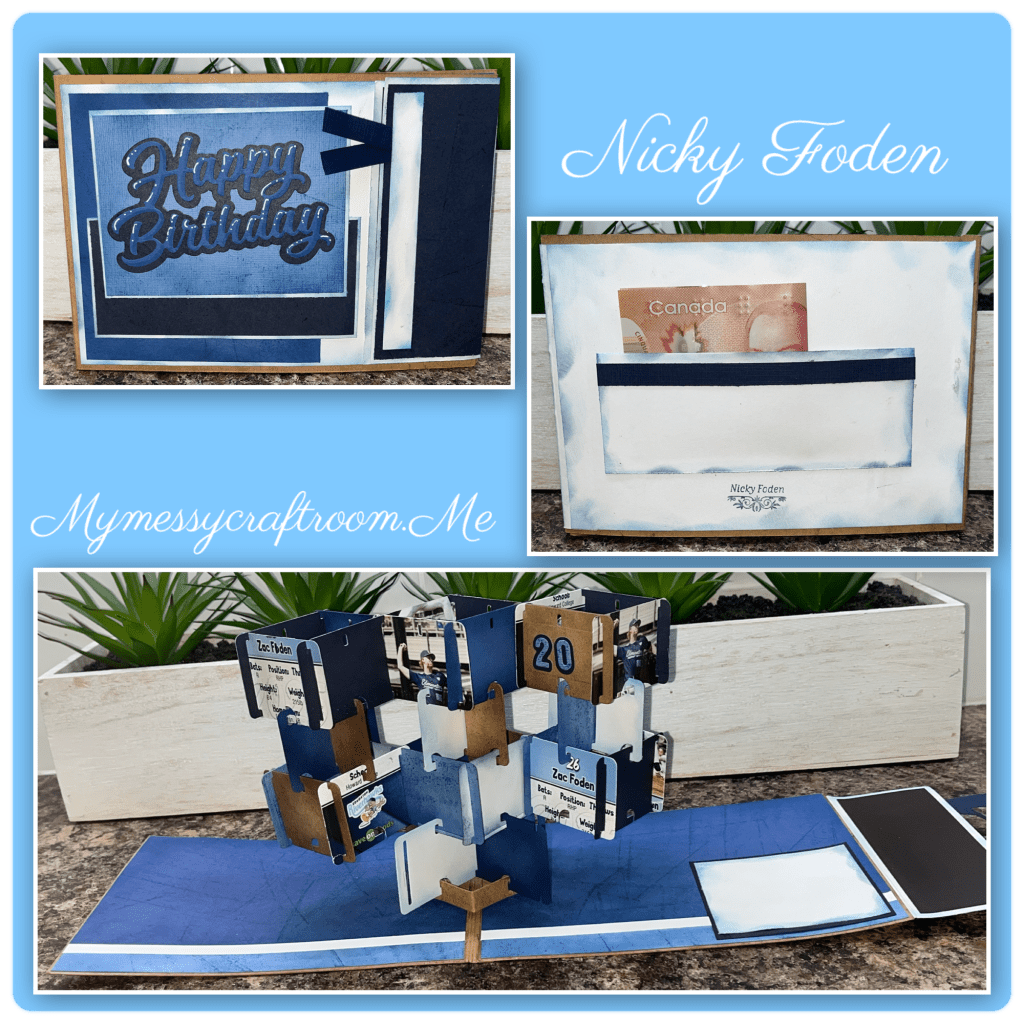
Hello crafty friends, sorry I have been MIA for the last bit, I was hoping to share this card before I left but I had to wait for the recipient to receive it . I hadn’t played wth the house of cards for a while so I thought I would give it a go. The recipient is a baseball player and I had a handful of his baseball cards from one of the teams he plays for (I did keep a few safe, if he makes it to the pros I will have to get him to sign them for me)
I came up with this 5”x7” card

All the fun is in the reveal, to see this card in action please check out my FACEBOOK page, feel free to join if you would like to share your own crafty creations. You can also see a video of this card on my INSTAGRAM page.
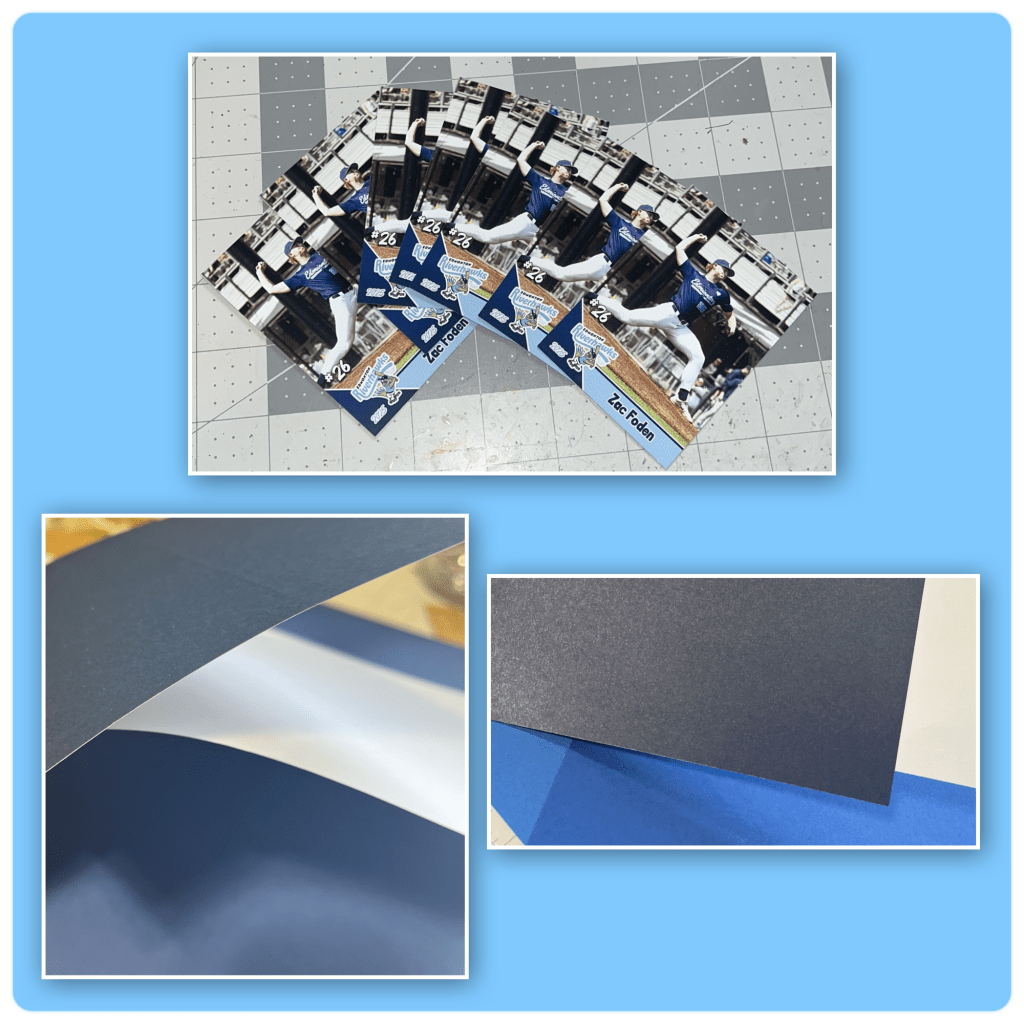
I started with a stack of his baseball cards, then found some matching shades of blue, white, and craft cardstock to match the cards.
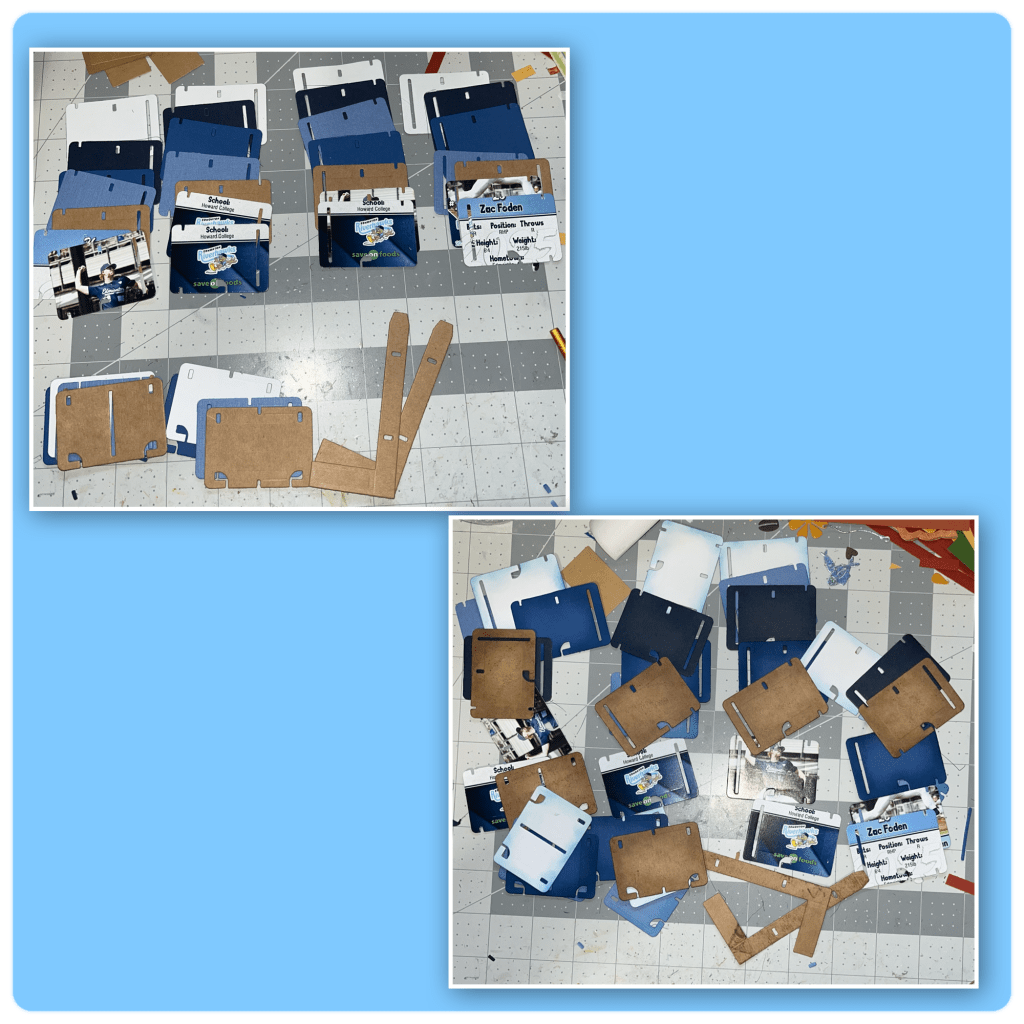
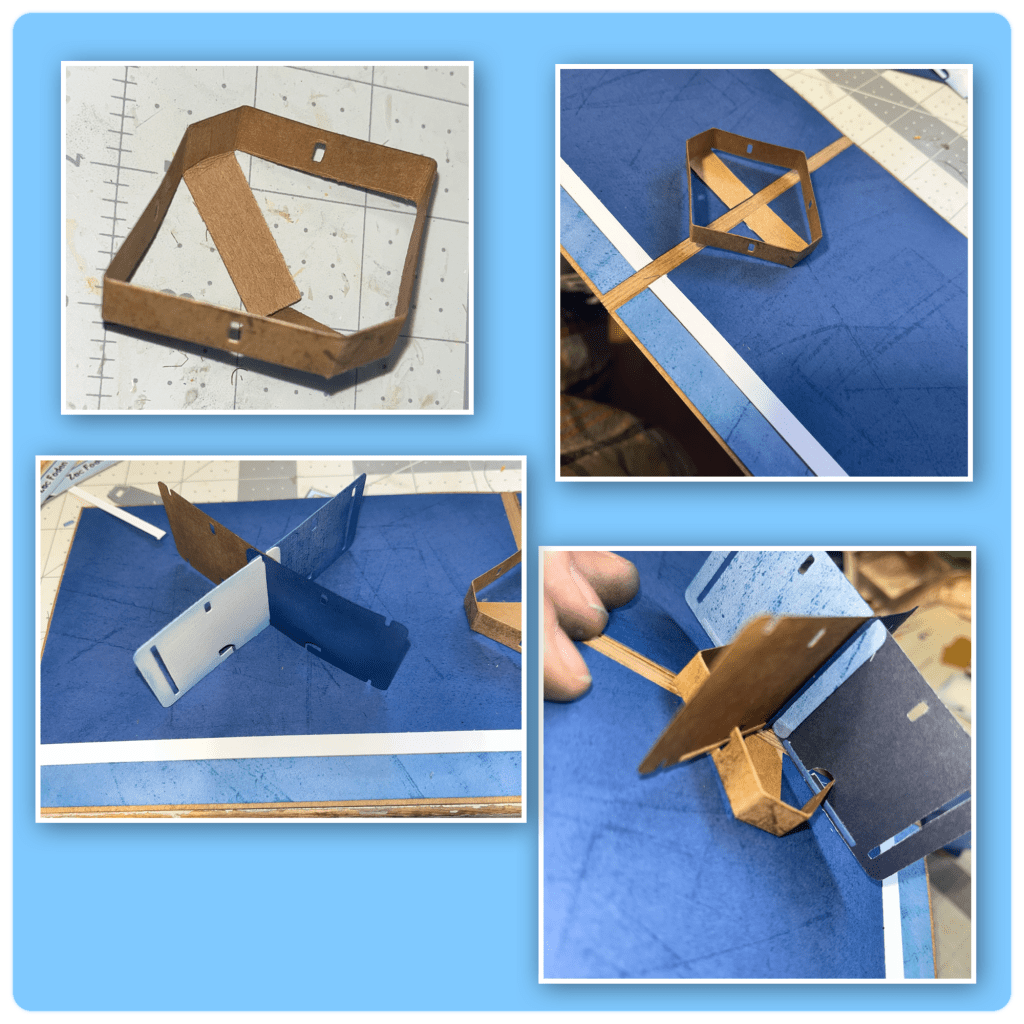
Using the House of Cards dieset (Karen has a video tutorial on the product page at the link ⬆️ ) , I die cut the pieces as shown. I added shading to all the pieces by sponging the edges, and rubbing the cardstock pieces right onto the ink pad.
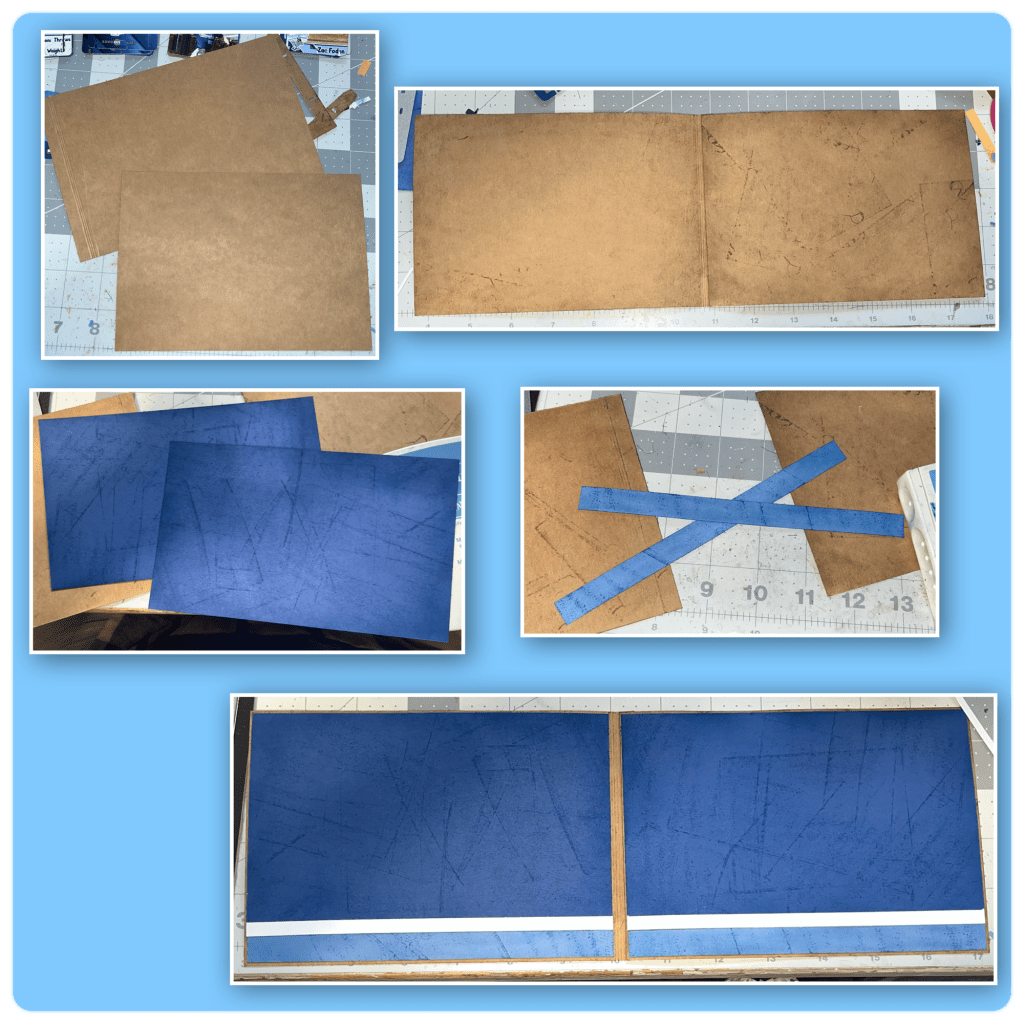
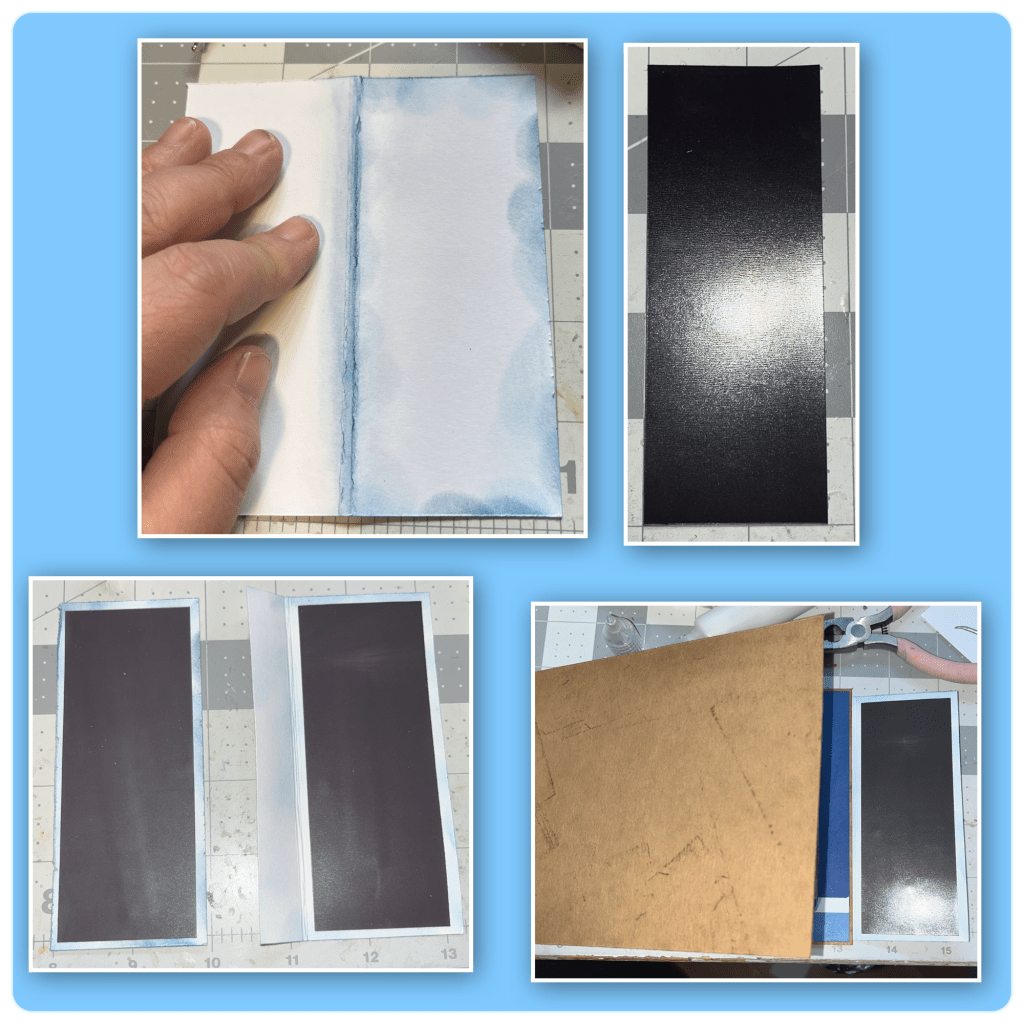
The card base pieces were cut to make a 5”x7” card, I didn’t have big enough pieces of blue to fill the whole card base so I used what I had, then cut a piece of white and blue to fill the gap in along the bottom. I inked the craft colour, and the blues the same way that I did above for the cards.
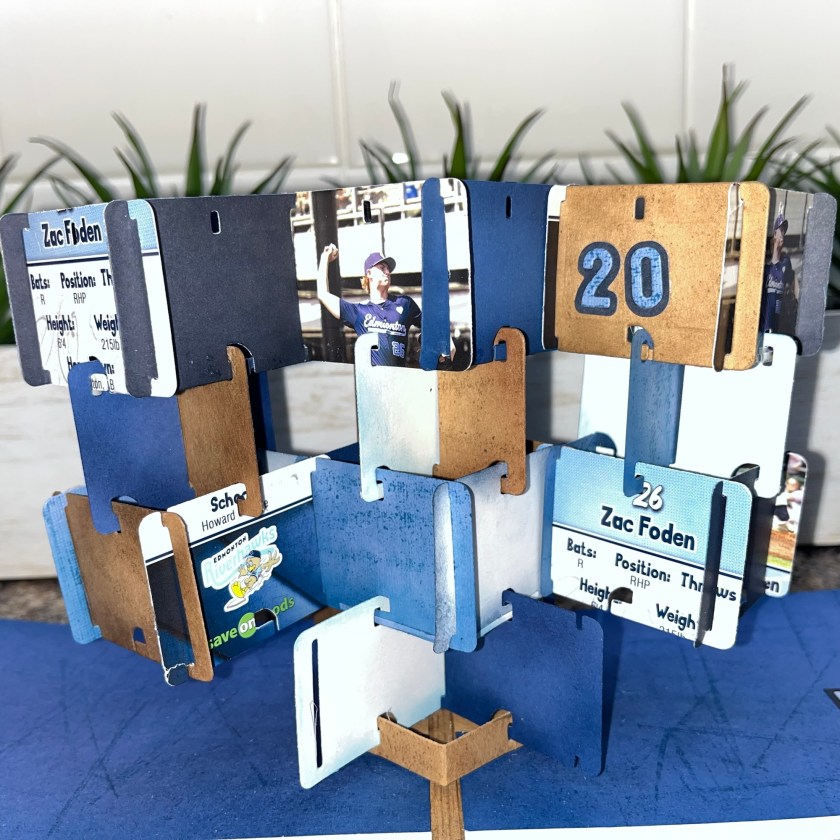
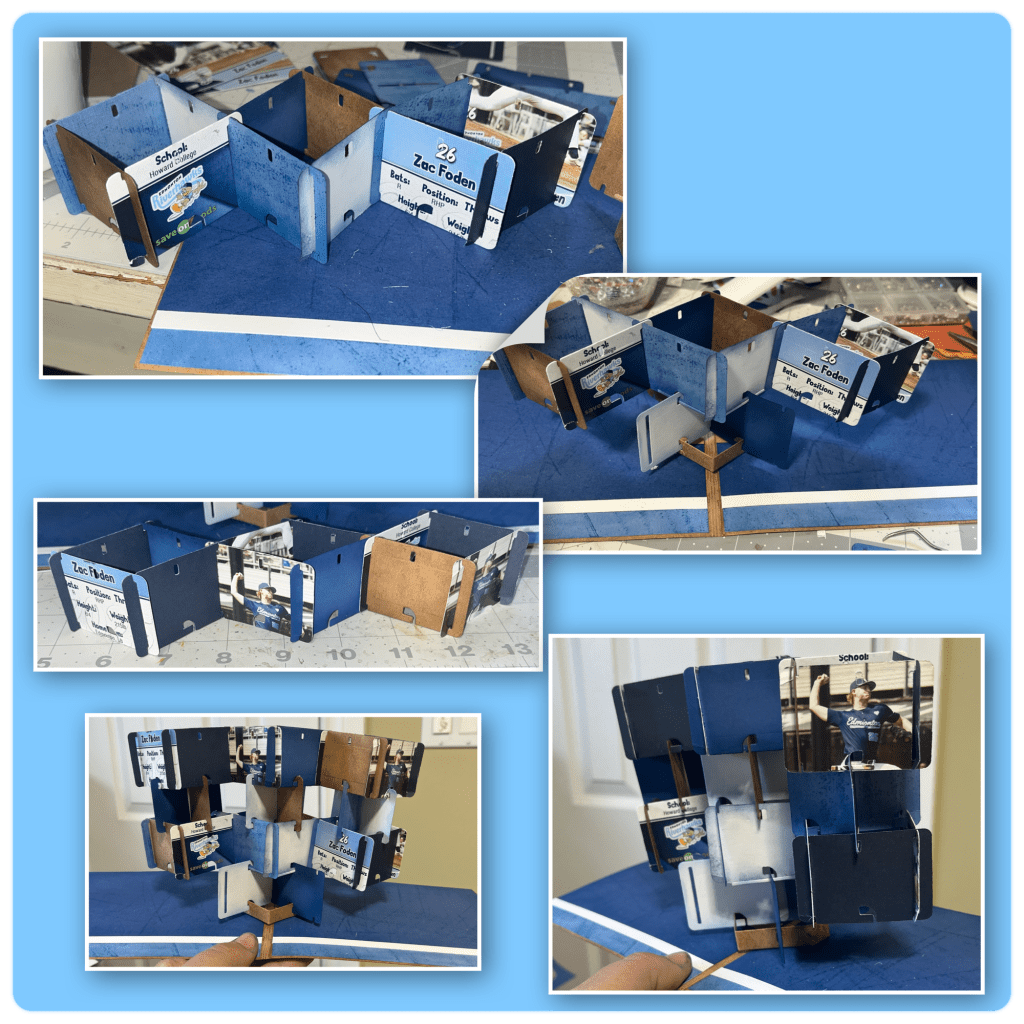
I assembled the mechanism and attached to the card, using Karen’s video directions. I added the first layer as shown. It’s hard to see but in the bottom right photo I used the little piece that comes out when die cutting, to reinforce where the cards attach to the mechanism to keep it from falling out. I will do this for each layer.
Now for the next 2 layers. I attached them together as shown, then attached them to the card.
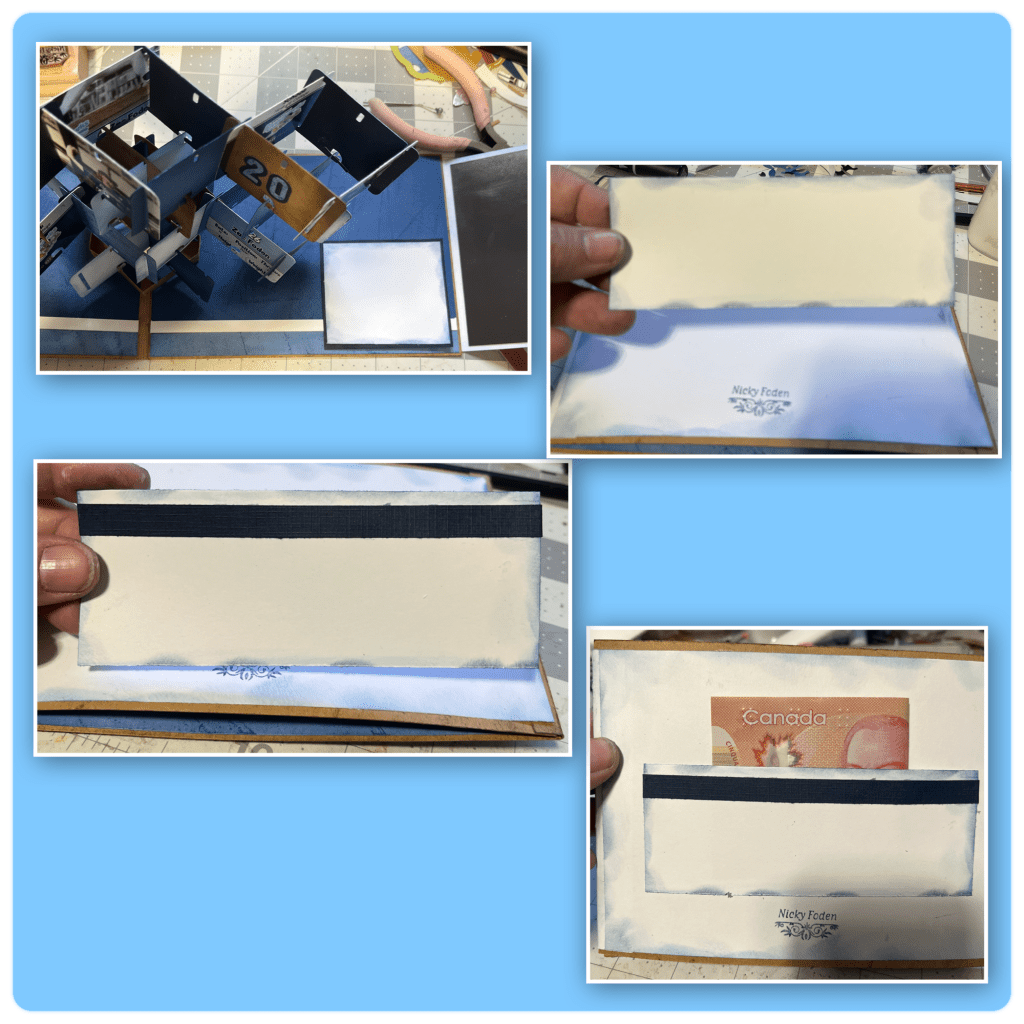
The card is pretty thick and didn’t want to stay closed so I decided to make a magnet closure. I made a flap the height of the card and 4” wide scored at 2” and inked up the edges, I also made a matching rectangle. I cut 2 thin magnet sheets into rectangles that are about 1/4” smaller than the cardstock pieces and attached. The piece with the flap I attached to the right side of the card as shown. I am missing a photo but I also added the other magnet to the right side of the card front.
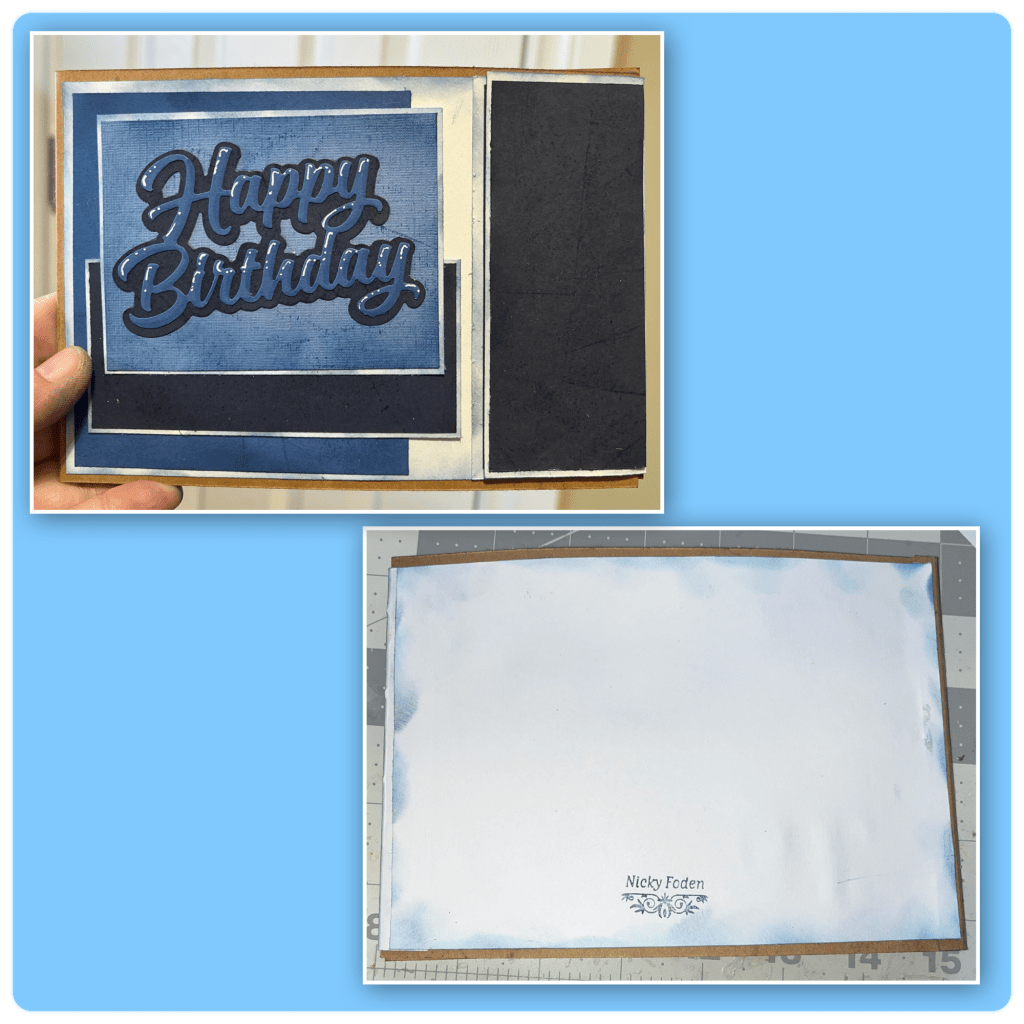
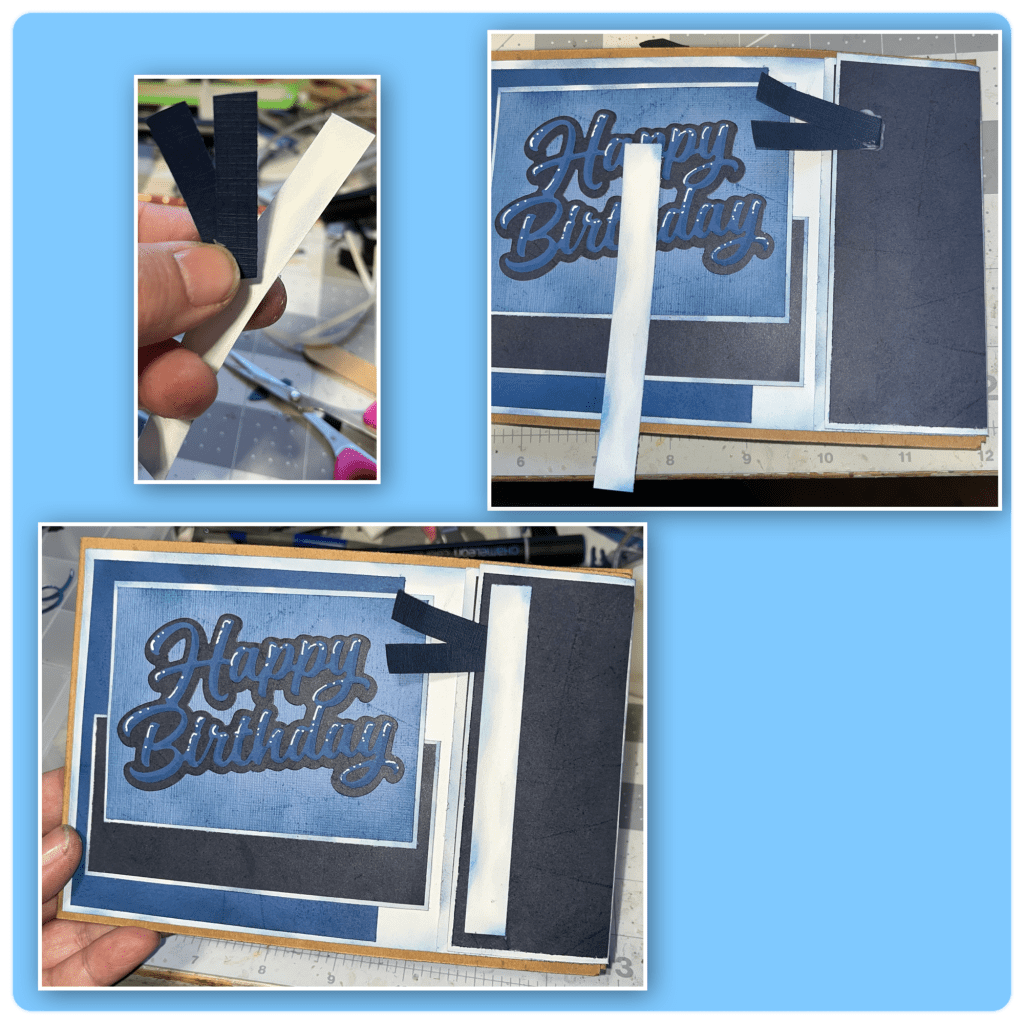
I really had random pieces of blue cardstock left so I matted them with white and added them to the card front, including the front of the flap. I cut Happy Birthday and Happy Birthday Shadow and added to the card front. I added I large white panel to the back to cover the backside of the flap closure.
I was having problems opening the flap so I cut a blue strip and a white strip. I folded the blue strip and added it as shown. Then covered with the white strip.
I added a square to the inside for a place to sign and I have added a pocket to the back so I can send a little cash as a gift.
Other Tools used
