
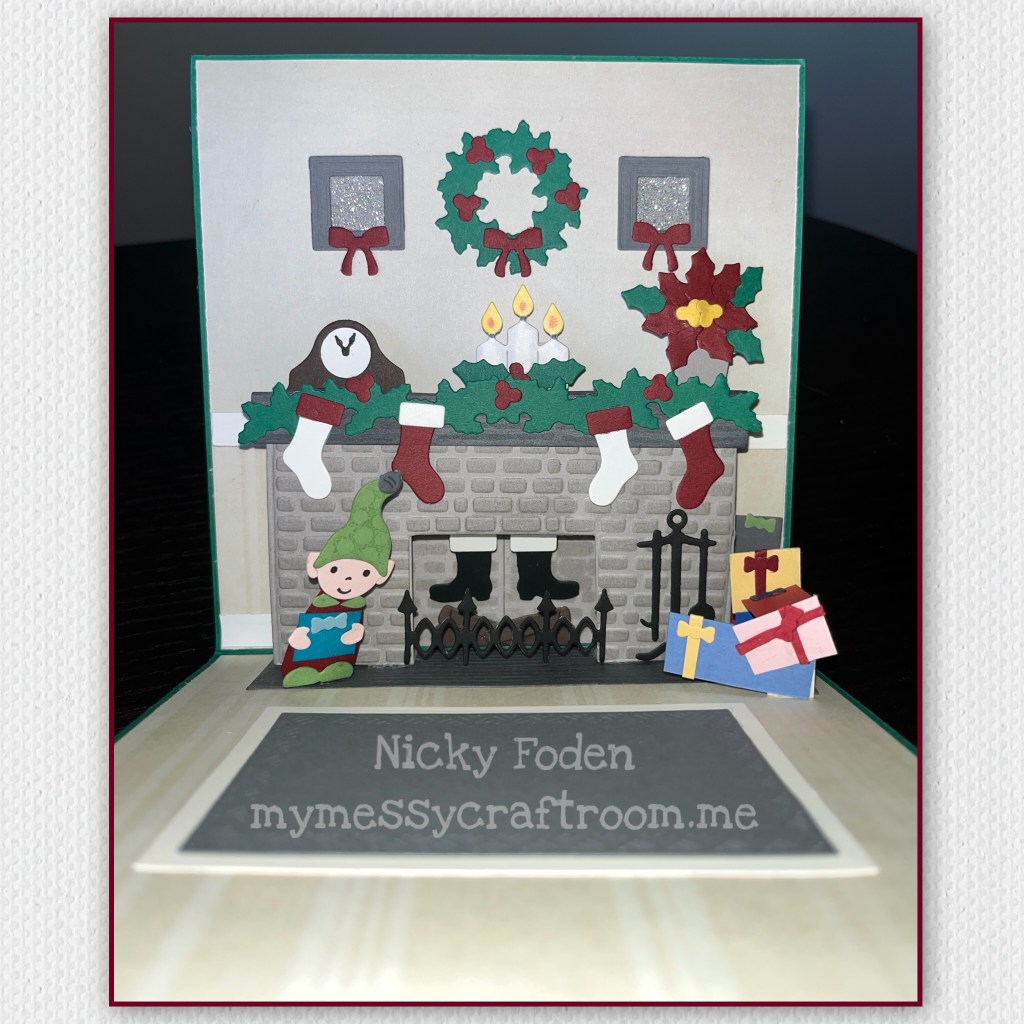
Today I have a Christmas card that I made using some more of Karen Burnistons NEW RELEASE. The main die set I used is the Fireplace Pop-up, and I also used the Fireplace Extras 1 (Christmas themed) and Fireplace Extras 2. There are so many pieces in these sets that the possibilities are endless as they can’t also mix and match with other prereleased sets. This is the card that I came up with.


All the fun is in the reveal, to see this card in action please check out my FACEBOOK page, feel free to join if you would like to share your own crafty creations. You can also see a video of this card on my INSTAGRAM page.
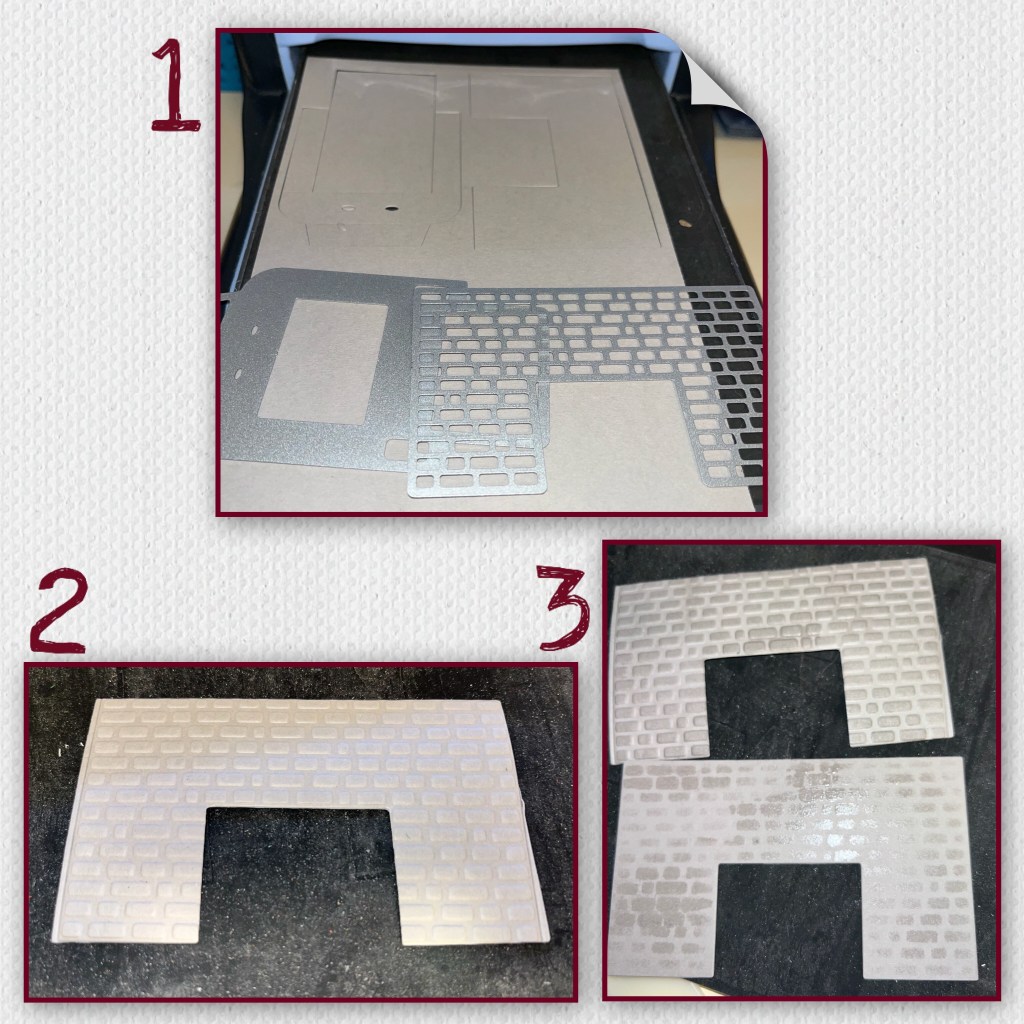
1- I chose a light grey cardstock for the fireplace and the mechanism, due cut them both. I die cut the fireplace twice.
2- I embossed one of the fireplaces using an embossing sandwich in my big shot. Use what ever options you have for embossing with your die cutting machine.
3- I used Versa Mark ink to the tops of the bricks on the embossed piece. On the piece that I did not embossed I places the fireplace die back over it and inked it with Versa Mark Ink
4- I cut the card base from Green cardstock, I cut it to 5 1/2” x 11” scored @ 5 1/2”
5- I picked a paper that I thought would look like wallpaper. I cut 2 of the patterned paper and one of the solid to 5 3/8” x 5 3/8”, and a stop of then patterned paper to 2” x 5 3/8”
6- I adhered a patterned paper to the bottom part of the card and the solid on the top
7- adhered the strip along the bottom of the solid piece on the top half.

8- I cut out 2 of the mantel pieces and added Versa Mark ink to them.
9- I took the fireplace piece that I did not emboss and trimmed as shown.
10- add one of the mantel pieces as shown, it is the hearth of the fireplace.
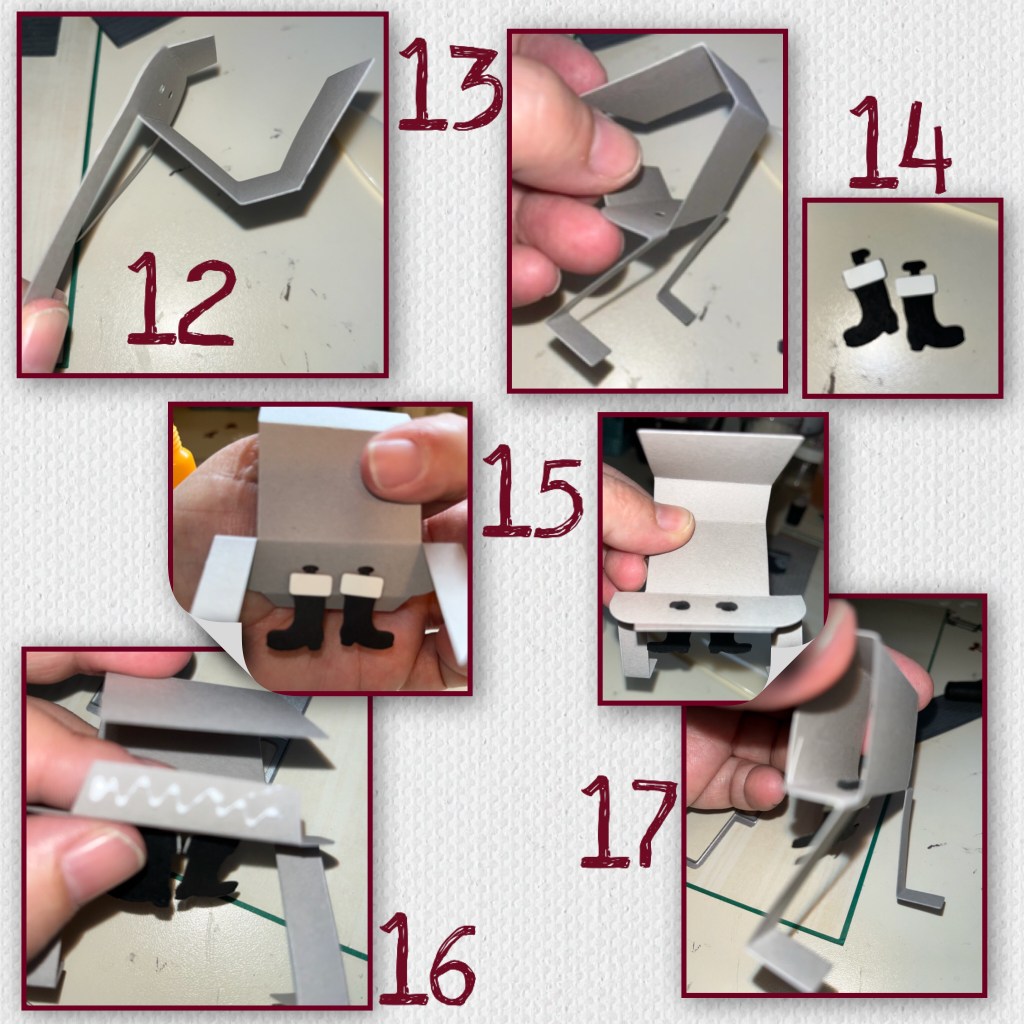
11- add the brick pieces to the card as shown. They are the back of the fireplace.

12- Fold the mechanism as shown. It should make a box with legs.
13- CORRECTION the feet are currently facing the wrong way.
14- assemble the boots, look closely and you will see I folded one of the tiny tabs on the top of boots. The boots will hook into a hole in the mechanism and then unfold the tab to keep them in place. It’s hard to tell in a photo but Santas boots wiggle
15- what it should look like on the front, and the back.
16- add glue to the tab to close up the box.
17- it should look like this EXCEPT the feet of the mechanism are still facing the wrong way.
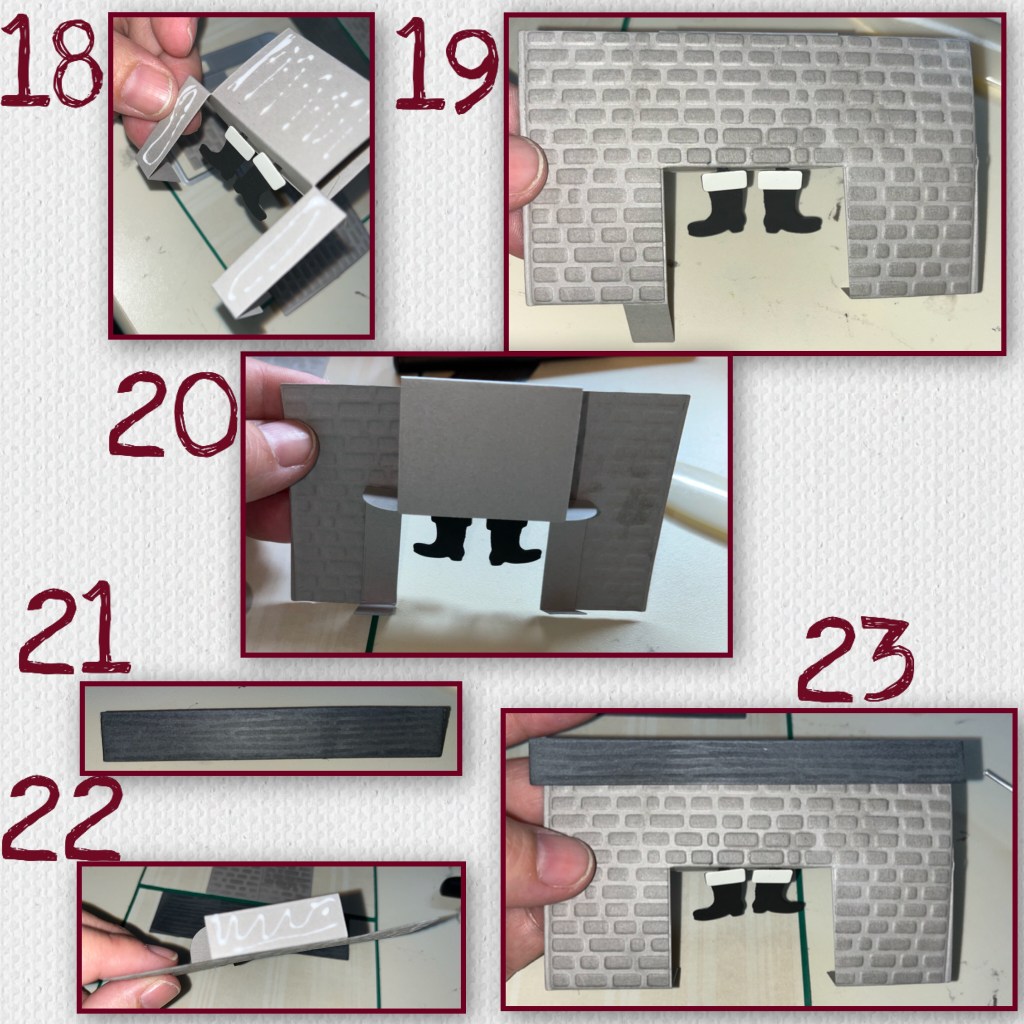
18- I finally flipped the feet the right way and I added adhesive to the front panel and legs
19- add the fireplace front to the machism, lining up the bottom and the legs.
20 -It should look like this from the back.
21- Take the second mantle, fold on score line
22- add adhesive to the top of the mechanism, add the mantel to it
23- it should look like this, I also added adhesive behind the
24- add adhesive to the feet
25- the feet will adhere to the hearth, lay the fire place face down, and make sure it is centered over the bricks on the wall.
26- while the fire place is still faced down, make sure the mantle is laying as shown and add adhesive. Close the card so the piece will stick to the back.
27- it should look like this.

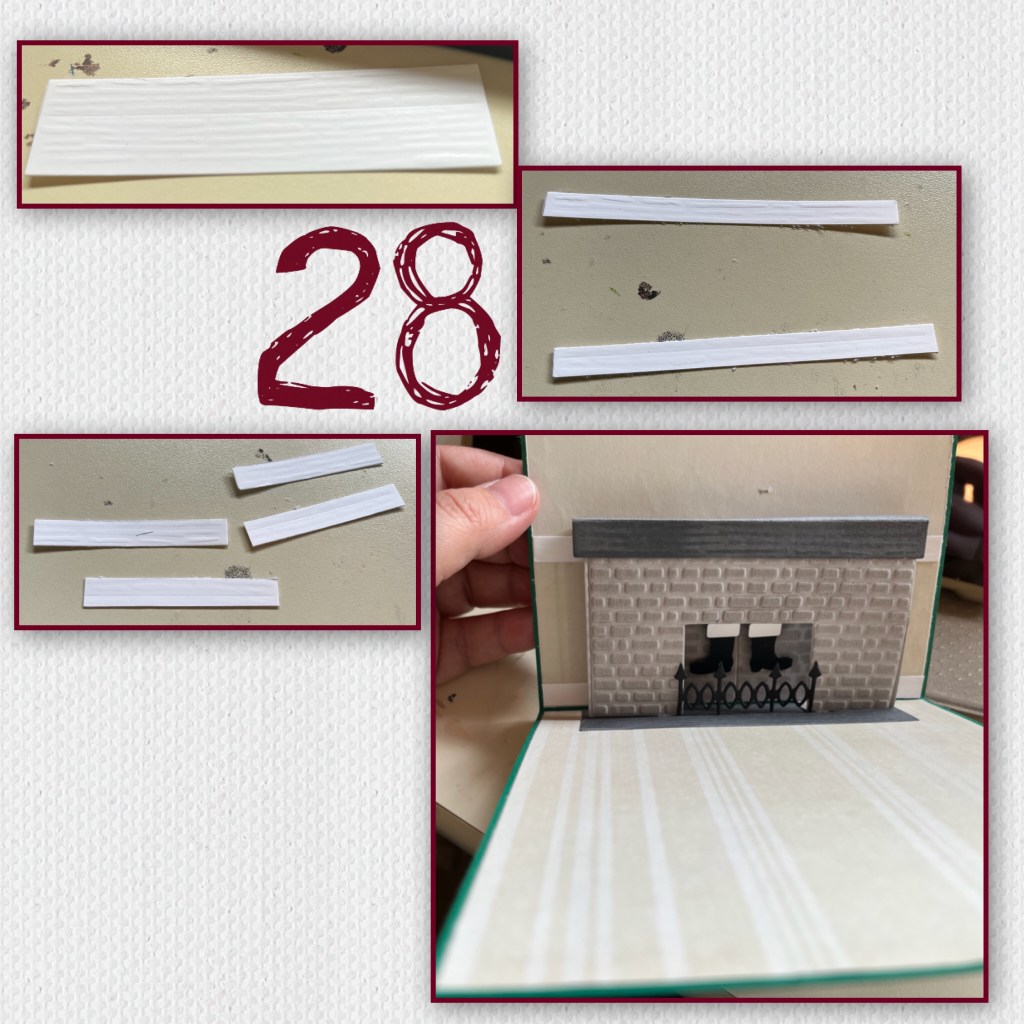
28- I cut and embossed the mantle out of white to make the baseboards, trim and add as shown.
29- I used the Tiny Gnomes set to make the elf. The little heart in the set makes great elf ears.
30- I diecut pieces to decorate from the three sets
31- The Fireplace pop up set also has a die to make a small box pop up, I added one on the top of the fireplace.
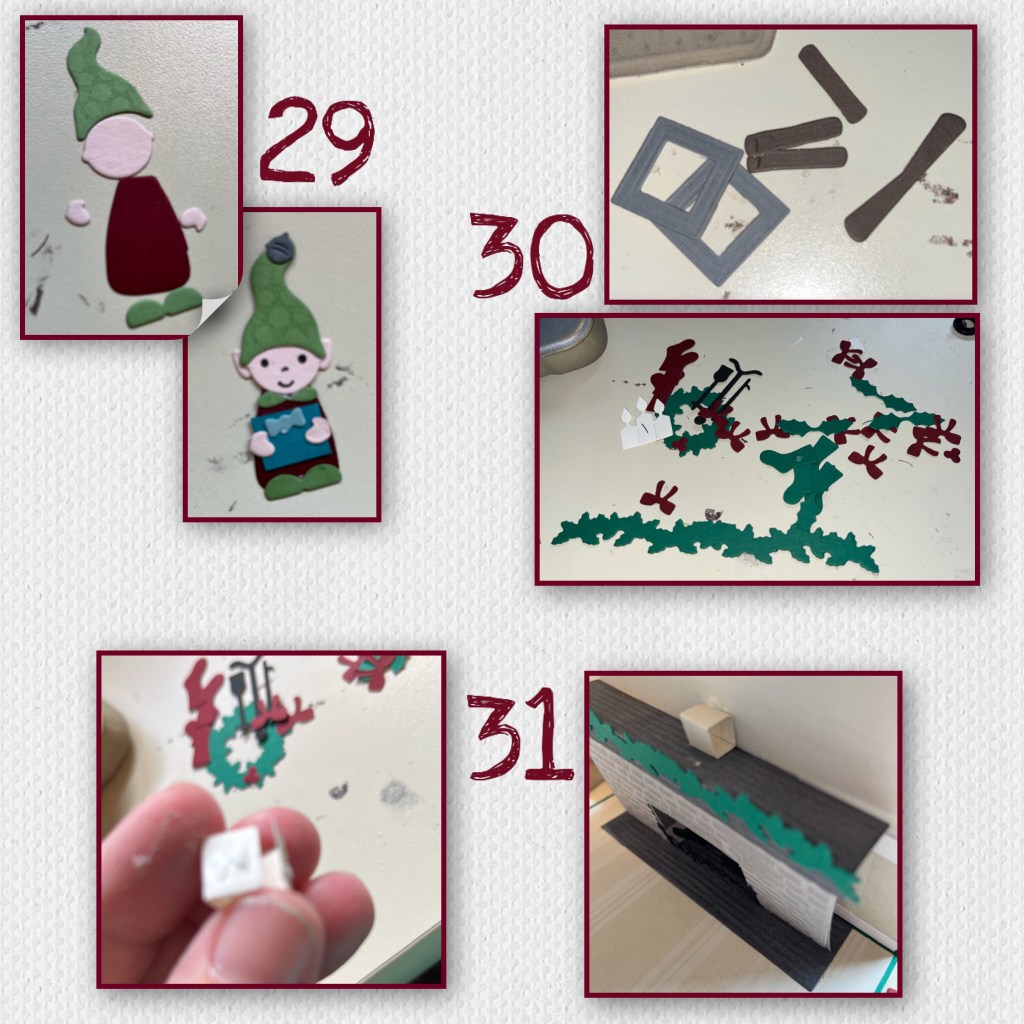
32- I cut out a pop up from the Mini Pops die set
33- add to the front of the fireplace
34- add the elf to the pop up. I also started adding some of the other decorations.
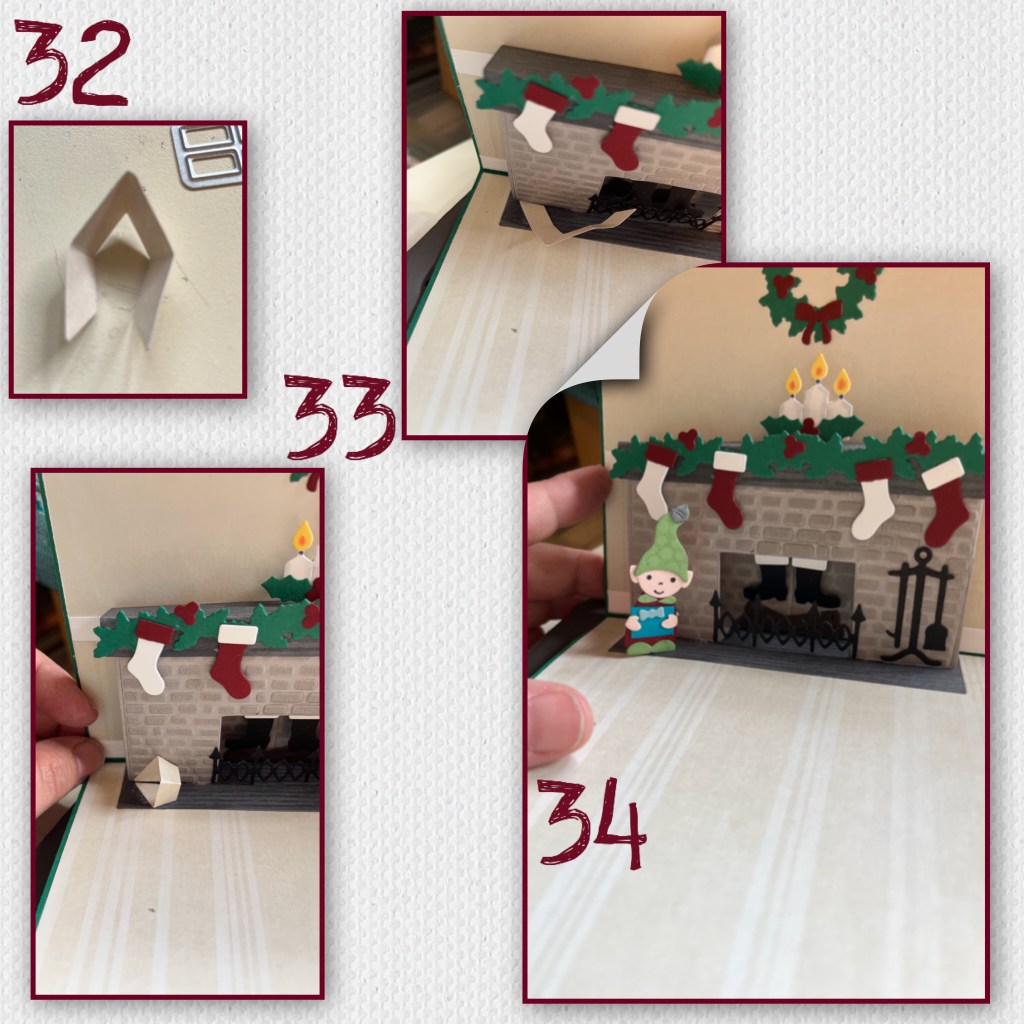
35- I wanted to add lots of presents but didn’t have the space, so I made a box pop up out of a strip of paper and added another piece from the Mini Pops set. I added the box to the floor and back of the card and the lots of pops to the box.
36- add the presents to the mechanism, it’s not shown but I added gifts to the tops, the insides and the bottom.

37- I diecut some of the holly leaves in green and red, and the berries in yellow
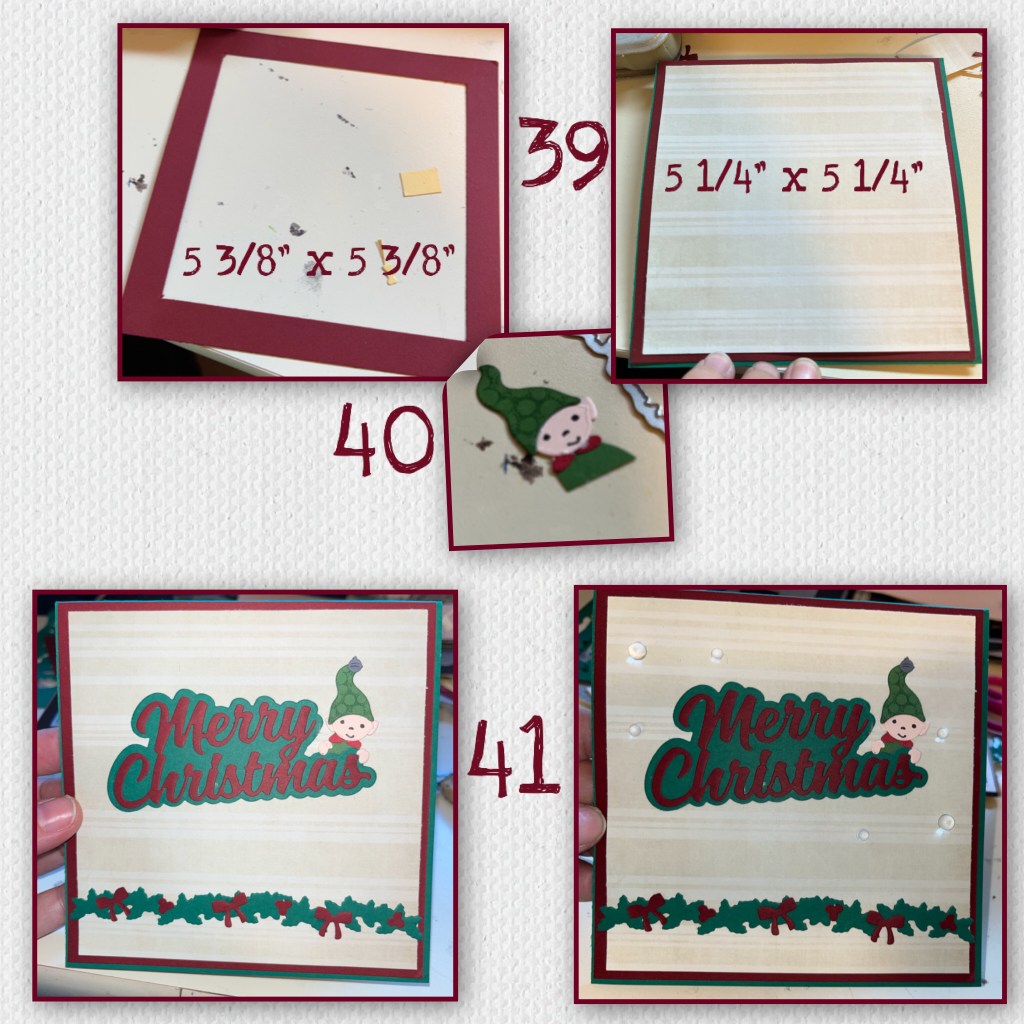
38- I used the little circle from the clock and added the leaves and berries to make a poinsettia and added it 2 the mantle. I also used 2 rectangles from the Rectangles crosshatch to make a rug

39- I cut a square to 5 3/8” x 5 3/8” from Red cardstock and cut the middle out. I took the last patterned square and trimmed it 5 1/4” x 5 1/4” and layered the 2 pieces to the front of the card.
40- I made 1/2 an elf
41- I diecut Merry Christmas from red and the Merry Christmas shadow from green, I added these pieces and some garland to the front. I added some bubbles to finish it off.

To see some other fun Christmas cards check these out
The Karen Burniston diesets used are

Wow, I love your fireplace! Did you say how long this took to make? Adorable!
LikeLiked by 1 person
Thanks, I don’t remember how long. The fireplace part wasn’t too long maybe 20 minutes. It’s all the extra little things that seem to eat up the time. Lol.
LikeLike
What a amazing card, and tutorial. I especially love how Santa’s boots wiggle. So fun! TFS! Kathy A at https://myasperations.blogspot.com/
LikeLike