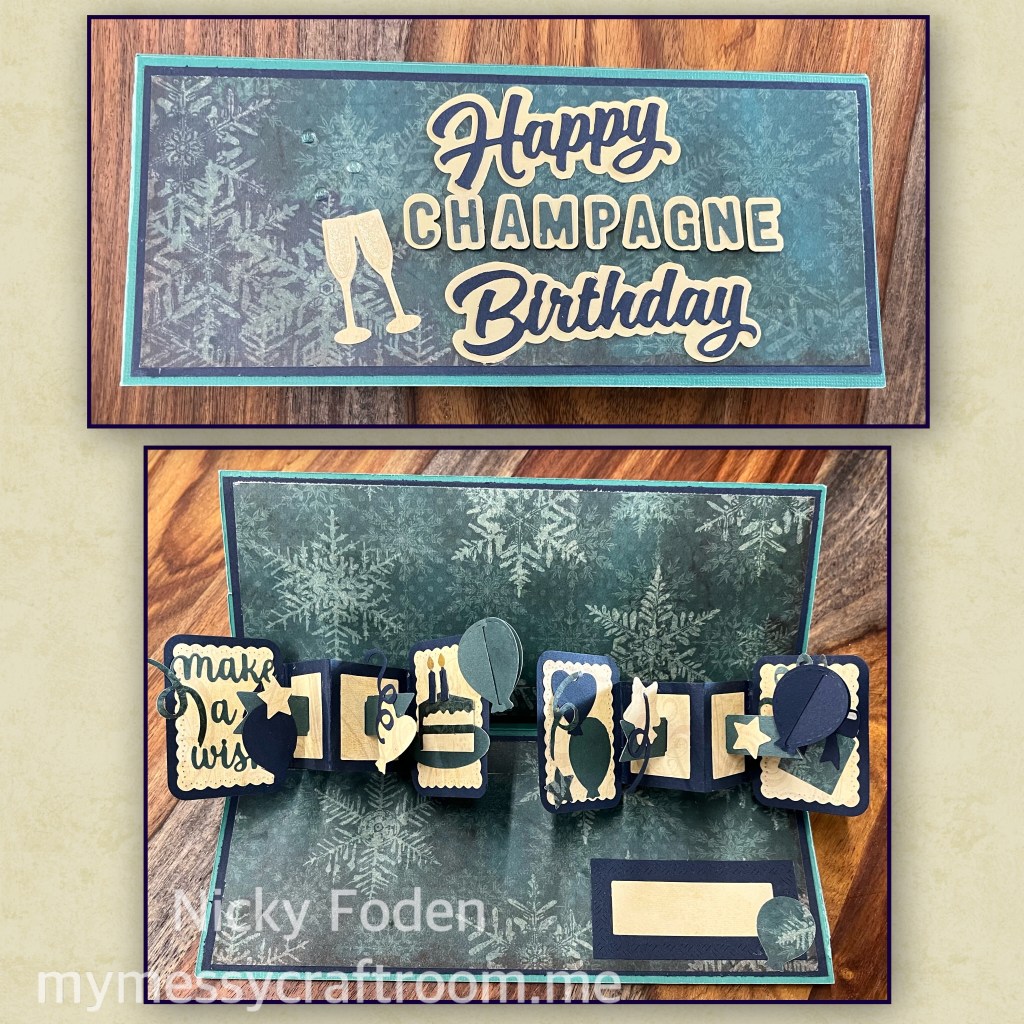
When I saw this paper I knew if I teamed it up with this die-set it would make a fun masculine birthday card, and I think I was right. I needed a birthday card for my son who was turning 24 on the 24th that’s what makes it a champagne 🥂 birthday (in case you were wondering what a champagne birthday is 🥂 🎂)

All the fun is in the reveal, to see this card in action please check out my FACEBOOK page, feel free to join if you would like to share your own crafty creations. You can also see a video of this card on my INSTAGRAM page.
For anyone who typically follows me you may notice that I will be making a few changes. I am trying to stream line my blogging a bit as I am finding it quite time-consuming. I have decided that since the majority of my cards, I use die sets from Karen Burnkston. Karen makes amazing videos, so if she has a video that explains the assembly of her mechanism or other dies I will link it. I will still give dimensions and helpful hints, and will definitely still explain any changes I make or other important info. The links I share are to her product page for that item, scroll down the page and she has video directions. Because of these changes I will add the links as I work my way through the post instead of at the end. So there in no mix up on what dies I used for each steps.
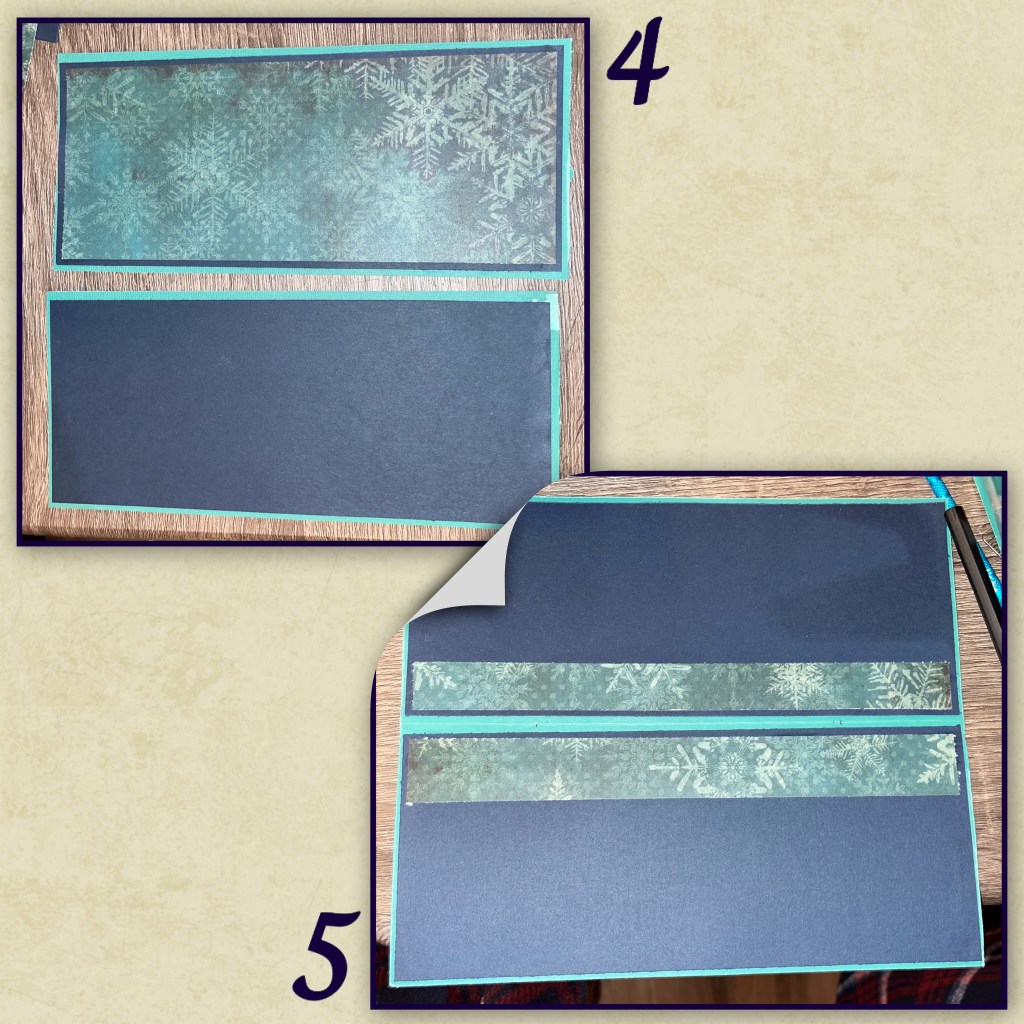
1- cut out the card base and panels as show. I originally was going to make a different card and was going to attach the card base panels end to end, then changed my mind. So don’t pay attention to the score line visible in the photo. The navy pieces are actually X 4, the pattered paper is actually X 3
2- because I cut the card base into 2 panels I had to cut this piece to attach the 2 pieces together
3- I attached the 2 pieces together from the inside.

Sorry the photos are a bit out of order, photo 4 was taken before I attached the card base panels together
4- attach the layers to the front as shown, I used 2 blue and one of the patterned paper
5- added 2 strips of the patterned paper 8 1/4” X about 2”
6- I diecut the pieces from the Little Twist Label die set from Navy and added them to the card base (there is an assembly video for this dieset at the this link)
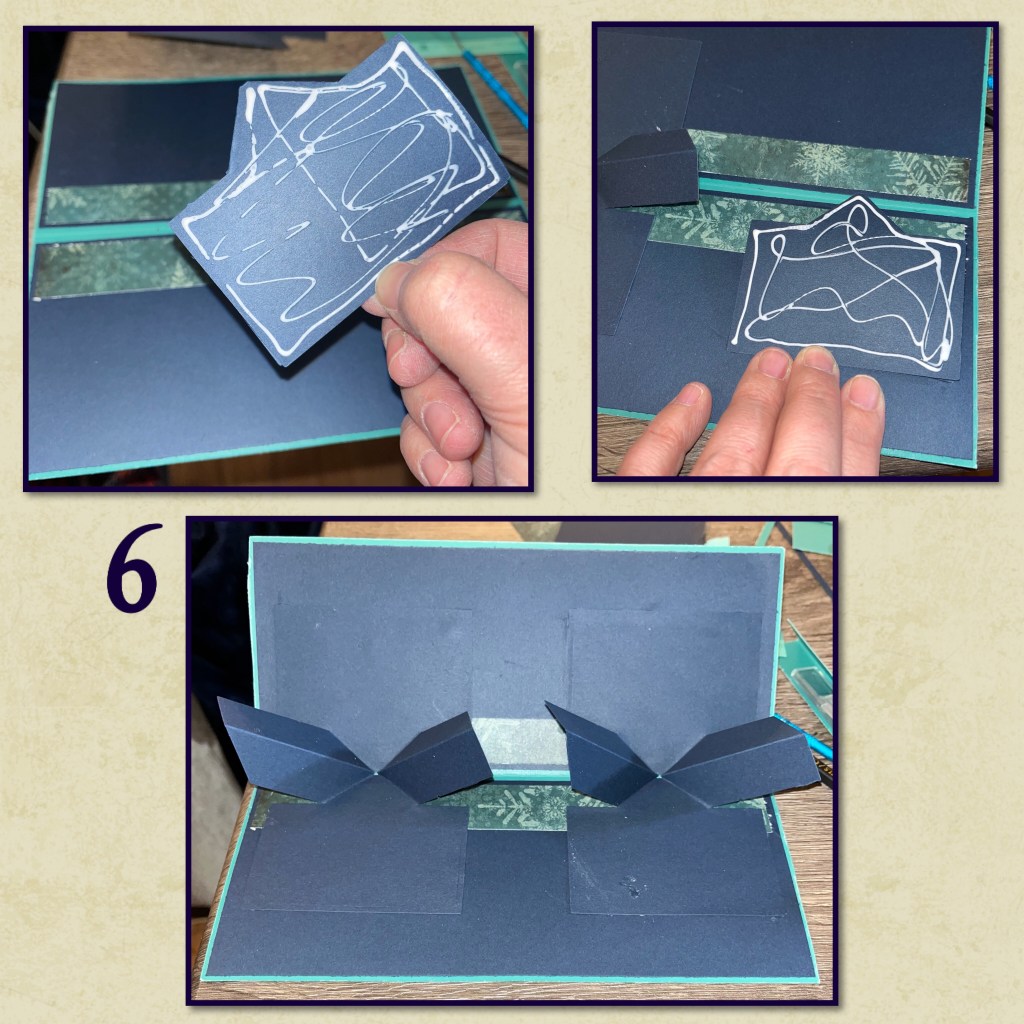
7- because of the mechanism the patterned panels did not fit so I had to trim them so they will fit. I lined them up in the card and marked where they needed trimming.

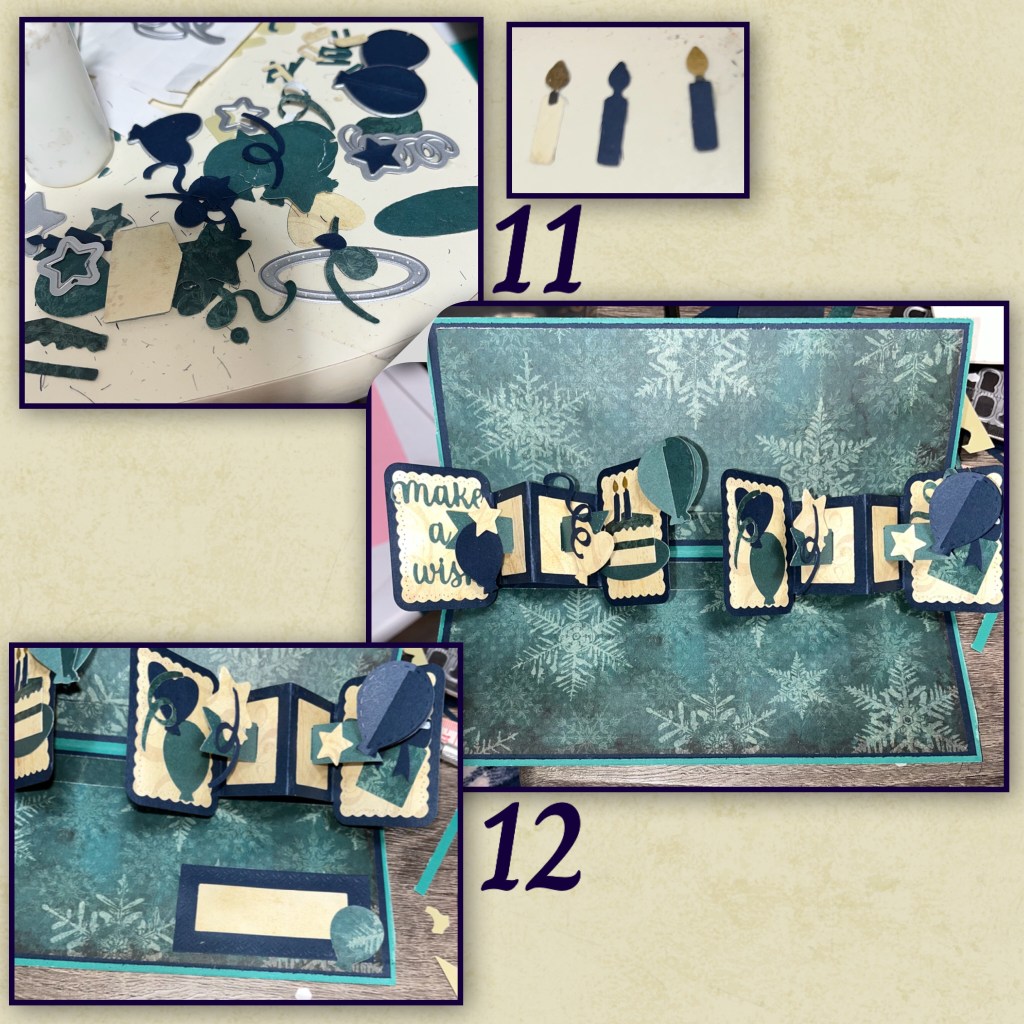
8- I diecut the panel pieces from the Little Twist Panel and assembled. Some of the papers are double sided.

9- add the panels to the mechanism

10- I had to do a little word surgery to get the greeting that I wanted. I wanted Happy Birthday to be separated and I wanted a shadow around the words I had to cut them separately making sure that a small section of the other word is still there so I can trim around it. I cut the word “Champagne” with the letters from the Mini Alphabet and Numbers

11- I die cut pieces from the Big Birthday Charms and the Balloon Collage add on, and the “Make a Wish” is from Word set 2 Birthday . The message block in the bottom corner is from the Rectangles and Labels Crosshatch
13- the champagne glasses are from the Wedding Charms, I coloured them in with a Wink of Stella. The little bubbles are clear half back bubbles. They look white in photo because of the glue.