

This was almost the card I was going to post for last weeks designer challenge as the theme was Halloweenor or Fall but I decided that Inwanted to be different than the rest and go with fall. Back in July Karen Burniston made a card using the Spinner Square dieset, where she used it THREE TIMES on one card, to make a “Triple Square Spinner Card”. I absolutely love when she teaches new ways to use dies that I already have. But anyone who knows me knows that I challenge myself to find a way to put my own spin (yes the pun was intended) on it, so instead of squares I decided to make a giant Haunted Mansion. This is what I came up with.

With this technique not only does the haunted mansion pop up but the bats, and the “boo” swing from left to right, and the ghost swings from right to left. To see this card in action please check out my FACEBOOK page, feel free to join if you would like to share your own crafty creations. You can also see a video of this card on my INSTAGRAM page.
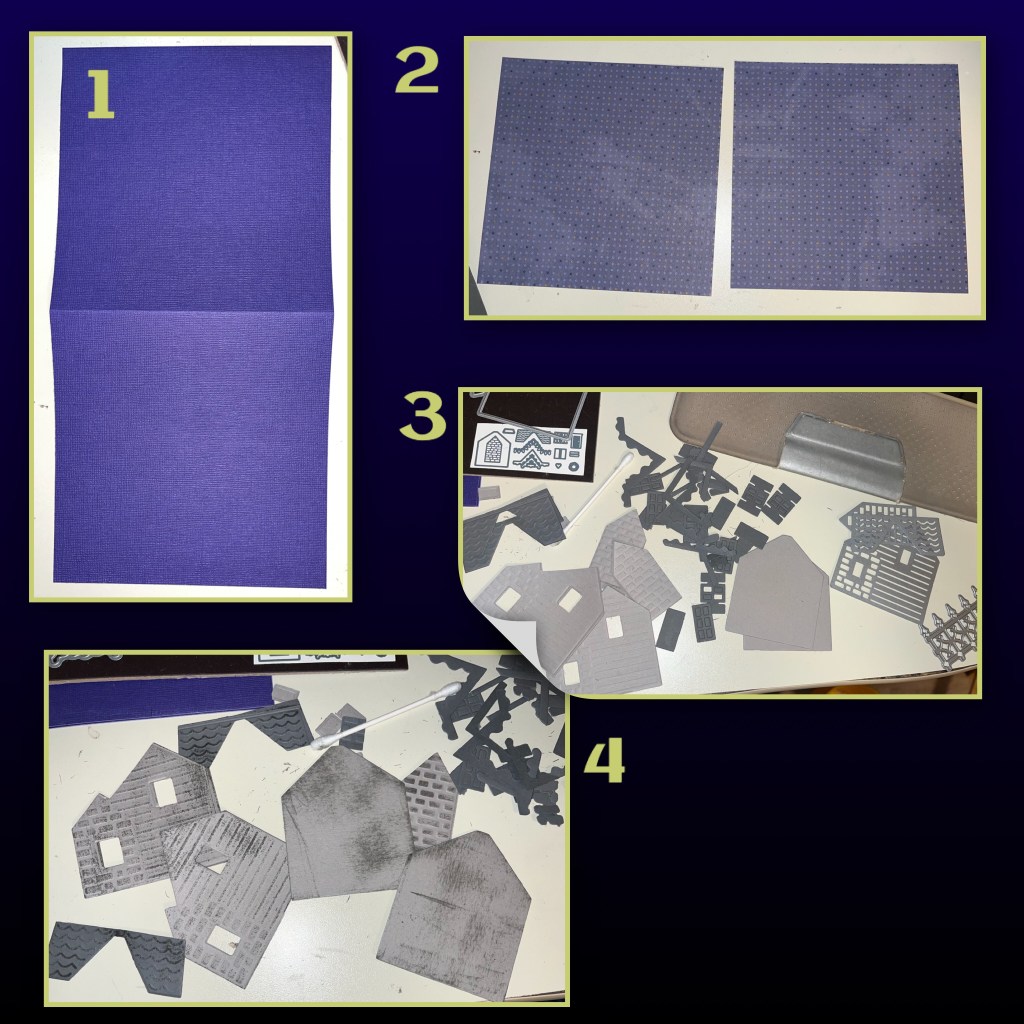
I went stash diving for paper, most of the cardstock is from Stampin up but the patterned paper I’ve had for years.
1- cut a 6” x 12” piece of purple Core Color cardstock, score @ 6” to make a 6” x 6” card
2- cut 3 pieces of purple patterned paper to 5 3/4” x 5 3/4” (only 2 shown)
3- die cut pieces from the Holiday House and the House and Fence pop up die sets. I used different shades of grey.
4- I also used the embossed heated on the dies, then I used grey ink to distress the pieces. I also ripped a couple of the larger house pieceses (not shown in the photo)
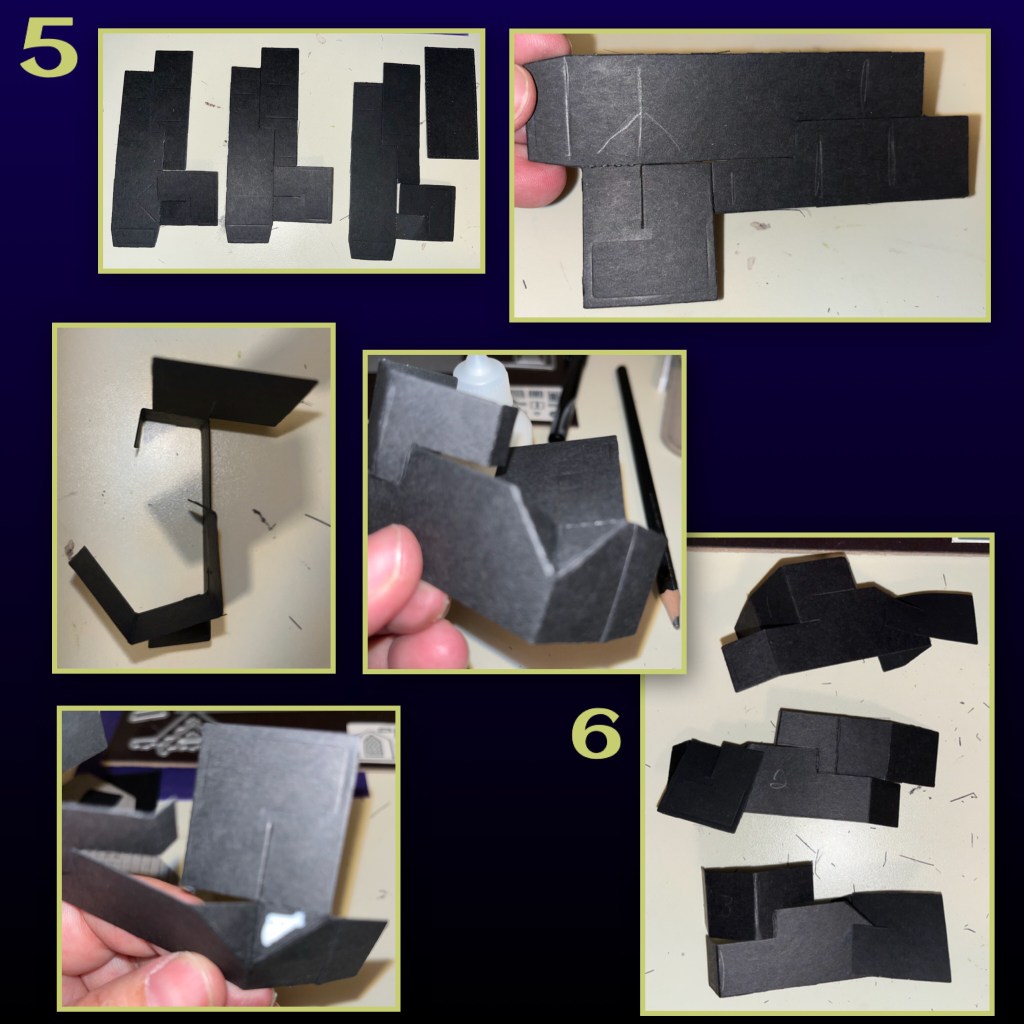
When it comes to assembling the mechanisms I recommend watching Karens video. I have photos to show some of the processes but she explains it better. Product links are at the bottom of this post and there video links on the product pages
5- cut 3 mechanism pieces and assemble. Assemble 2 properly, assemble one in reverse.
6- mechanism 1 & 3 have the spinning part on the right, spinner 2 will have the spinner on the left
7- oops apparently no missed 7
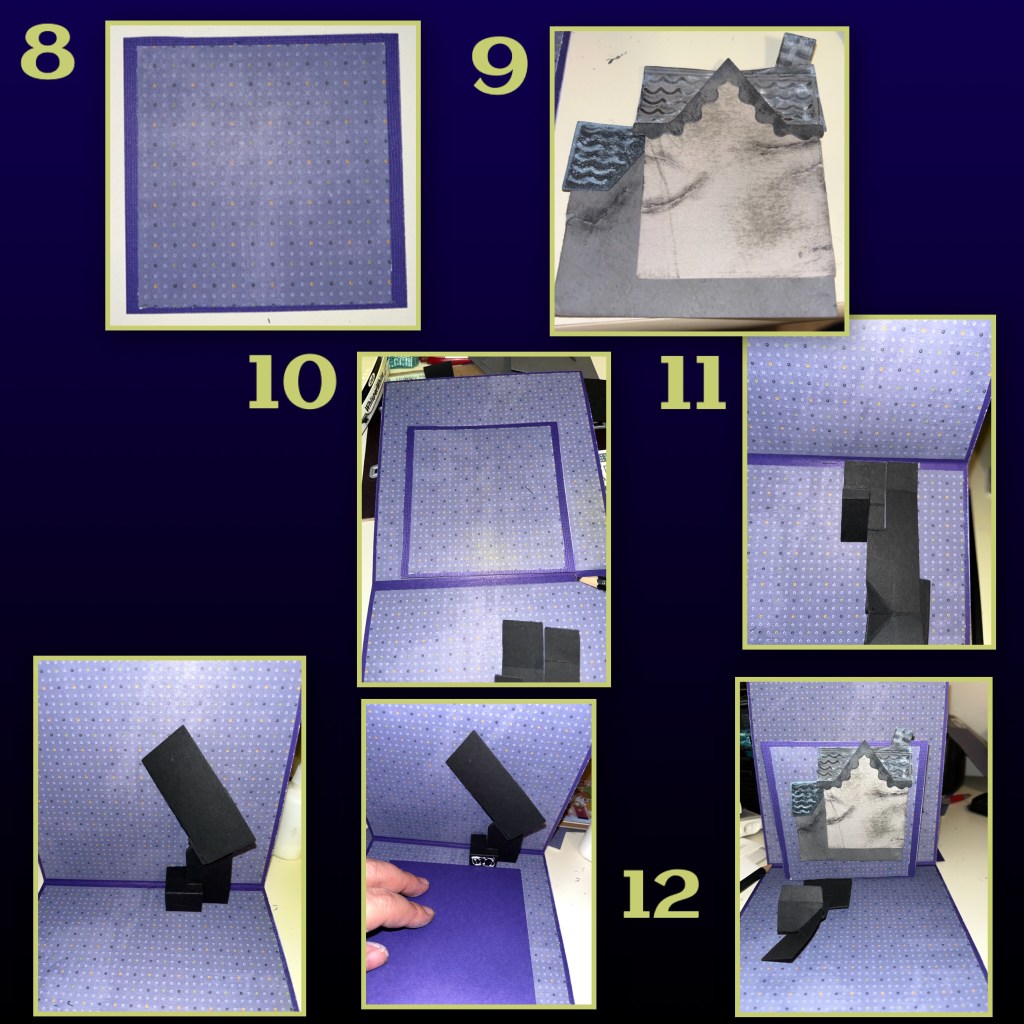
8- cut purple cardstock to a 4 1/4” x 4 1/4”, cut the purple pattern paper to 4” x 4” adhere together
9- assemble some of the house pieces. You can see where I ripped the cardstock to look like cracks in the concrete.
10- I laid the square down to make sure I had it centered, and mark with a pencil
11- add the mechanism to the card
12-add the square/house to the mechanism, this photo also shows the second mechanism about to be adhered to the left side.
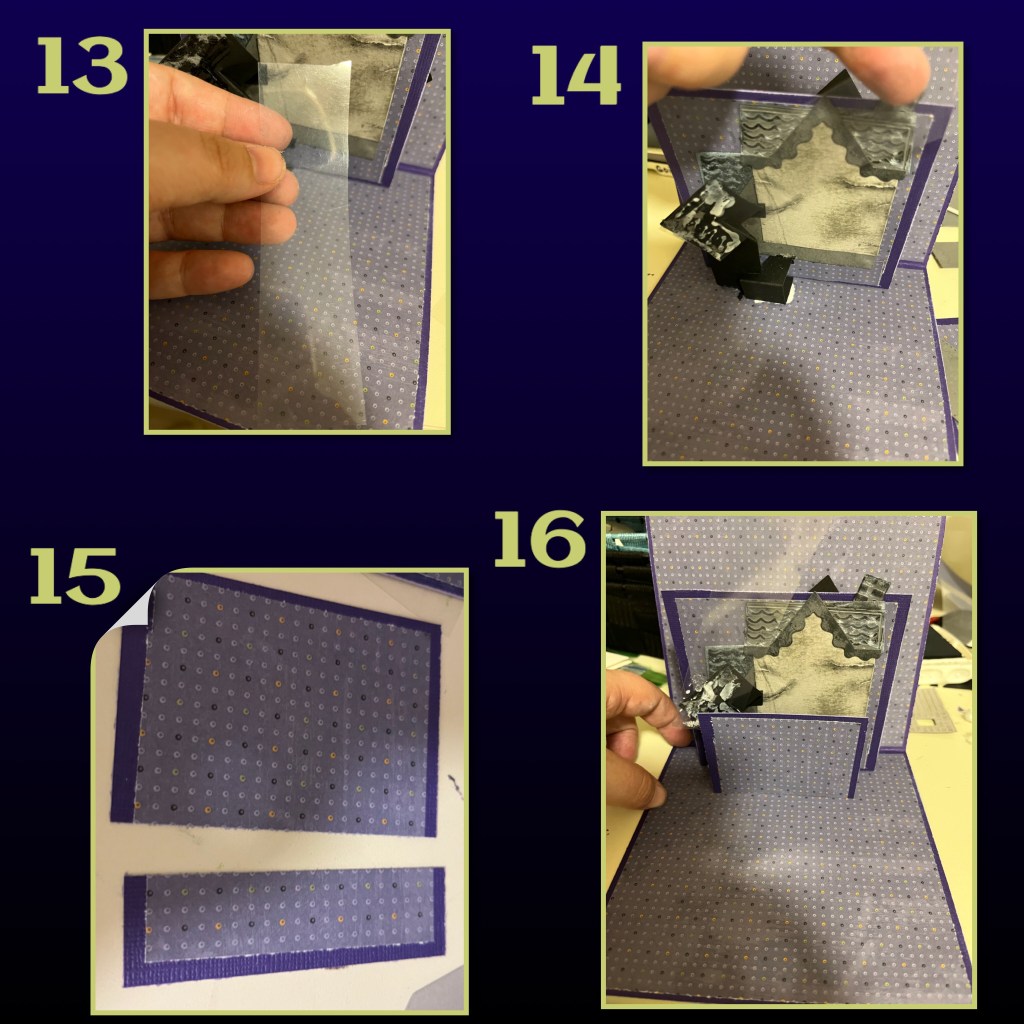
13- 14- cut a strip of acetate and add it to the mechanism
15- I had a 3” x 3” purple square with a 2 3/4” x 2 3/4” patterned paper ready to add, but felt it would cover too much of the house. So I cut it down to 2 1/4” high
16- add to the front of the second mechanism
17- The house wasn’t going to be tall enough so I decided to add a rectangle along the bottom, to look like foundation.
18- add some more of the house pieces, I started adding windows and shutters, I put yellow card stock behind the windows but drew on little cracks. I also sponged around the yellow with grey, to make it look dimly lit as opposed to the bright yellow. I drew a little head in the top window.
18- add the third mechanism to the right side of the house
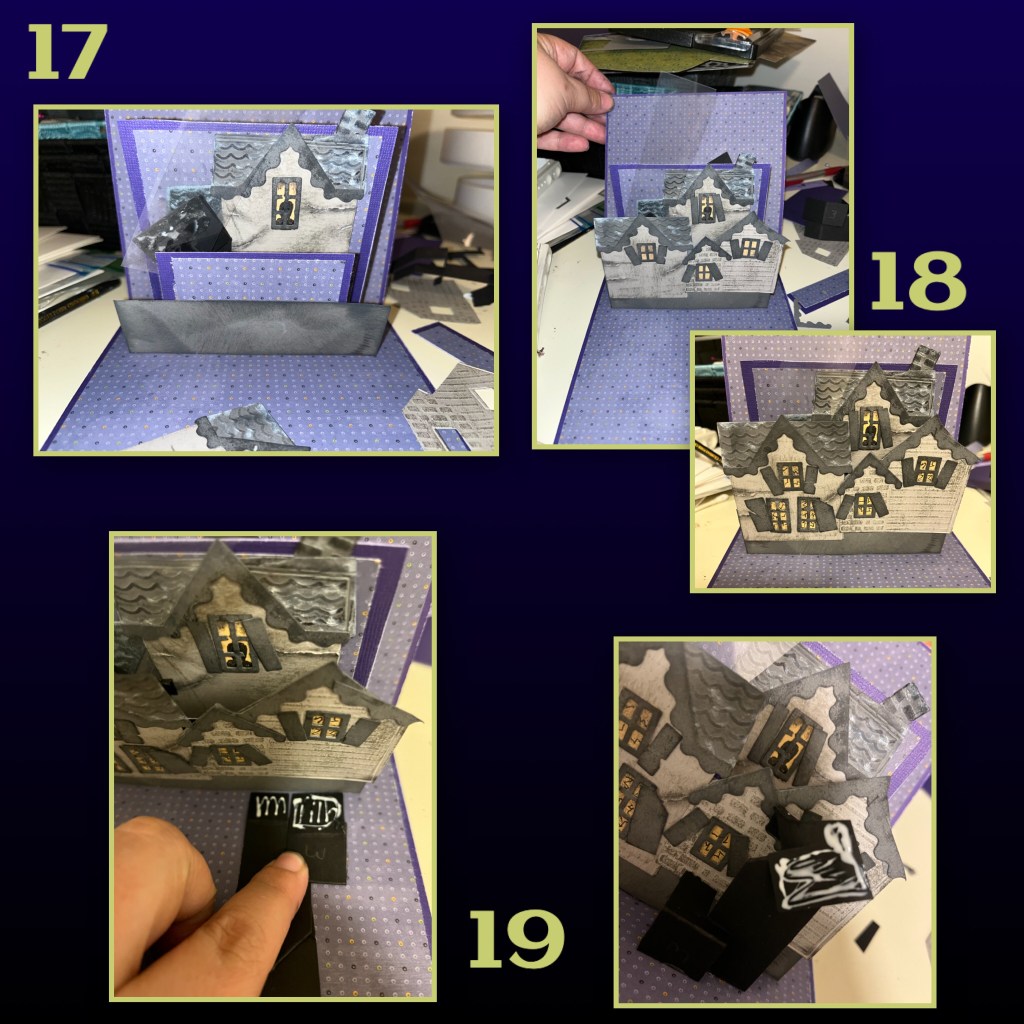
20- the last mechanism is ready for the front of the house
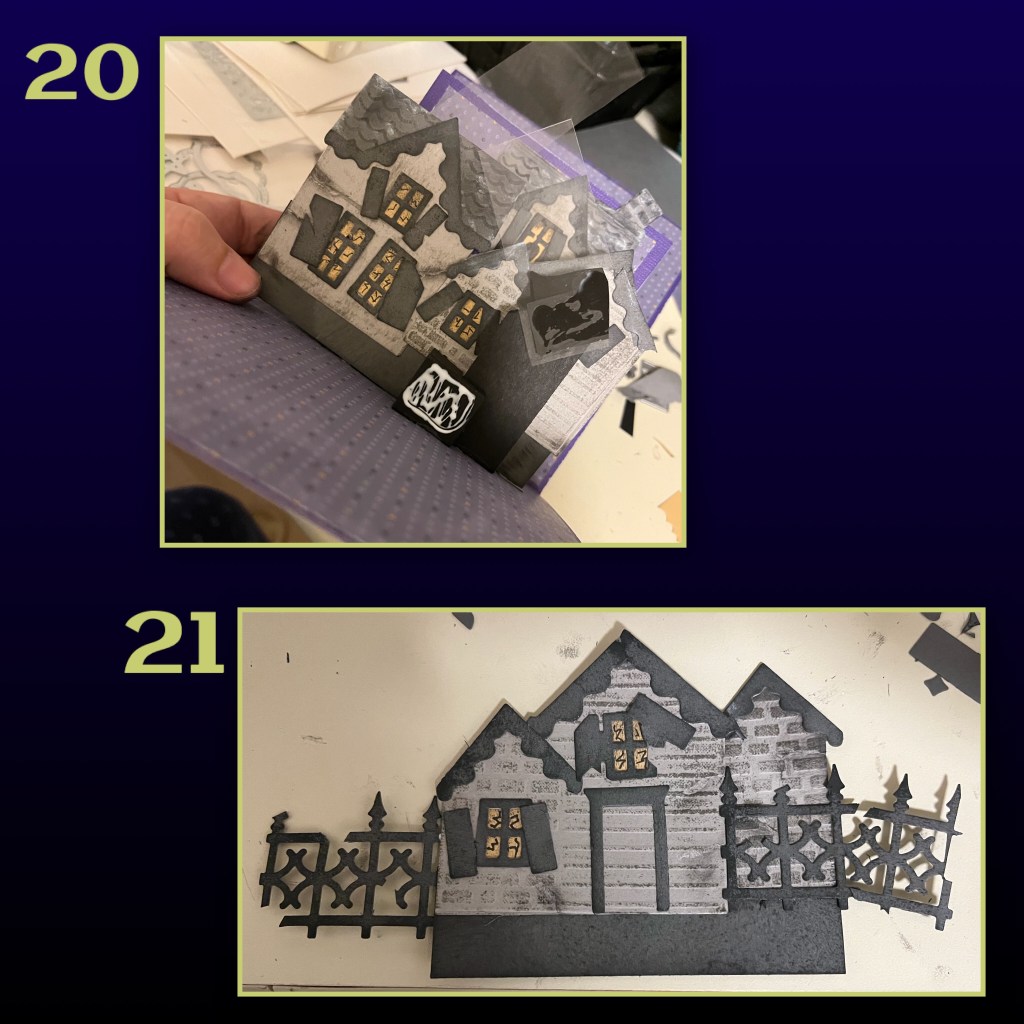
21- assemble the front of the house, I also added the fence from the House and Fence pop up. And add to the mechanism
22- diecut the Bats Slim Pattern plate
23- cut another strip of acetate
24- I cut off the black arm that I originally had on the first mechanism (the back mechanism, and added the acetate arm.
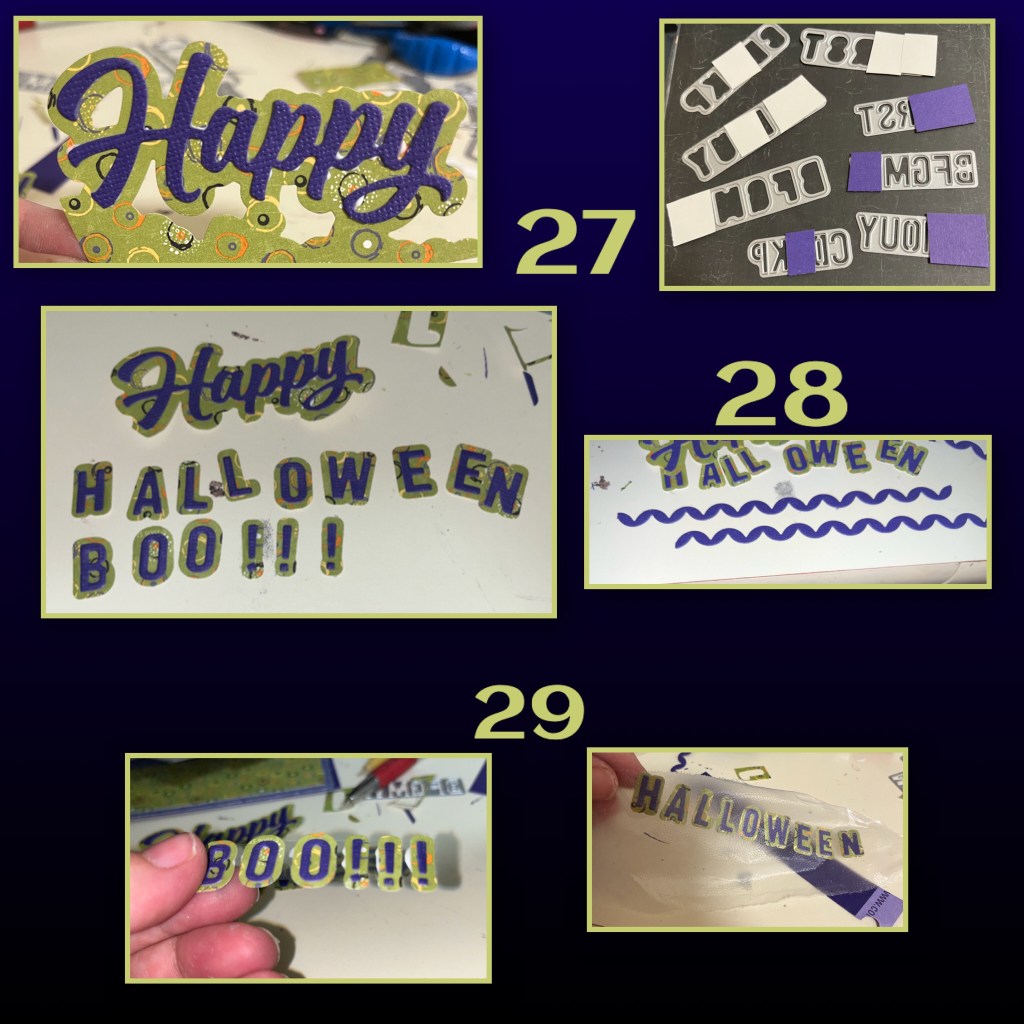
25- I cut off a section of the bats, adhered it to some acetate and trimmed the acetate around the bats
26- add the bats to the acetate arm, they should dip in behind the house when the card is closed and come up from behind the house as you open the card.

27- I die cut “Happy” from the purple cardstock using the Happy Birthday die, and the “Happy Shadow” from Green patterned paper using the Happy Birthday shadow die. And trimmed it out. I die cut the words Halloween and Boo!!! using the Mini Alphabet and Numbers die set, in the same colours.
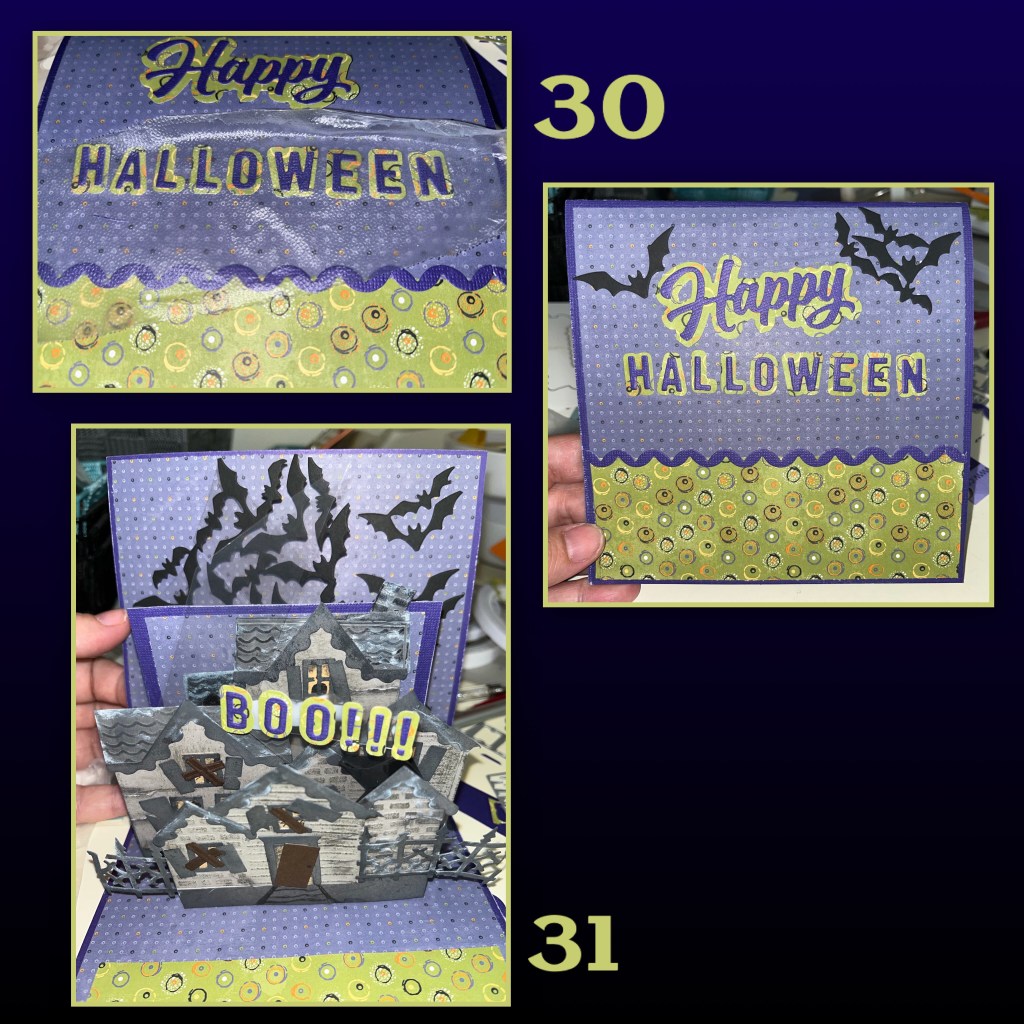
28- I also diecut a few borders from the Border Blends trims set
29- I attached Boo!!! to a piece of acetate, and I laid out the word Halloween on to a piece of Press and Seal so I can make sure they are even then added adhesive to the back.
30- I added a strip of the green patterned paper to the bottom of the card front, then the border, the words, and a few bats.
31- I added the word Boo!!! To the third arm (the front arm) it will swing from left to right. I also added boards from the Holiday house to board up the windows, and I added the door. I also added a few bats to the upper right corner.
32- I hand drew the ghost, cut it out and outlined it with a black marker.
33- I diecut the clouds from the Castle Pop up, in grey and green. The grey I kept as clouds, the green I used as bushes for the front of the house.
34- I diecut the little box pop from the Fire Place pop up. And the little cat from the Skeleton and Bat dieset, cat can be seen in the next photo.
35- I die cut a yellow circle for the moon, and added all the diecut pieces. I drew in stairs in front of the door

36- I wanted to use a Crosshatch rectangle for the writing block but it didn’t fit. So I diecut the yellow rectangle which is 2 3/4” x 1 1/2”, laid it over the purple rectangle and trimmed off the excess purple cardstock.
37- I took the purple strips that I just cut off and added them to what was left of the purple rectangle, to finish the Crosshatch pattern.
38- add the yellow rectangle
39- add to the card, I also added some bats.

Here are some close up photos

To see some other card using the Spinner Square Mechanism check these out.
Karen Burniston products used are
Happy Birthday the word “Happy”
Happy Birthday Shadow the “Happy” shadow
Skeleton and Bat the cat
Castle Pop up clouds
Dies that would have made this card a little easier
Squares Crosshatch square to attach to the mechanism
Halloween Elements ghost
Halloween Charms ghost

Stunning design and your colours and design is fabulous
LikeLiked by 1 person
I cannot wait til nexr month to try this/thank you for actual plans and not needing special dies to cut- THIS is how we usexd to makle cards
LikeLike