
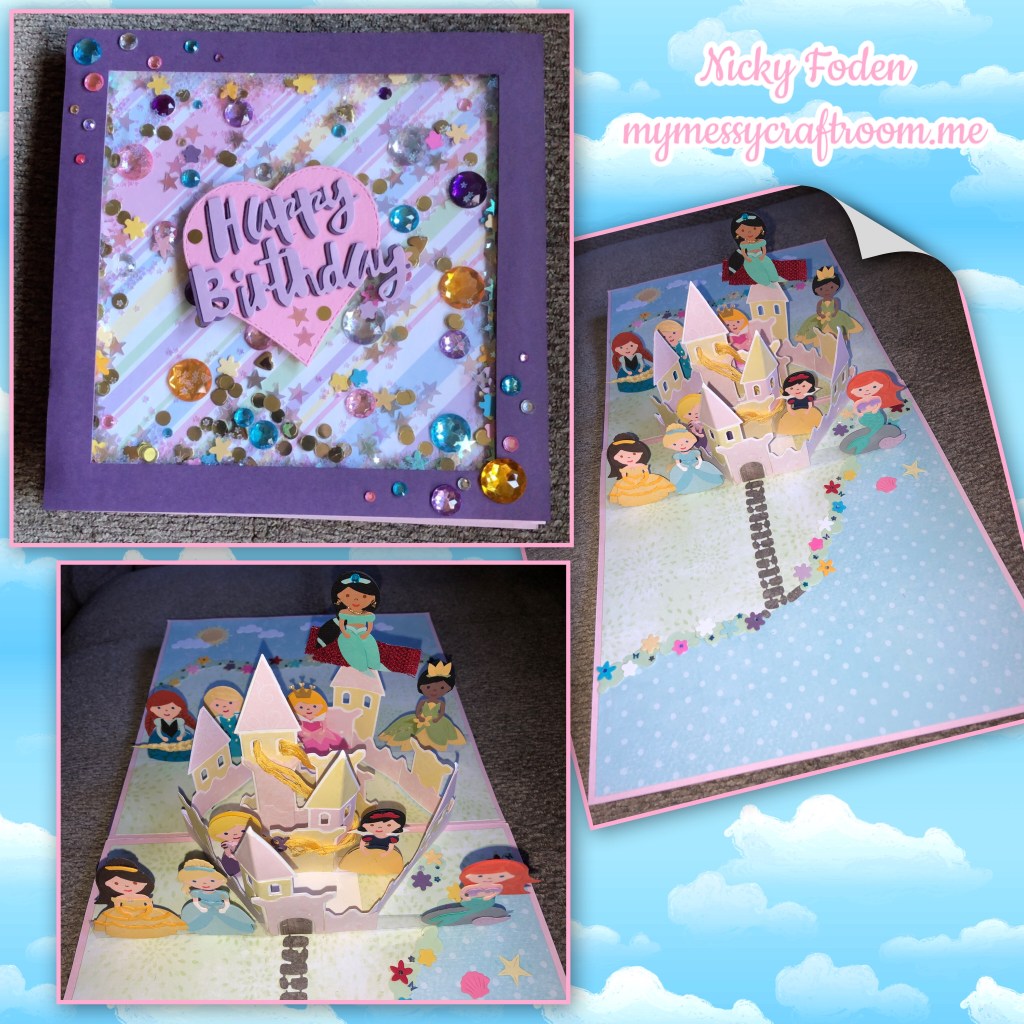
*Wow, things have been pretty hectic lately and I wasn’t able to complete a card for this weeks Crazy4Challenges challenge. I have a few cards that I have made that I hadn’t posted yet and this is one of them. A friend of mine needed a fun card for a special little girl in her life who was having her 5th birthday and this is what I came up with.

All the fun is in the reveal, to see this card in action please check out my FACEBOOK page, feel free to join if you would like to share your own crafty creations. You can also see a video of this card on my INSTAGRAM page.
This weeks Crazy4Challenges challenge was to make a card with a gnome, if you would like to see the beautiful cards by the very talented design team please check this out C4C blog
Ok so usually I post the colours that I used but I used Sooooo many colours on this card I decided that I won’t this time as most of the colours I pulled from my scrap bin, they are all from Stampin Up. The patterned papers are from my stash. I believe they are from Costco.
The dies are from Karen Burnistons collection and I will post them as I go.
I have made a double ringed castle in the past so I will link to it HERE there are more pictures and much better details that I didn’t repeat here so if you want to make this style I recommend checking it out as I use different score lines for the outer ring than how it would normally be assembled.
I started with the Castle Pop up die set and I cut out 3 castles, and a few castle sections. The main deference in assembling this card from my last card is I wanted the princesses to be able to be attached all around so I attached acetate strips.


When I made the inner ring I folded it backwards so the towers would be spaced out better once the card is finished. I also added a acetate strip to the front of the inner ring. I did have to trim it to fit inside the castle.


Now for the cardbase.


I didn’t mention, attach the inside wall with the tower
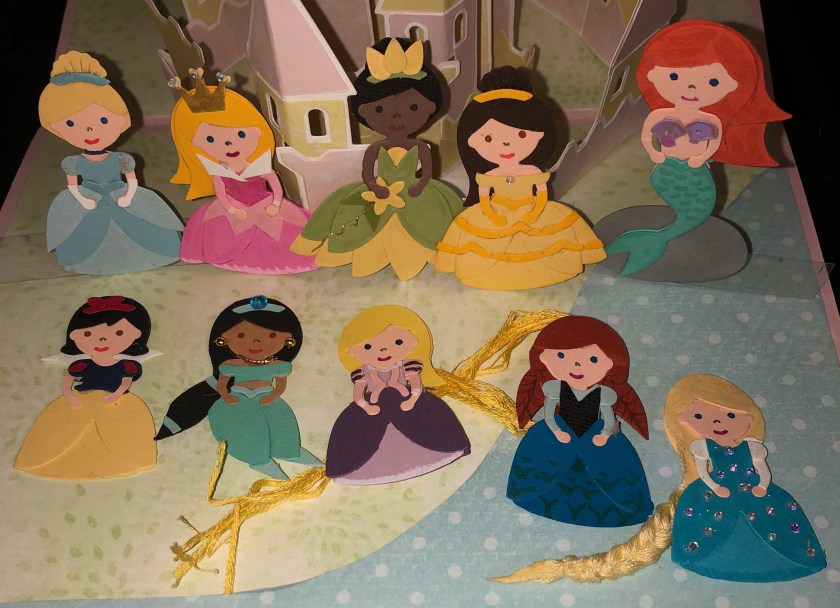
Here come the Princesses. I used the Princess and Mermaid dieset. I tried to stick with the one dieset as much as I could and I got creative with the snipping and adding of pieces. For instance the poofy hair on Cinderella, Belle and Tiana is the sea shell, the headband on several of them is actually the waistband die. The hair on Rapunzel and Elsa is embroidery floss. The details on Belles dress is actually made up of the 2 different waistbands in the set. I added Wink of Stella to most of the dresses to add a little sparkle.


I actually decorate the backs of the princesses as well and I attached them to the acetate strips by sandwhiching the acetate between the front and the back of the dress.

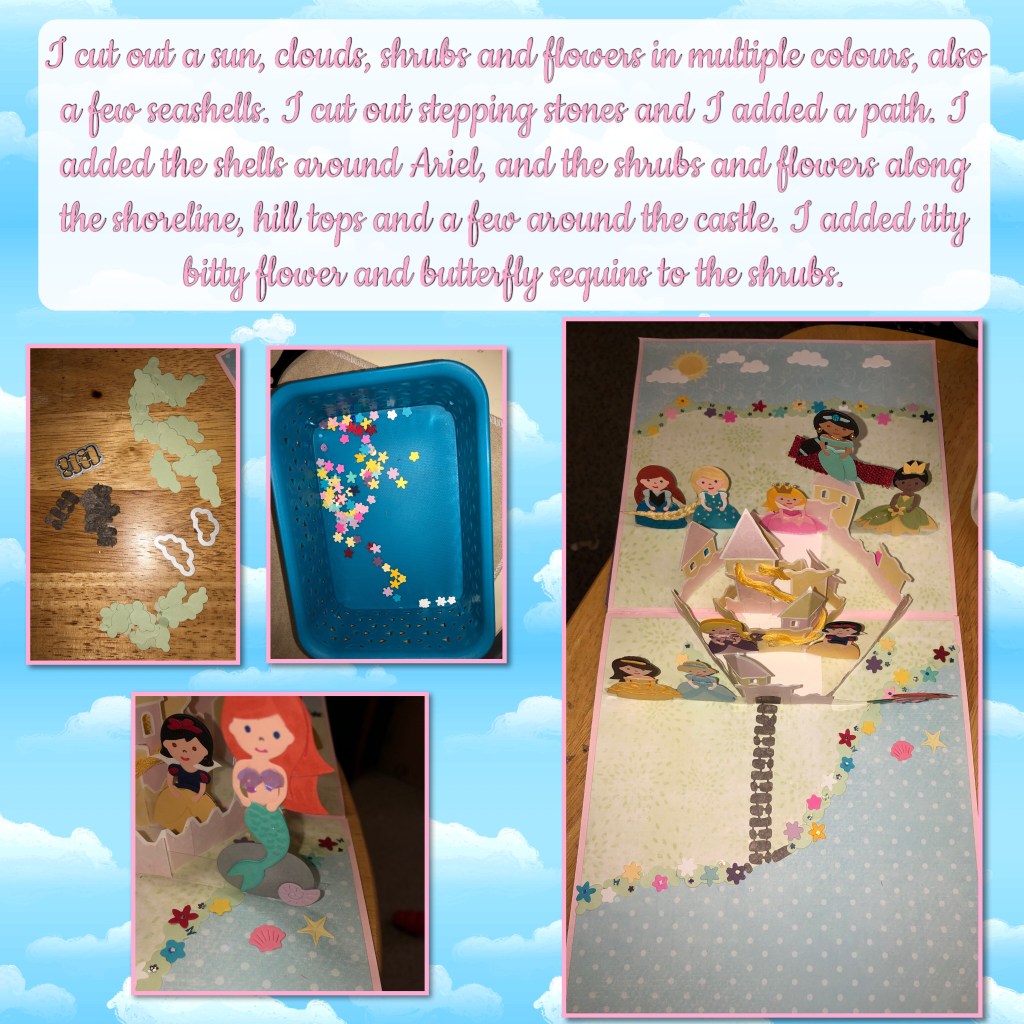
Some of the dies I used below are the House and fence pop up for the path, Tropical scene for the sun and the seashells, the cloud die comes with the castle set and one of the flowers comes with the Princess set. The other little flowers is from a retired set
The giant blingy gems I used below were a Christmas gift but I think they came from Walmart.


To see some other unique ways to use the Castle dieset please check these out
