

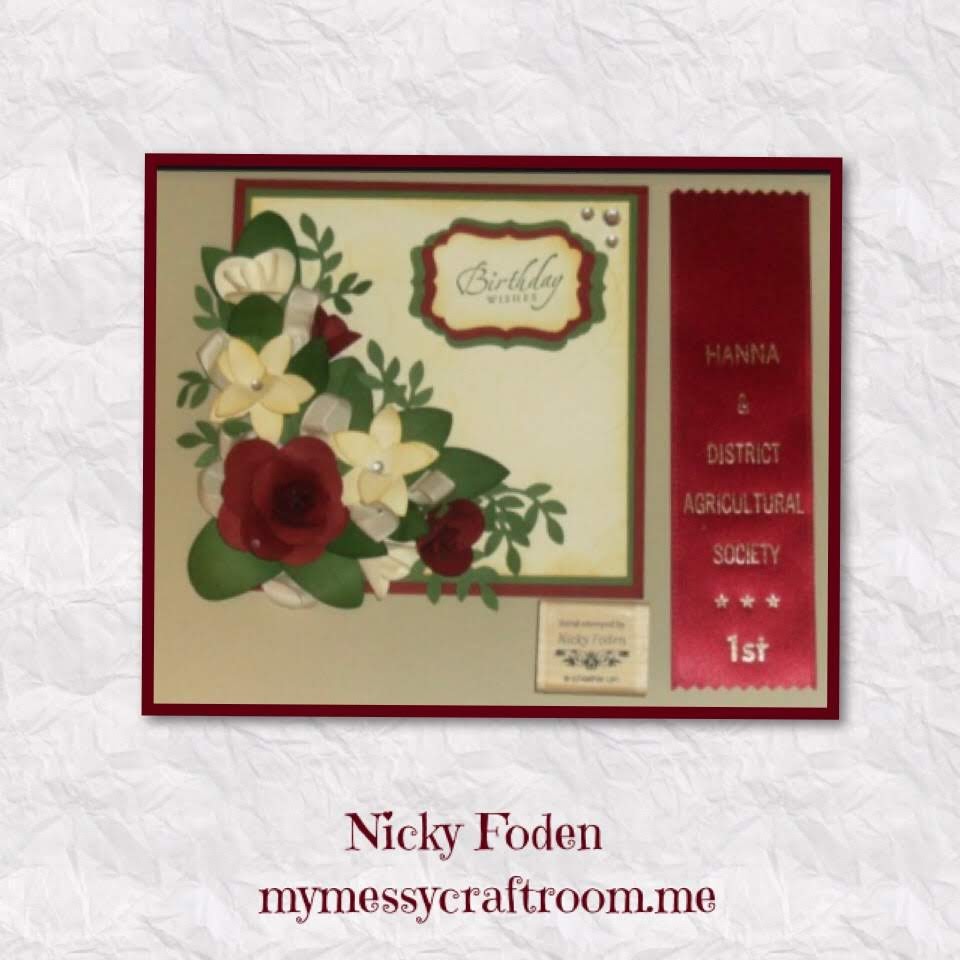
I have a bit of an oldie today, I made this card a few years back for our local Fall Fair. I entered in one of the contest and won the first place ribbon. I have posted some 3d roses cards before but I did add a little bit more detail to this post. Some of the ideas for this card I learned when I was a Stampin Up demonstrator from Stampin Connection, the Roses were a big hit back in 2011 but I really have no idea who the original creator is, the same with the method on how to make the tag. I thought I would share as both elements are fun and easy and you may have the same or similar tools at home to create your own 3D Roses card.

Continue reading to see all the details on creating this card.
if you would like to follow me on Facebook feel free, and I would LOVE for you to share what you make in your Messy craftroom/kitchen table/garage/wherever it is you create https://www.facebook.com/groups/MyMessyCraftroom/
When I originally created this card I didn’t take any photos when I was making it so I zoomed in on some of the areas when describing and recreated some of the elements for tutorial purposes so the colours might not be the same as the card.
All the supplies are from Stampin Up and will be listed in the descriptions (some of the items may be retired.)
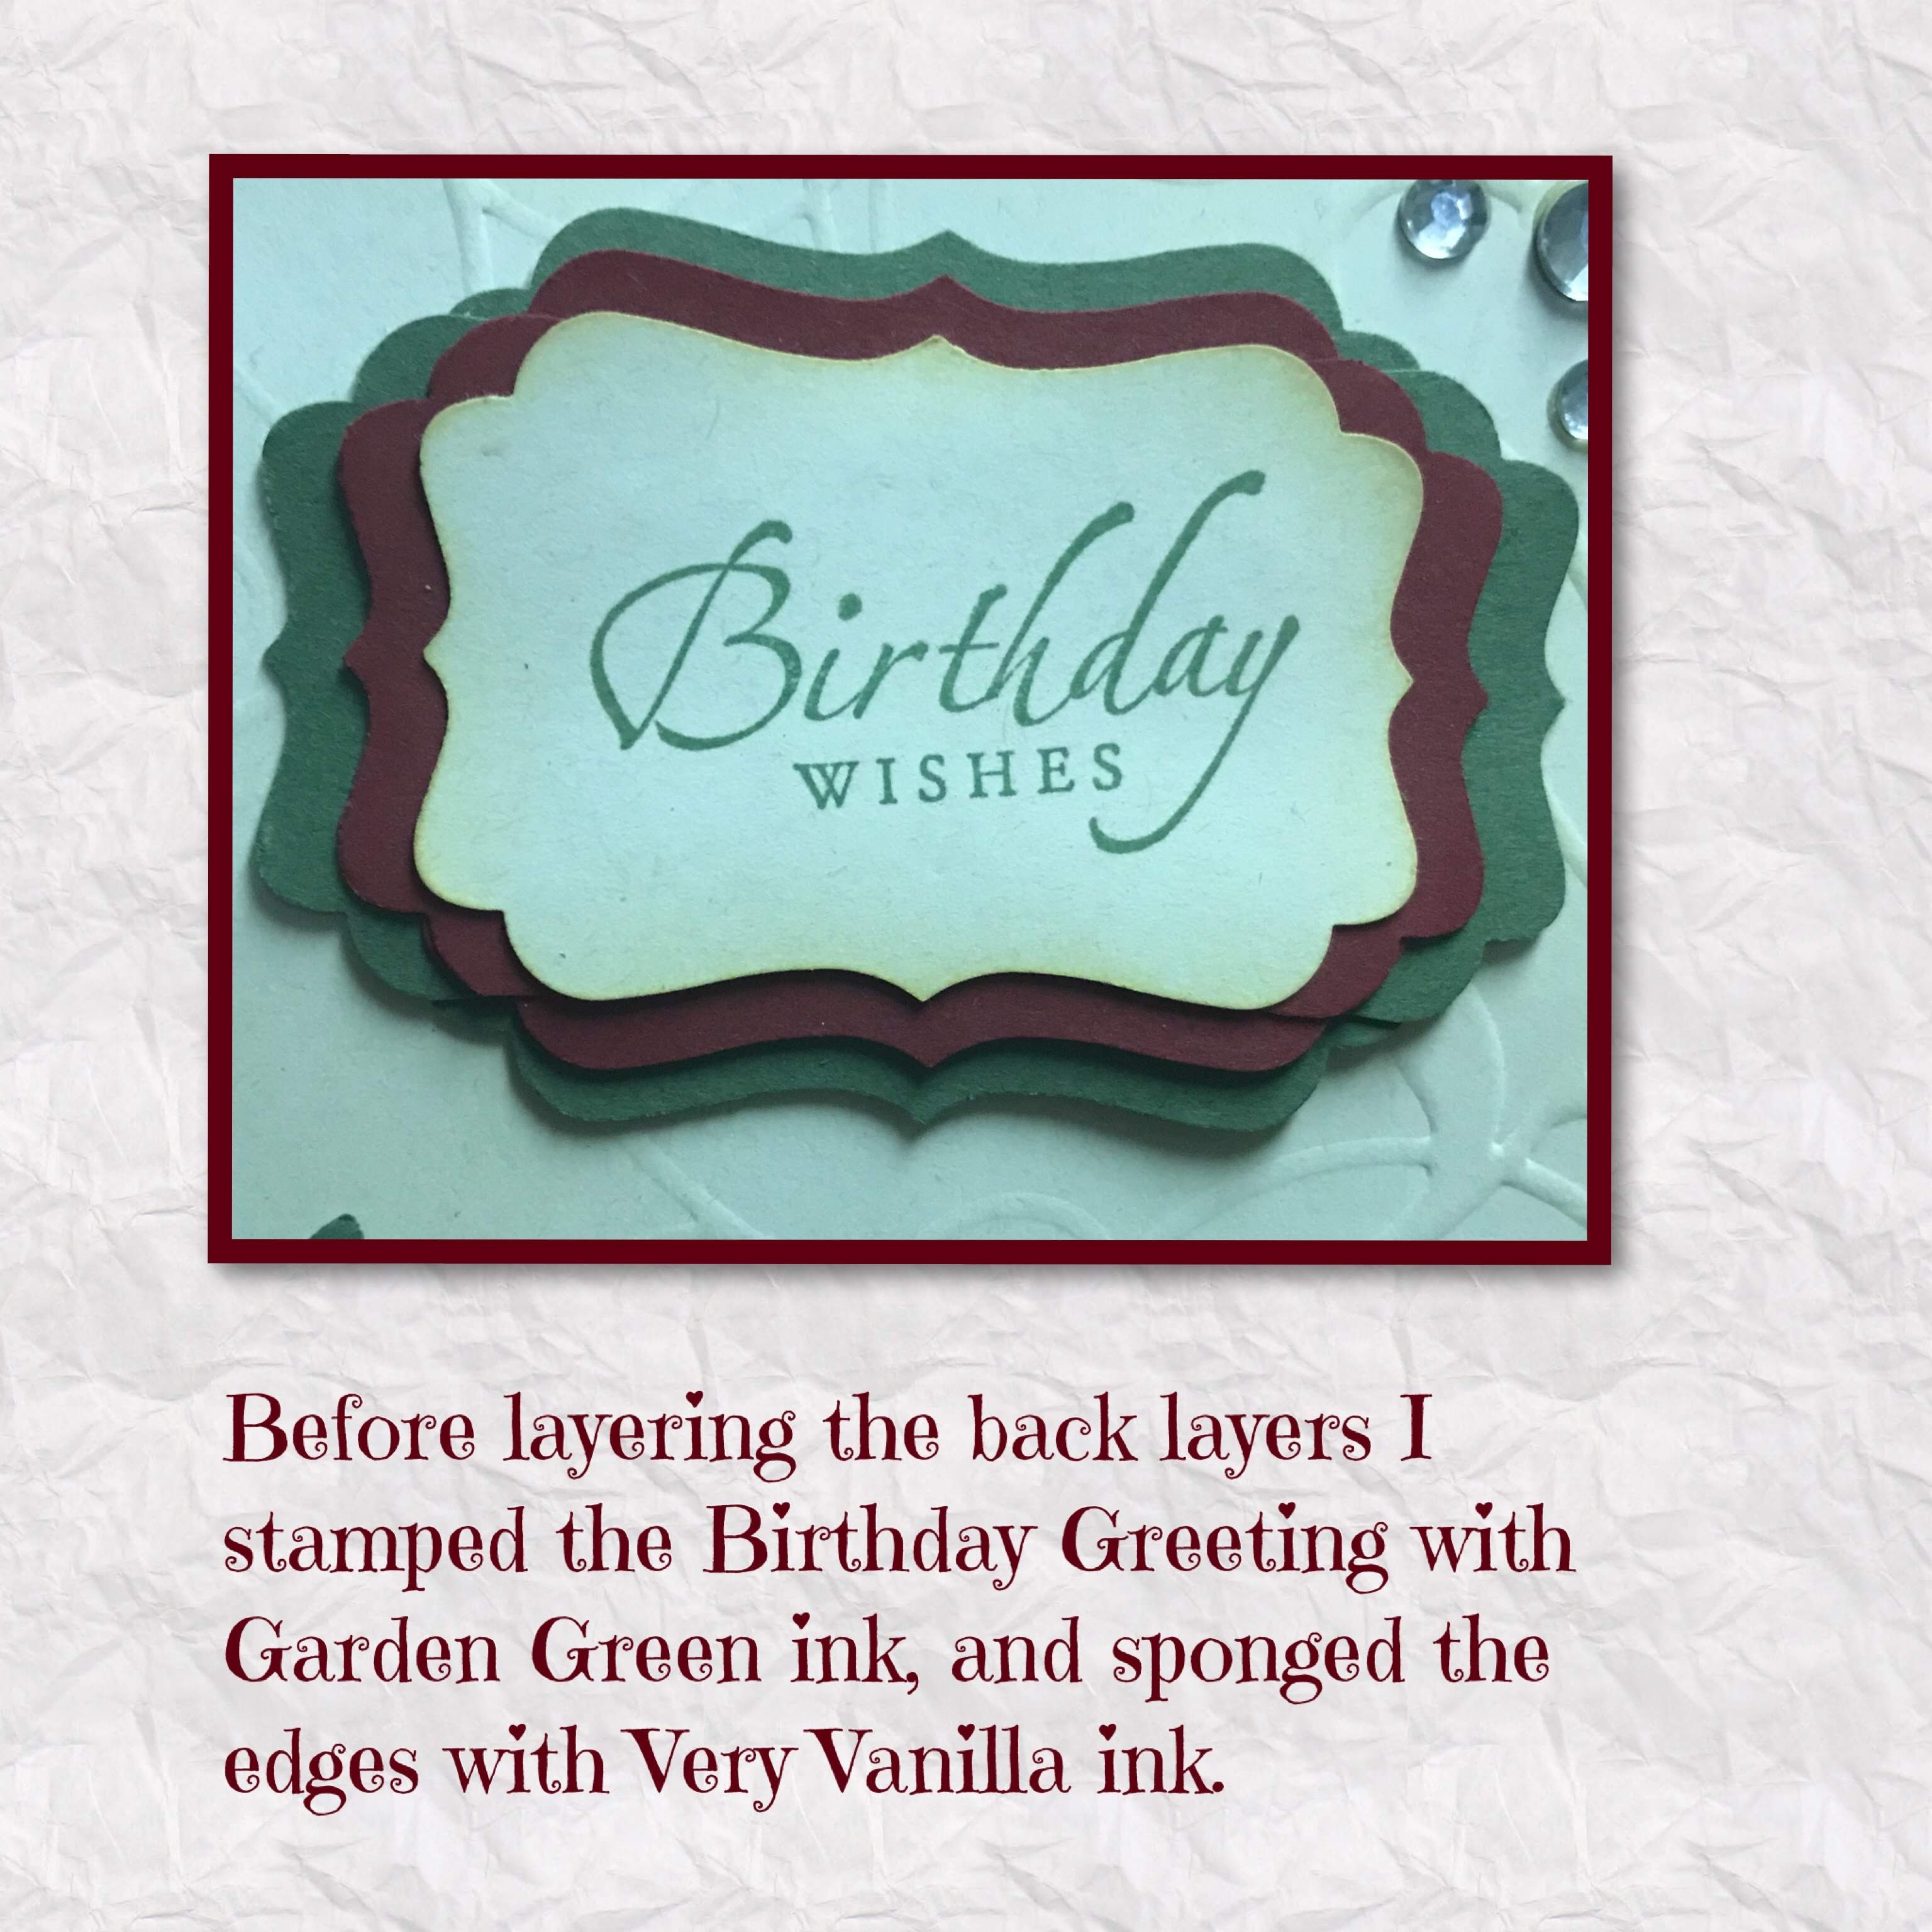
The card base is Cherry Cobbler cut to 6″ x 12″ scored at 6″ it is a 6″x6″ square card. Then there is a Garden Green layer cut to 5 3/4″ x 5 3/4″. The Very Vanilla Layer is 5 1/2″ x 5 1/2″. I used a sponge and sponged Very Vanilla ink around the edges of the Vanilla panel.
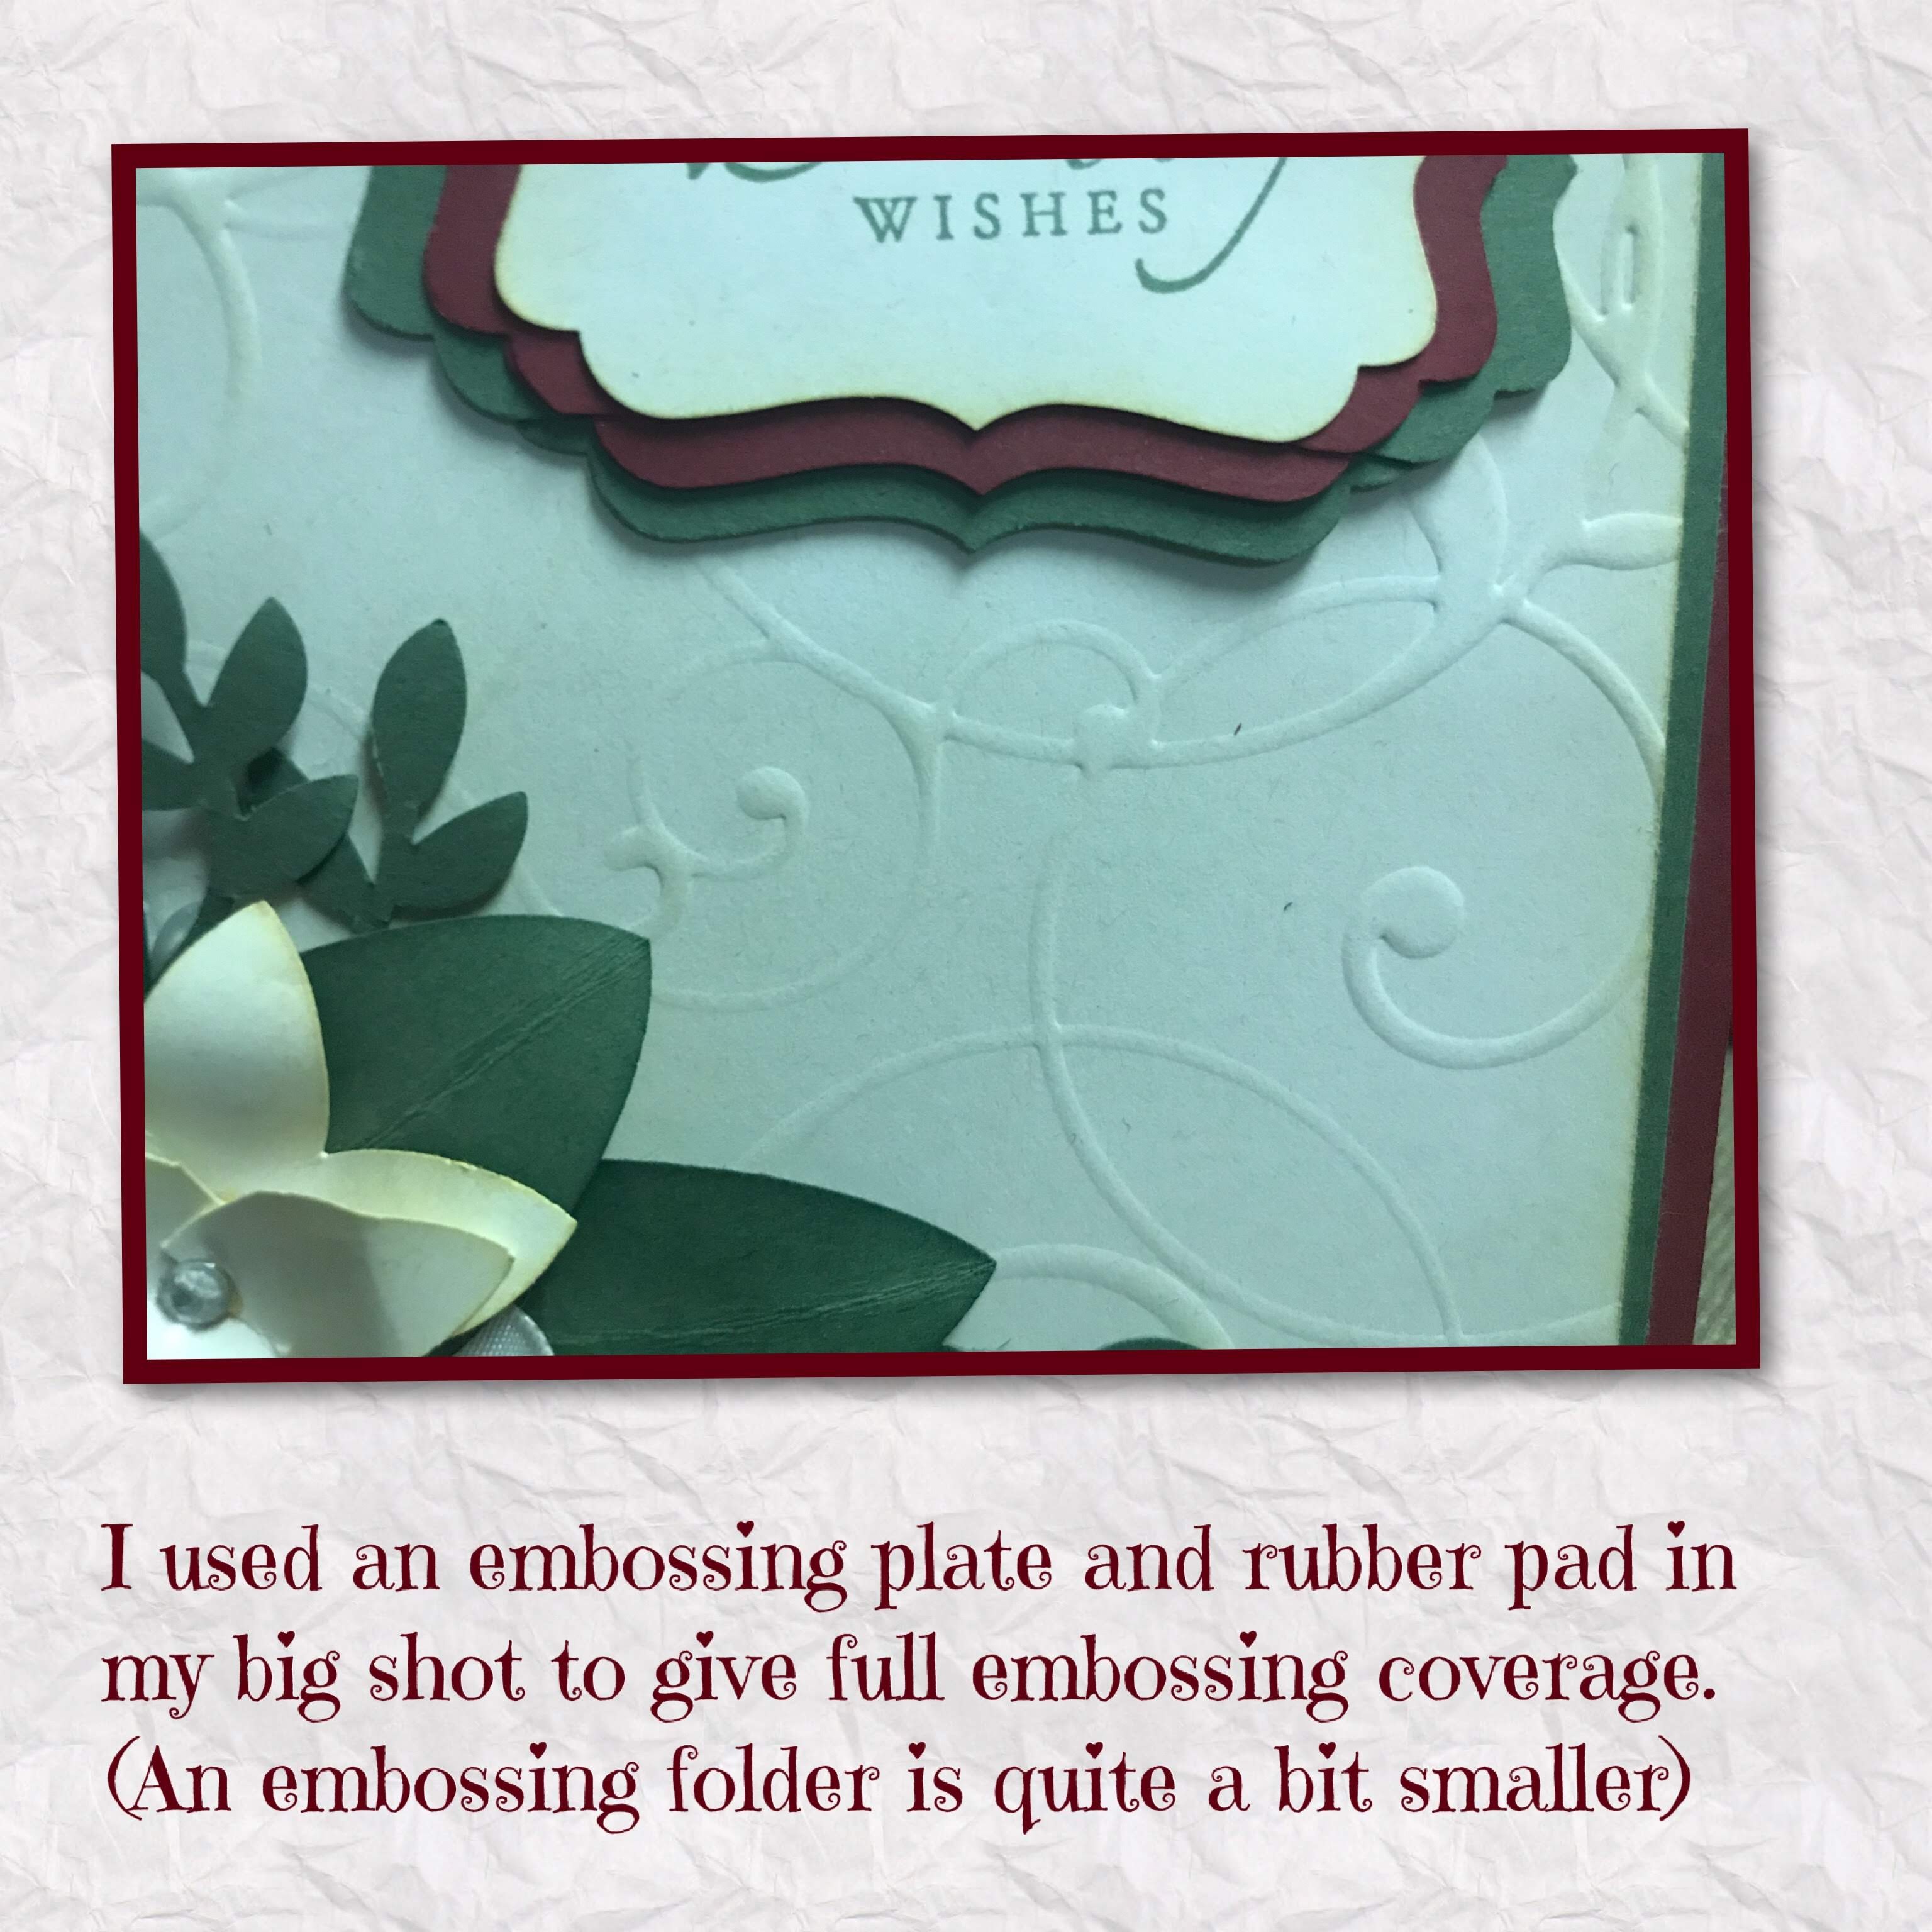
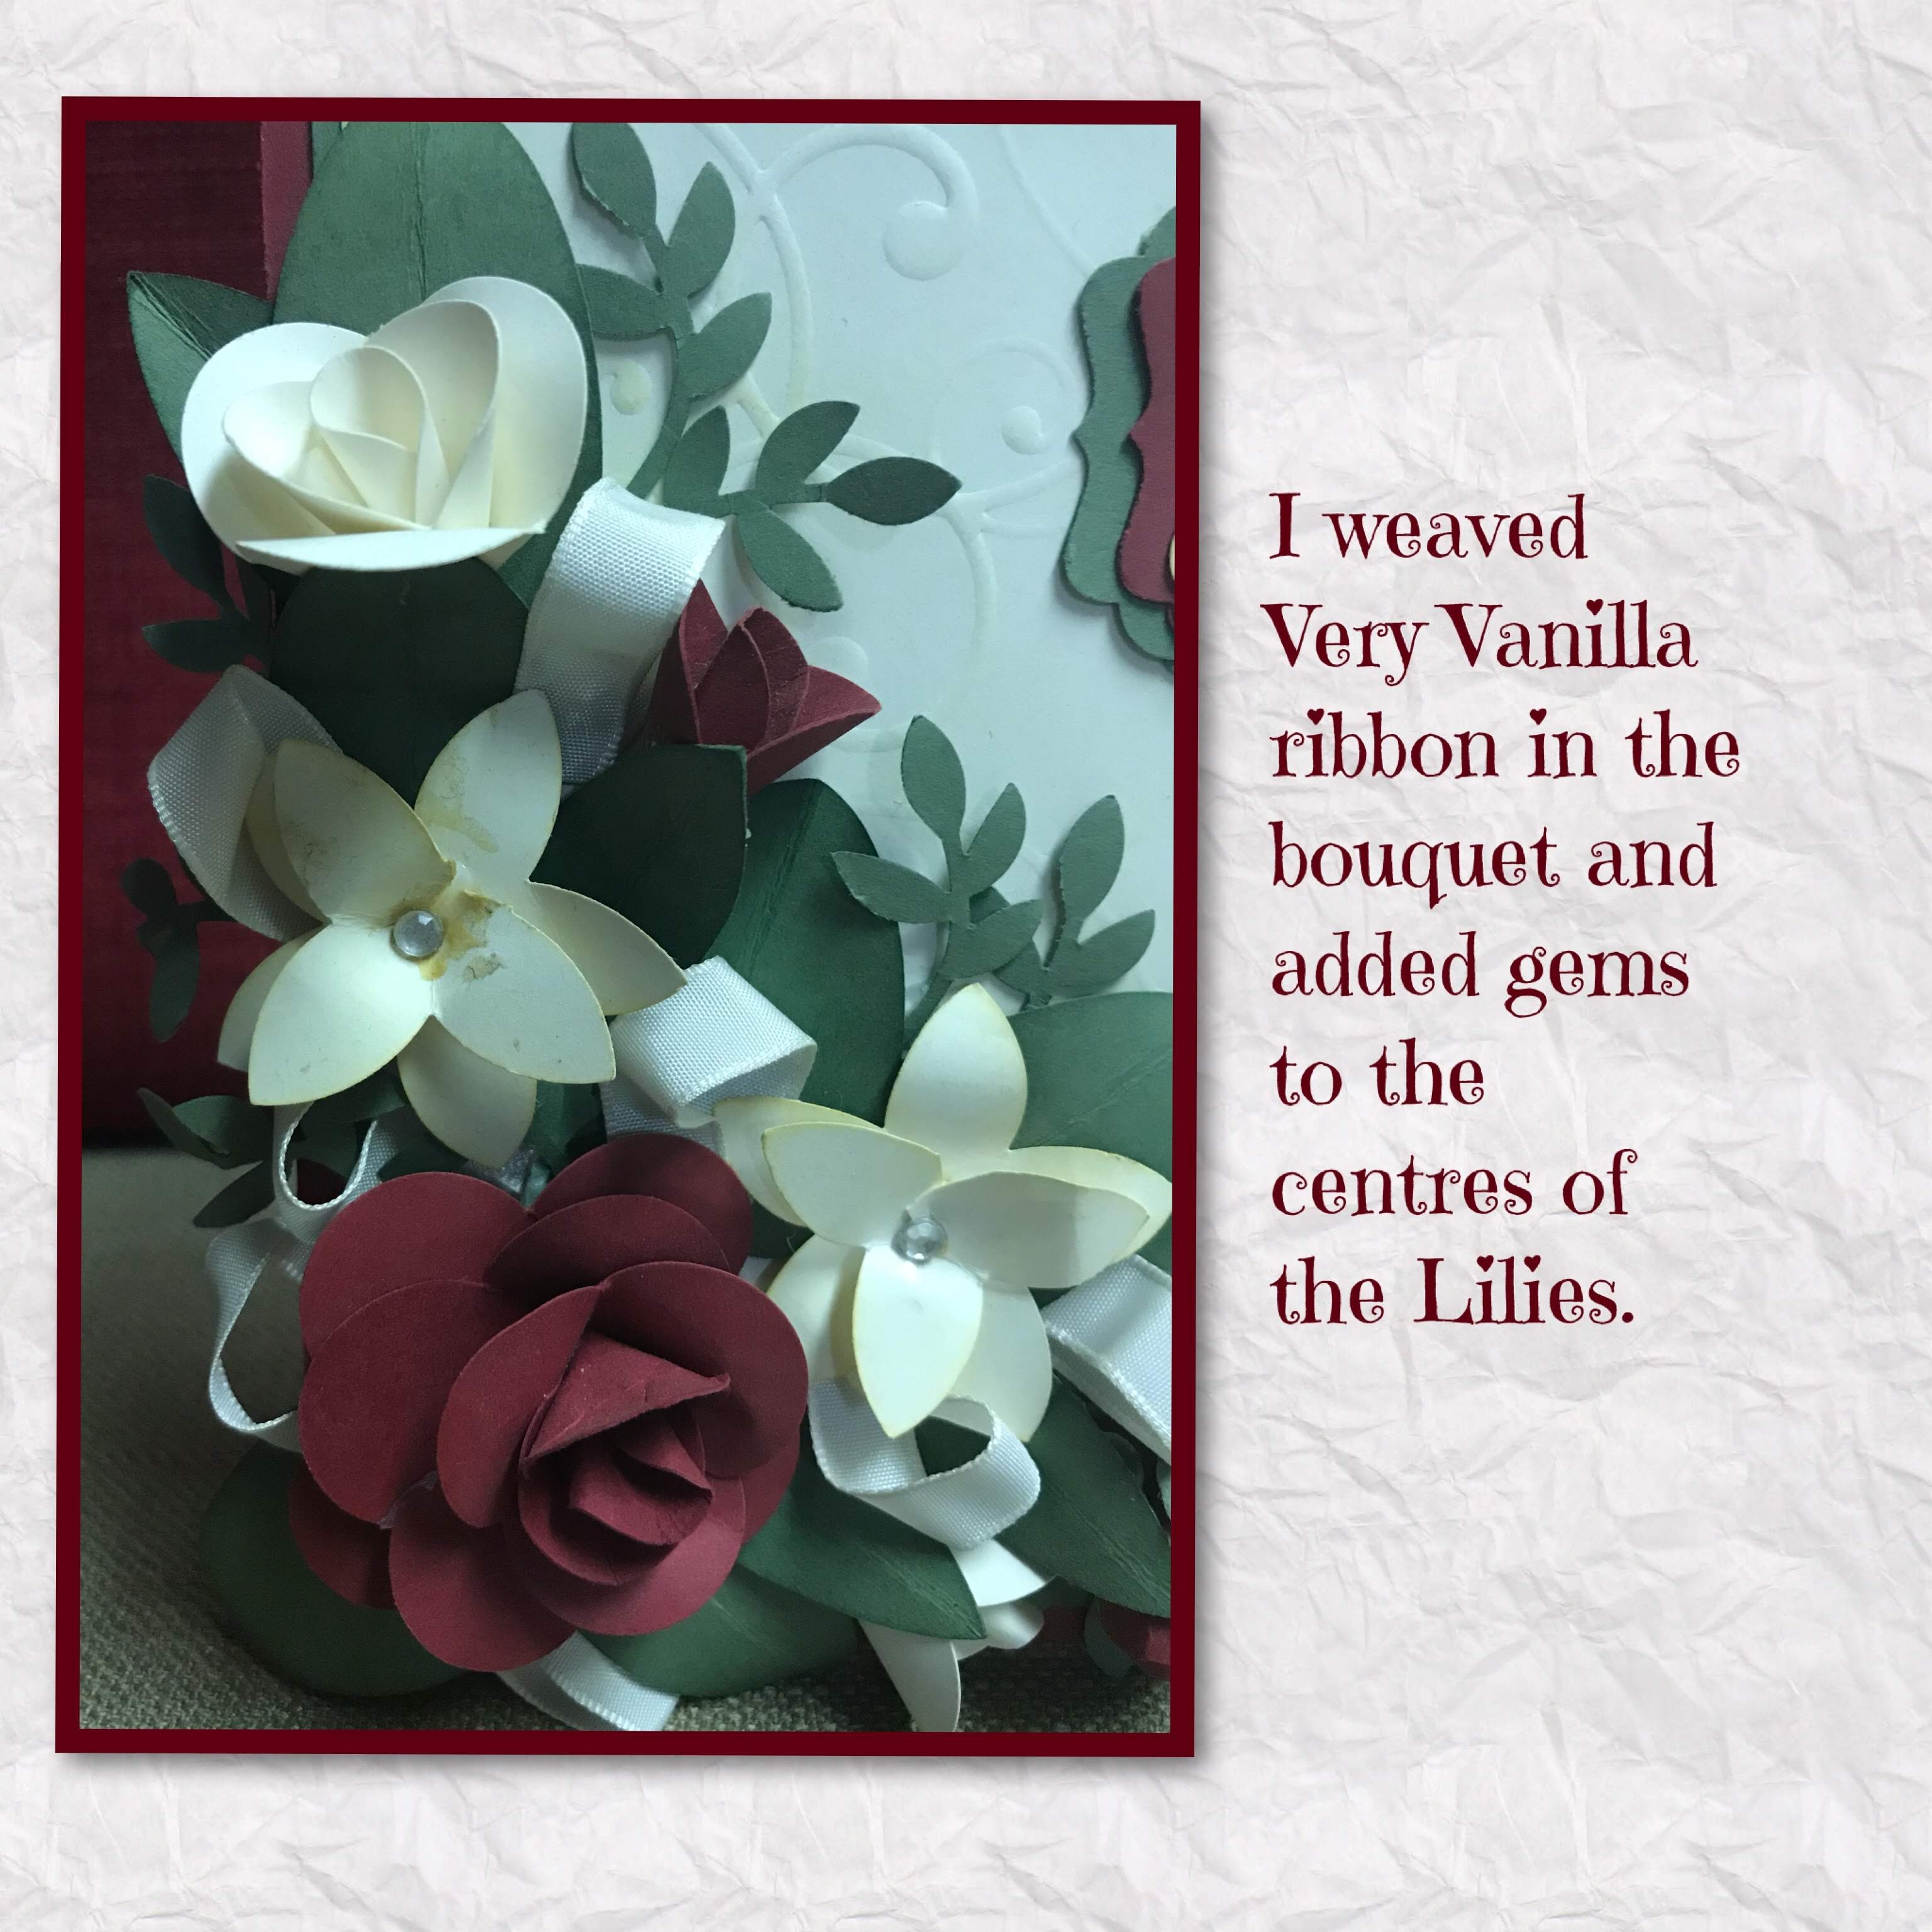
Next come the flowers, on this card I used Cherry Cobbler, Very Vanilla and the Leaves are Garden Green.

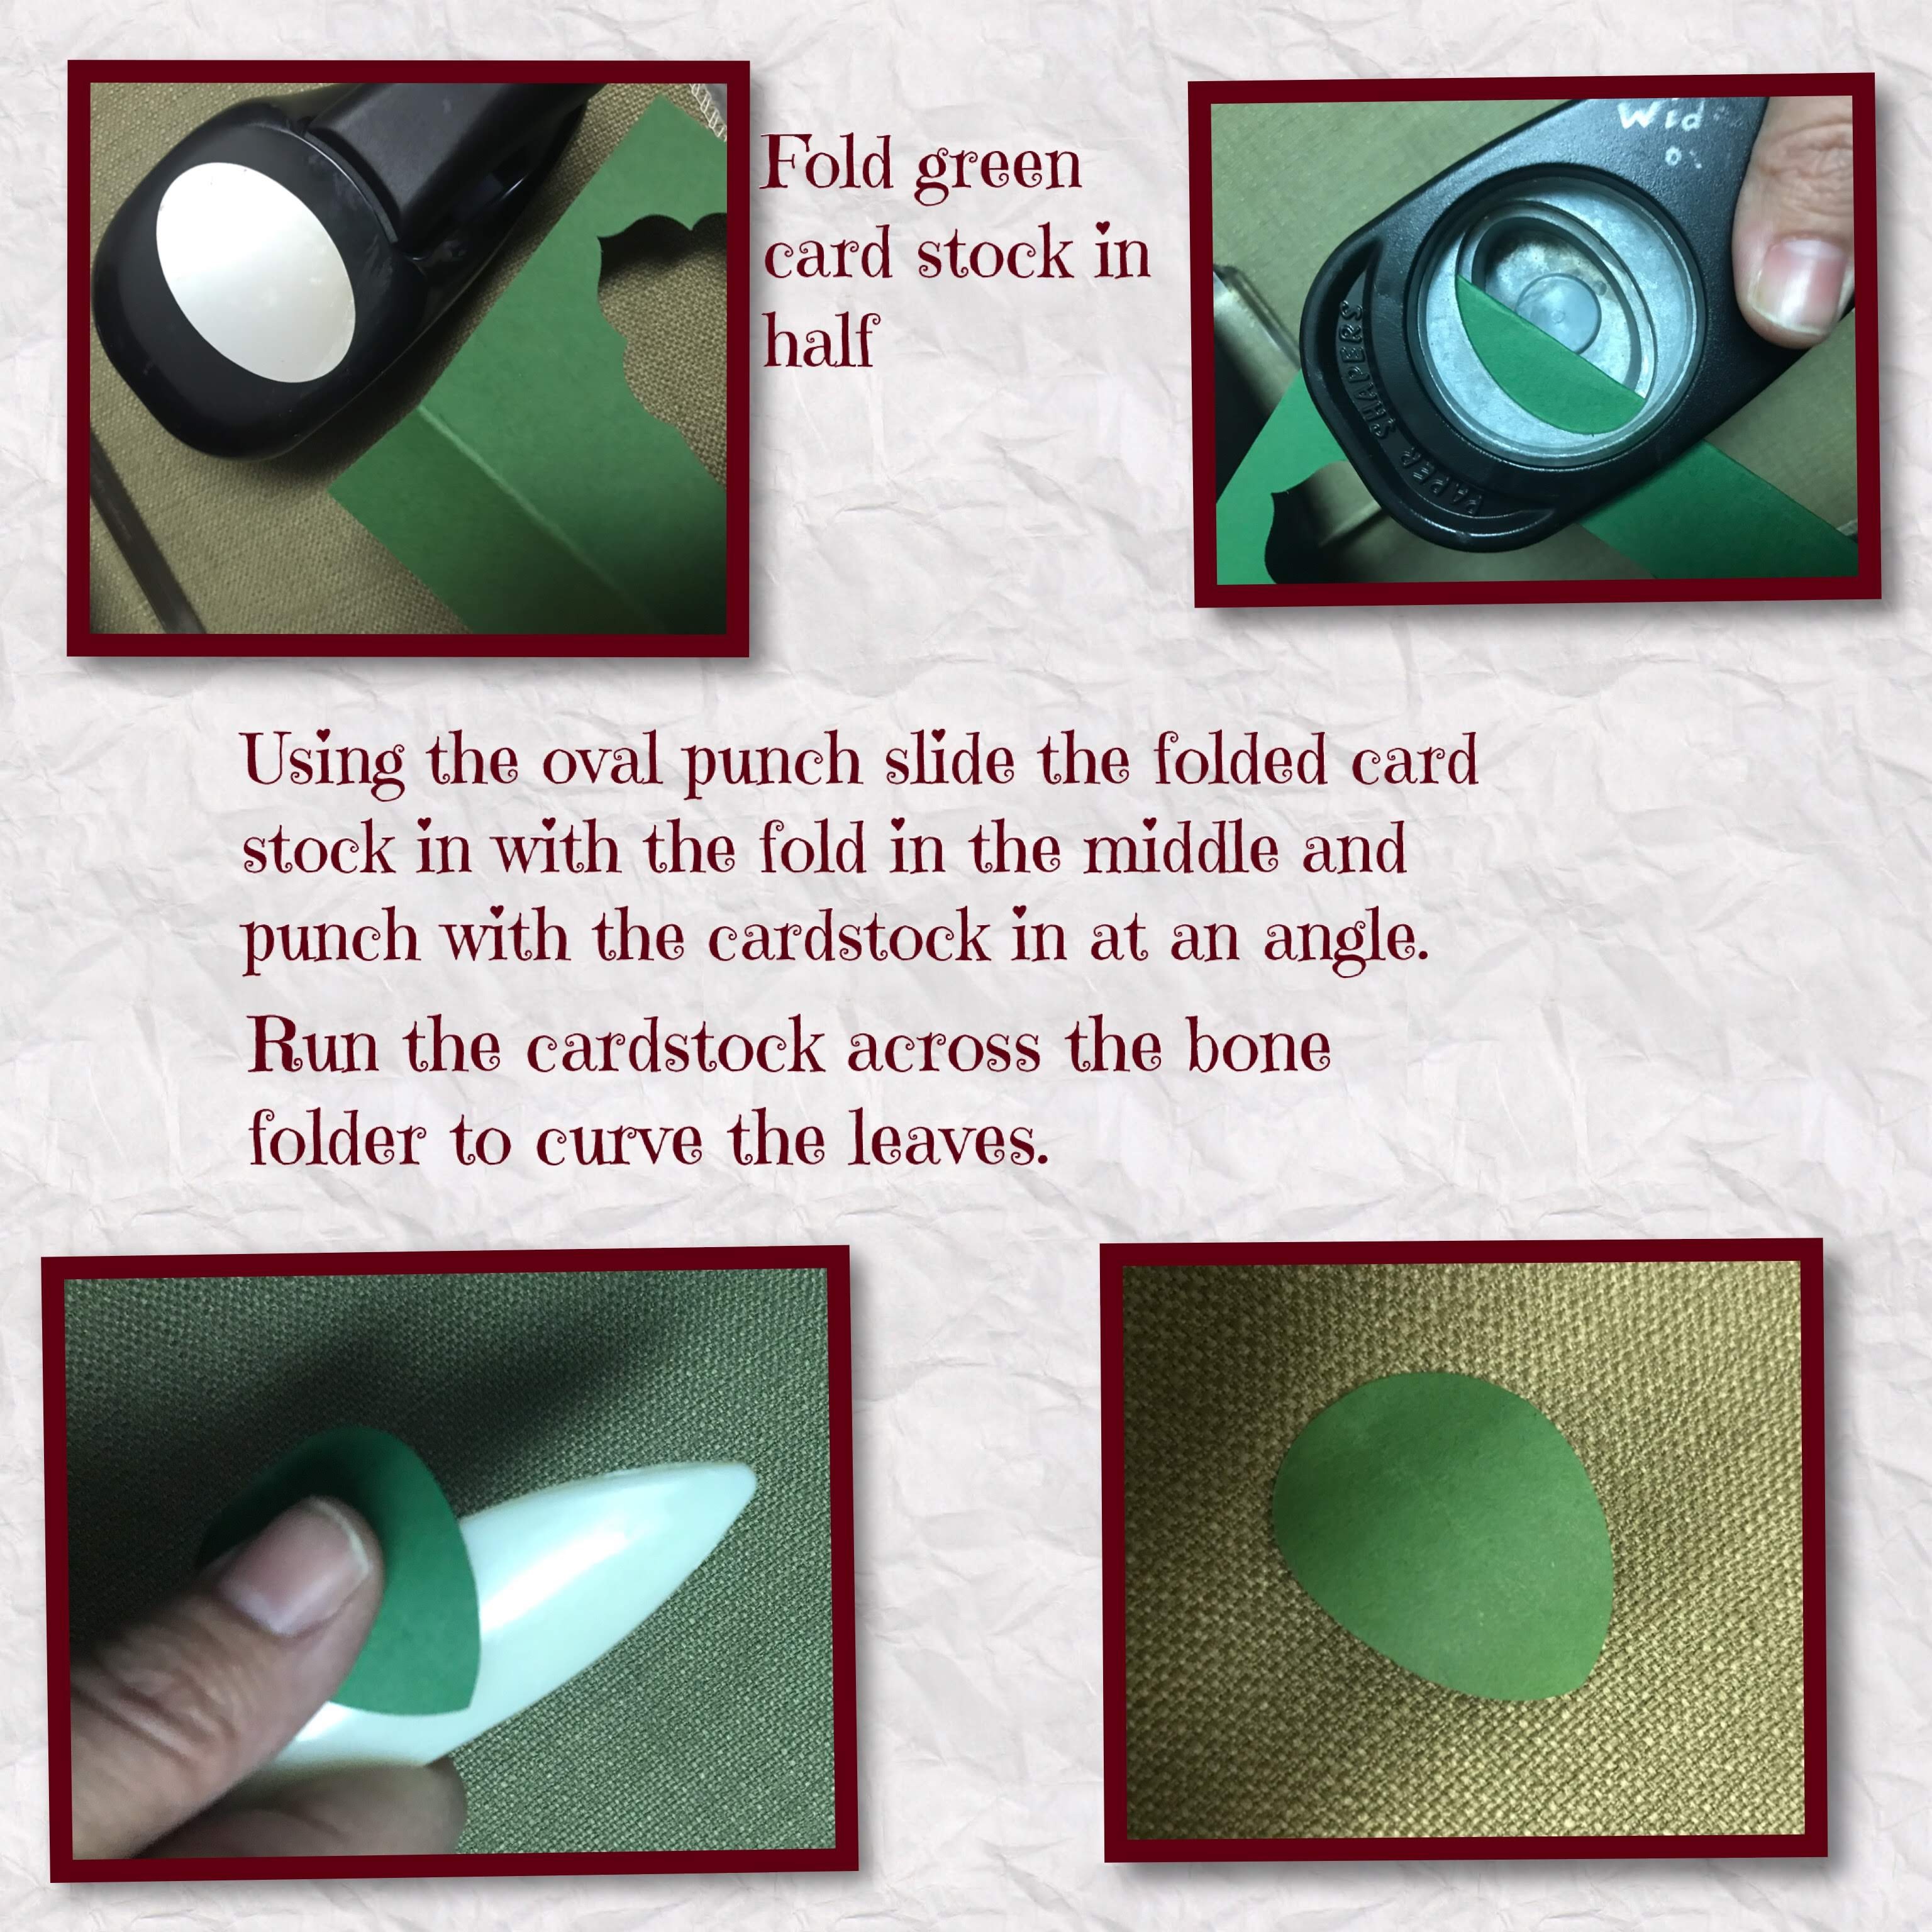
I used a large Oval punch to create the leaves. To create different sizes of leaves you can use different size of oval punches or just control the depth of how much of the folded cardstock gets cut. I used a small vine die to cut the vines with the little leaves.
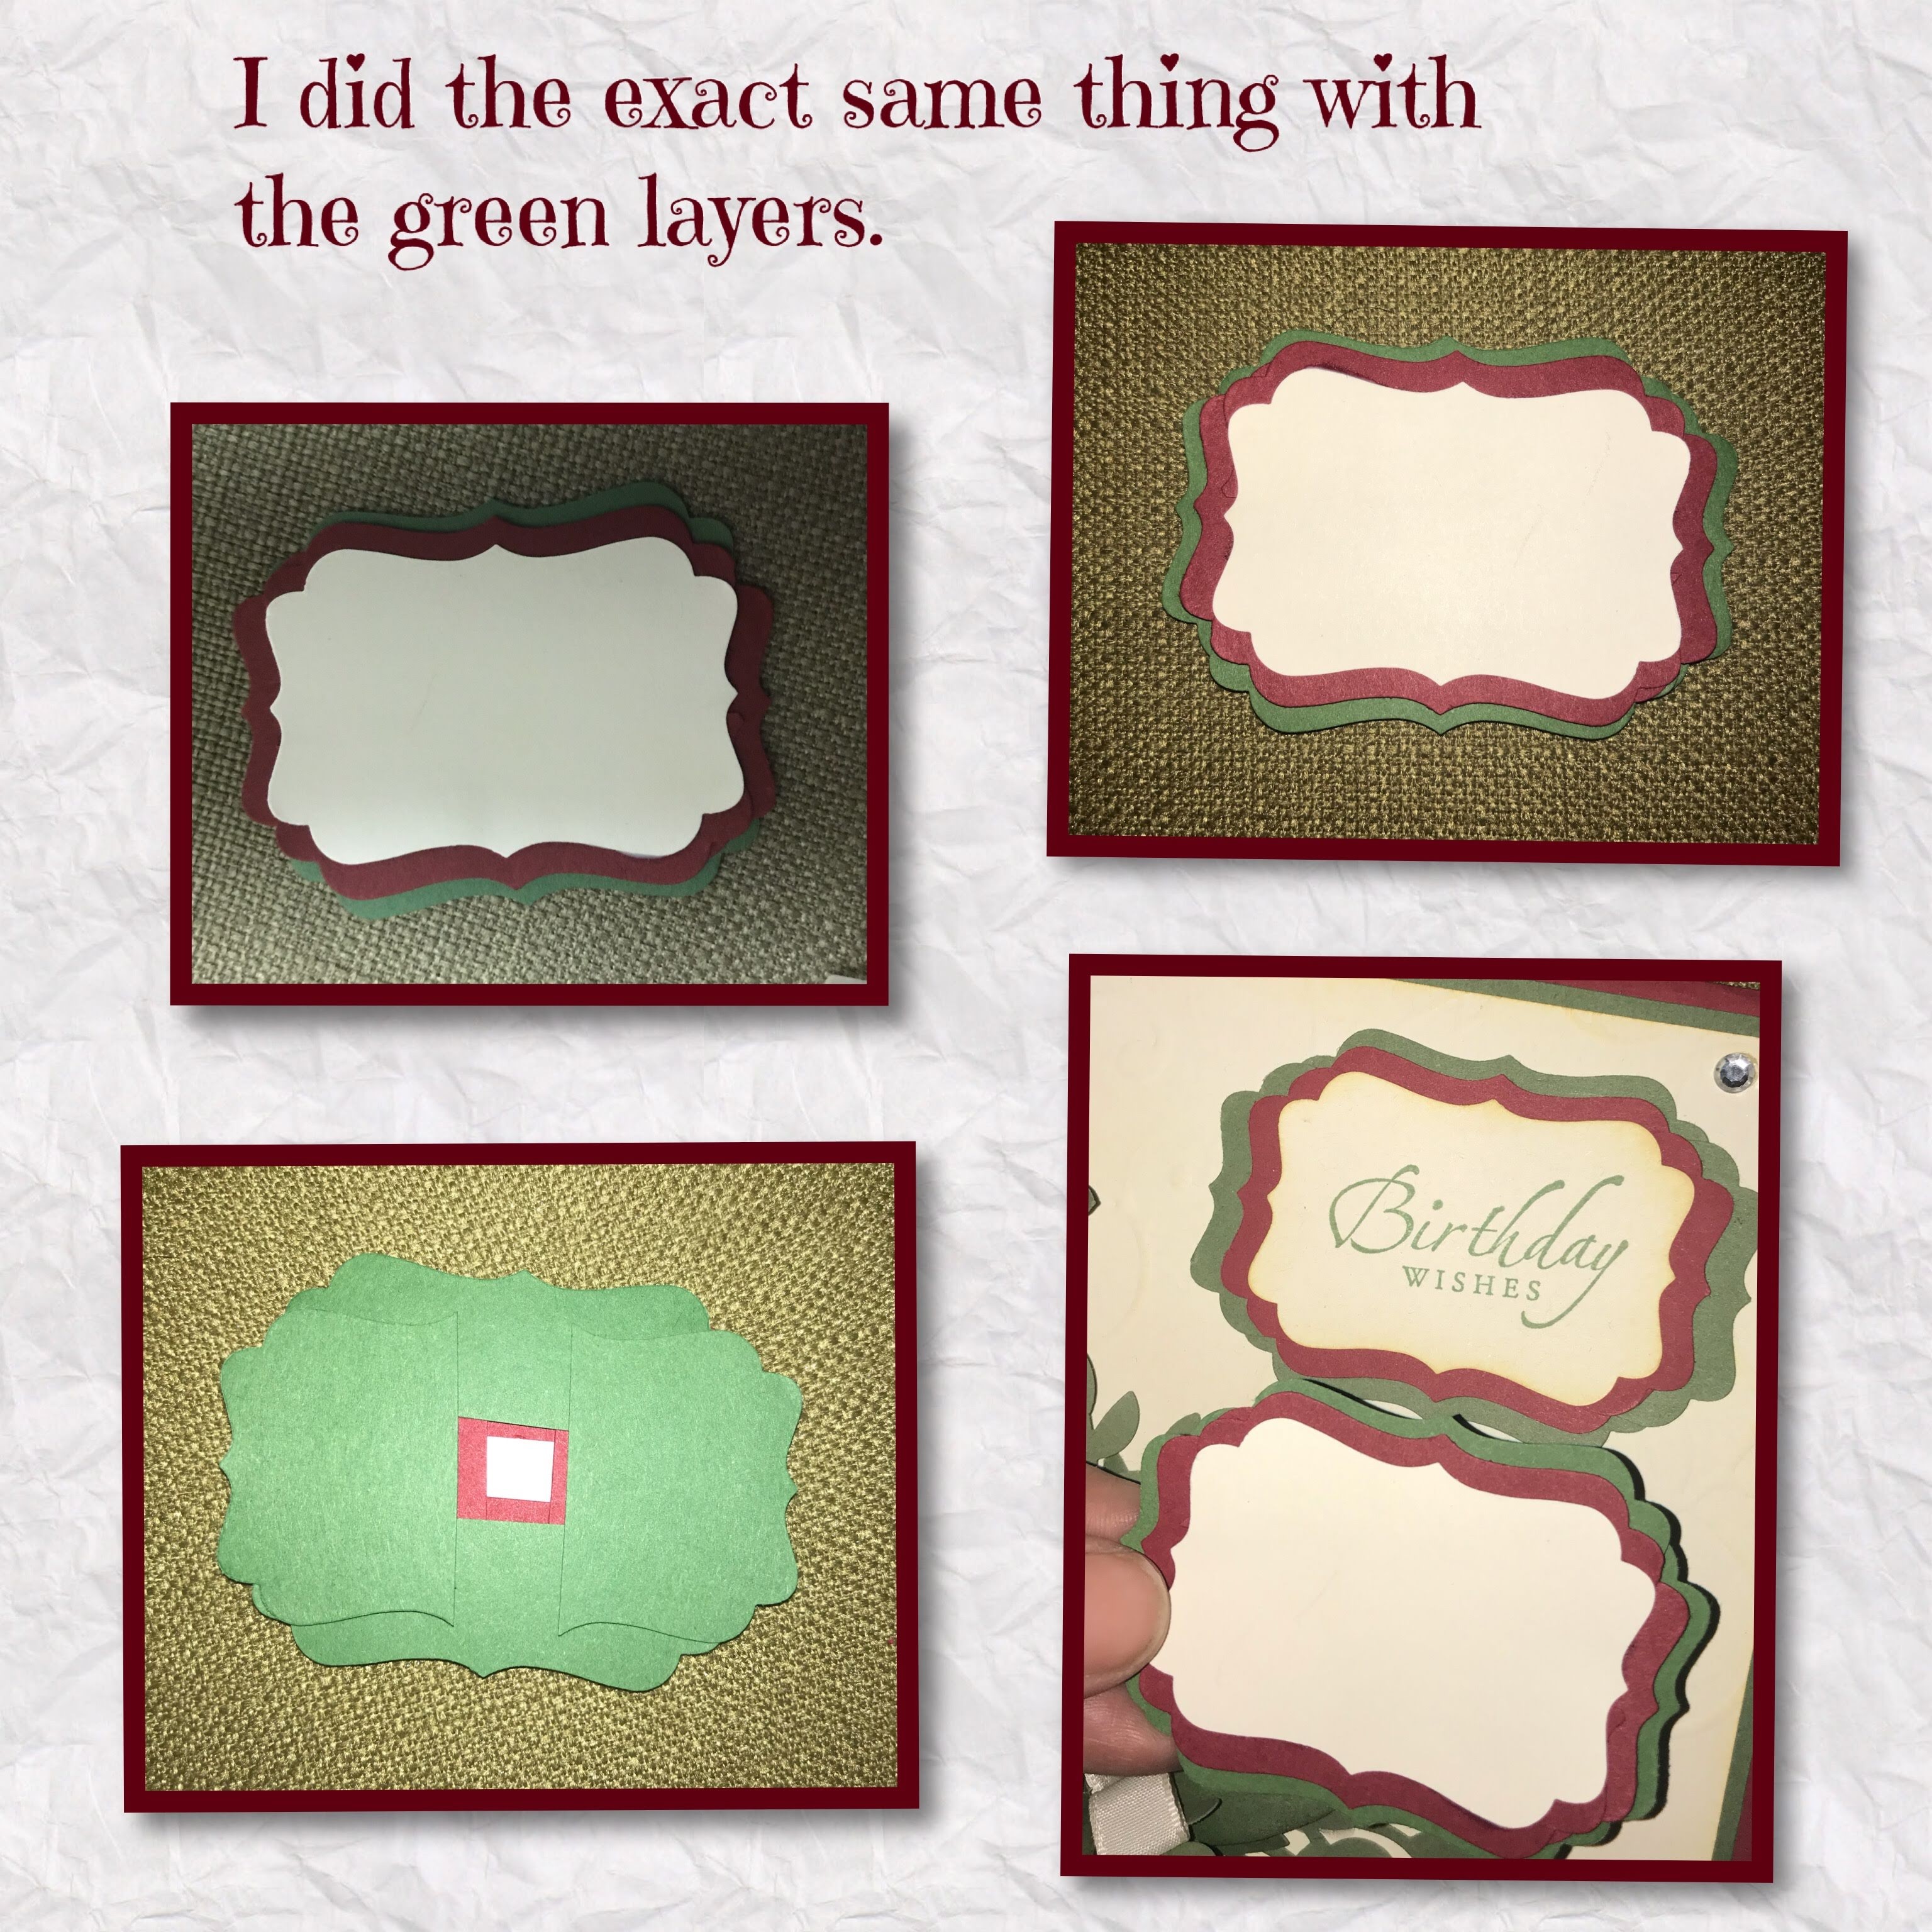
Here is a neat trick to do if you don’t have layering dies or if the spaces between the layers are too big and you want a smaller layered tag. At the time I made this I had this Stampin Up label punch and this was the only way I had to layer it.

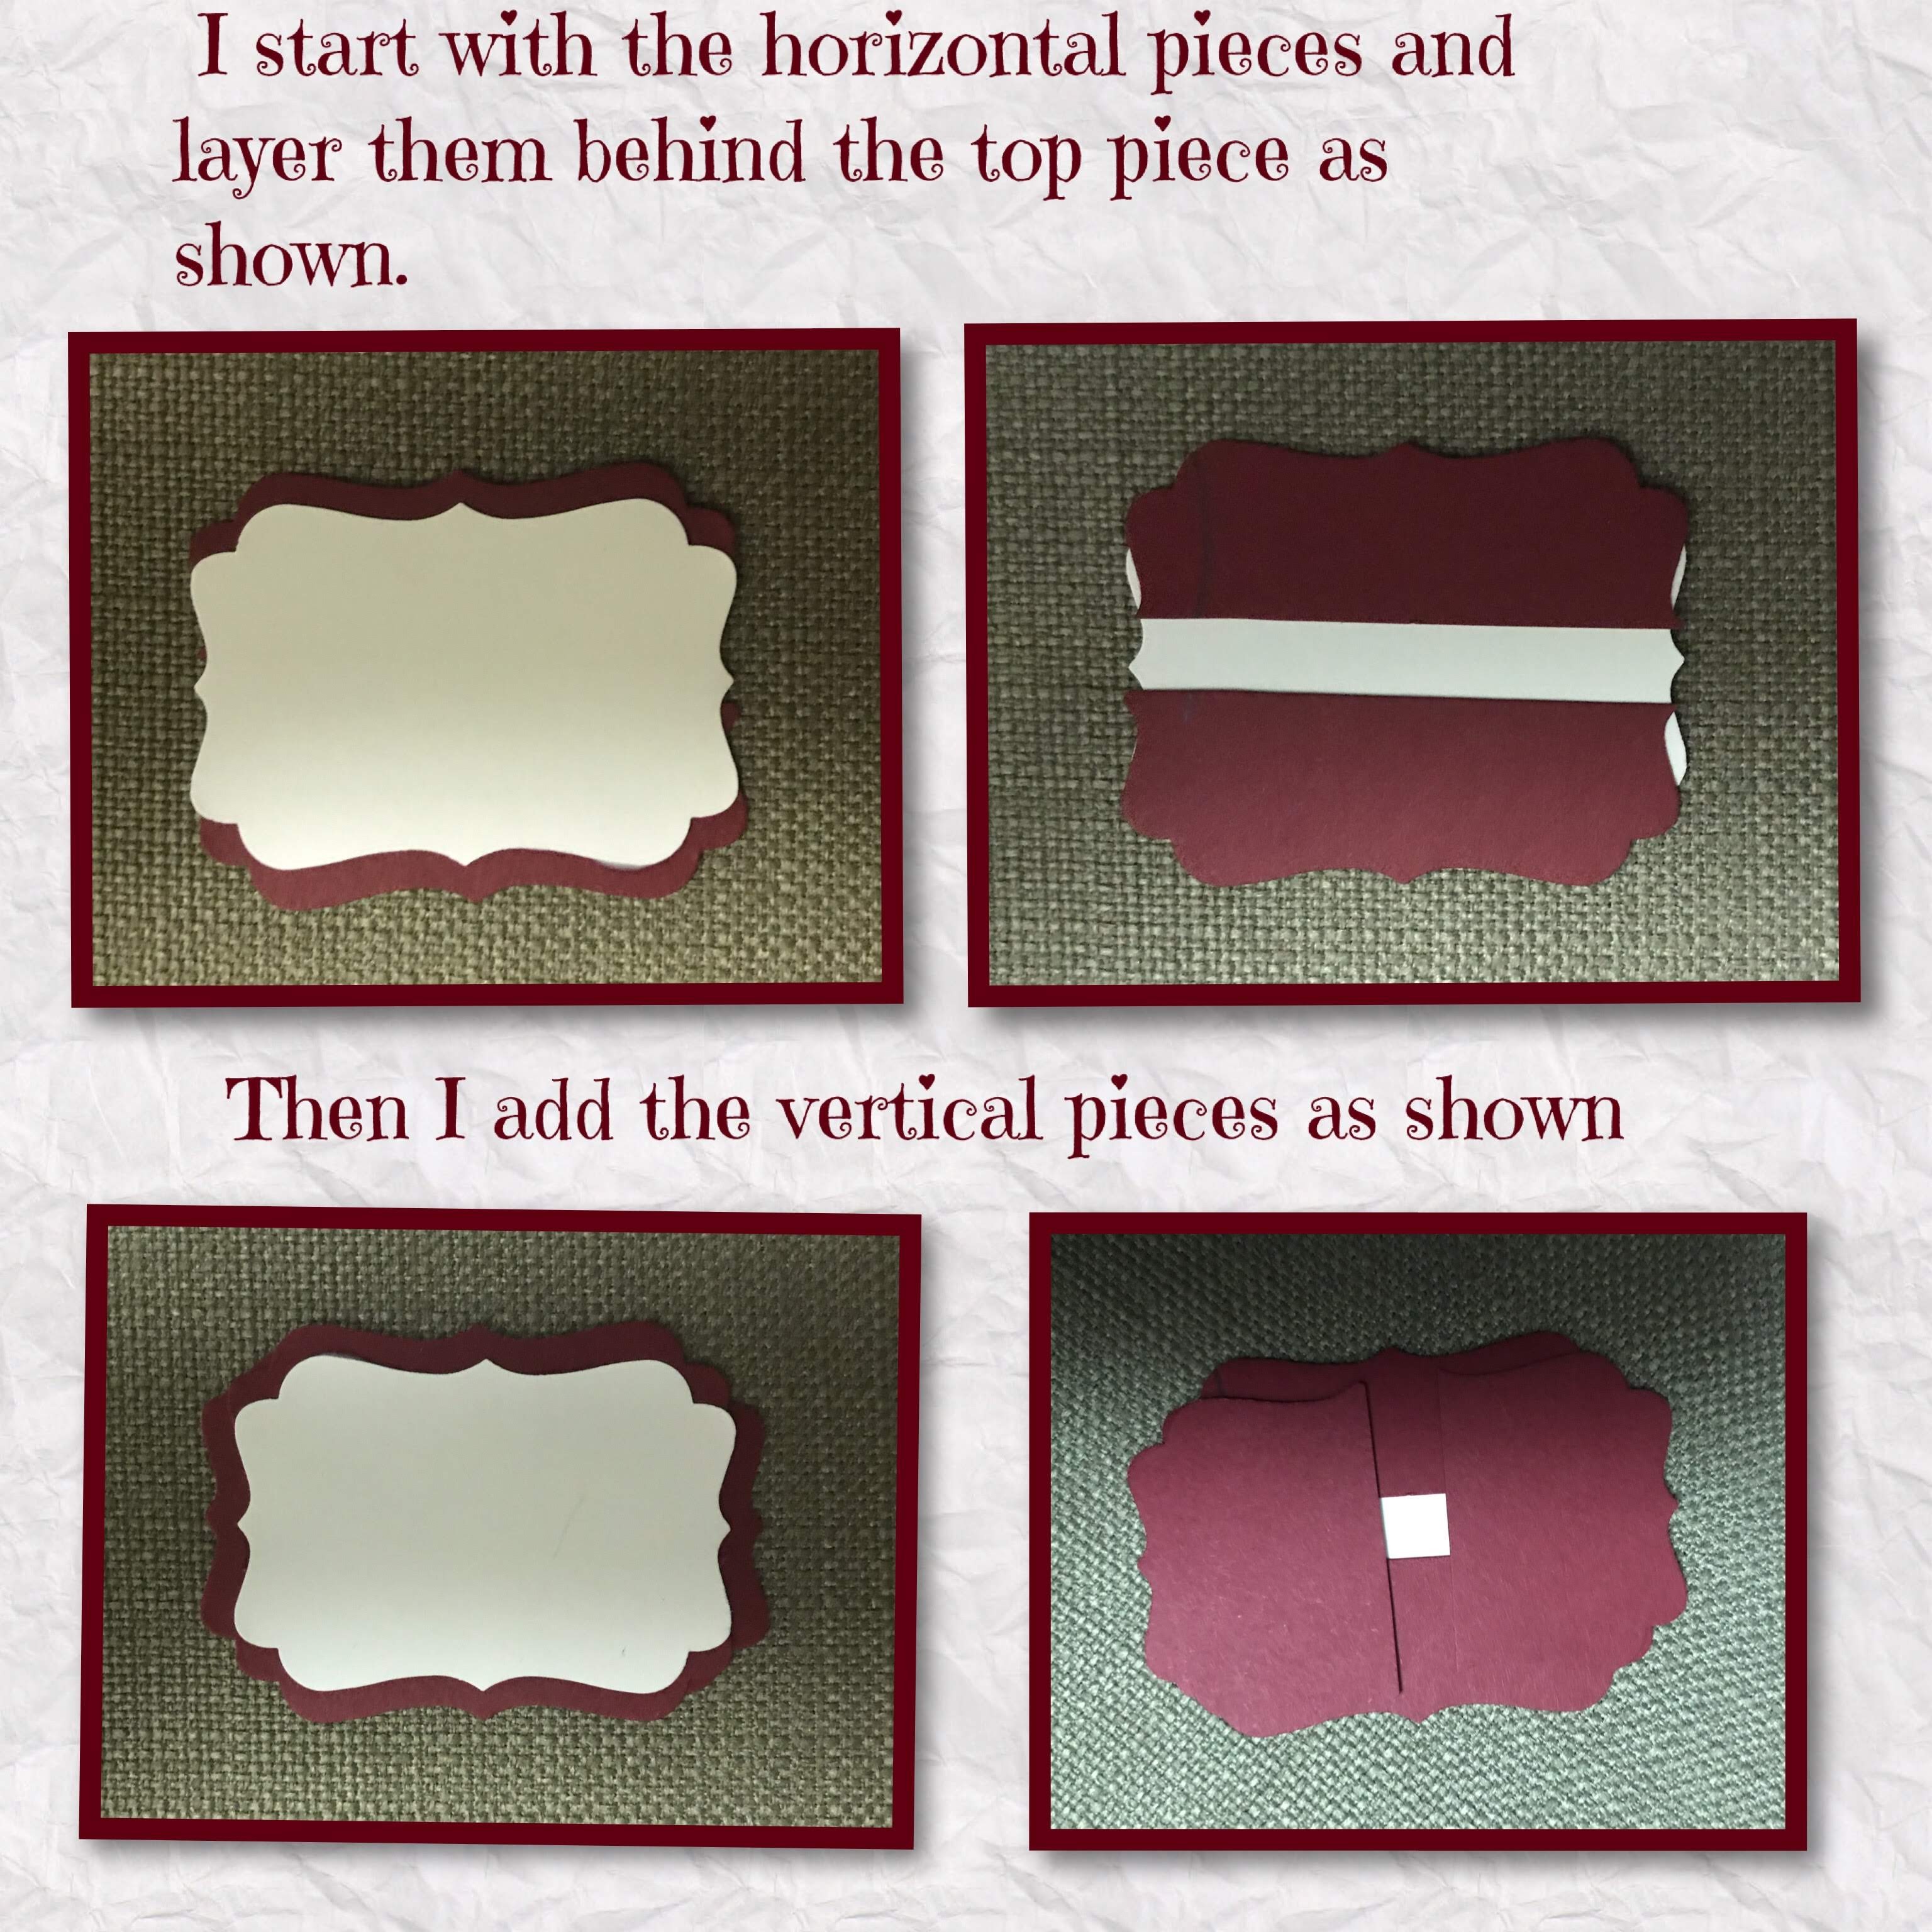
Try to make sure the spacing is even around all four sides.
I started adding the flowers and leaves to the bottom left hand corner of the card base.
I added the Birthday tag and large gems to the top right hand corner. I got the gems at Walmart.

To see my other 3D Roses Cards check these out

Love this, it’s beautiful hun xx
LikeLike
Thanks, your comments make my day.
LikeLike