

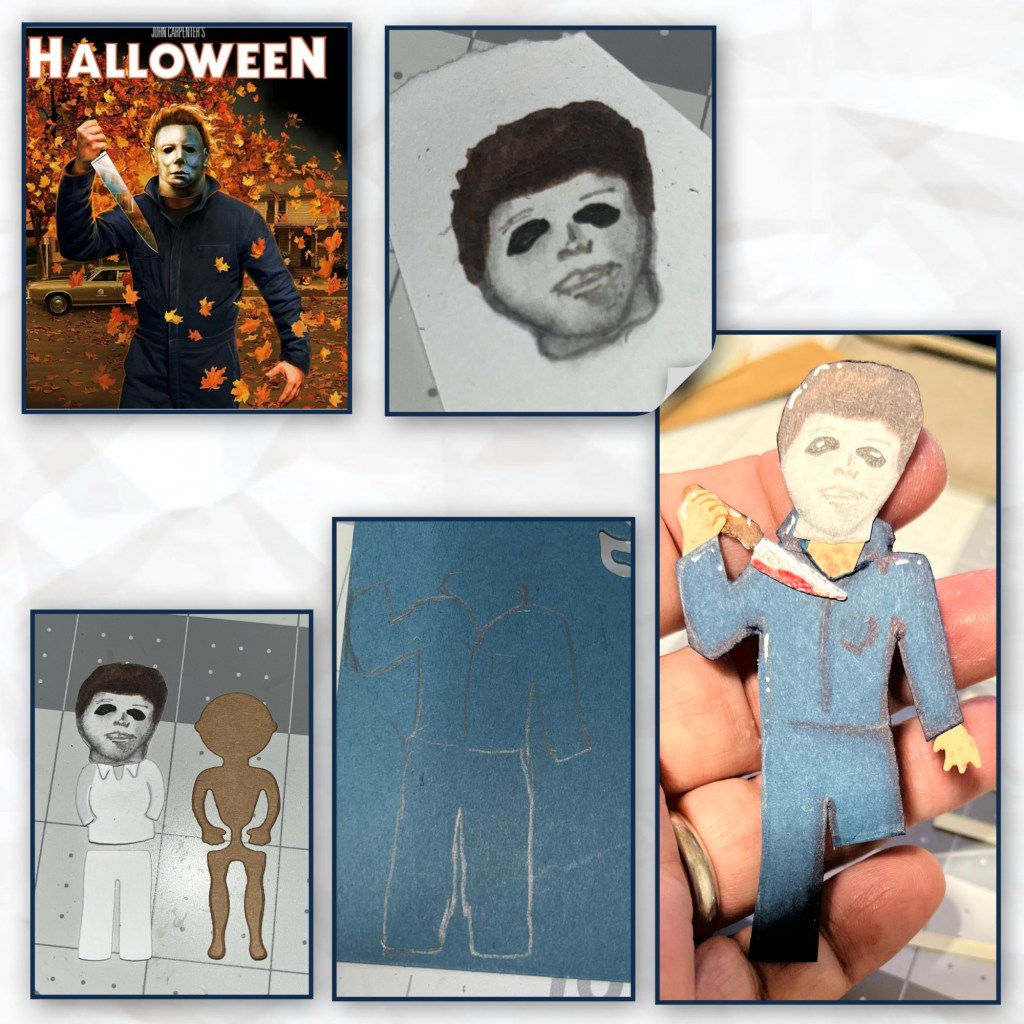
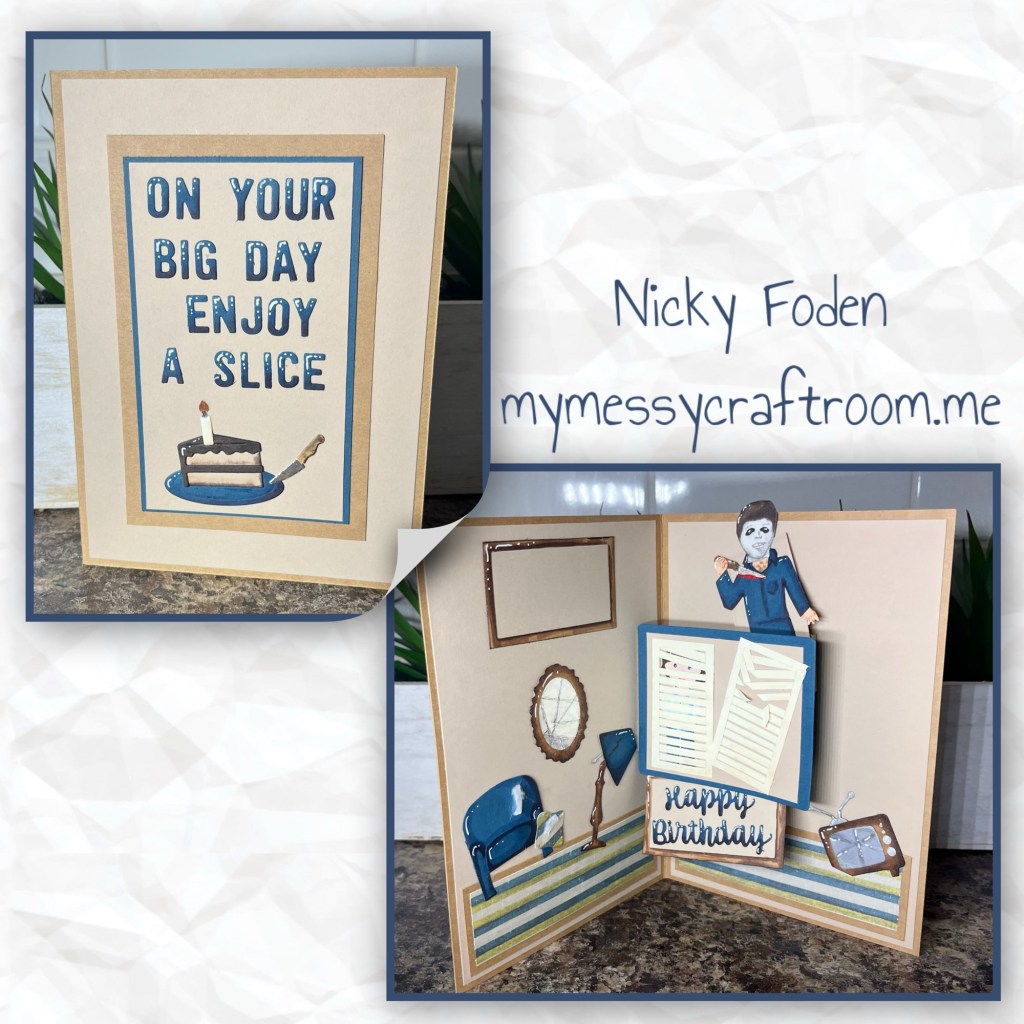
Wow, where did the summer go, I can’t believe it is already time for the September Karen Burniston design team challenge. This months challenge is “Letters” so I decided to use the Mini Alphabet & Numbers to diecut the message on the front. This is also a birthday card for my horror movie loving brother….. can you tell who the slasher is. This is my third year of making horror themed birthday cards for him, the first year was Jason, and the second was Freddie, and here is Michael….

All the fun is in the reveal, to see this card in action please check out my FACEBOOK page, feel free to join if you would like to share your own crafty creations. You can also see a video of this card on my INSTAGRAM page.
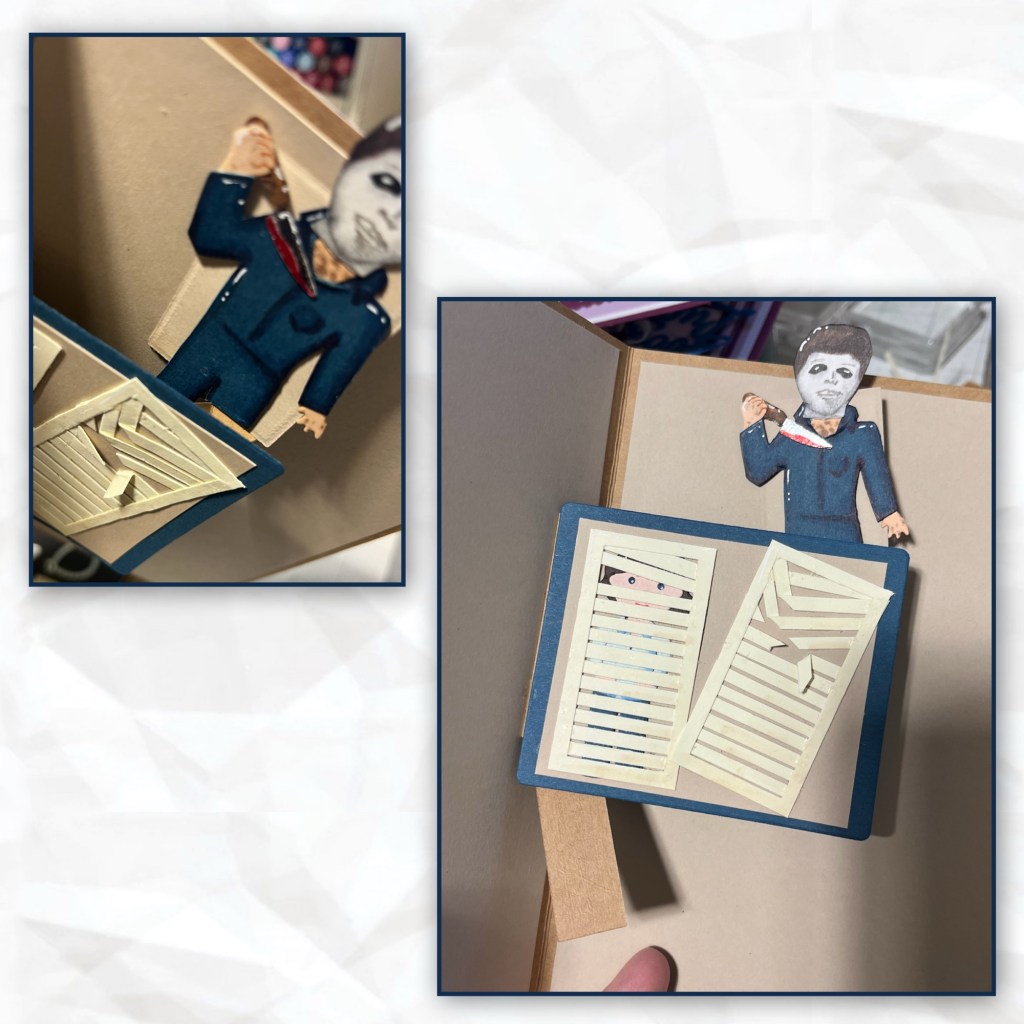
Michael is known for the mask, so I had to make this first, because if I couldn’t pull it off then I was going to have to change plans. I looked up a photo on line and drew it onto white cardstock and coloured with some alcohol markers. At first I thought I was going to use the Paper People for the body but the mask was a little too big, but I liked how it looked so I decided to draw out his coveralls. I used alcohol markers to add shading to the coveralls and a white gelly roll pen to add the highlights. He is missing a leg because that photo was taken just before I added him to the card, and he wasn’t going to fit where he was supposed to go without the amputation.
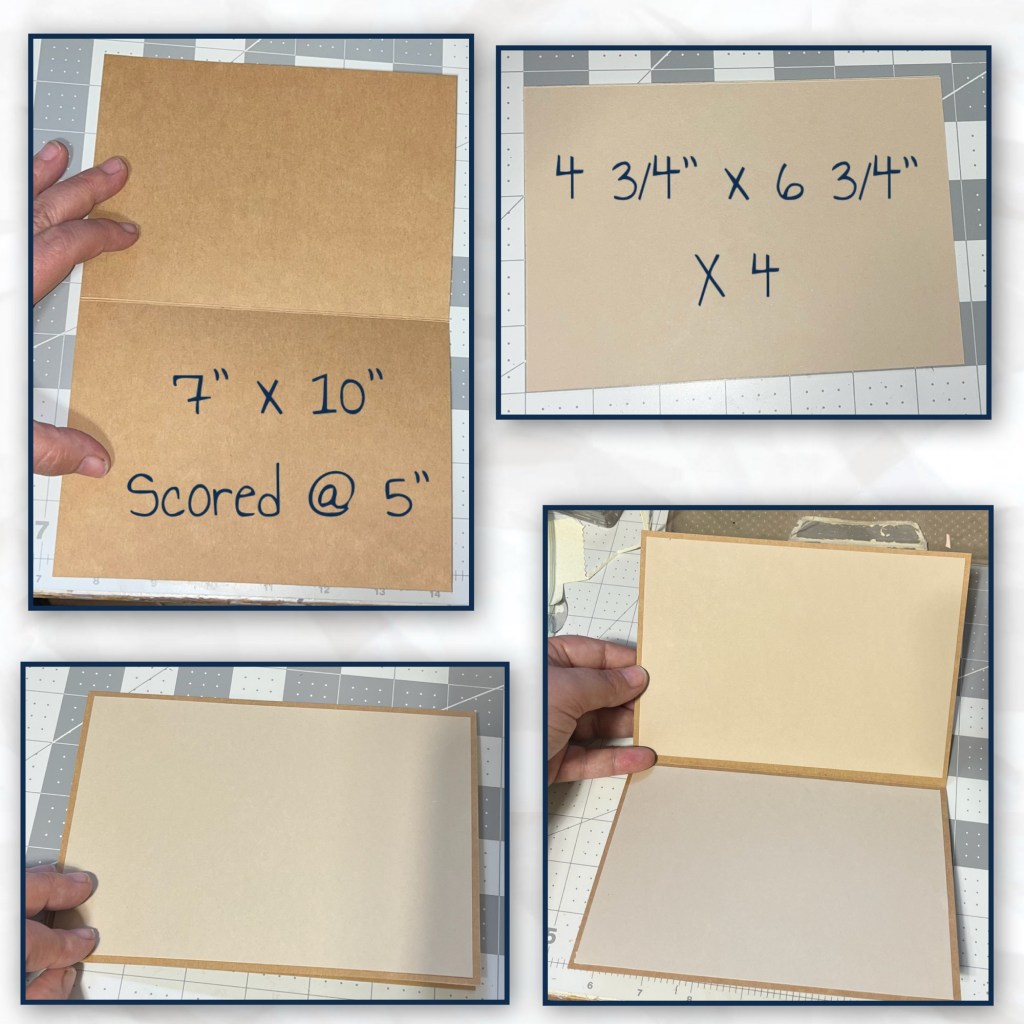
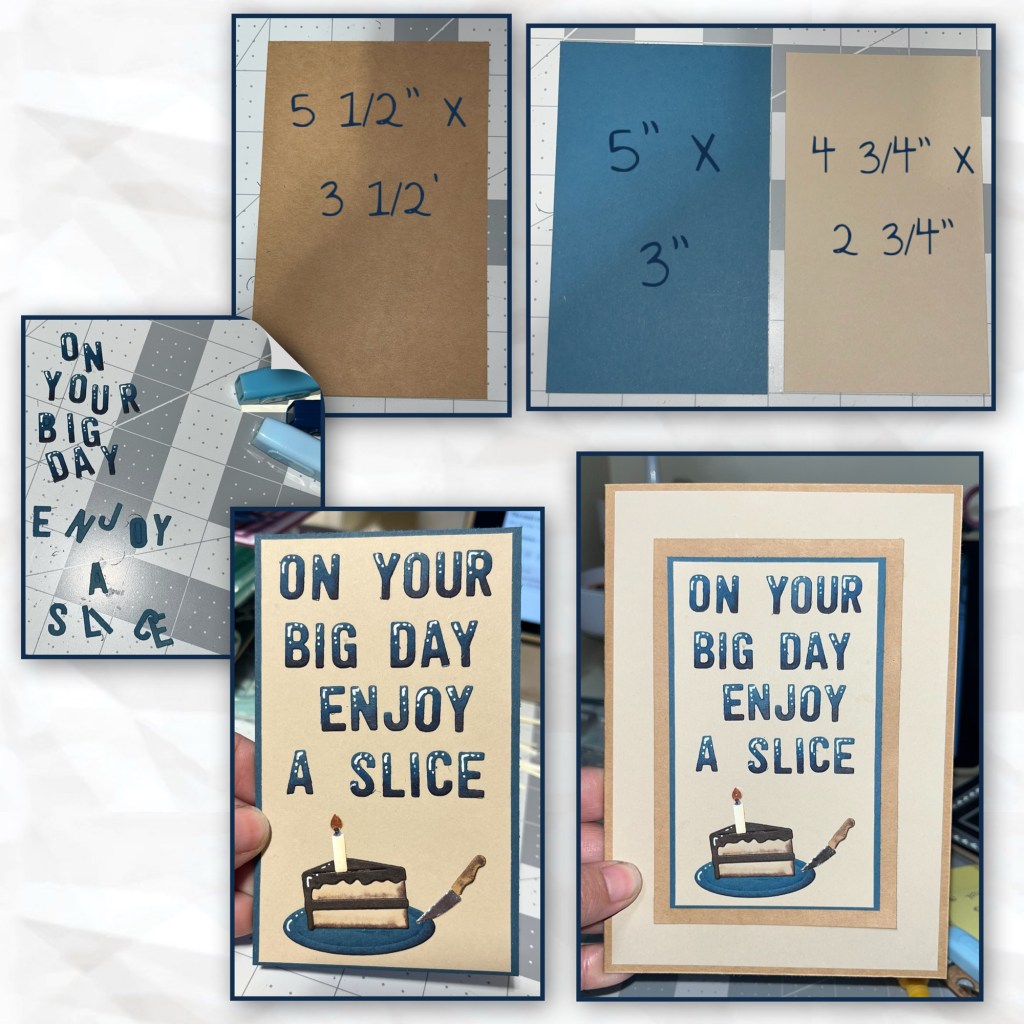
I created the 5” x 7” card base and cut the panels to the dimensions below.
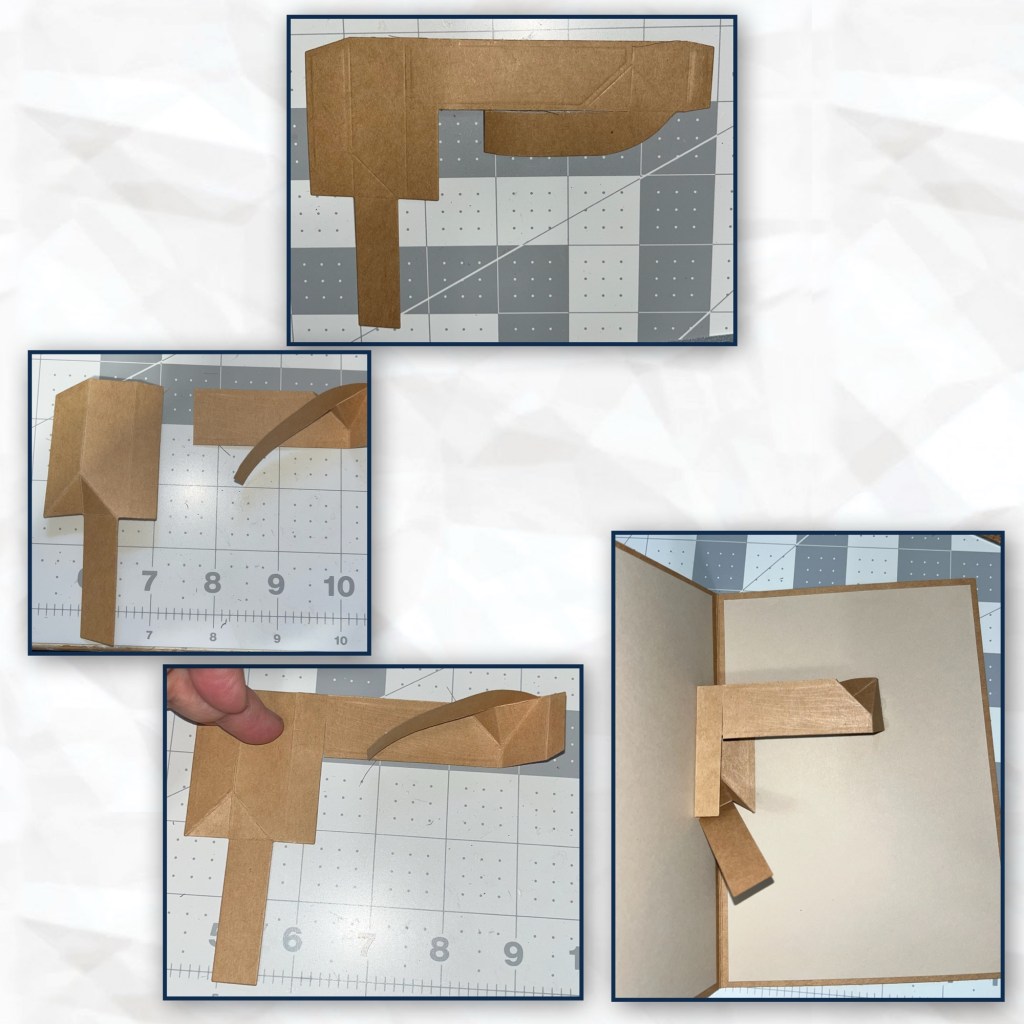
I cut out the mechanism from the Pop ‘n Swap die set and followed the VIDEO tutorial for the alternated assembly which is at 16:26. This will change the mechanism from a Pop’n Swap to a Pop’n Pop
I was trying to think of what I could put on the Pop panel then I thought of the iconic scene where the heroine is hiding in the closet and peeking through the slats in the door. I thought this would work with Michael popping up from behind. The navy panel is cut from the main die set, and I cut the beige square 1/4” smaller. I made the closet doors by cutting to the dimensions shown below. I cut thin strips and glued them behind the frame. I cut some to look like they were sliced through and made a peeky space on the other. I made the “Laurie” by using pieces from the Paper People, I know I messed up the hair, but it’s not that noticeable from behind the door. She is also too tall so I had to cut her feet off. Assemble the pieces as shown.
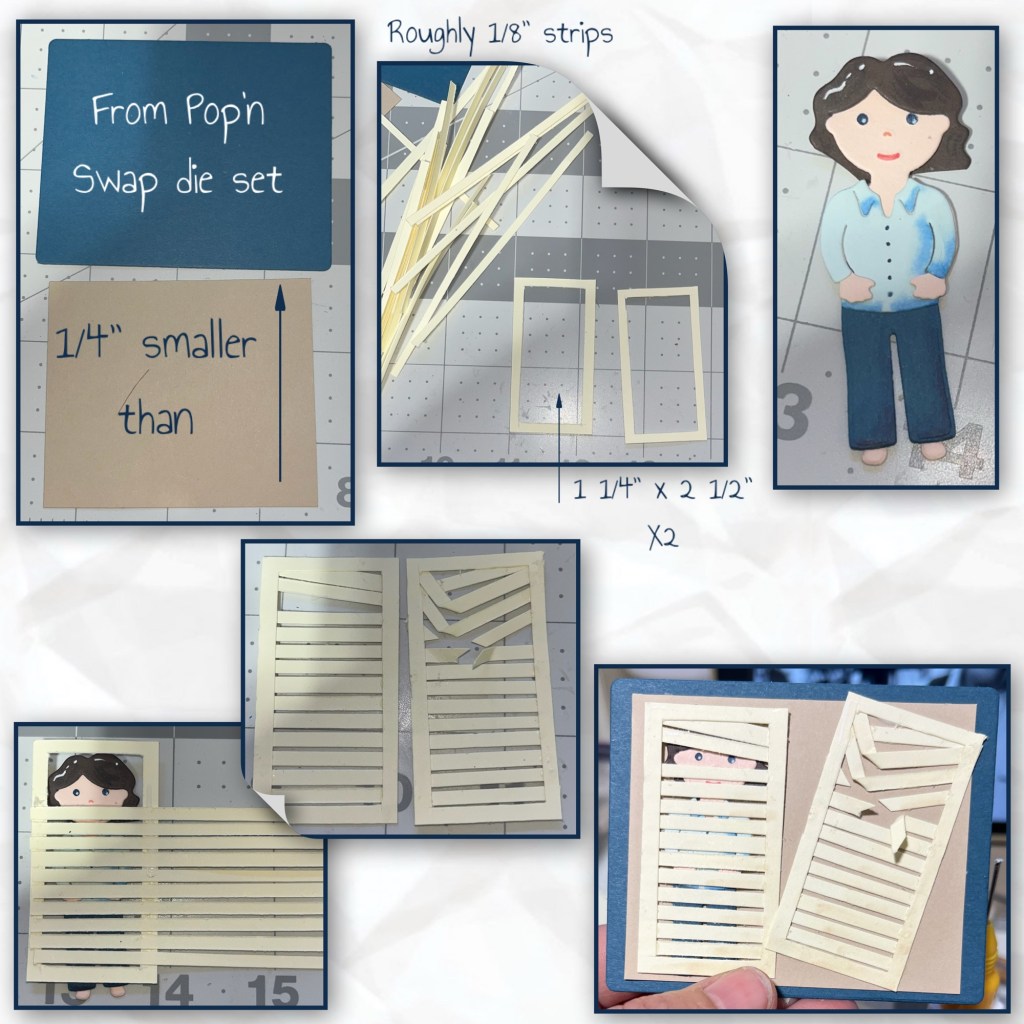
Add the panel to the front of the Pop’n Swap panel, and Michael to the upper swing arm. This is why I had to cut off one of his legs.
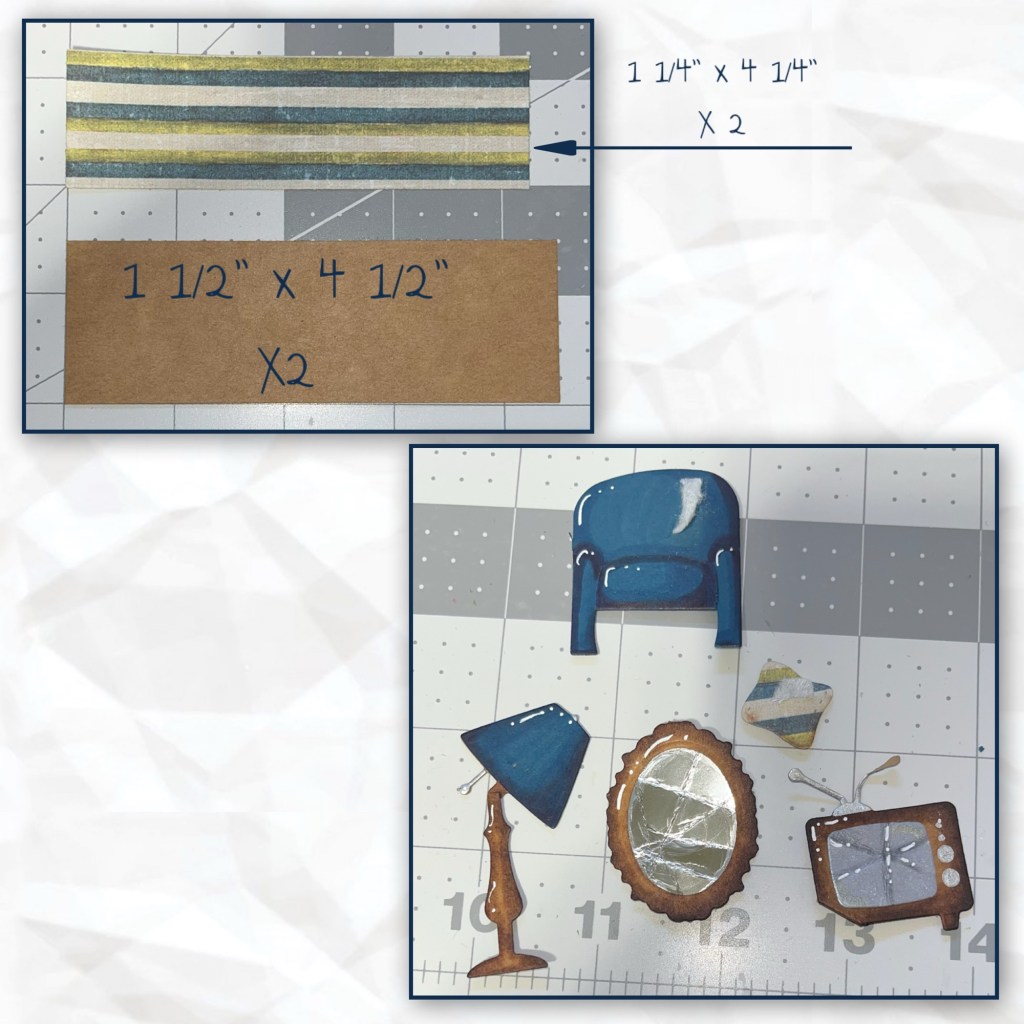
I had a lot of empty space so I thought I would make a living room after it as been rampaged (I pretty sure I remember Michael slashing himself through the house, It’s been decades since I have watched this movie). I diecut the chair from the Family Room but assembled it differently than it is intended. It is meant to be a pop up, BUT I folded up the seat piece to make a thick cushion, and left the arms down to created legs. I used blue alcohol markers to add dimension and shadows, and a white gelly roll pen to add highlights. I added a striped cushion. I cut through both with a craft knife and used small pieces of a Swiffer Cloth glued into the cuts to make it look like there is stuffing coming out.

I add a bottom border using the pieces below. And added more furniture using pieces from the Memory Charms. I made them as though they were damaged as well.
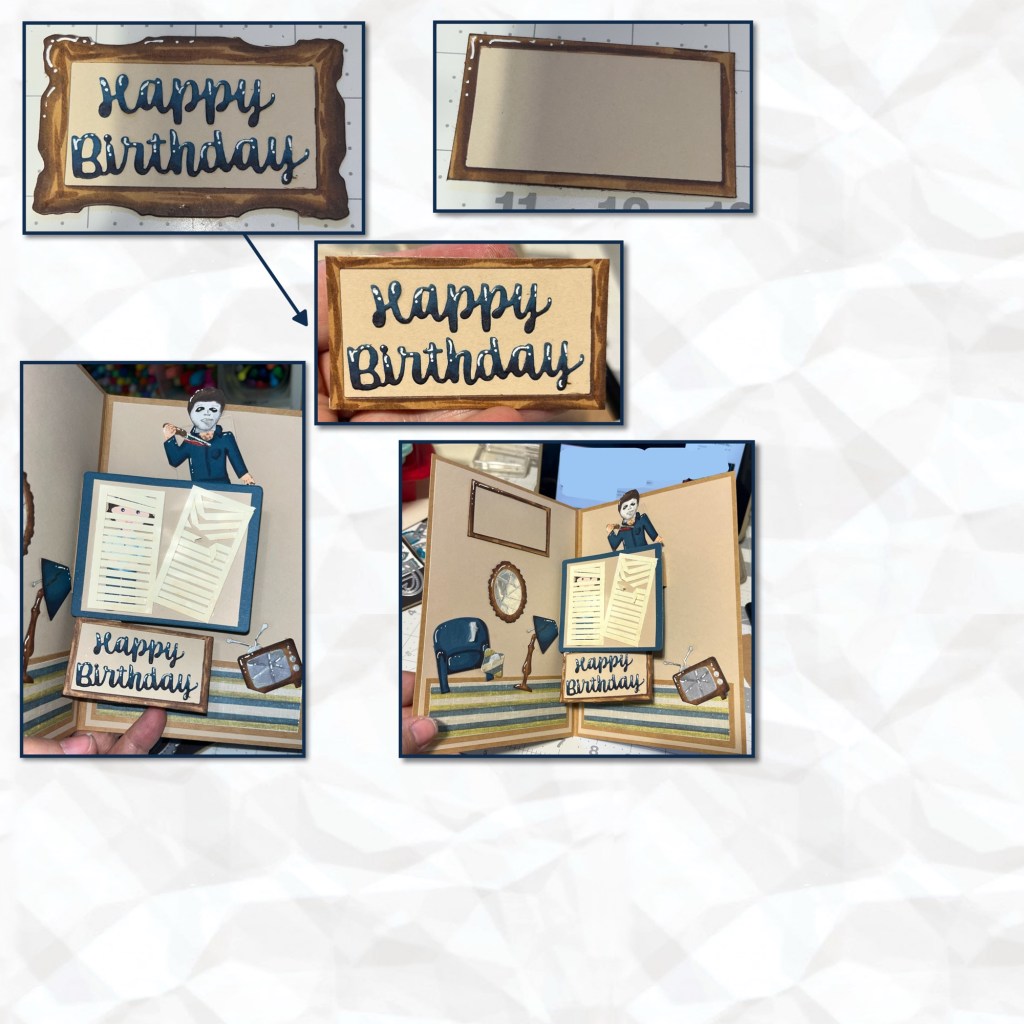
I added them all to the card as shown.

I had a vision of adding the “Happy Birthday” to the Slim Frames, then adding it to the bottom swing arm, but it didn’t fit. I had assembled it and used alcohol markers to add shading and a white gelly roll pen to add the highlights. I trimmed it down to a skinnier frame and it did fit so I added it to the bottom swing arm. I made a second one and trimmed it the same so they would match and added it to the top left corner as a place to sign. Inside is done!!!!
Now for the front….. I cut the panels to the dimensions shown and cut out the message using the Mini Alphabet and Numbers. I used 3 shades of blue to colour the letters in an ombré effect and added white highlights. I assembled the cake slice from the Big Birthday Charms, and the knife from the Oven Extras and assembled as shown.
Die Sets Used
Other Tools used

WOW! I bet your brother will really enjoy this card. It is sooo creative. Thanks for sharing.
LikeLiked by 1 person