

Here is my second card for this new release
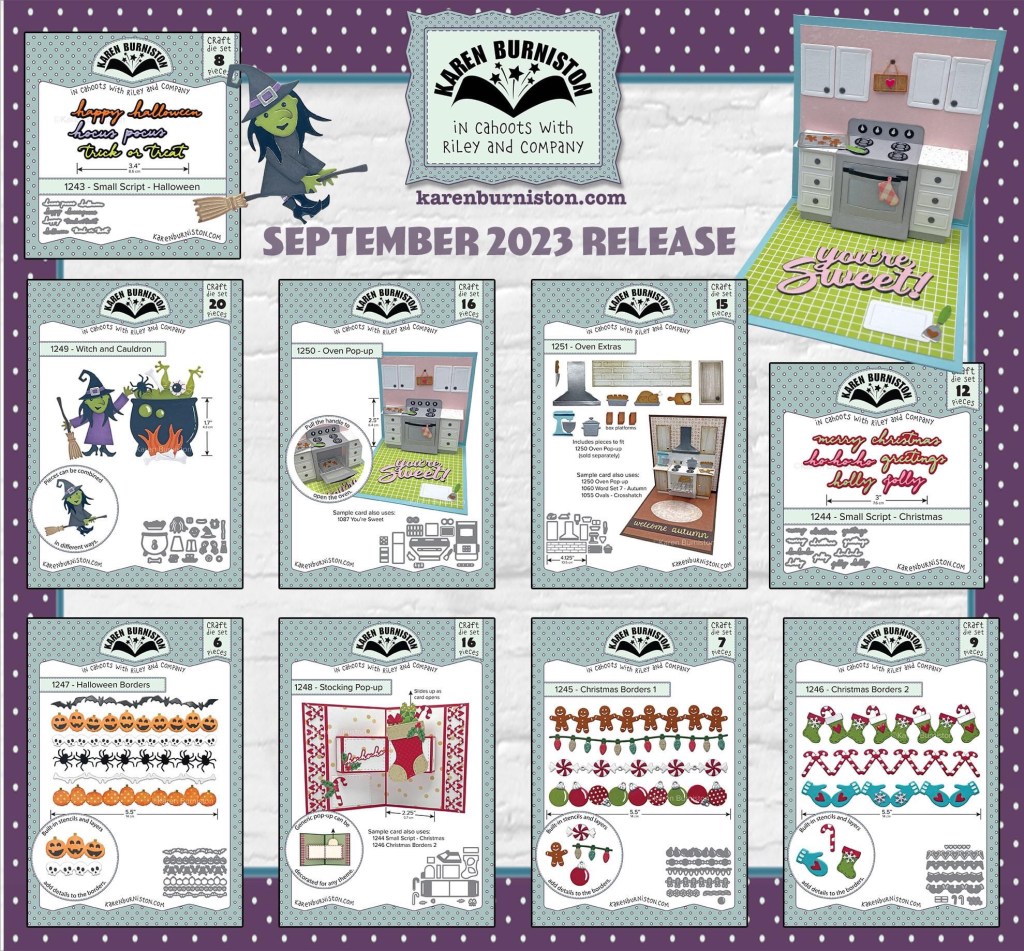
I am so stoked to share this card today. It is a card I made for my slasher movie loving brother, and it was a hit. Believe it or not but this card uses the new Stocking pop up to animate my Jason Character

All the fun is in the reveal, to see this card in action please check out my FACEBOOK page, feel free to join if you would like to share your own crafty creations. You can also see a video of this card on my INSTAGRAM page.
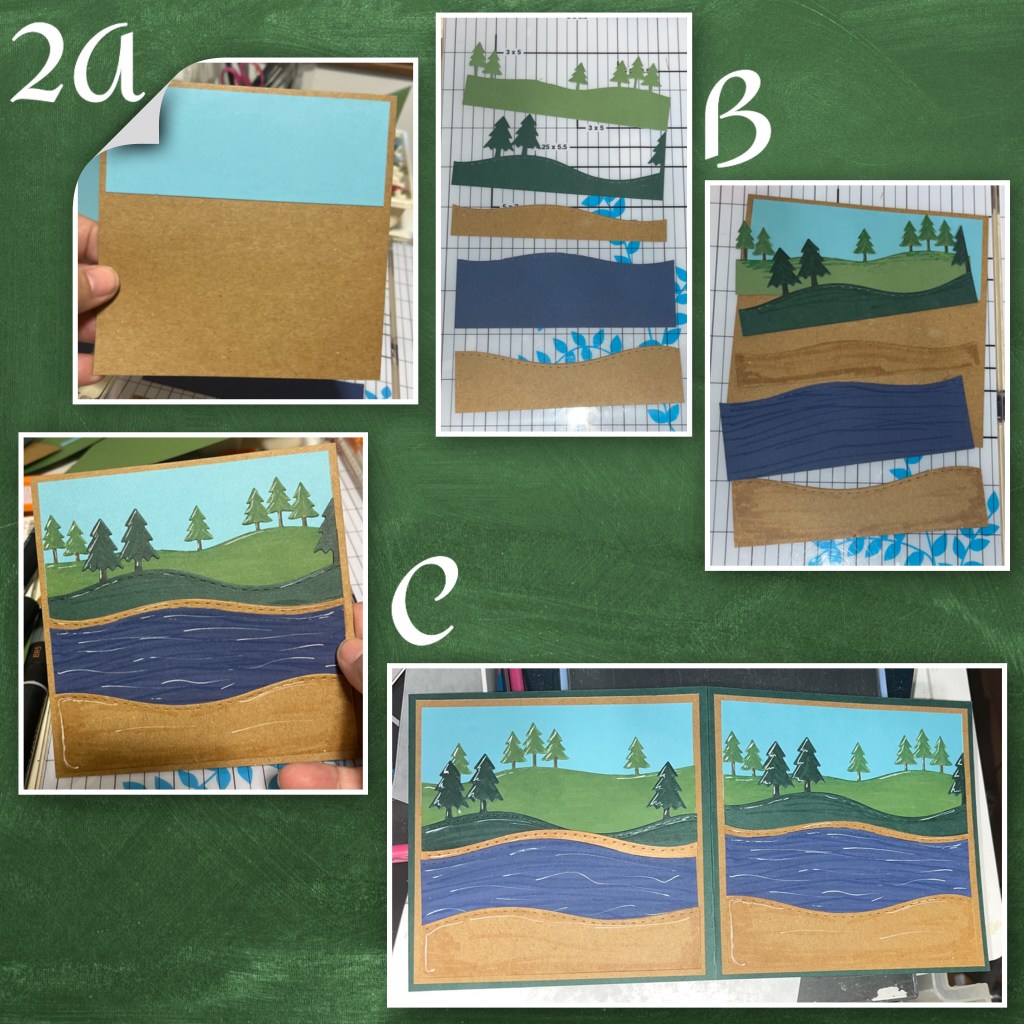
1A- I made a square card base from dark green cardstock and kraft coloured panels, using the dimensions below,
B- I cut strips of paper as shown. If I were doing it again I would have made 2 of the dark green strips 4” instead of 2”. Not shown is a couple of strips in the Kraft colour.

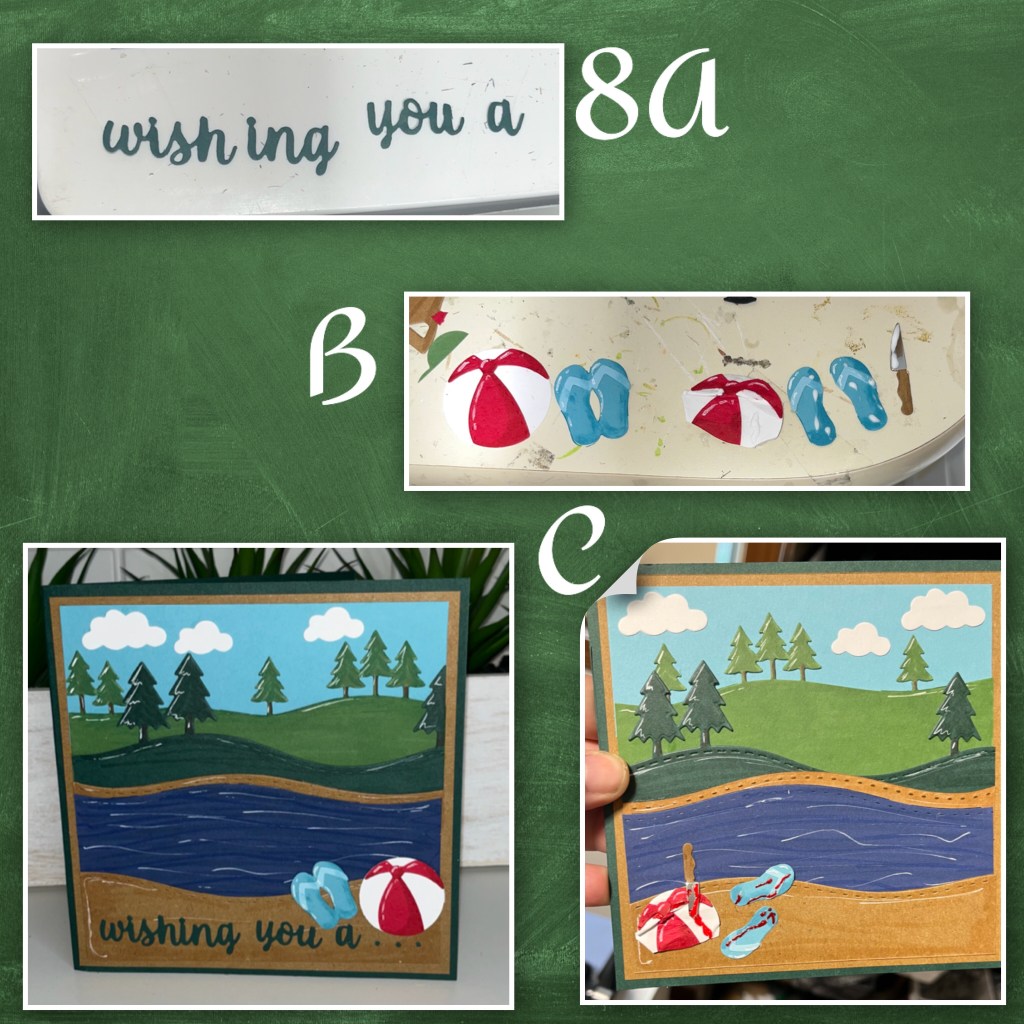
2A- For the front and back of the card —add the sky blue to the top of the Kraft coloured panel
B- I cut the other pieces as shown using the Long Natures Edges, and Out Door Scene border dies, I used alcohol markers for shading and white gel pen for highlights.
C- add the panels to the front and back of the card
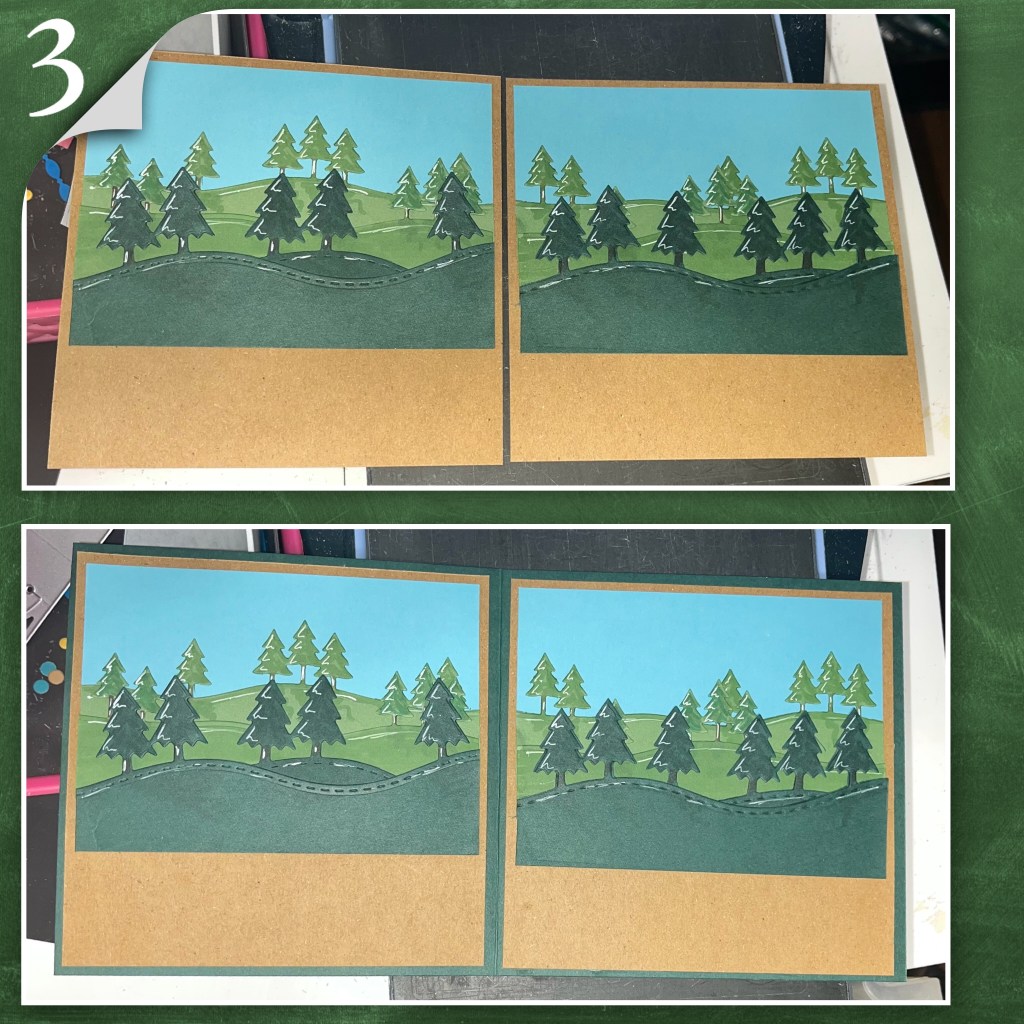
3- I did the same for the inside but didn’t add the water. That’s why I would have had 2 of the dark green strips wider.
4A- I cut the inside part of the mechanism from kraft colour cardstock and the outside of the mechanism with the dark green
B- add the inside mechanism then I added green card stock to cover the bottom, then added the outside of the mechanism

5A- using the Gnome and Santa and the knife from the Oven Add ons I started cutting out the pieces to make my Jason. Don’t forget to grubby up his clothes.
B- I traced his head on to white cardstock keeping the mask within the limits of where his face would be. Then I drew on mask details using an online photo for reference.
C- I assembled the rest of him, and grubbied up his mask and skin

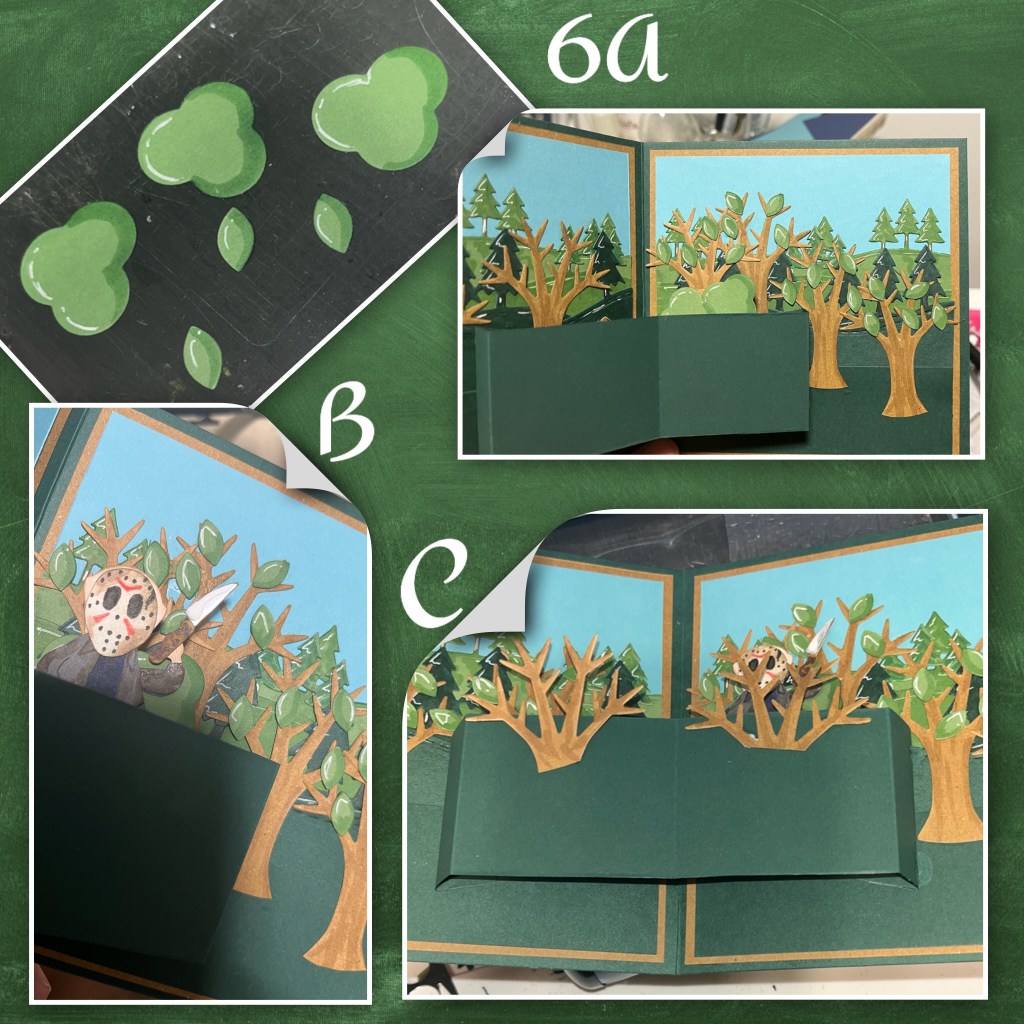
6A- I cut several trees and their pieces from the Tiny Trees pop up. I used alcohol markers for shading and a white gel pen for highlights. I started adding them randomly around. I added 2 of the cloud shaped pieces to the pop up mechanism.
B- I added Jason and the knife to the mechanism
C- I added branches to the outer part of the mechanism
7A- I added the lighter green panels, I used the Mini Alphabet and Numbers to cut “killer” and “birthday” from Wordset 2- Birthday Out of the darker green and red. The red letters I fussy cut to look like dripping blood. I added LINECO Neutral Ph Adhesive over everything that was blood, including Jason’s knife. This glue dries NOT TACKY so it made the blood shiny.
B- I added more dripping blood and filled in the shrubs and trees
C- I added more branches and I used a Martha Stewart tear drop punch to make more blood drops. when the glue dried I went over it with a red sharpie and it made the red pop.

8A- the “wish, you, a” are from the Word set 2 Birthday , and the “ing” I cut off the word camping from Word set 6- Summer
B- I die cut the beach ball and flip flops from the Beach Charms, and a second knife. I trimmed them and ruffed up the ball so it looked deflated. I added blood as shown the same way I did in step 7. Add the diecuts as shown.

Other Tools used

so awesome. I think this will make an amazing hunting card.
LikeLiked by 1 person