

I was in need of a masculine birthday card when I sat down to make this Craft Roulette card. I was stumped for a day because I also wanted to make a pop up card but I wasn’t sure how to work that in with parameters. I actually hadn’t figured it until after I started. Here are this weeks parameters…
The way the card is folded is a Joy Fold card, I actually made a slimline Joyfold, I think the colours used could be seen on a buggy ride, the colours of the sky, grass, trees and the colours of buildings could be seen in the striped paper. The sticks can be found in the trees and the stones are around the trees. The trim is the twine around the front and the woven ribbon on the front and inside of the flap. I had the added challenge of making it a masculine card and working in the pop up.

All the fun is in the reveal, to see this card in action please check out my FACEBOOK page, feel free to join if you would like to share your own crafty creations. You can also see a video of this card on my INSTAGRAM page.
1A- The striped paper is from my stash, and found some Stampin Up cardstock to match, cut the card base and the striped panels as shown.
B- add the panels as shown. this is how it looks on the inside.

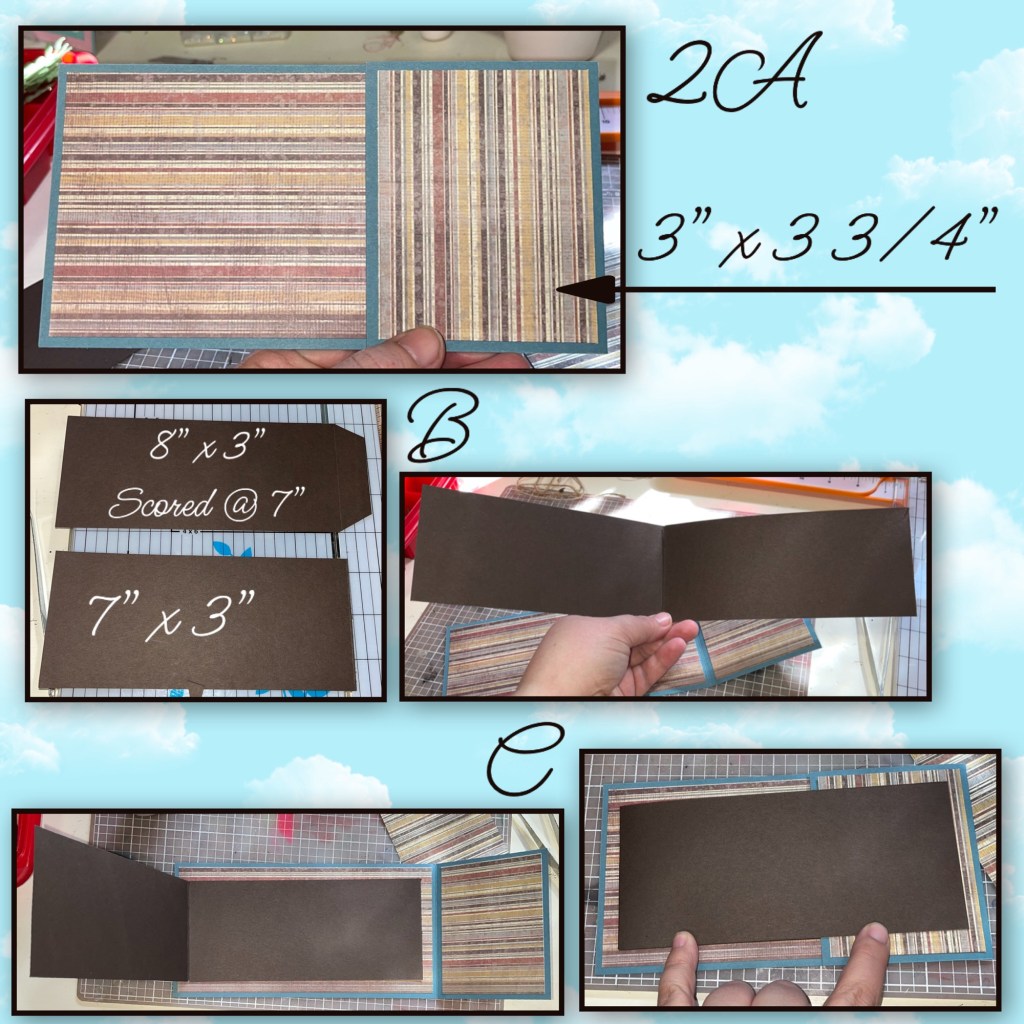
2A- I added another panel to the flap when the card is closed. I decided it would add a bit of interest if I had the stripes going the other direction.
B- cut and join the brown panels as shown. This will make the Joy Fold part of the card.
C- add the brown card base to the blue one as shown, it will open on the opposite side.
3A- cut the panels as shown.
B- add them to the front and inside of the brown base pieces.

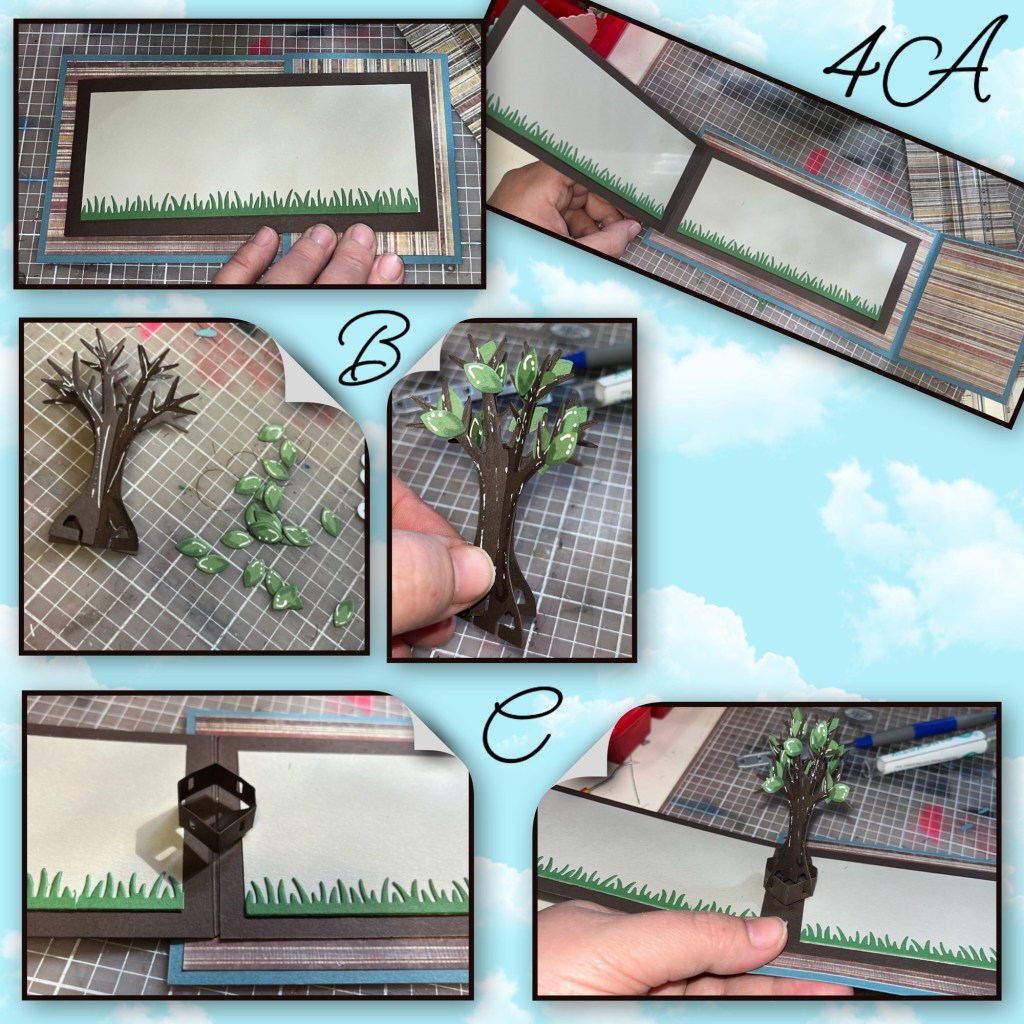
4A- I used the grass border from the Easter Borders on the front and inside.
B- die cut and assemble a tree from the Tiny Trees, I added shading with a Versa Mark Marker, and highlights with a white Gelly Roll pen
B- This was about the time that I thought I’d see if I could use the pop up mechanism inside this card. I was originally just going to leave the trees flat. I was pleasantly surprised that it fit inside the smaller part of the cardbase.
5A- I diecut Happy Birthday and the Happy Birthday Shadow as shown, I added shading with a Versa Mark Marker, and highlights with a white Gelly Roll pen
B- I dug out some twine and a woven ribbon to use as trim. I wrapped the twine around the right side of the brown cardfront.
C- I added the twine ribbon on the front of the flap, when the card is closed it should line up behind the twine as shown.

6A- I diecut “wishing you a” from Wordset 18-Connectors, “day” was trimmed from “Birthday” from Wordset 2- Birthday , and “Wonderful” was cut using Mini Alphabet and Numbers
B- I added another tree to the inside right and added a couple of blue birds using the bird from the Tiny Trees set. The stones are from the Tiny House Pop Up and I added them to the base of the trees.
C- I decided to add another piece of the ribbon to the inside of the flap.

7- I added a tree, and some leaves and stones to the front.

Other Tools used

Gorgeous card design and explanations. xx
LikeLiked by 1 person