
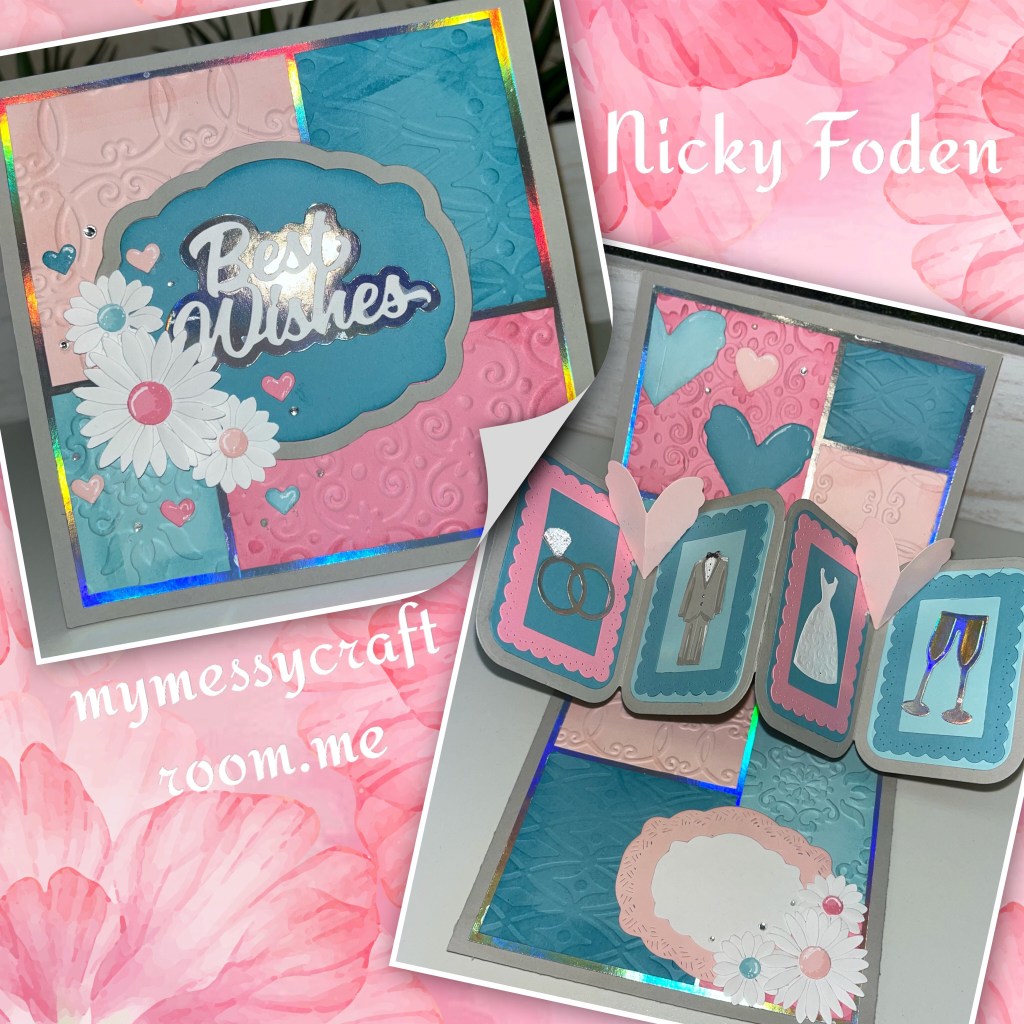
It’s the the first Tuesday in June so you know what that means, It’s Karen Burnistons Design Team challenge. This months challenge is to make either a “Wedding or Baby” card. I had decided to make a wedding card, but for some reason I was drawn to these colours, possibly because I just bought this paper pack at Michaels lol. So I guess with a swap of charms and greeting this could easily become a baby card, or a gender reveal card.
All the fun is in the reveal, to see this card in action please check out my FACEBOOK page, feel free to join if you would like to share your own crafty creations. You can also see a video of this card on my INSTAGRAM page.
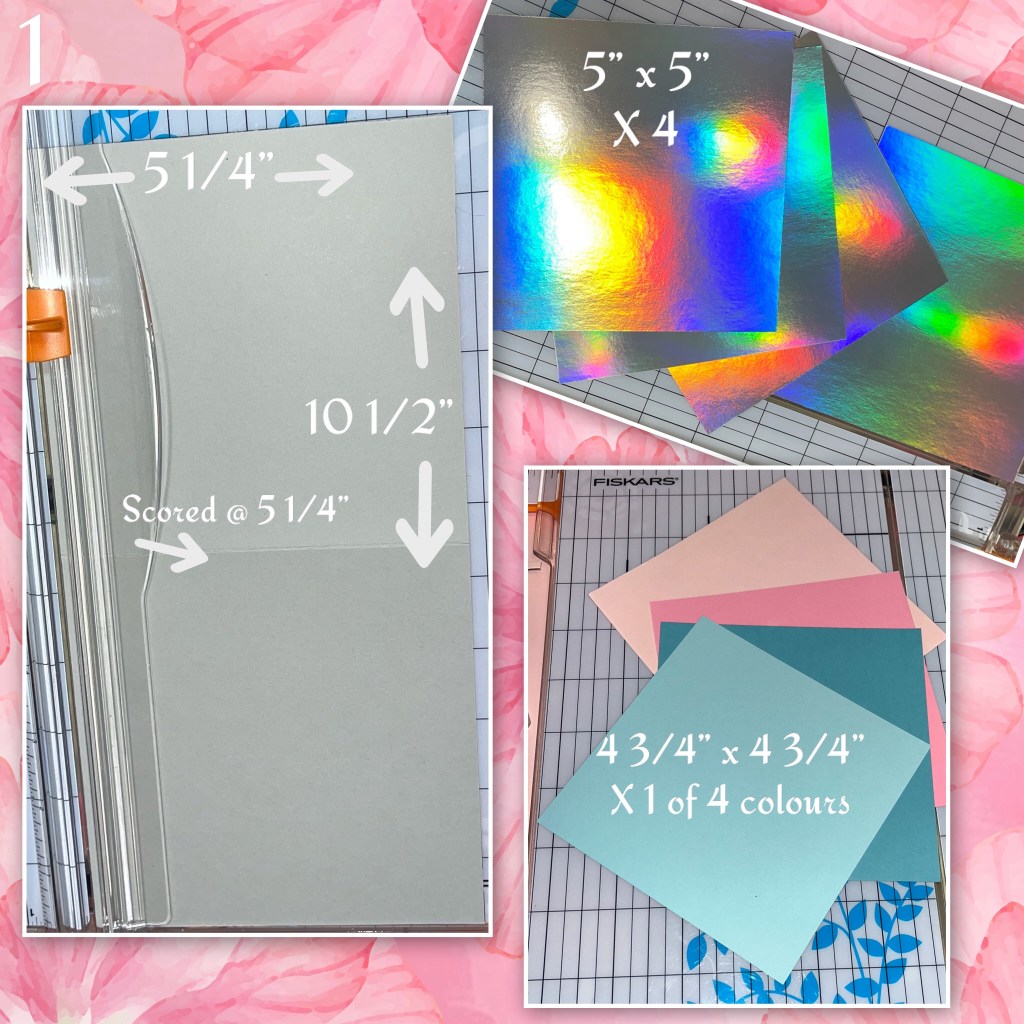
1- I cut the card base and the panels as shown below. The card is grey, there are 4 holographic panels and one each of the pinks and blues.
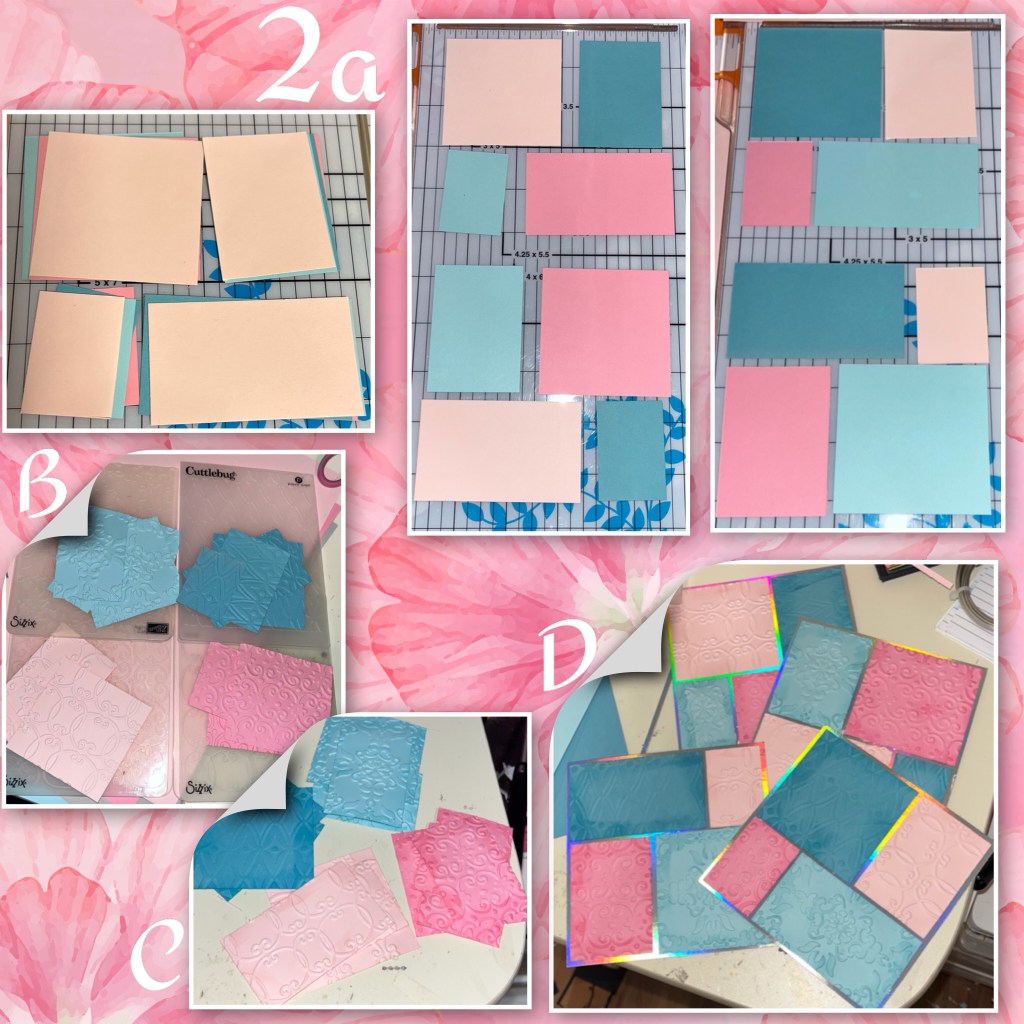
2a- I cut the 4 coloured panels as shown, all the same. And divided them so there would be one of each colour on each panel. I did not measure.
B- I embossed all of the coloured panels, each colour with its own embossing folder. 3 from Sizzix, 1 from Cuttlebug
C- I used Versa Mark ink to sponge the edges
D- I added the coloured panels to the holographic panels as shown.
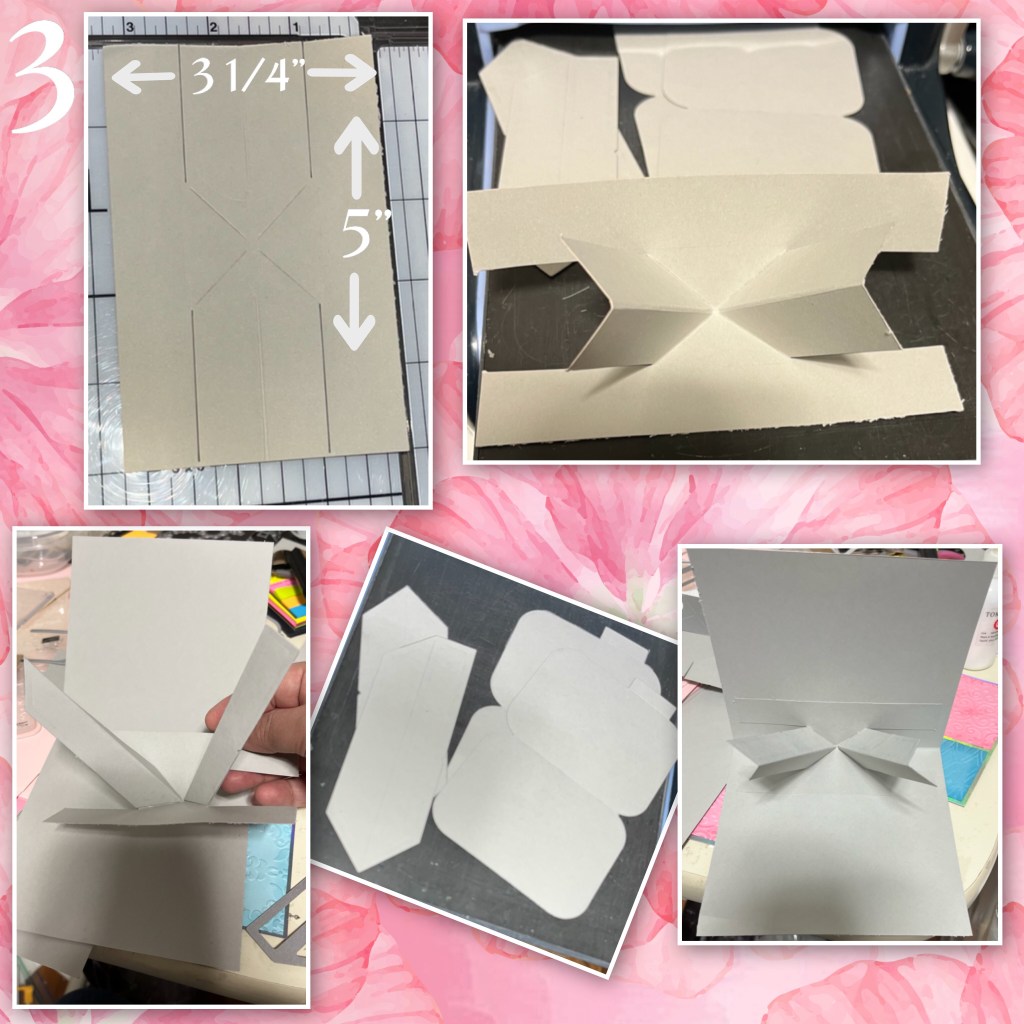
3- I created the Twist Panel Pop up mechanism using the dimensions below. (Check link for instructions) and added it to the card.
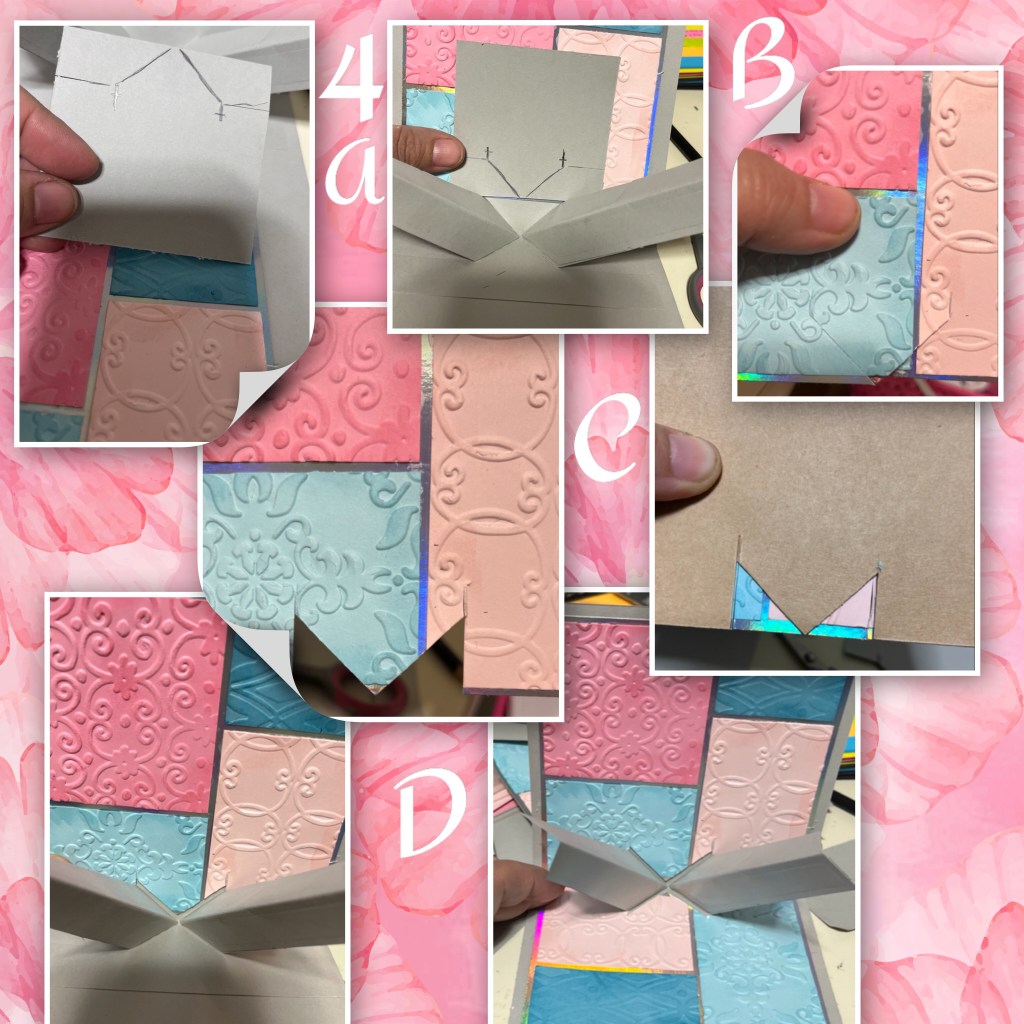
4a- I embossed the mechanism on a separate piece of cardstock as well so I could make a template to mark where to cut into the the panels.
B- I cut the panel (shown at bottom of photo)
C- I used the cut panel to mark the uncut panel.
D- add the panels to the card, slipping the cut pieces into the spaces of the mechanism.
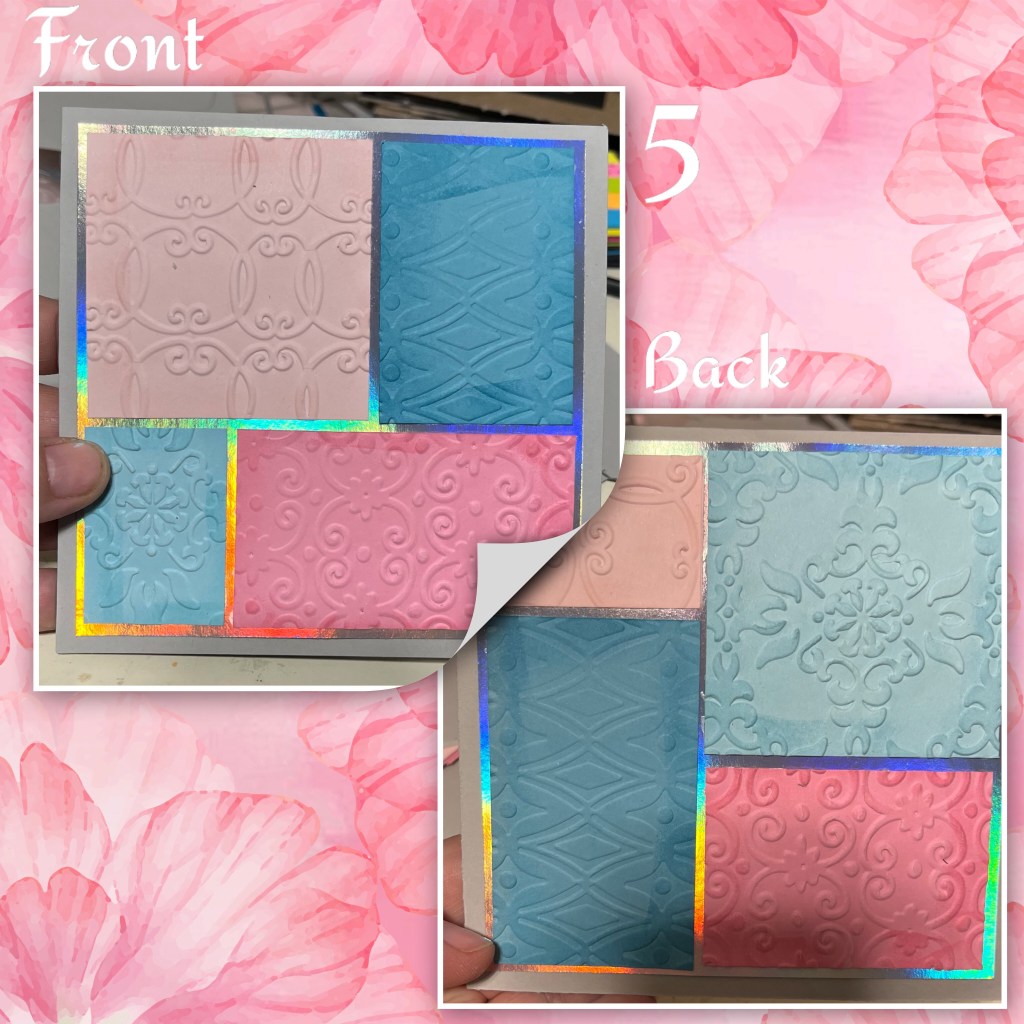
5- added one of the other panels to the front, and the other to the back.
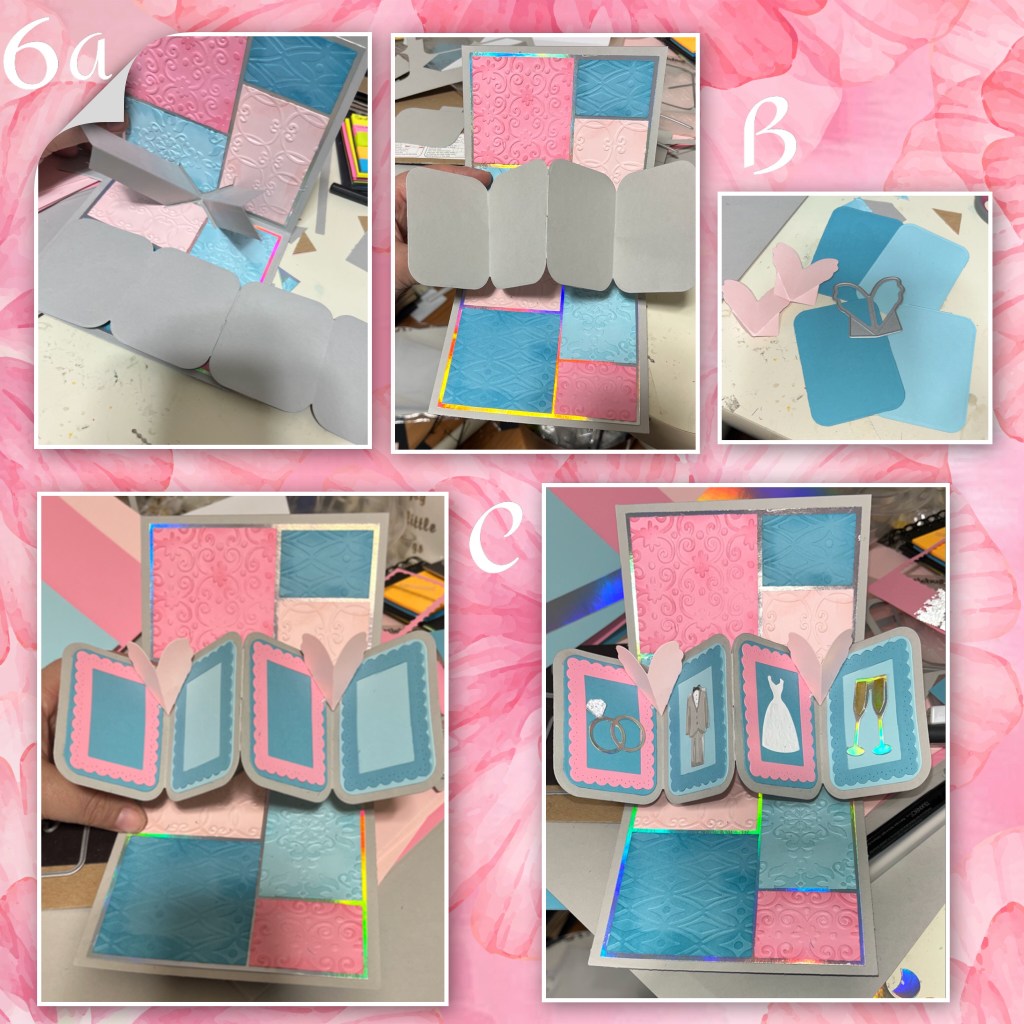
6a- add the strip of panels from the Twist Panel pop up to the mechanism
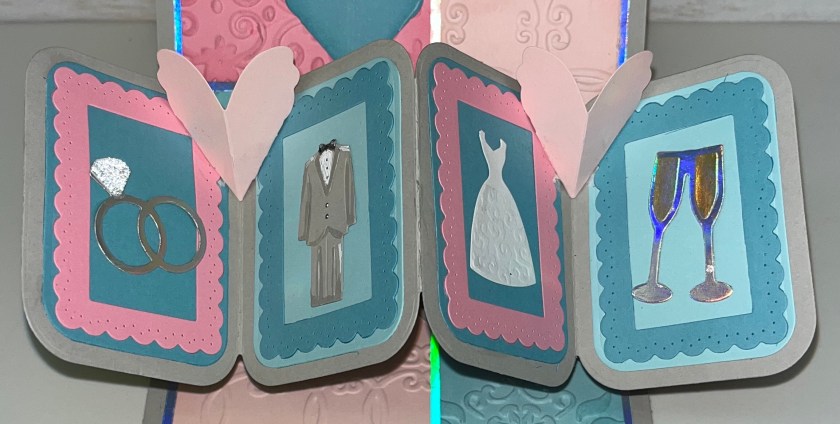
B- I die cut some of the pieces from this set to decorate the panels, and added them to the card
C- I diecut some pieces from the Wedding Charms dieset and added to the card base, the “Best Wishes” is also from the Wedding Charms set.
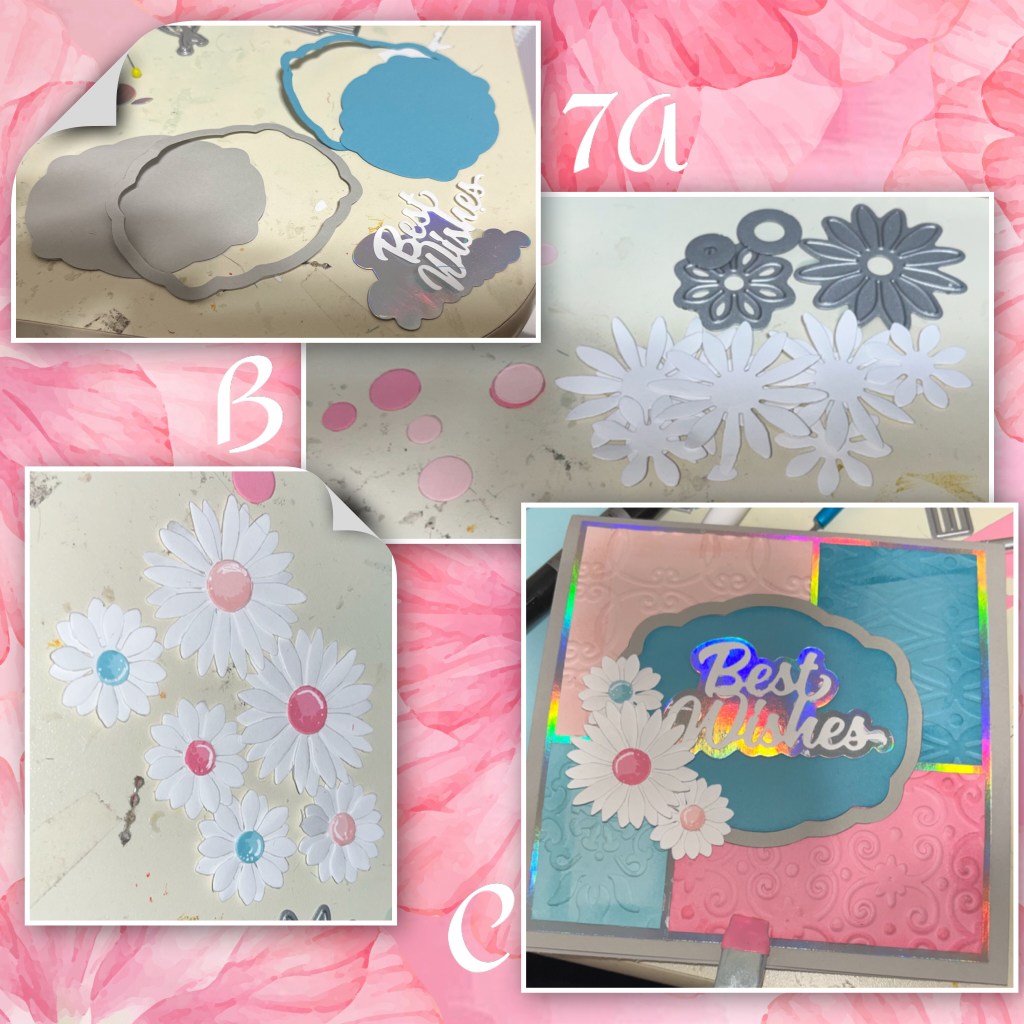
7A- I diecut the labels from the Rectangles and Labels Crosshatch dieset, and the flowers from Flower Pot Pop up
B- I added some shading with a Versa mark marker and highlights with a white gel pen.
C- add all the pieces to the front.
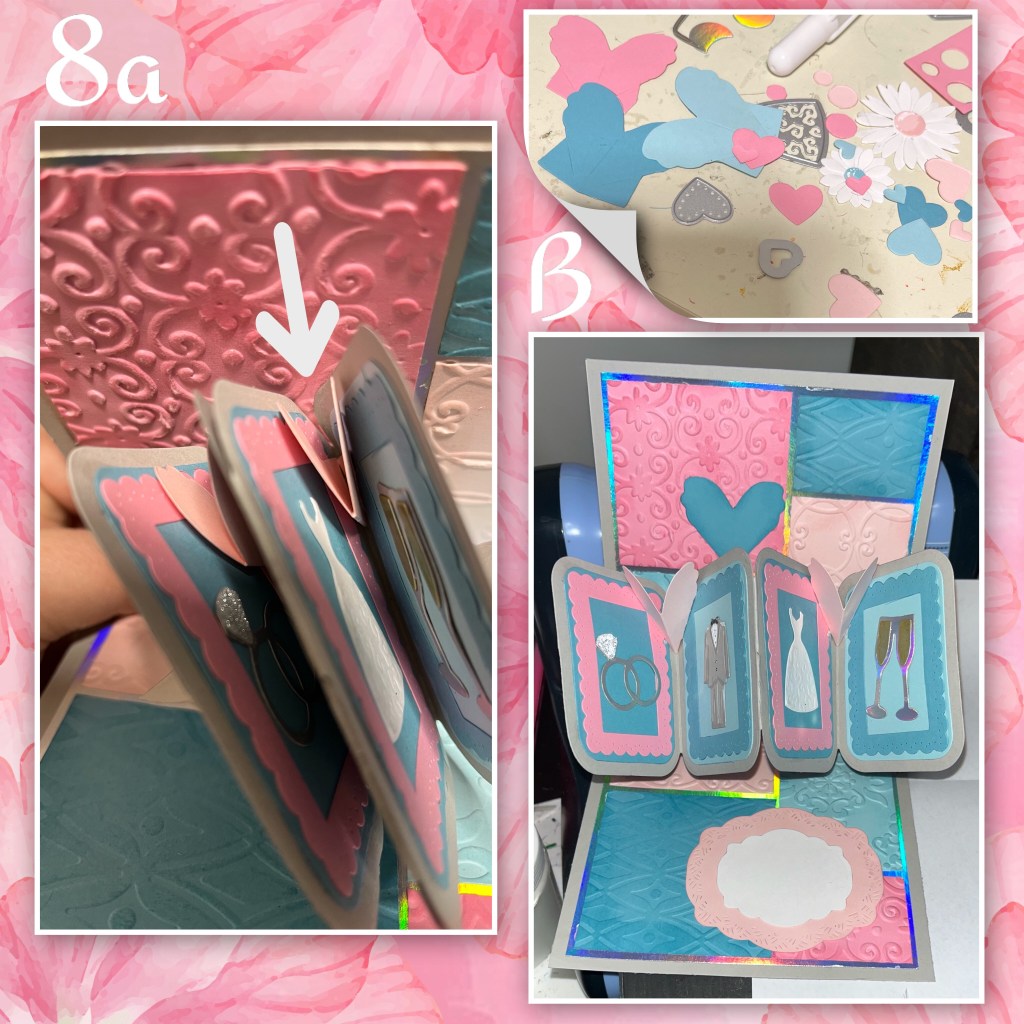
8a- the embossing looks pretty but….. it created a catch point when trying to close the card 🤦🏻♀️
B- so I cut some more shapes and labels from the sets I’ve already used.
C- I put the 2 pieces shown exactly over where they were catching. Problem solved.
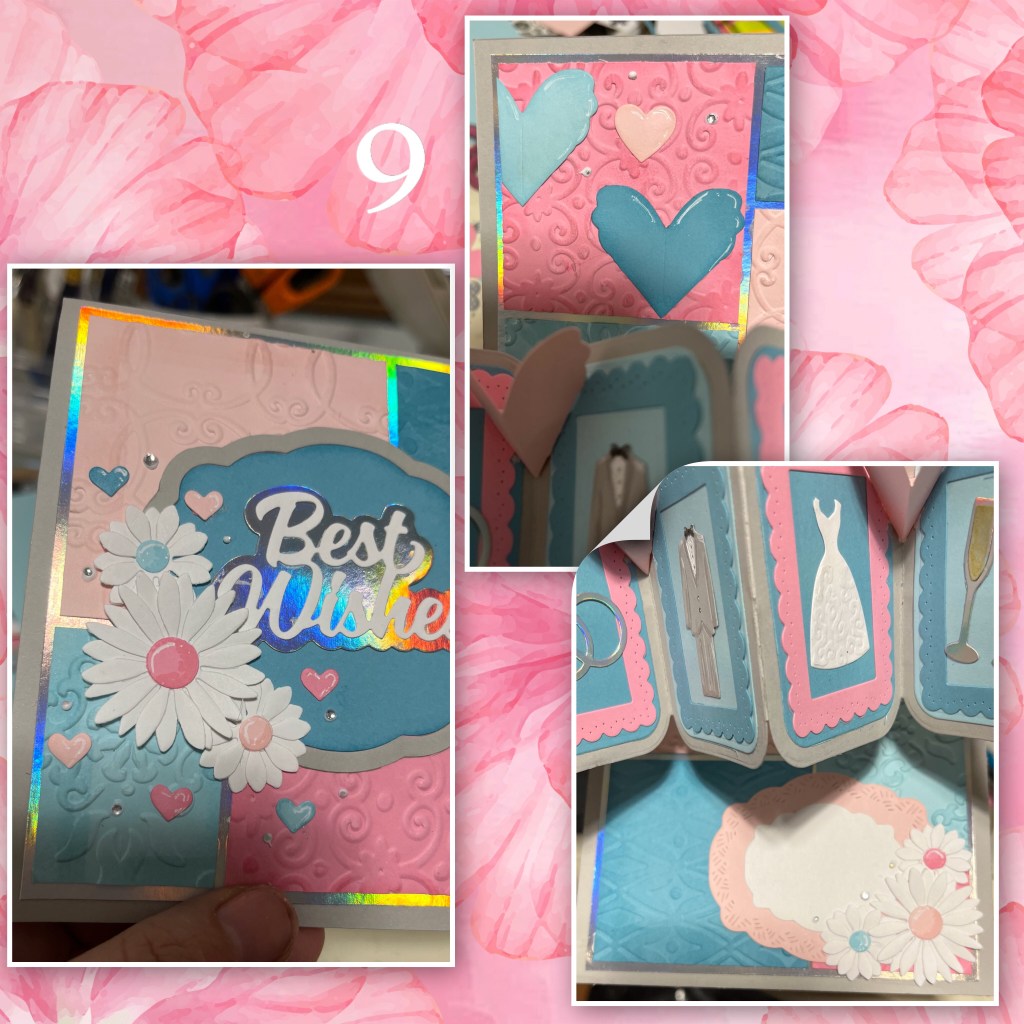
9-I added more pieces as shown to finish off. Including some mini rhinestones.


Great wedding card.
LikeLiked by 1 person
I LOVE the holographic paper! Great wedding card!
LikeLiked by 1 person
Nicky this is gorgeous and so pretty, love the design and stunning card x
LikeLiked by 1 person