

I have a bright and sparkly card this week. I needed a special card for my sister and I want to find a way to make it a bit extra sooooo I decided to add a few windows and and add a shaker element to the back panel and it turned out better than I thought. The bright colours were chosen because the colours matched a package of sequins I had recently purchase. This is what I came up with……

All the fun is in the reveal, to see this card in action please check out my FACEBOOK page, feel free to join if you would like to share your own crafty creations. You can also see a video of this card on my INSTAGRAM page.
1- the sequin pack is multi coloured and has sequins in 3 different sizes, I chose the purples pinks and teal cardstock for my main colours. I used Core Color Cardstock
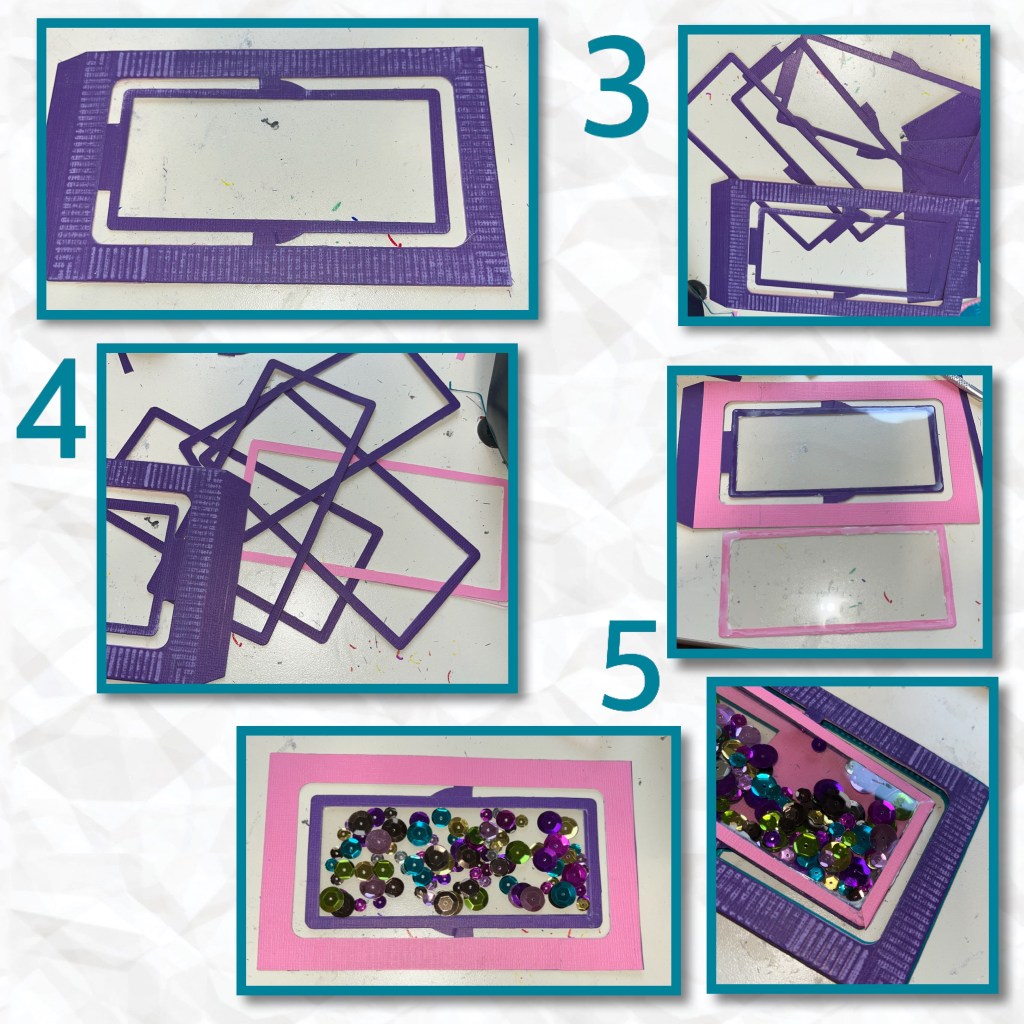
2- I die cut 3 panels in 3 different colours for the card base, then cut 3 more in the same colours, I trimmed out the centres and the side tabs to make frames. And added the frames to the card base pieces.

3- using a rectangle from the Short Rectangles Crosshatch I diecut out the center of what will be the last panel. I diecut out 4 others in the same colour, cutting out the centres to match the card panel
4- take the 4 frames and trim of the pivot parts so they are a perfect frame. Do the same with a piece of pink
5- cut out 2 acetate pieces to fit the frames, adhere one to a purple frame and one to the pink frame. Adhere the other purple frames behind the purple/acetate piece sandwiching the acetate between 2 and adding the rest to what will go on the inside (they will be spaces so the sequins can shake around. Add the sequins and close up the shaker window. I put the pink frame on the purple side and the purple frame on the pink side.
6- lay down the pieces that will be your first and middle panels. Mark an X on the right side of the first panel and the left side of the middle panel. These are where the windows will be cut out.
7- using the frame from the Landscape Rectangle Accordion set cut out the window for the first panel,
8- use the first panel to draw where exactly the window will be cut out on the middle panel.
9- cut it out. It should look like this.

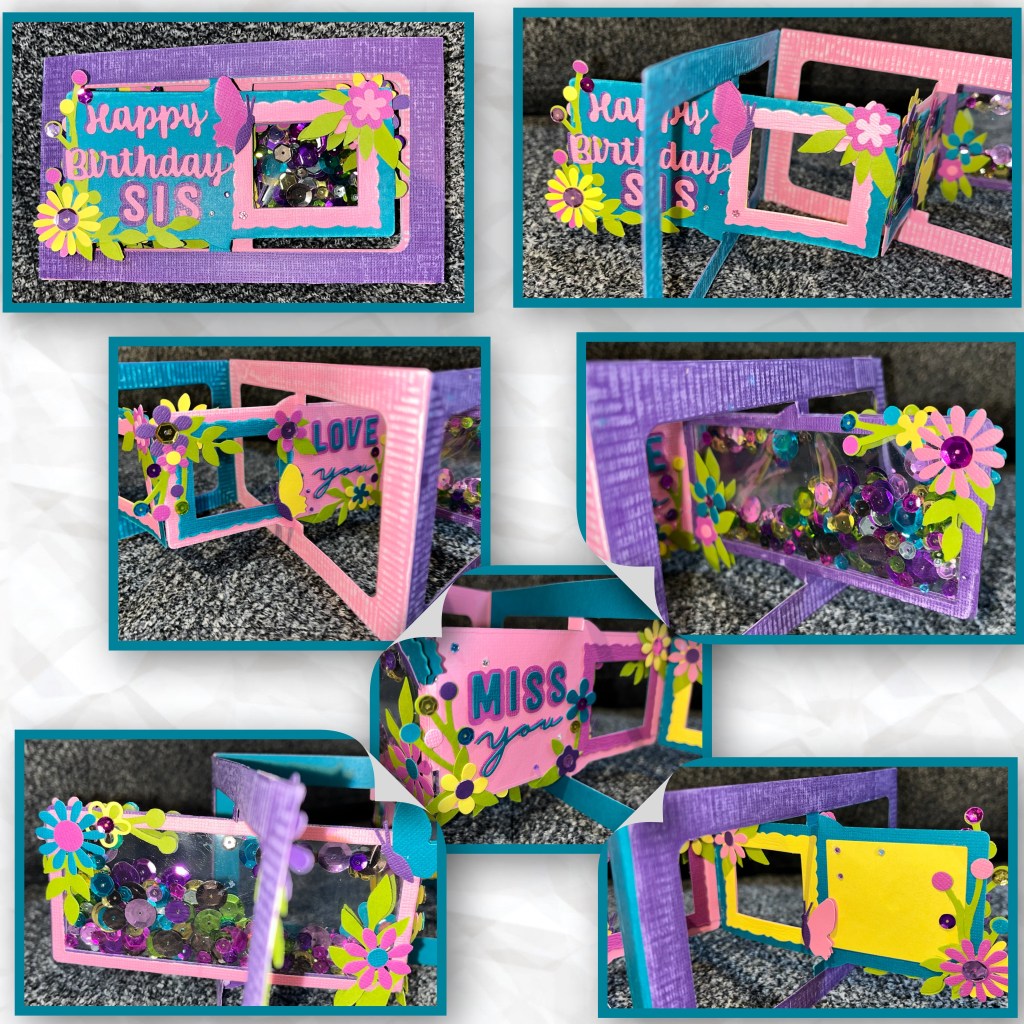
10- adhere the three panels together using the side tabs. Then adhere the small tabs on the centre panels together. Fold as shown.
11- when closed you should be able to see through the first and middle panels to see the shaker that is on the back panel.

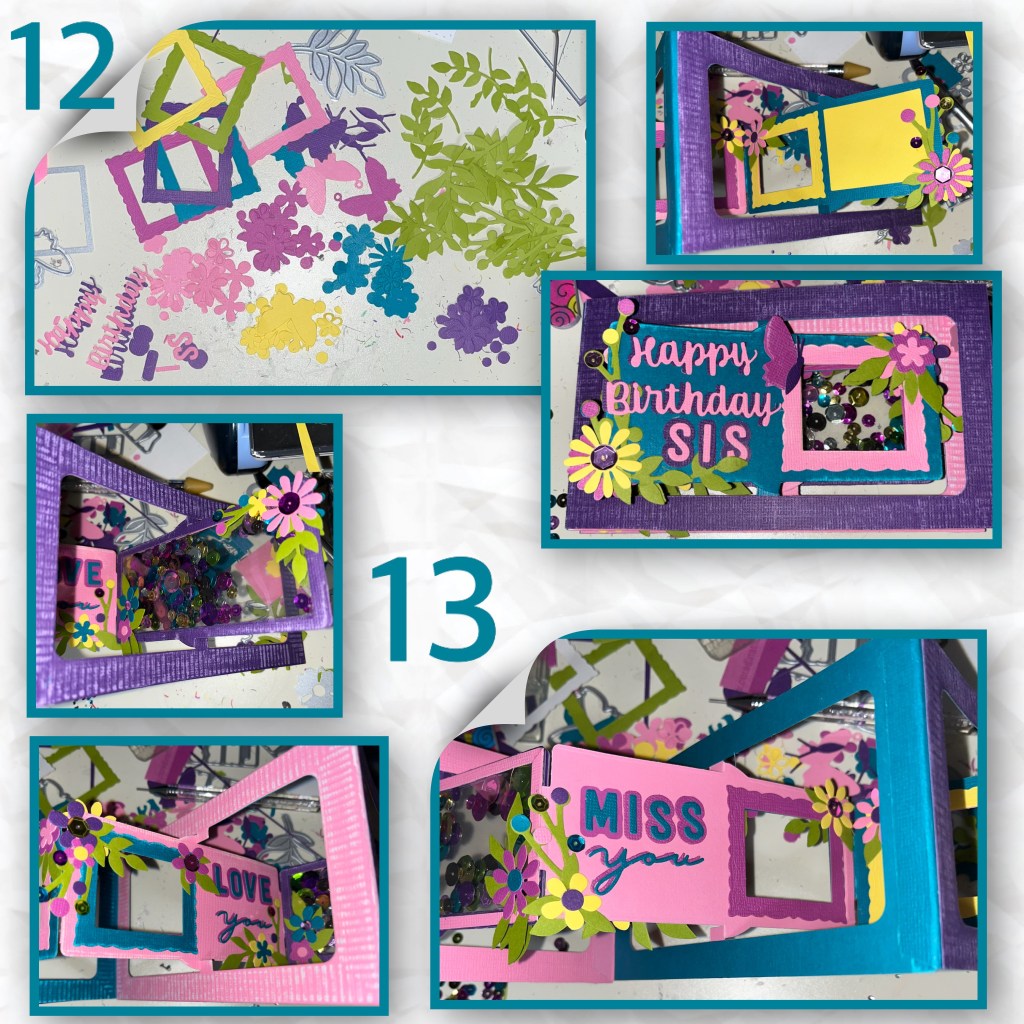
12- I die cut several frames, leaves, flowers and butterflies from more colours that match the sequins. I also die cut “Happy Birthday Sis” and started adding to the front of the 3 panels.
13- I diecut “Miss you” and “love you” and started decorating the backs of the 3 panels.
I added sequins to the centres of flowers and randomly around
Here are some close ups from different angles. They are hard to see but I also added a few mini gem stones.
I used a lot of diesets and they are listed here.
Flower Pot Pop up flowers and foliage
Flutter Charms flowers and butterflies
Flip Frame flowers and leaves
Woven Basket small flowers and foliage
Tools

Fabulous fold and style Nicky amazing card for your Sis and stunning colours her.. xx
LikeLiked by 1 person