

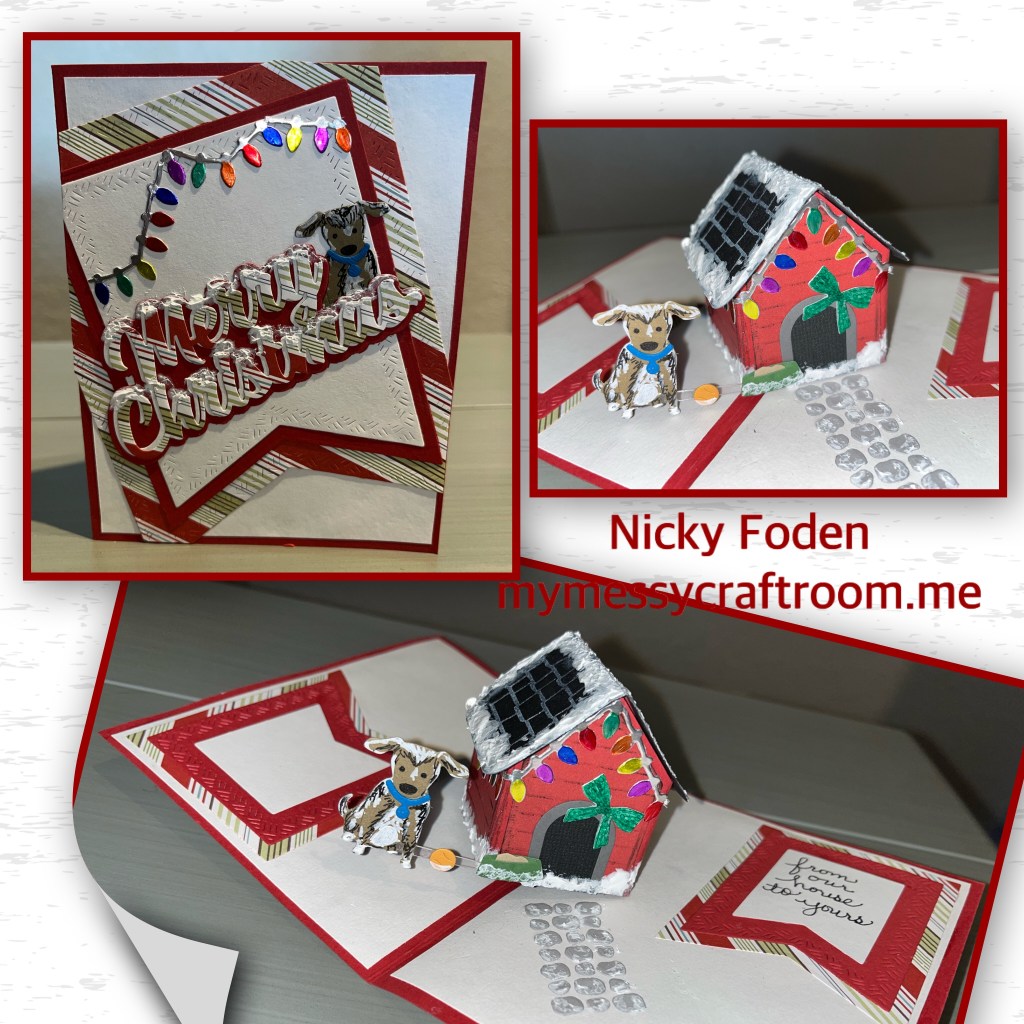
I’ve got a super cute dog house Christmas card that I didn’t have the chance to post earlier. I tried to make the dog look like my dog, lol.

All the fun is in the reveal, to see this card in action please check out my FACEBOOK page, feel free to join if you would like to share your own crafty creations. You can also see a video of this card on my INSTAGRAM page.
1-I die cut the pieces from the Tiny house and the Dog house add ons. The dog house pieces have a stamp feature to make the lines along the sides, the roof also has a die feature to make shingles.
2- I die cut the lights from the Holiday House from silver mirror card-stock and coloured them with Sharpies
3-4- added the lights to the house and added the door

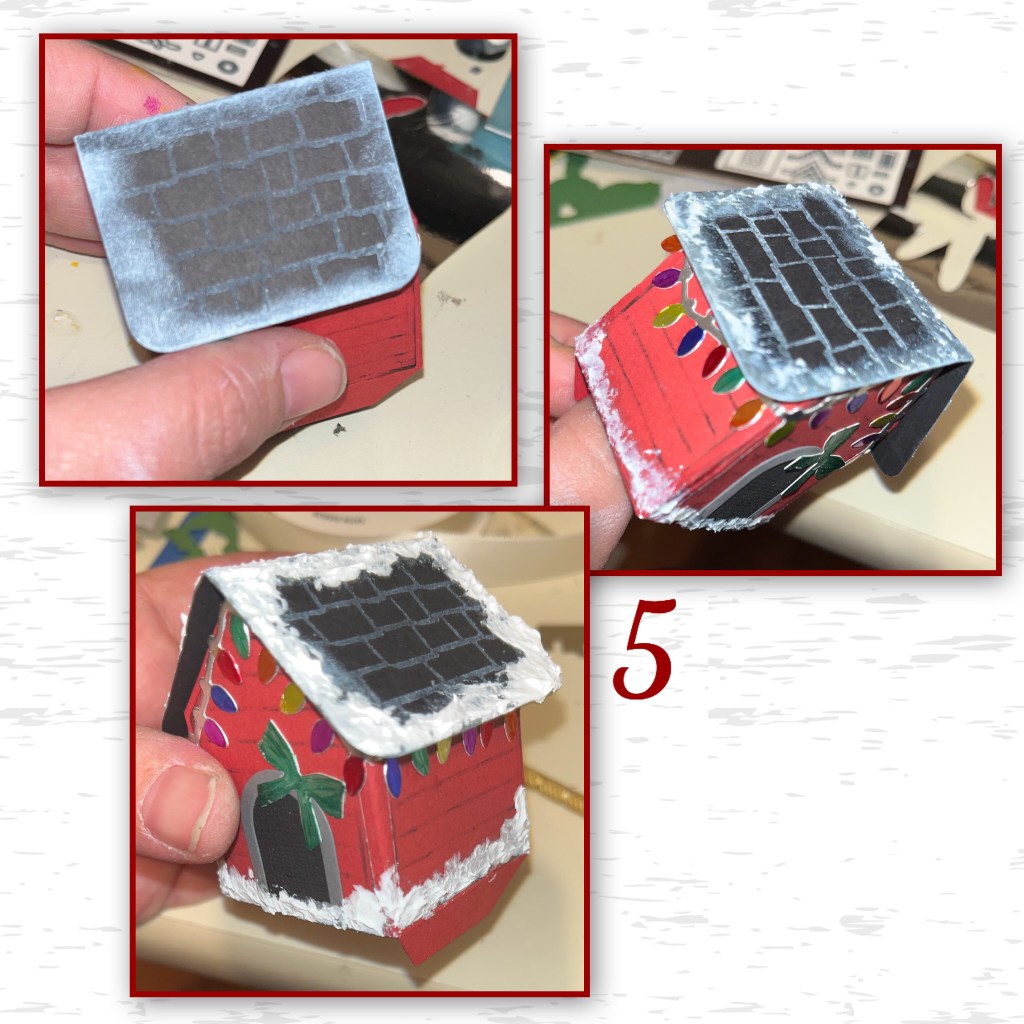
5- I wanted the roof to look like I had snow on it, white ink wasn’t cutting it so I used embossing paste that I have in my stash. I also added snow to the base of the dog house.
6- now for the card base, dimensions below

7- I added the card to the paste (Karen has an awesome video I will like at the bottom)
8- I used a piece I’d acetate to add the dog, I attached it to the house by adding glue to the back of the dog dish. I also added a stone sidewalk (from the Tiny House set)

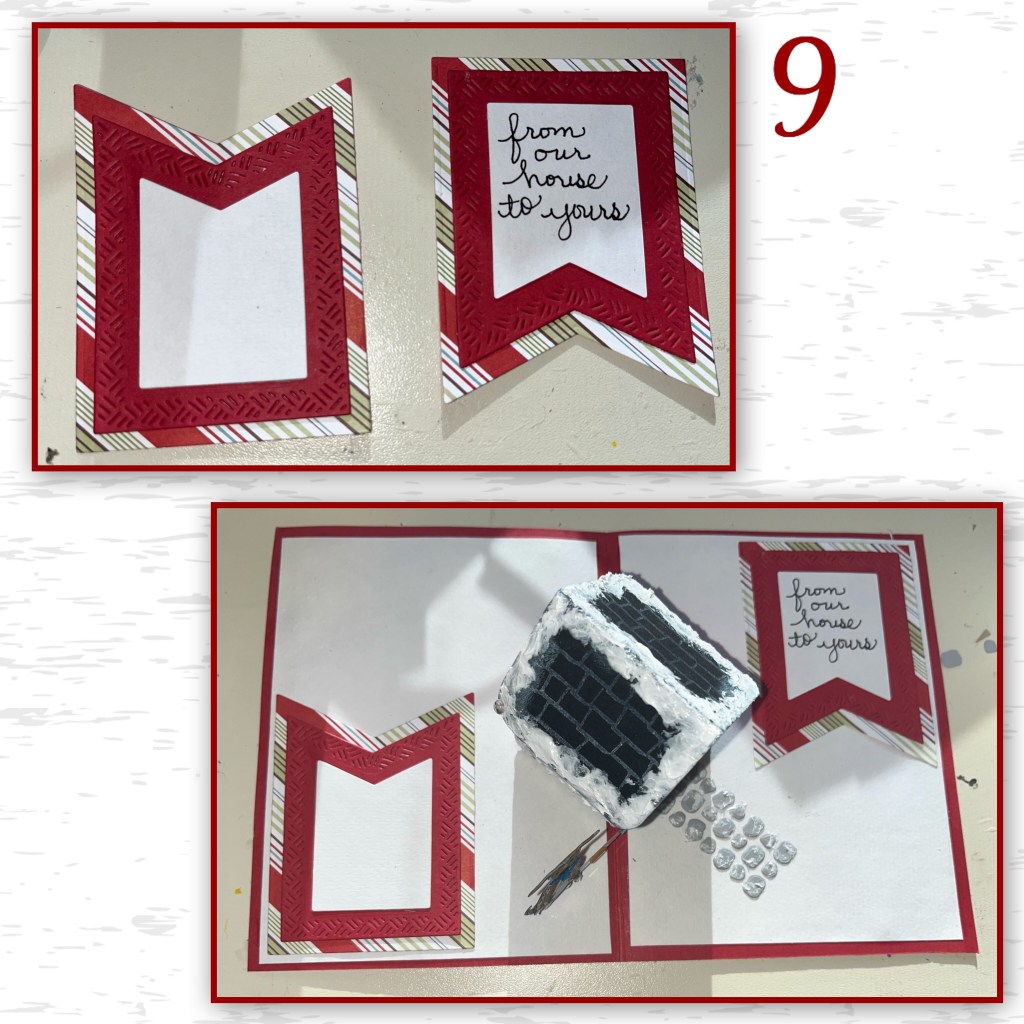
9- I using the Crosshatch Banners, I layered three , one with patterned paper, one in red and one in white. I hand wrote the greeting as I don’t have a stamp with this sentiment. Then I added them to the card as shown.
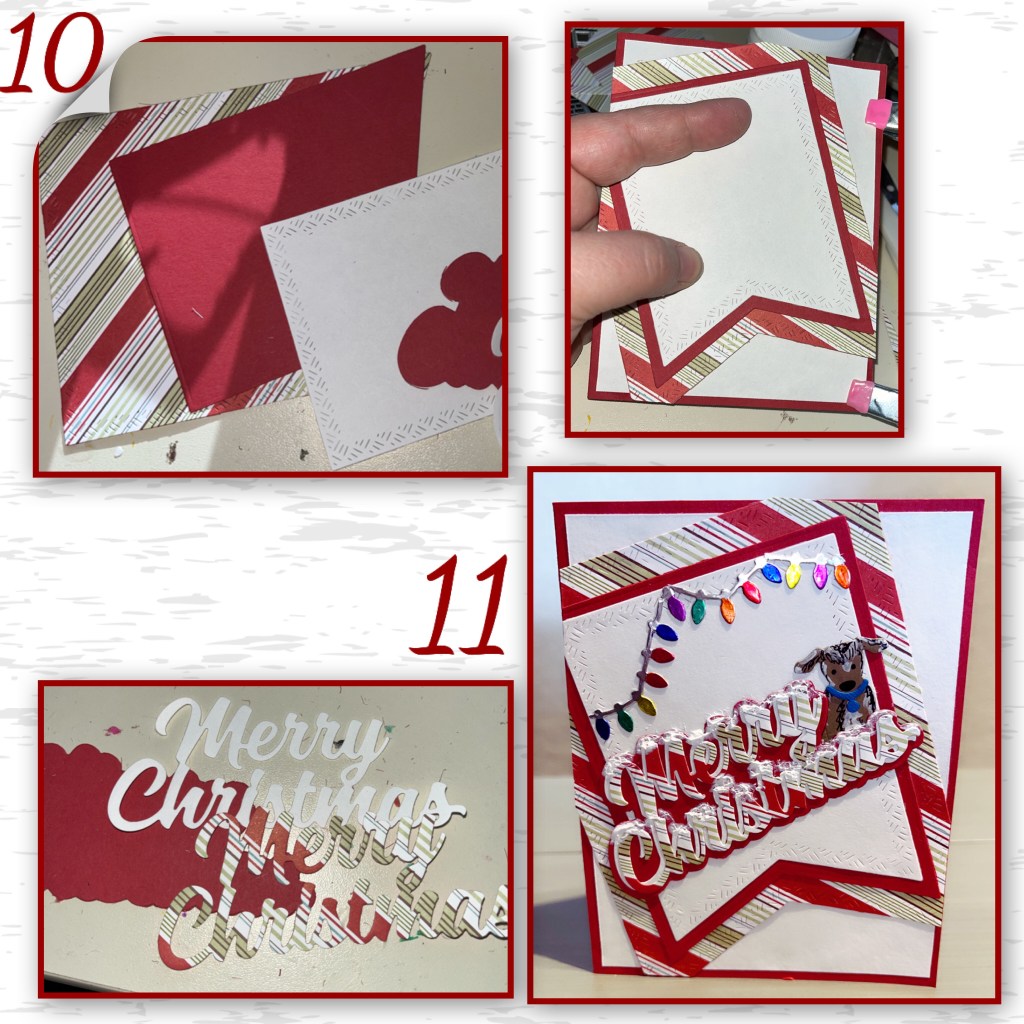
10- now for the front. I layered larger Banners and off set and trimmed them when adding them to the card front.
11- I layered Merry Christmas from patterned paper on to white, then onto the red shadow, and added it to the card front. I added more lights and another dog to finish it off.
Diesets used are
Tiny House Karen’s video can also be found here
Holiday House – Christmas lights
Cat and Dog the collar and dog dish
Gift Pivot Panels the bow
Tools
