
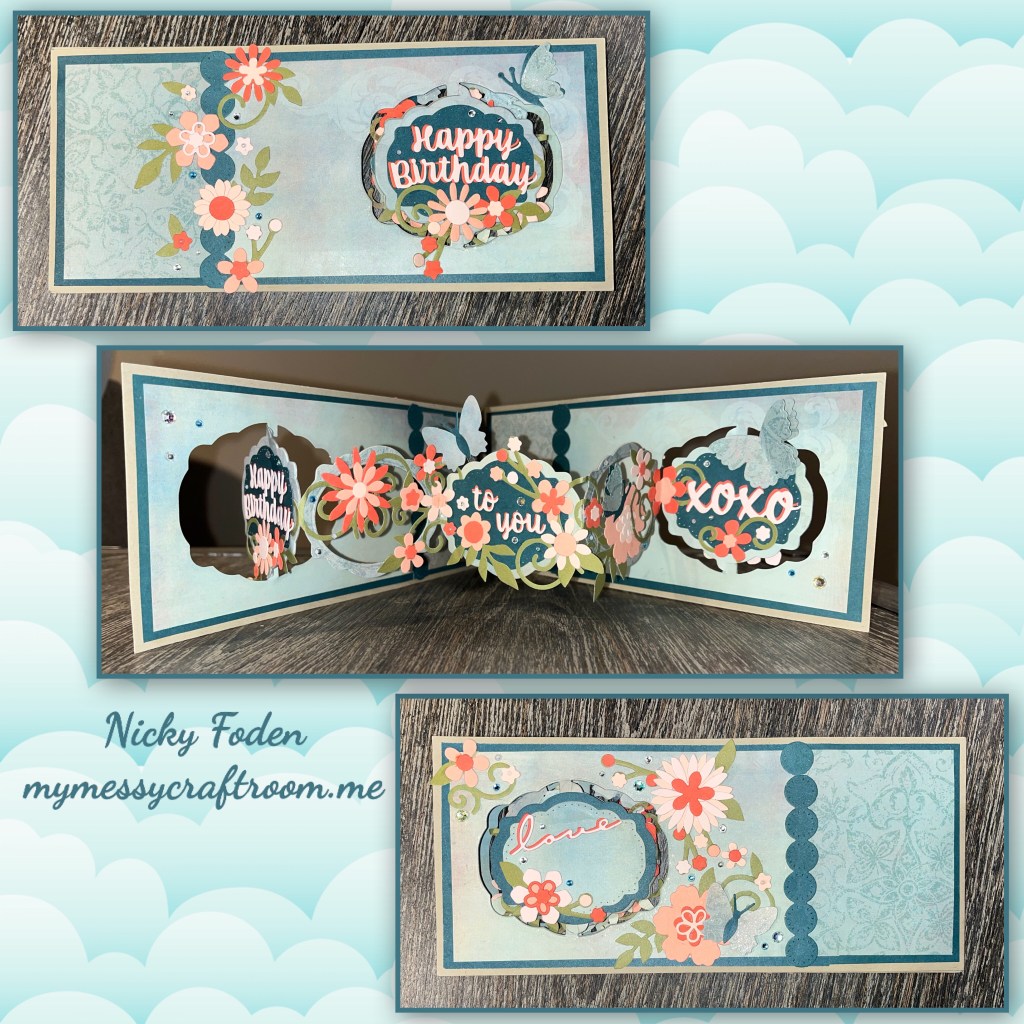
When I first receive my Label Charm Pop-up dieset, the wheels in my brain started turning trying to plan a longer accordion version. I did make a different version (I’ll post a photo at the bottom of this post) but I changed it sooo many times when making it that my photos would make the tutorial too confusing. I came up with this version when I was trying to make an extra special card for my niece.

All the fun is in the reveal, to see this card in action please check out my FACEBOOK page, feel free to join if you would like to share your own crafty creations. You can also see a video of this card on my INSTAGRAM page. Diesets will be listed at the bottom of this post
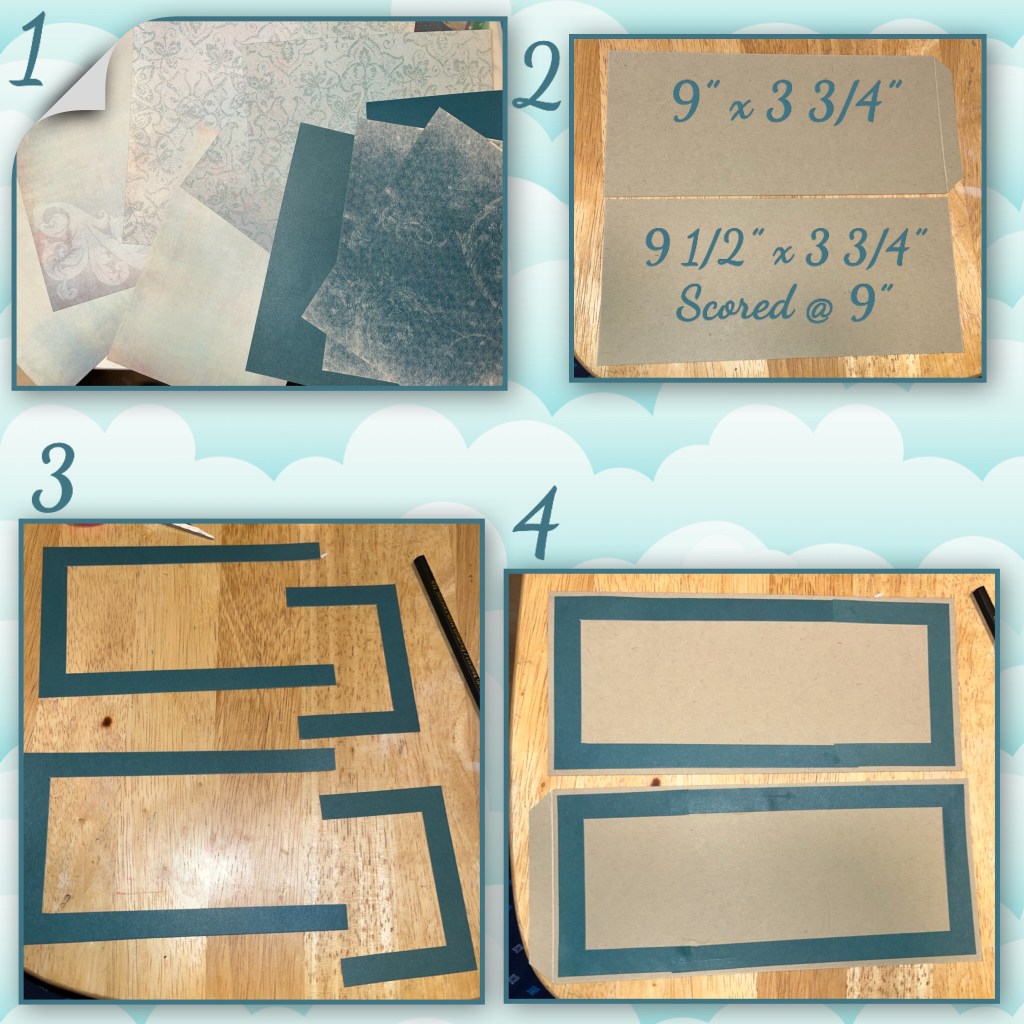
1- so I went stash diving and found some patterned paper in shades of light blue with some darker blue accent colours.
2- Stampin Up Crumb Cake cardstock panels cut to the dimensions shown below ⬇️
3- 4- the dark blue papers weren’t long enough to make the panels so I cut frames that when put together will make a 3 1/2” x 8 3/4” frame, which is about an inch thick. I made enough to put on both Crumb Cake panels, front and back.
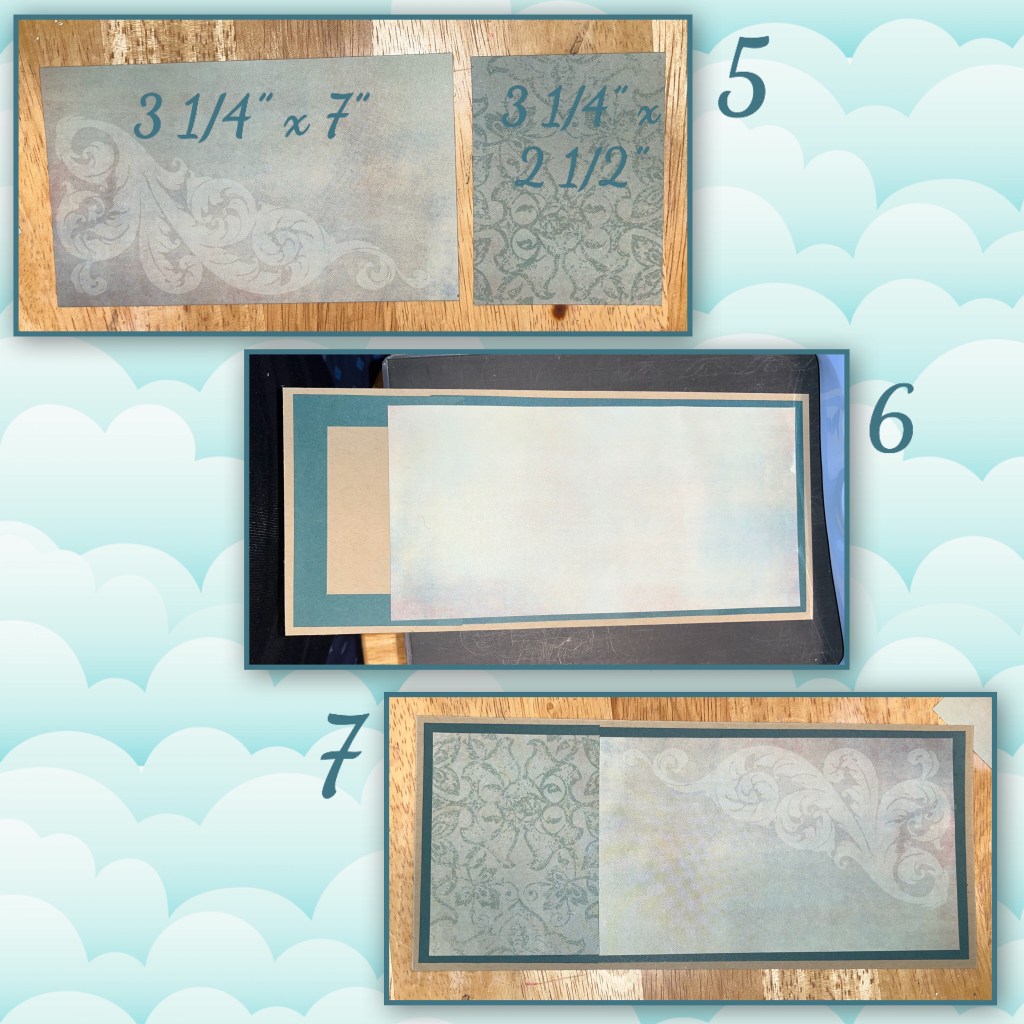
5- because I was using 2 patterned papers I cut them to the dimensions below ⬇️ I cut 4 of each, so front, back, inside and out
6-7 I started with the front panel, add the longer paper to the front and inside, I also added the shorter paper to the front
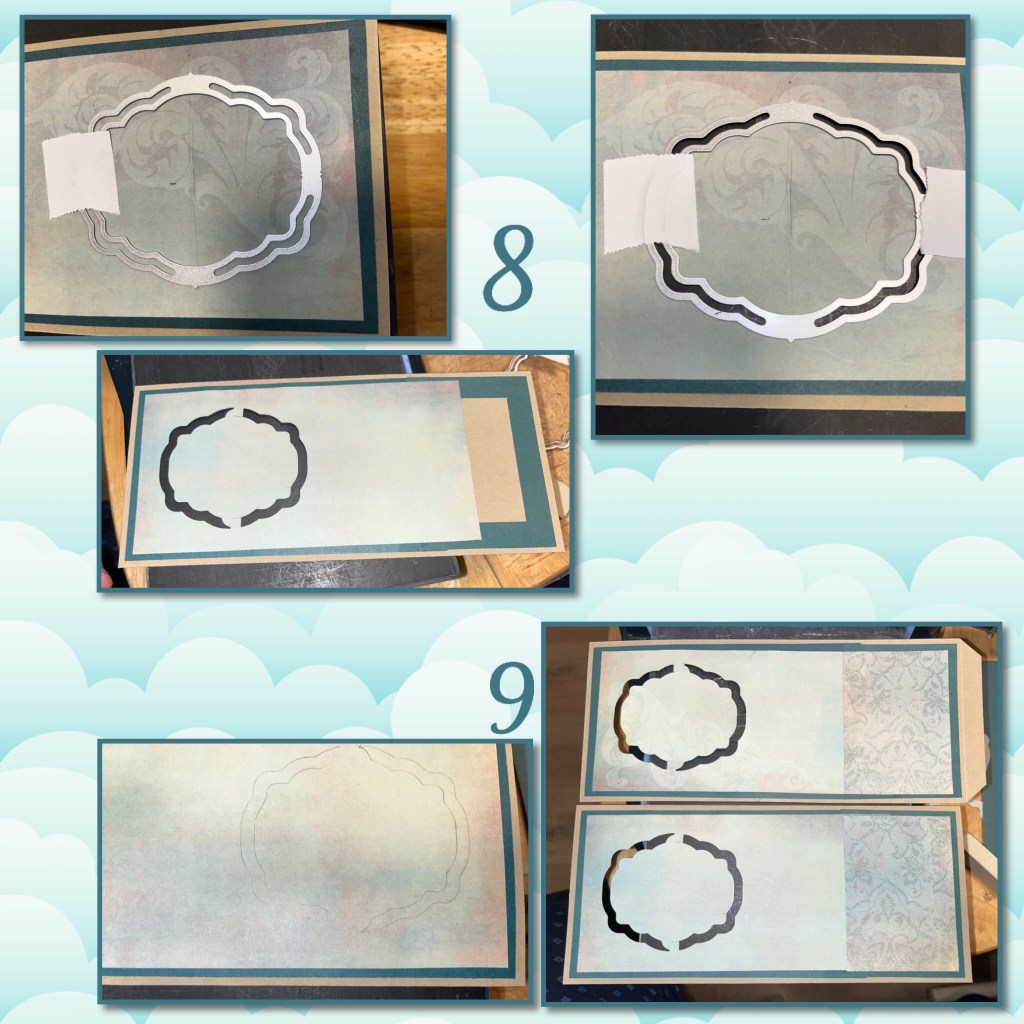
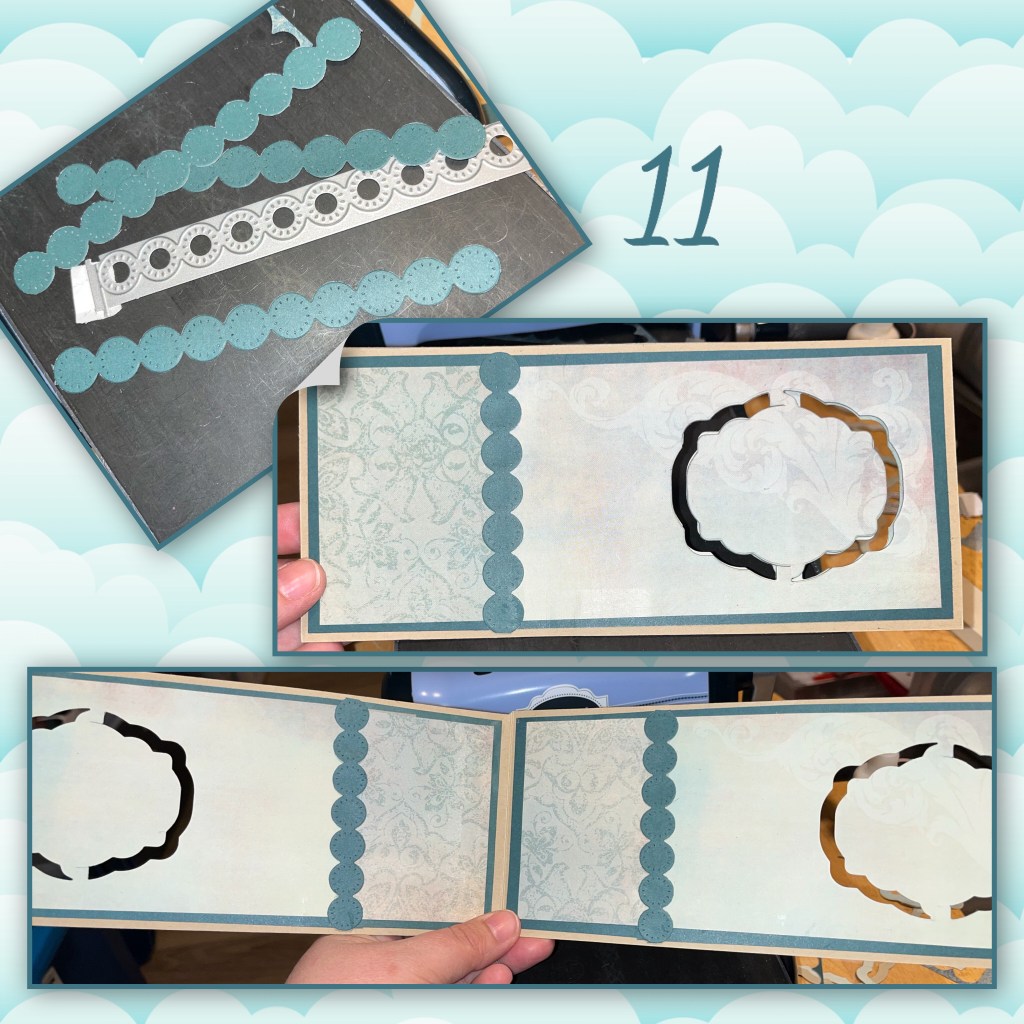
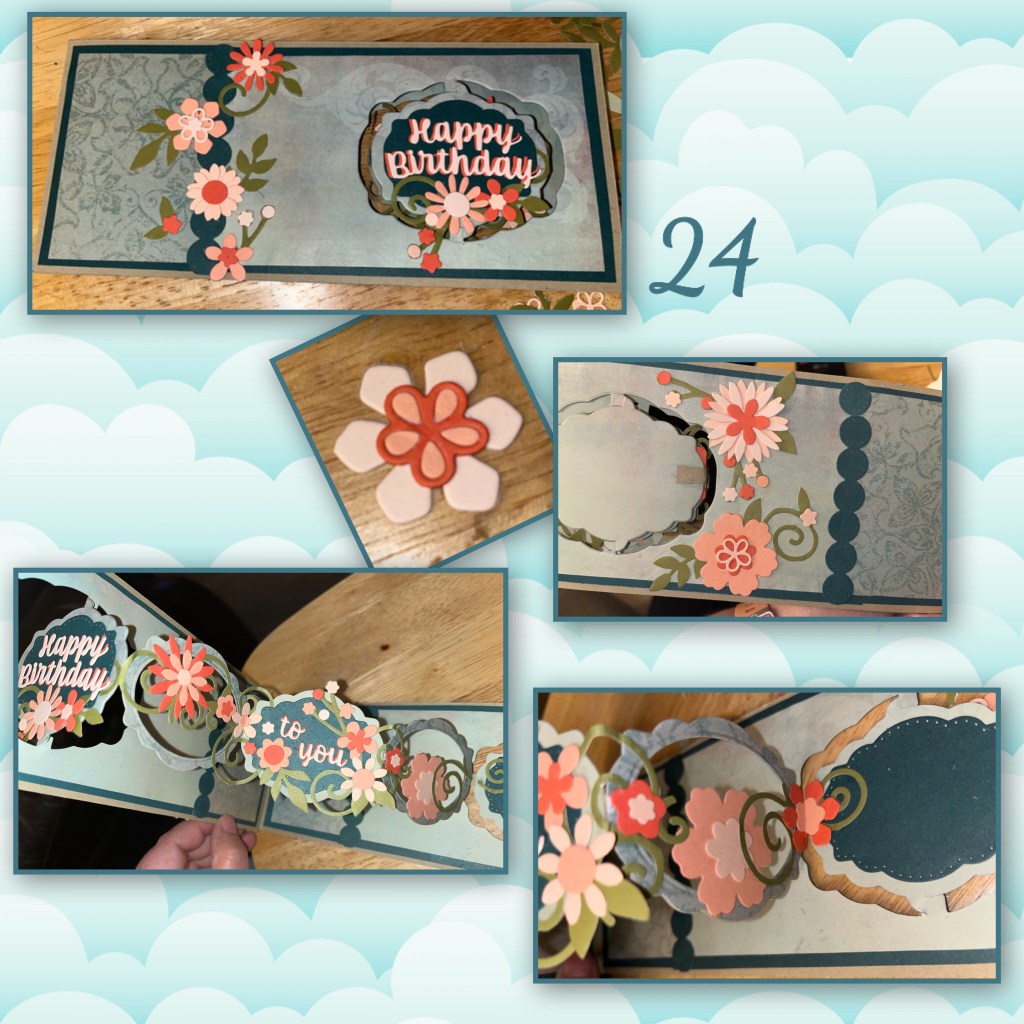
8- Line up the Pivot Label die, close to the right side, make sure it is level, the die itself has points that makes it easy to measure and mark on the card front. Make sure the die cuts through the front paper panel, the cardstock and the inside paper.
9- Do the same on panel 2, I used panel one to trace the label on to panel to, I wanted to make sure the alignment was right.
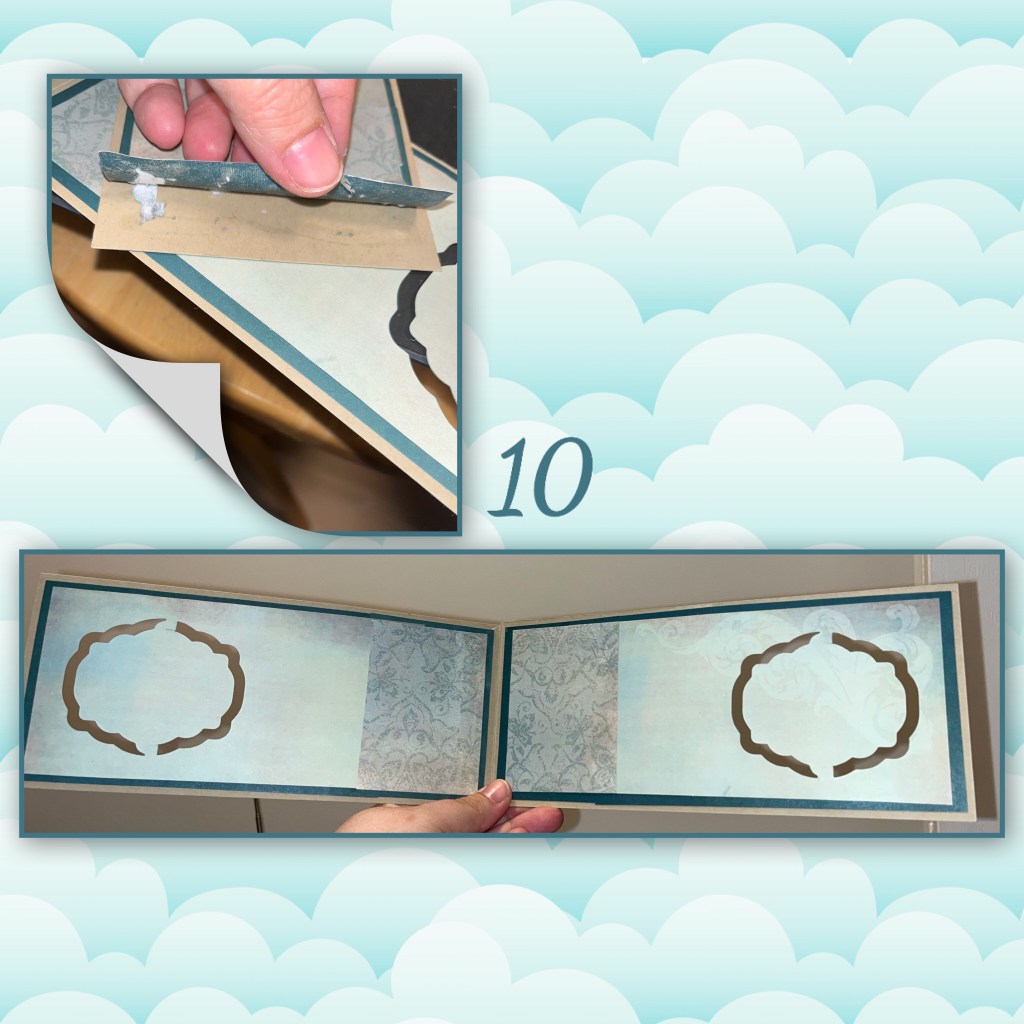
10- I had to peel back the paper when I was adhering the tab from panel two to panel one. If I were making this card again I would have not adhered the paper all the way to the end until both panels were together.
11- die cut a few borders from the Border Blends Trim set. Enough to cover all the seams from where the papers meet on all sides.
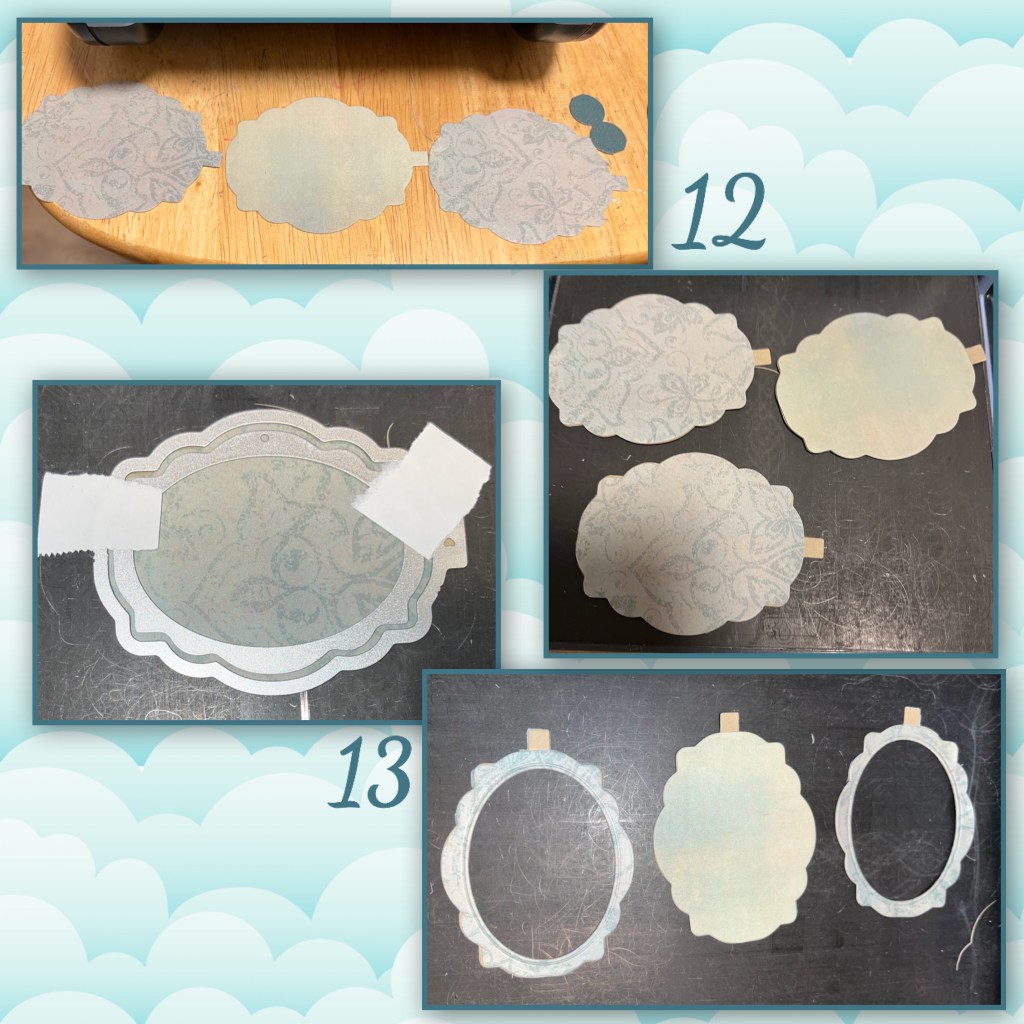
12- die cut the Labels with the tabs from cardstock and the pattered papers. Adhere the paper labels to the cardstock ones.
13- there is a die in the set to cut out a window, I die-cut windows in two of the labels. I wanted alternating labels. The solid ones will be with the light paper, they on the first, third, and fifth labels. The darker paper labels have windows and they are the second and fourth labels.
14- I started adding the labels together by attaching the tab on the left side to the right side of the label beside it. They will fold as shown in the photo, label 1-2 mountain fold, 2-3 valley fold, 3-4 mountain fold, 4-5 valley fold.
15- because the labels have the tab on the left side when you get to the fourth panel there is no tab to attach it to the fifth panel so you have to cut a little strip.
16- attach the fourth panel to the fifth panel and it should look like this.

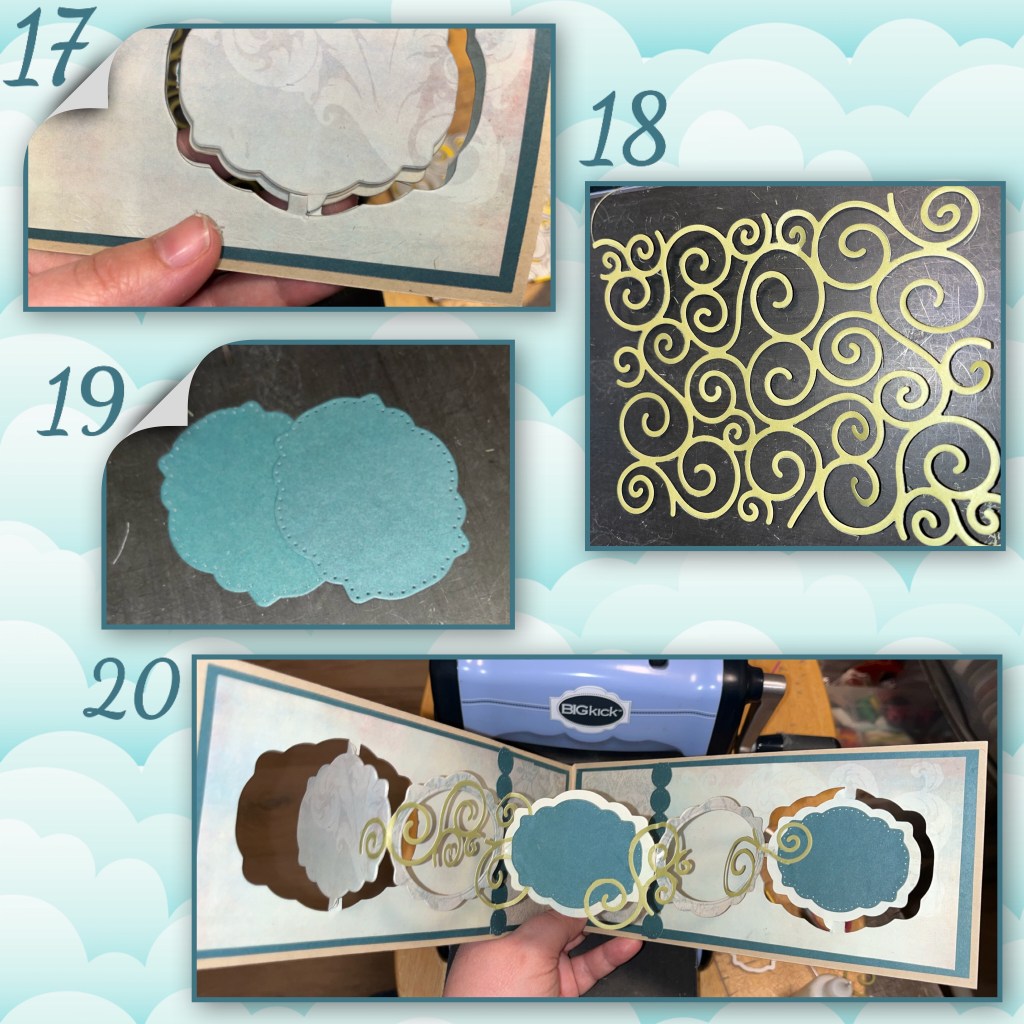
17- so because the labels are only attached in the middle of each label, I noticed when the card was closed the middle labels had a bit of a sag, and could be seen when the card was closed.
18- die cut Swirls from the Karen Burniston Swirls Pattern Plate, from green cardstock
19- diecut a 3 blue Labels (2 shown here)
20- I trimmed some of the swirls and used them to add support to where the labels meet each other, so the have more connection points, therefore helping to prevent the centre from sagging. Also add the blue labels to the three sold Labels, (only 2 shown here)
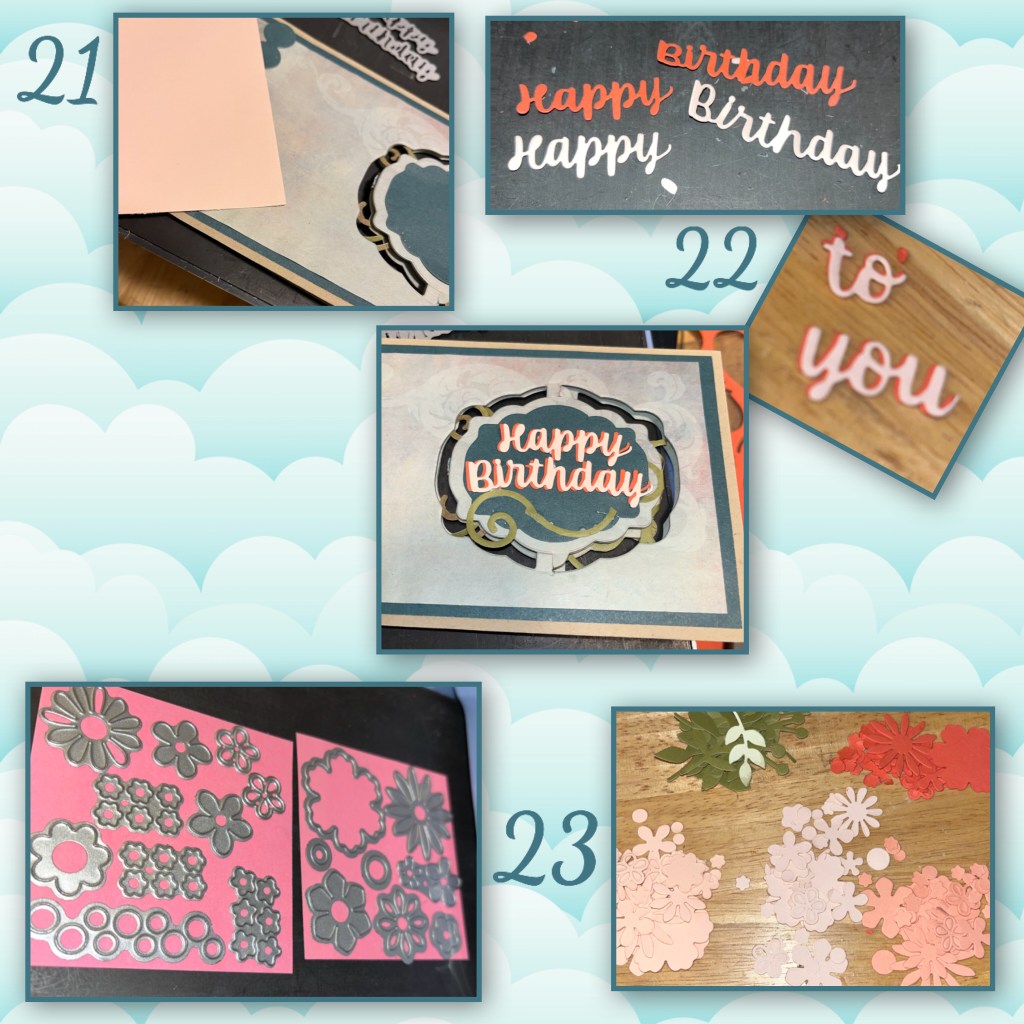
21- I chose the peachy cardstock because there is a bit of peach in the blue background paper
22- die cut “Happy Birthday to you” from peachy and coral cardstock and layer as shown. I add them to the front panel with some more swirls.
23- diecut flowers, and leaves from 4 different peach and coral shades and the same green as the swirls.
HELPFUL HINT- I used full adhesive Post It notes, I stick the dies to them so I don’t have to individually place them down every time I changed colours.
24- start adding flowers and leaves through the card, making sure that everything opens and closes without catching.
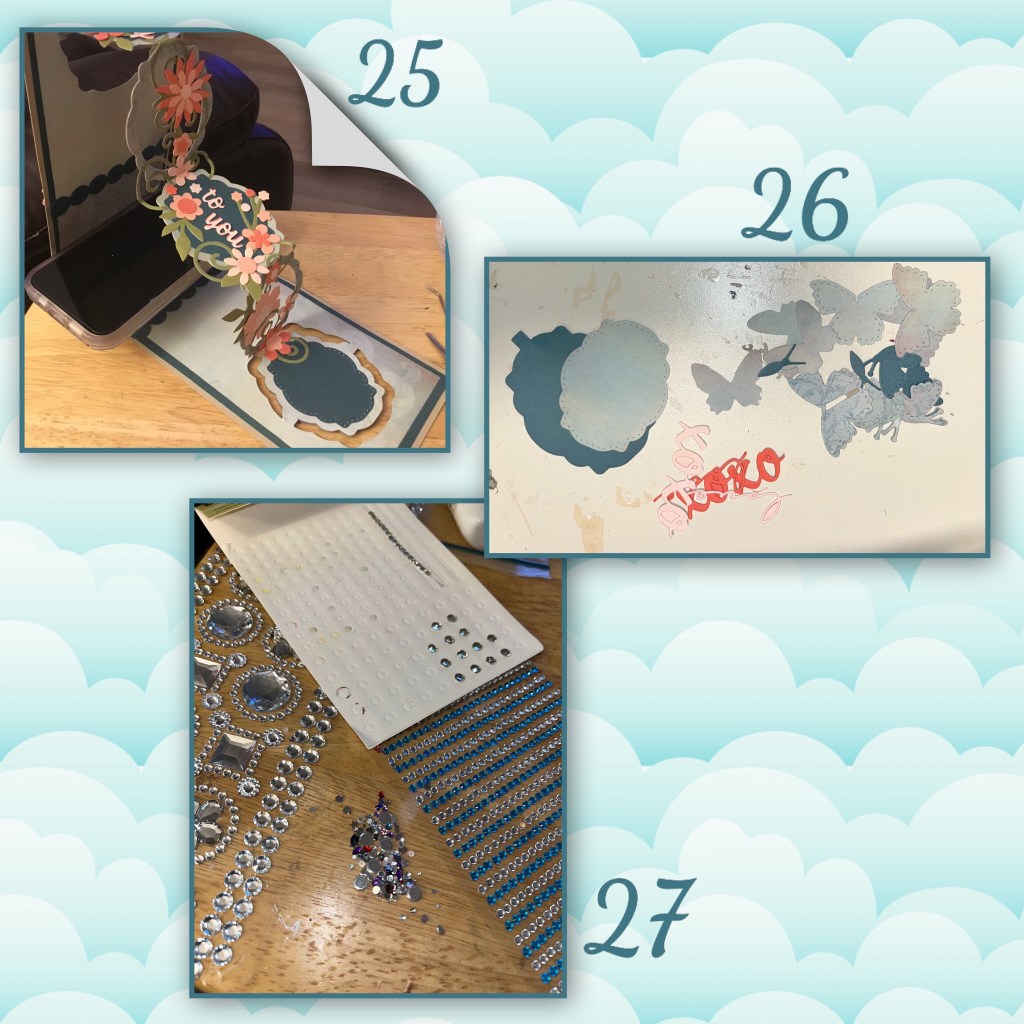
25- it was tricky to decorate so I used my phone to hold things up. If I make this style again I would do some of the decorating before attaching the labels together.
26- cut another blue label with the tab (cut off the tab) cut a smaller label from the light blue paper, butterflies from all the blues and patterned paper, and XOXO and “love” from the same cardstock as the Happy Birthday.
27- dig out the bling ✨
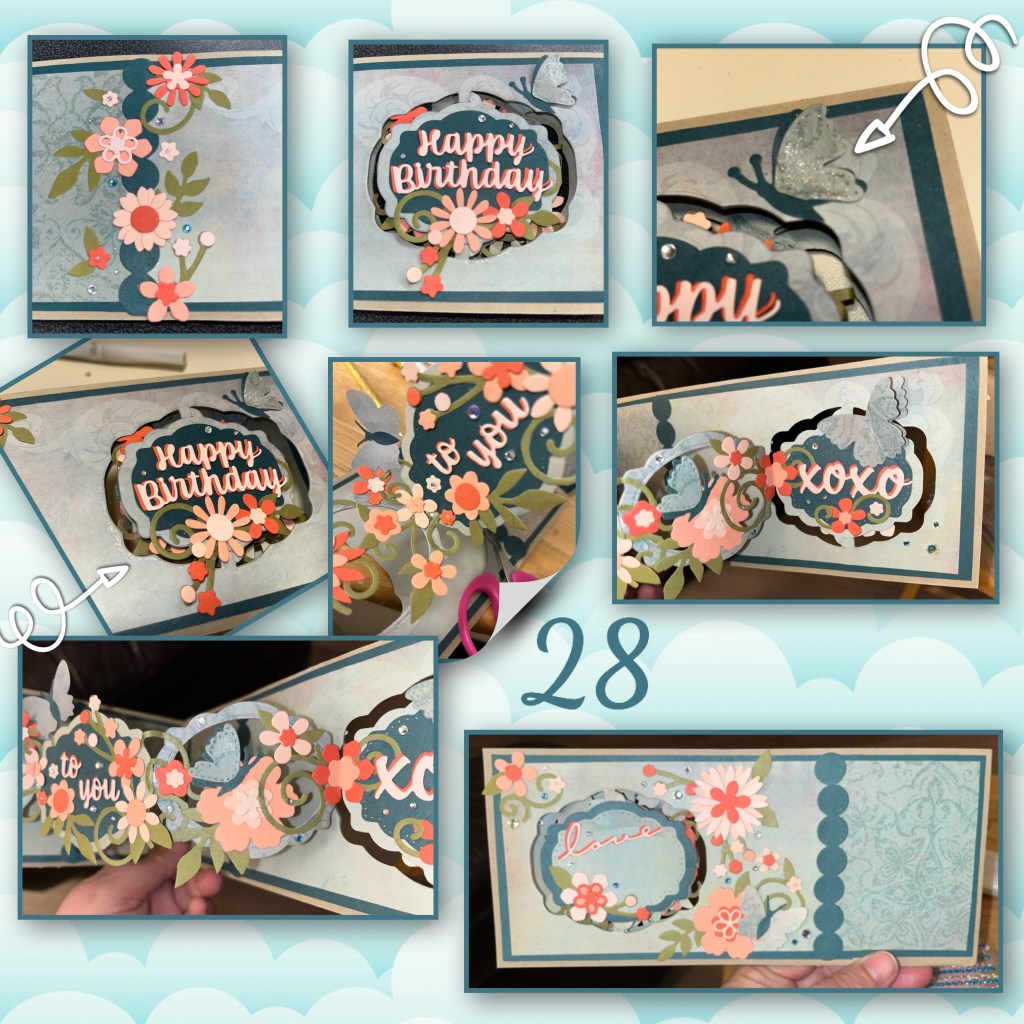
28- Add more flower, butterflies, and little rhinestones. I also added Wink of Stella to all the butterflies and around each label window, and frame (it’s hard to see but it adds a little extra)
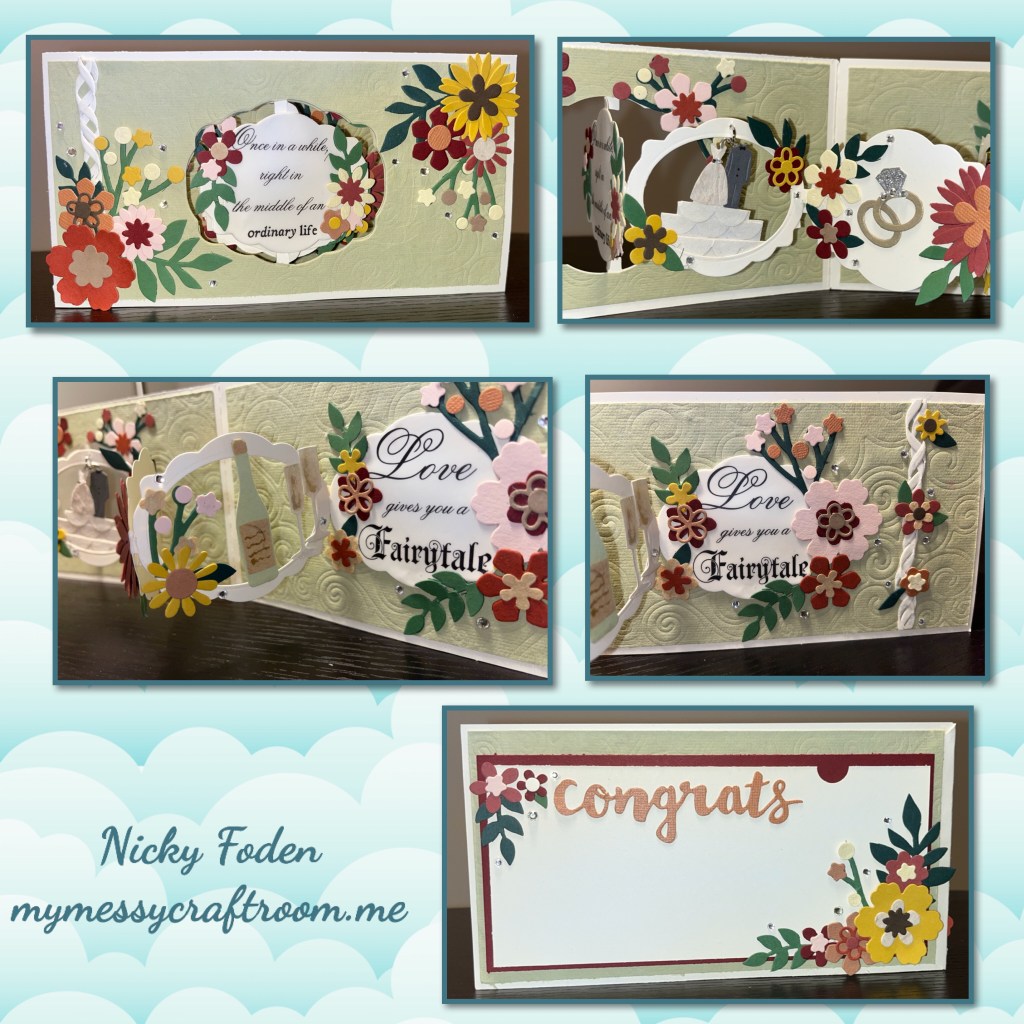
Here is the alternate card that I had previously made. I made this card for a friend who needed a card for a wedding. She wanted a pocket on the back to put money in so I didn’t put a pivoting label on the back. I used the Swirl Pattern Plate to emboss the swirls onto the green cardstock.
I used a pile of diesets for this card and they are listed below
The flowers are a mix from the following sets
The word “love” is from the Popn Swap die set
On the Wedding card I used a lot of the same dies as I did on the birthday card but I also used these
Cake Pop up Cake topper
Wine Charms trimmed to make the Champagne glass
Dolled up the perfume topper is the diamond on the ring, the rings are letter 0s

This is one of a kind and all the detail is excellent.
LikeLiked by 1 person
What a labor of love! Beautiful card
LikeLiked by 1 person