
When I found out that family friends of ours would be celebrating their Golden Wedding anniversary I knew exactly the card I wanted to make. A few months ago Karen Burniston made a card using three of the Heart Collage mechanism, I wanted to switch it up a little bit. I put the Photo collage mechanism in the middle (bigger mechanism) and a two heart collage mechanism on either sides (smaller mechanism) and I wanted gold, LOTS of gold.

All the fun is in the reveal, to see this card in action please check out my FACEBOOK page, feel free to join if you would like to share your own crafty creations. You can also see a video of this card on my INSTAGRAM page. Die sets will be listed at the bottom of this post.
Like most of my cards, I went stash diving. The gold glitter, and black glitter card-stock came from a paper pack that I got from the dollar store I also got the black chalkboard paper from the dollar store, the black, vanilla, vellum, brushed gold and gold mirror card-stock are all from Stampin Up (not sure what items they still carry)
1- Card base, black 3 3/4” x 7 1/2”.
2- the alternating glitter card stock on the inside of the card are lightly different sizes. Because the centre mechanism is slightly bigger I made those rectangles slightly bigger (dimensions in photo below) I also cut out the centres so I would not waste the pretty card stock, it also helps keep some of the bulkiness down)
3- I cut the Vanilla card stock to the dimensions shown in photo.

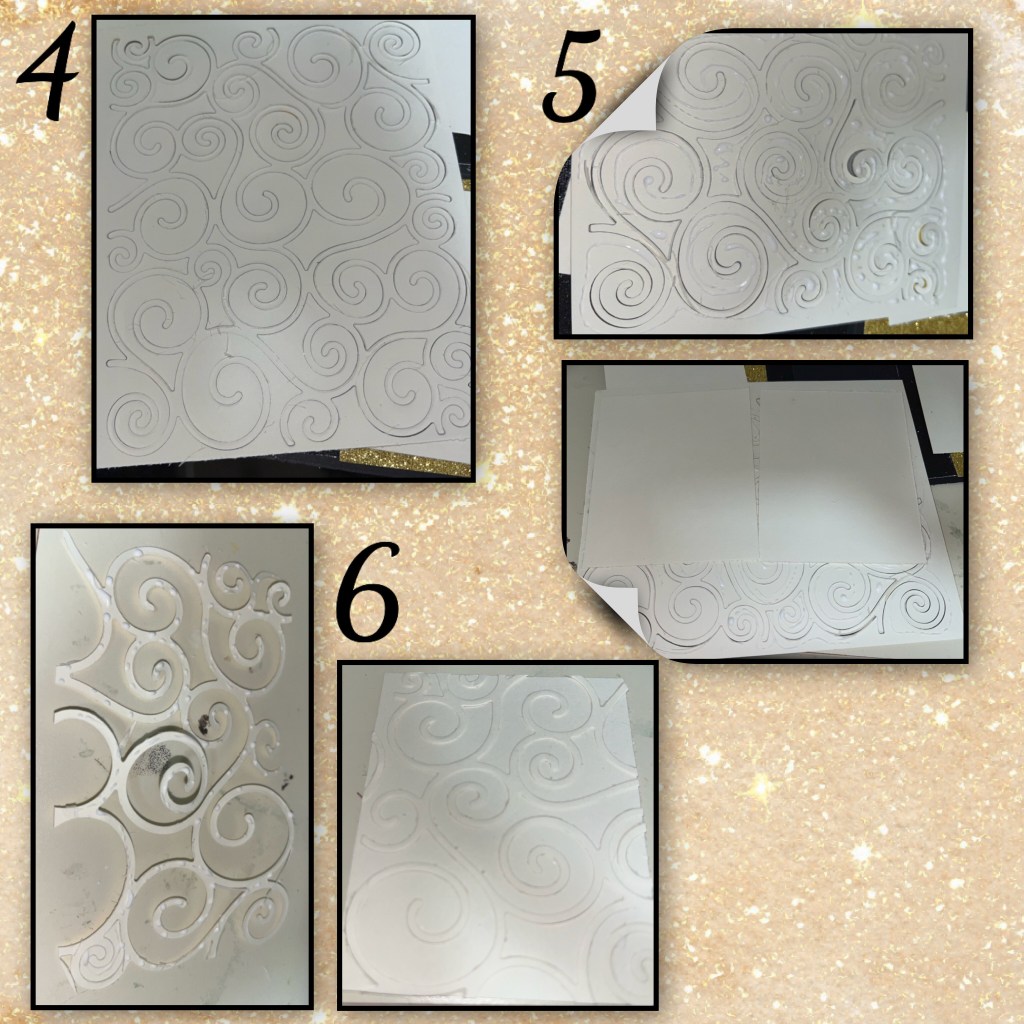
I wanted there to be pretty swirls on the Vanilla pieces, and I know from using the Swirls Pattern plate that the negative pieces are pretty too, but the fall out loose when the swirls are removed so I…..
4- die cut the swirls BUT don’t remove the die yet, try to keep all the pieces in place.
5- add adhesive ONLY to the negative space pieces, add the pre cut vanilla rectangles into the adhesive.
6- adhere the swirls on to some of the other Vanilla pieces.
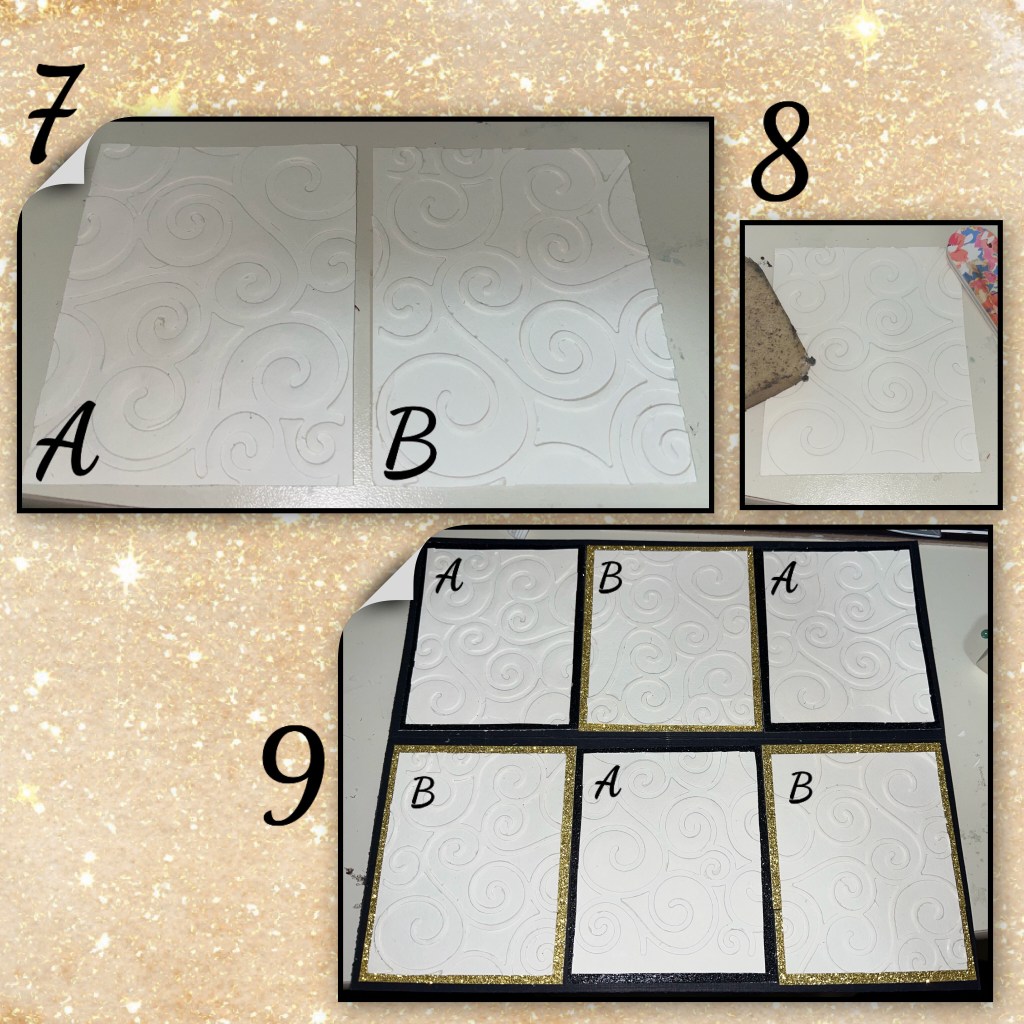
7A- Shows the Vanilla rectangles using the negative space, 7B- Shows the Vanilla rectangles with the Swirl diecuts.
8- I used an adhesive eraser to get rid of any residual adhesive
9- I adhered the A pieces to the Black Glitter and the B pieces to the Gold Glitter
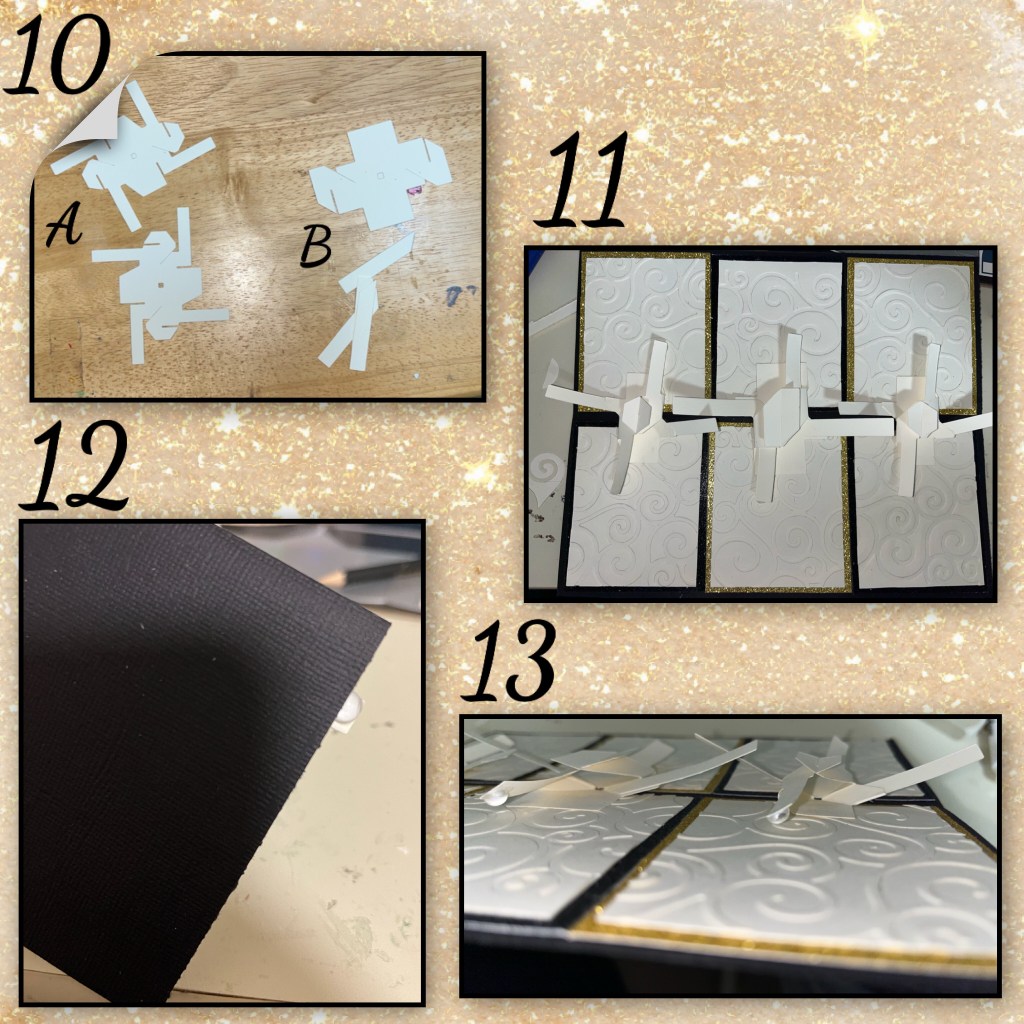
10A- diecut 2 Heart Collage mechanism, 10B- diecut the pieces to the Photo Collage mechanism.
11- assemble and adhere the mechanisms to the card base. The Photo Collage mechanism in the middle, and the Heart Collage mechanism on the outside. They should all be centred on the fold and centred in the middle of the vanilla pieces as shown.
12- 2 of the arms actually hung out side the card when closed (1 on each side), so I had to trim them.
13- I added 1/2 bubbles under the arms that scraped along the card, to prevent catch points.
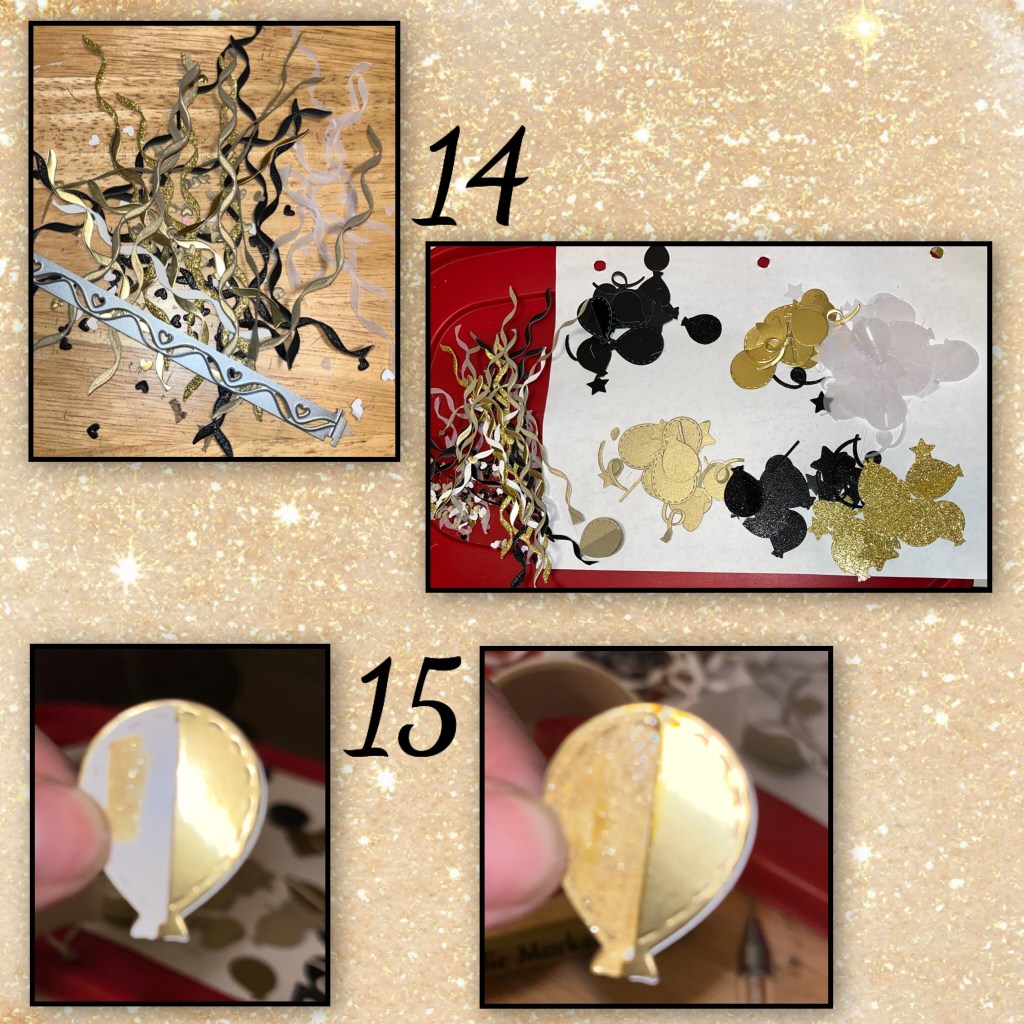
14- I die cut balloons, streamers, and stars. I also cut long streamers from the Border Blends Trims set. The colours are Black chalk board paper, gold mirror card stock, vellum, gold glitter card stock , black glitter card stock , brushed gold card stock.
15- I assembled the fluttering balloons, I used a Gold Wink of Stella pen to colour the white backs, so the white isn’t as noticeable when the balloons flutter.
16- I got decorating and forgot to take photos. Add decorations starting with the middle mechanism. This will take some time, there are a lot of moving parts so the card has to be opened and closed after each piece is attached to make sure the card closes properly and nothing snags or catches.
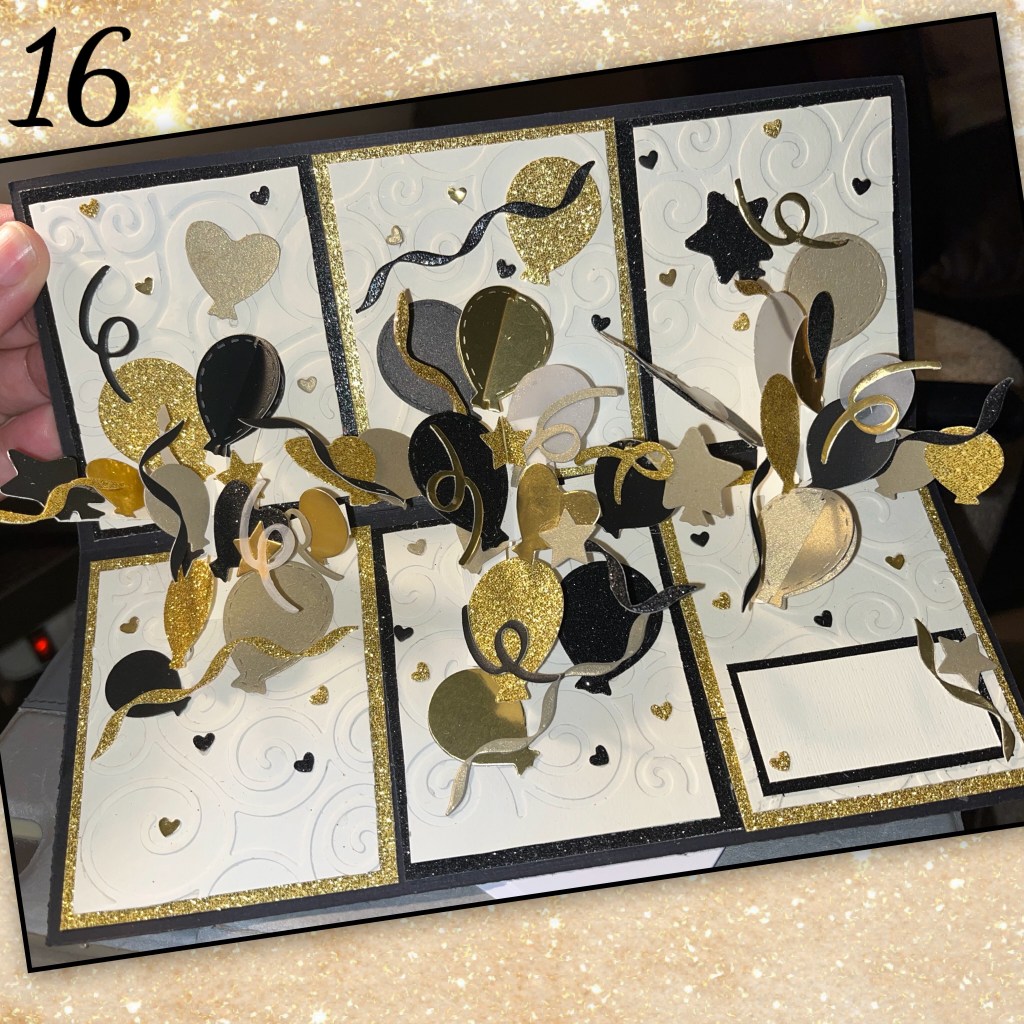
17- close ups of each mechanism
18- cut a rectangle for a smooth message block, and decorate.

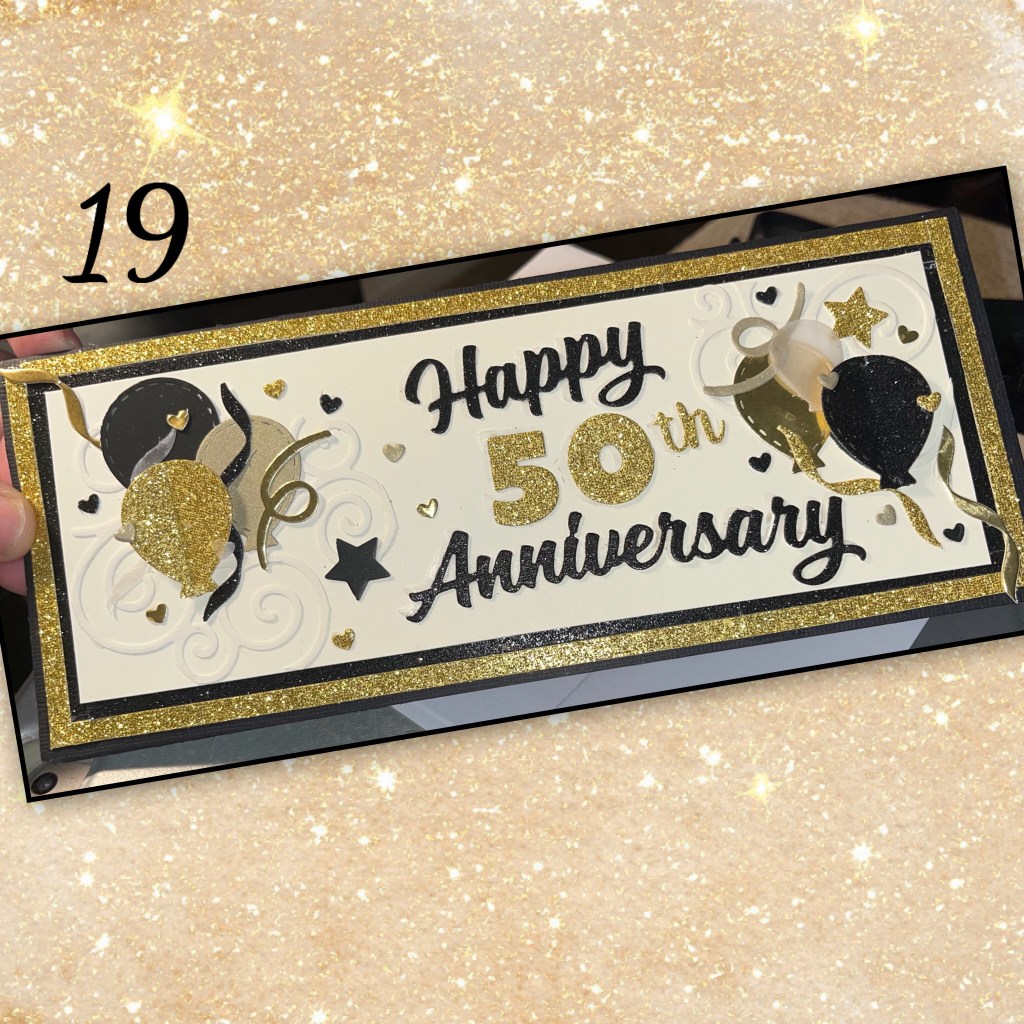
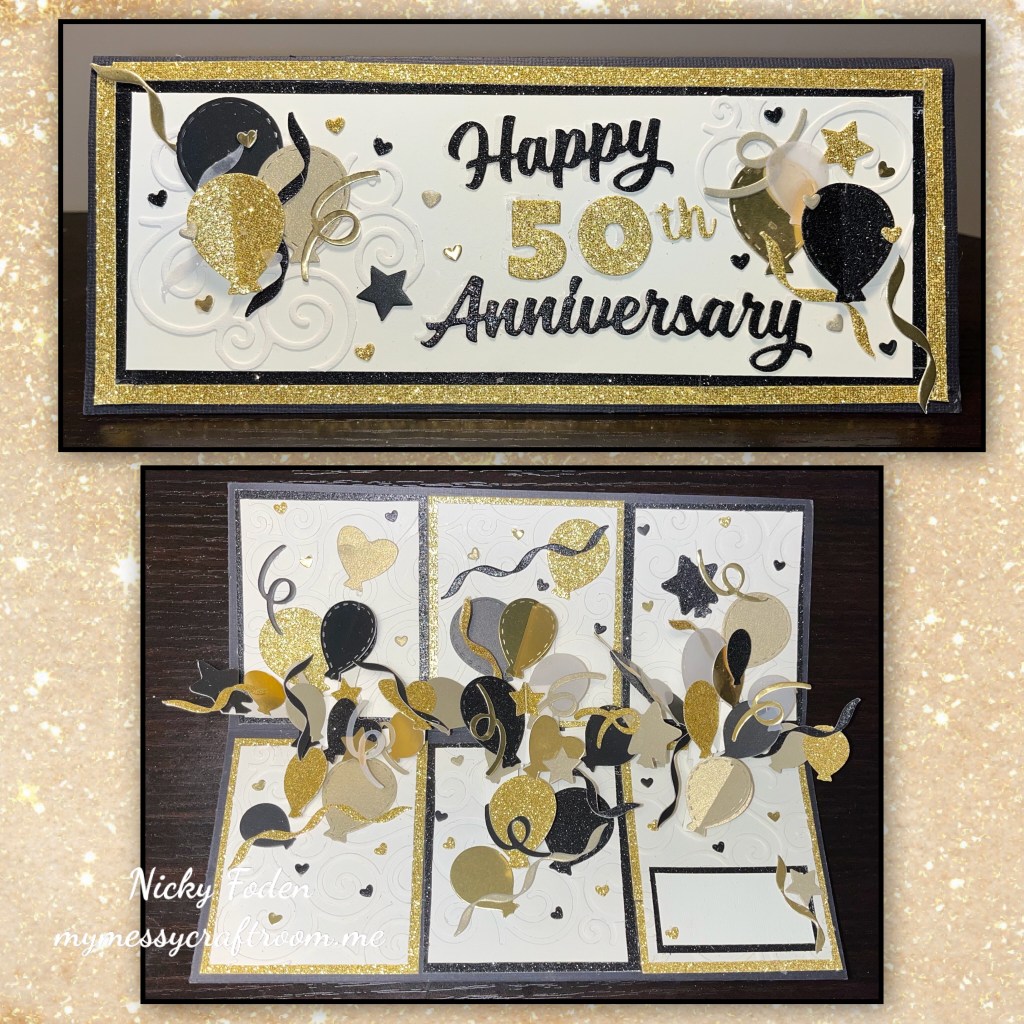
19- I die cut Happy 50th Anniversary, and I used some of the extra decorations to decorate the front. I also cut a gold glitter frame and a black glitter frame to go behind the vanilla rectangle.
Karen Burniston Die Sets
Photo Collage Pop up Middle Mechanism
Heart Collage 2 smaller mechanisms
Balloon Collage add on balloons and stars
Explosion Pop up balloons and streamers
Border Blends Trims long skinny streamers and little hearts
Supplies

This is one awesome card wow lovely fold and very interesting ,.x
LikeLiked by 1 person