

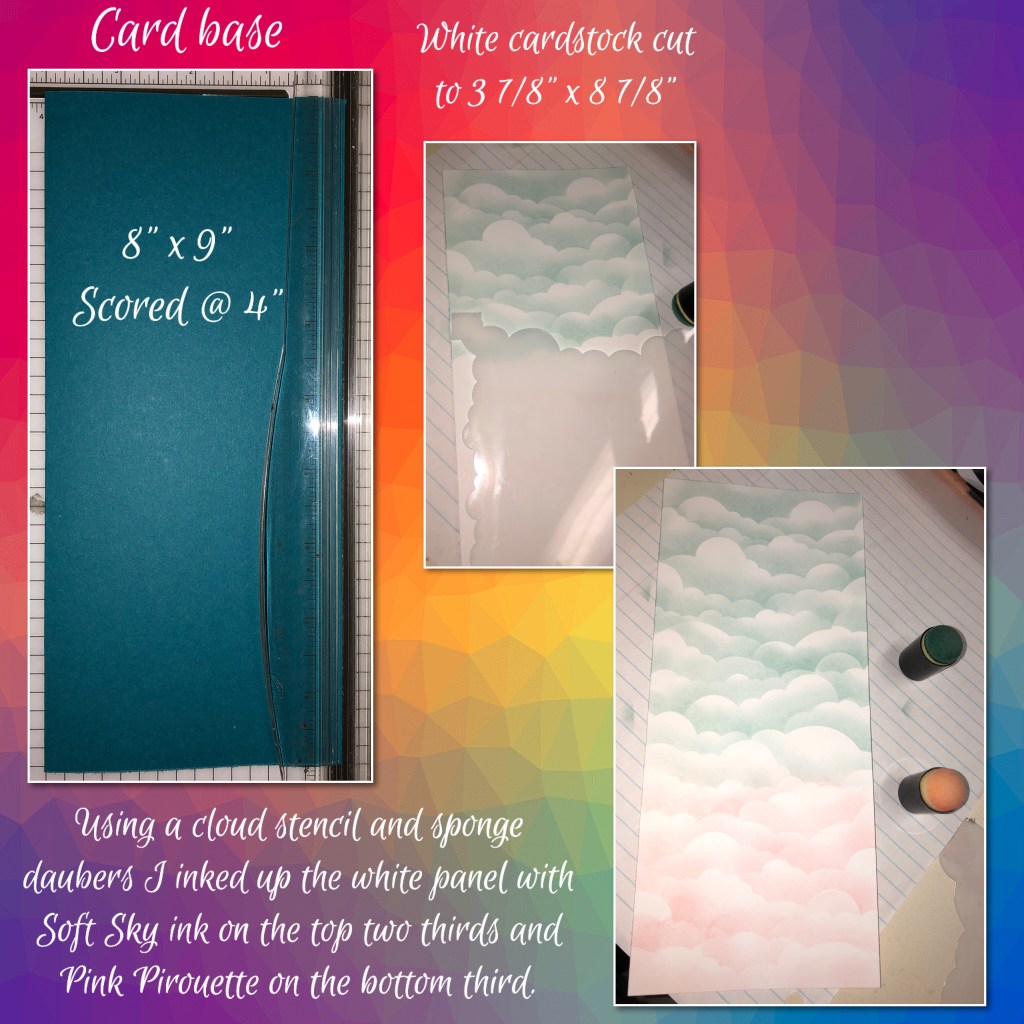
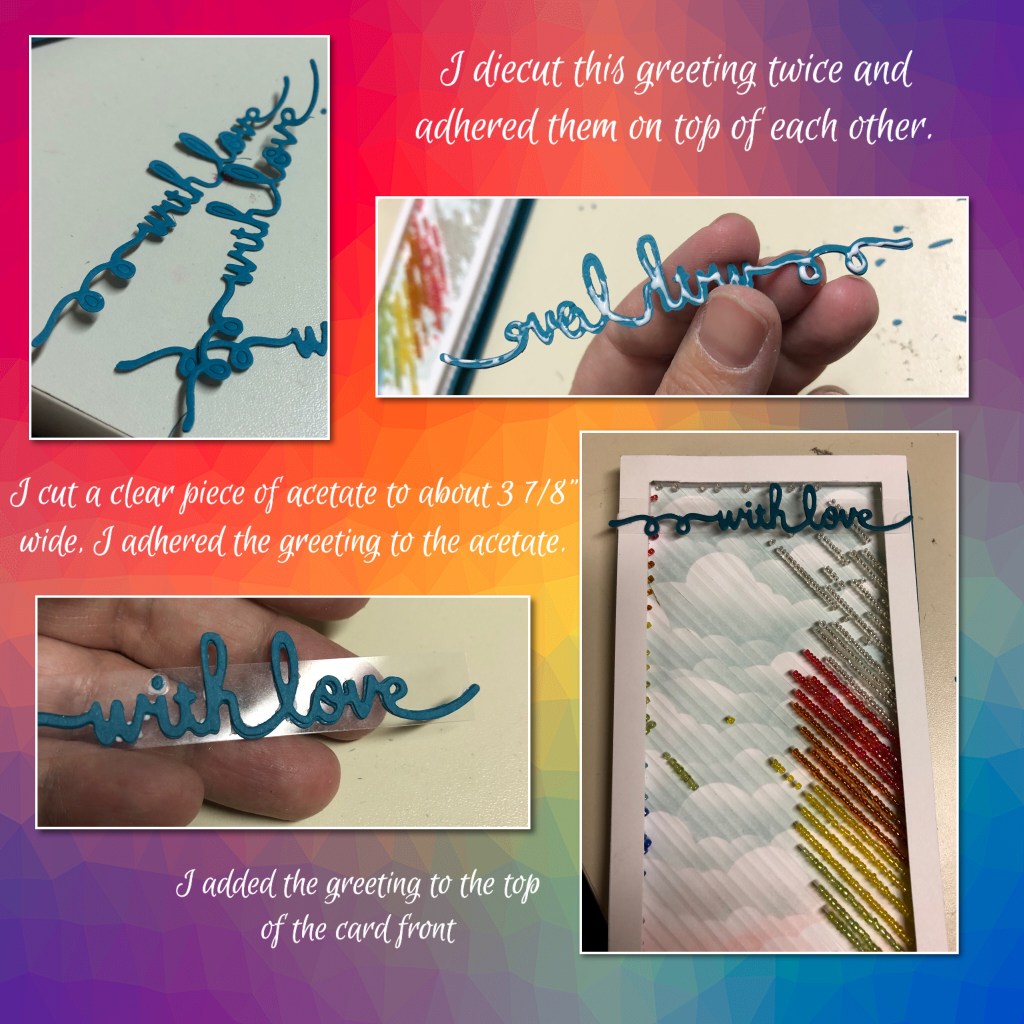
Hey all, this is week 2 of me hosting the Crazy4Challenges challenge blog. This is so much fun. You know what they say “April showers bring May flowers” so this weeks challenge is to have rain 🌧 or a rainbow 🌈 on your card. I decided to have a bit of both. Last fall I made a Magical Rain card I really liked how it turned out so I thought that I would make a different version. I thought it would be really neat as a rainbow, I also changed the size of the card and the angles and this is what I came up with.

This card looks so much better in action so to see it in action please check out my Facebook page or my Instagram account.
To see the rest of the rain and rainbow cards by the very talented design team please check this out C4C blog
This card has a lot going on, it has the raining rainbow on the front and the pop up mechanism on the inside. The cardstock and ink are all from Stampin Up (colours listed below) and the mechanism is Karen Burnistons Rockin Rectangle Below I explain how I fit the mechanism into a slim line card. The ideas of making a Magical rain card is not my original idea, back when I made the first one I watched a VIDEO from Laura Dovalo. I changed a few things when I made my first card, and now I changed a few things making this card.

I decided to make this a slimline card, they seem to be popular these days and I had a few envelopes kickin around. I ended up making this card so thick but it does not fit in the regular legal length envelope. I’ll have to figure something out.
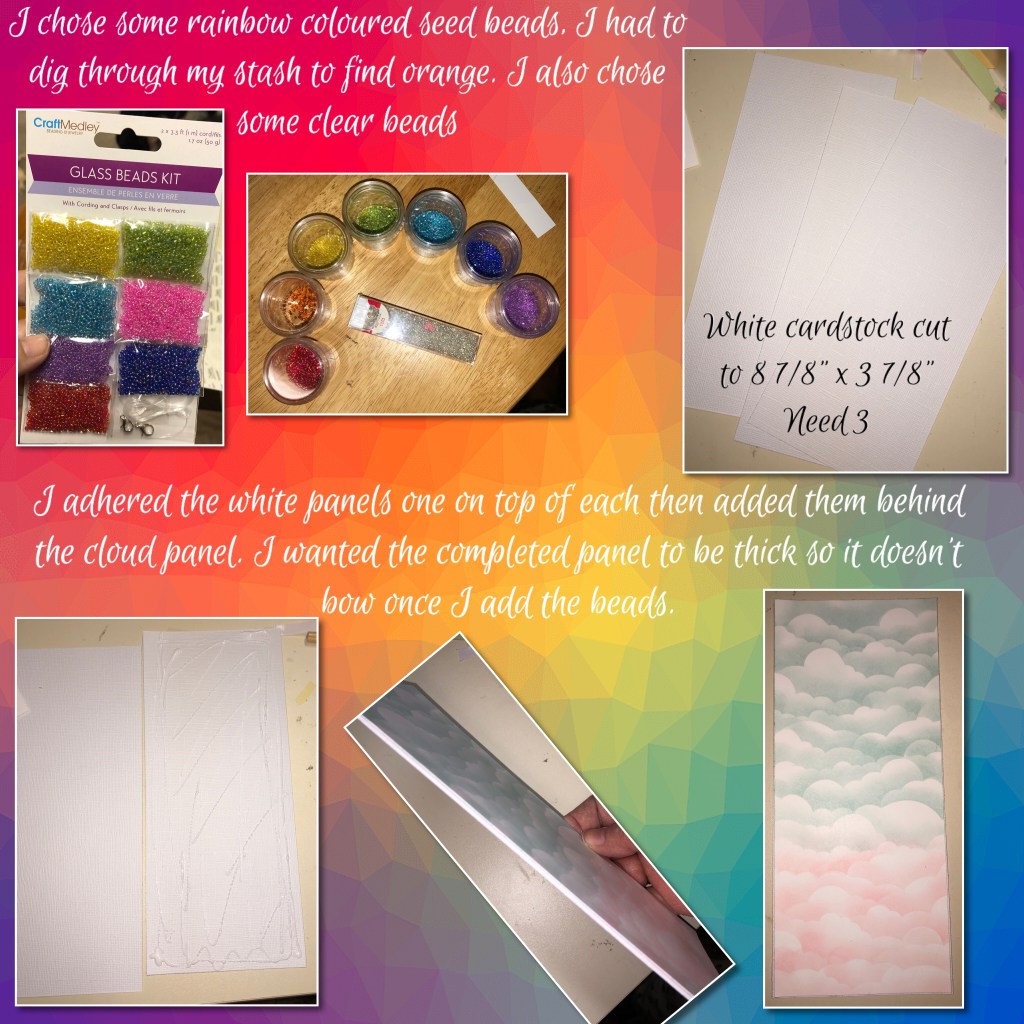
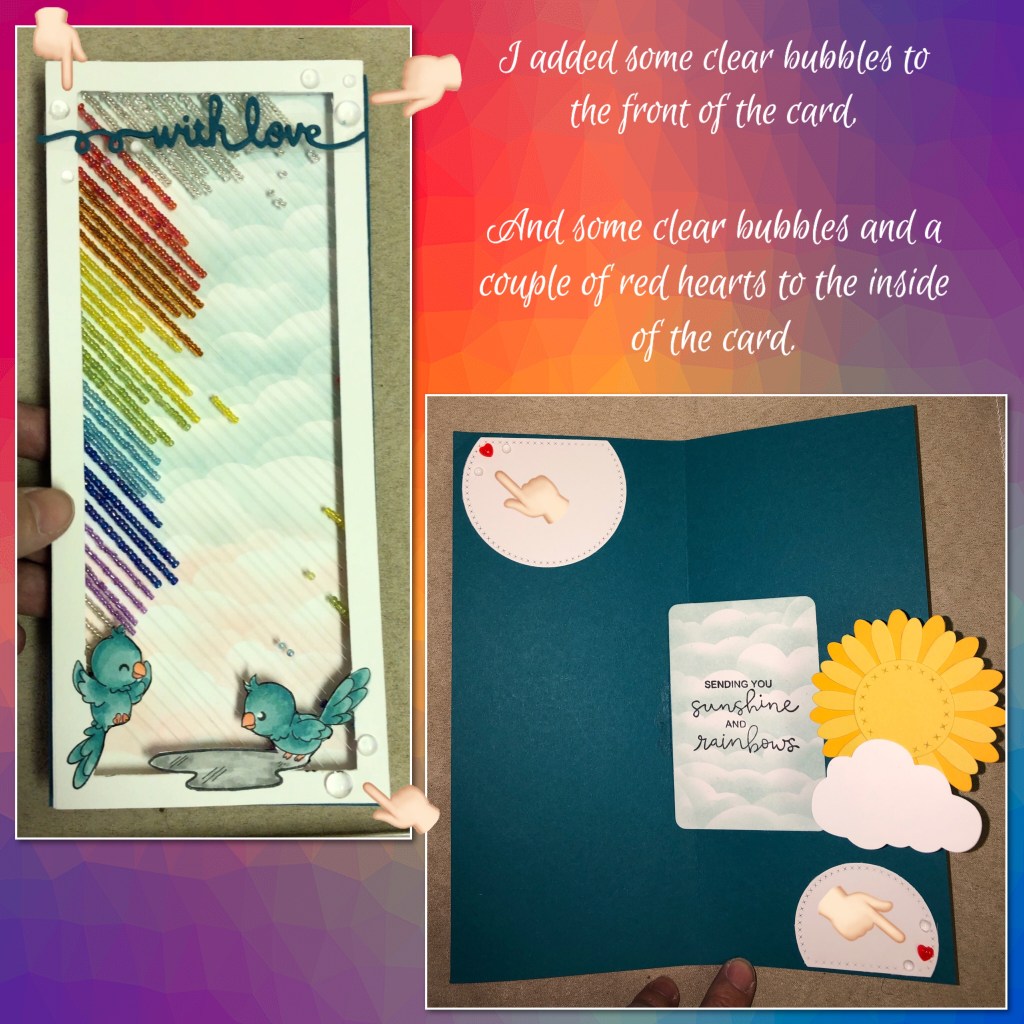
If you’re just making a rain card, you can just use the clear Seed beads. I found my multi coloured seed beads from the dollar store. It did not have orange so I did have to go through my stash to find orange.


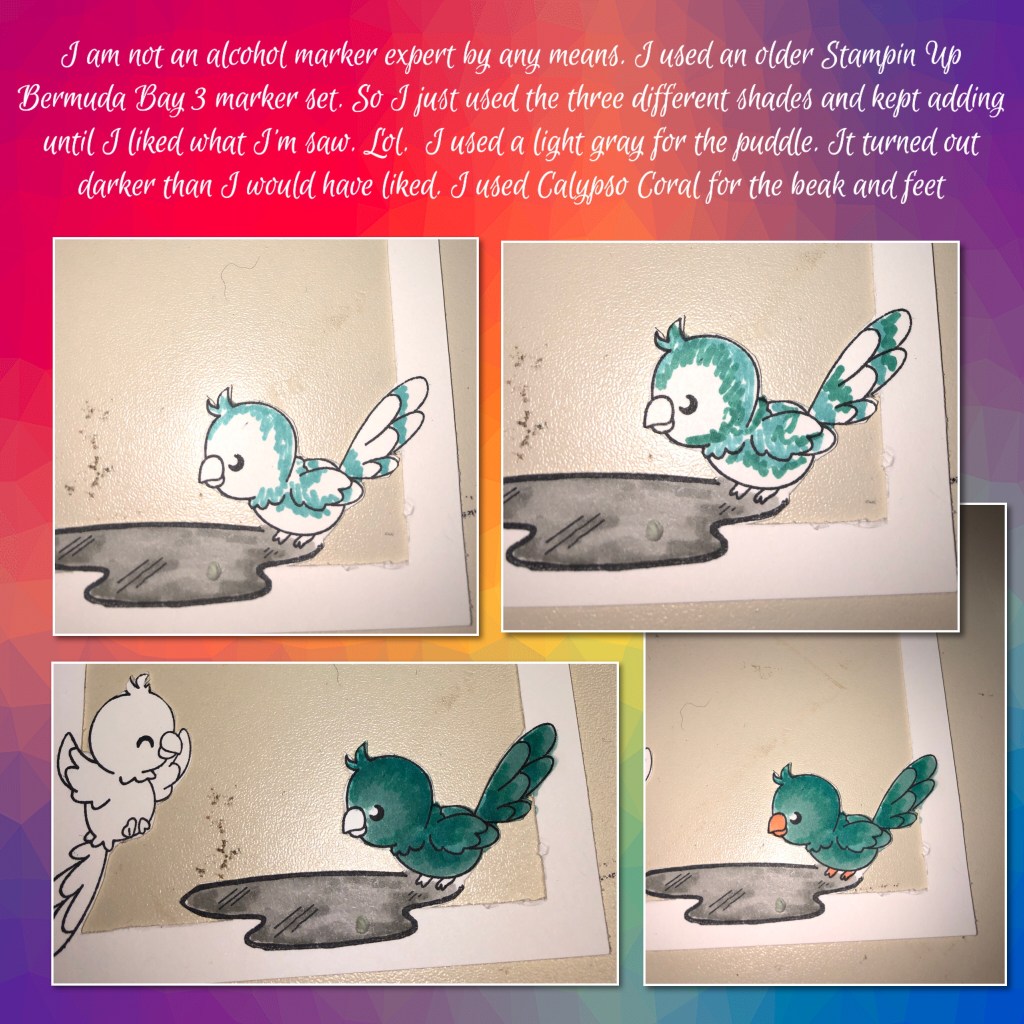
I didn’t actually look up the last Magical Rain card I made. I totally forgot I used the same bird stamps on my first rain card and this rain card. At least I made them different colours LOL. I used Black Memento ink to stamp the images.

Now for the inside 😀

I try my best to explain how to assemble the Rockin Rectangle mechanism. It is really hard to do in photos so I highly recommend watching Karen Burnistons Tutorial Video. I did make a slight change in order to make this mechanism fit in a slimmer card. Just follow the slight change I mention below if you are adding this mechanism to a slim line card.

I originally tried to make this mechanism fit without altering (as shown in the photos above) But it didn’t, just cutting the tapered end in half makes the mechanism not need to stretch out so far, so I can adhere the other end right at the card edge. I forgot to take photos of the next step, the tapered end that I trimmed has to be adhered to the left side of the cart with the end in the fold. The other end has to be adhered right at the edge on the right side. You can see this in the photos below.

By altering the mechanism by that little bit, the bottom platform is a little lower than it is meant to be. But the card still opens and closes without a problem.

To see some other fun cards check these out

WOW!!! This card is incredible!!
LikeLiked by 1 person
This is a masterpiece, such an amazing creation must have taken some patience. Emma
LikeLiked by 1 person
Ya the beading part took a bit of time. Lol.
LikeLike
Another great card! You are so talented and always give me inspiration!
LikeLiked by 1 person
What an absolutely stunning card! Your hard work definitely paid off!! XO Emma||Cardstock Queen
LikeLiked by 1 person