
As soon as I got to see what this new release held, I knew that I was going to make a very special birthday card for my son. I knew I wanted to incorporate the new Stage Pop Up.
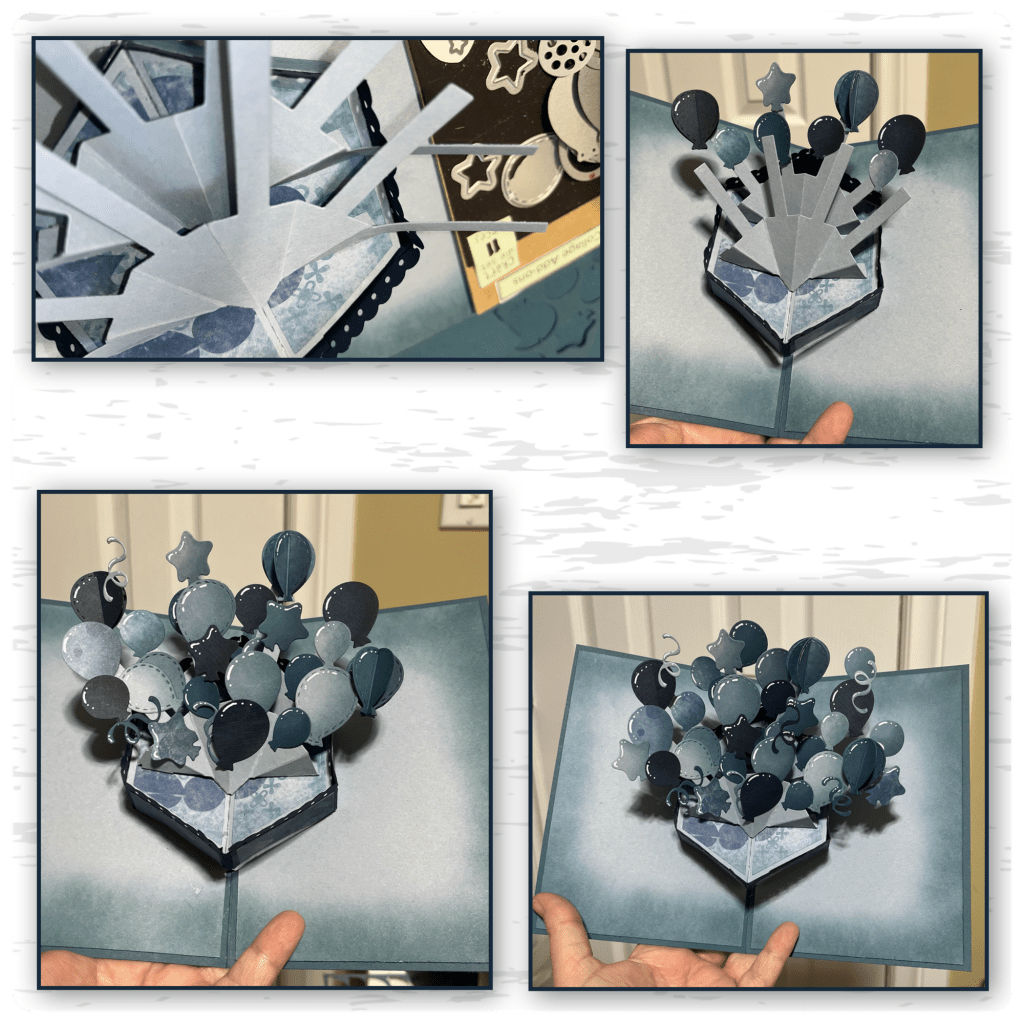
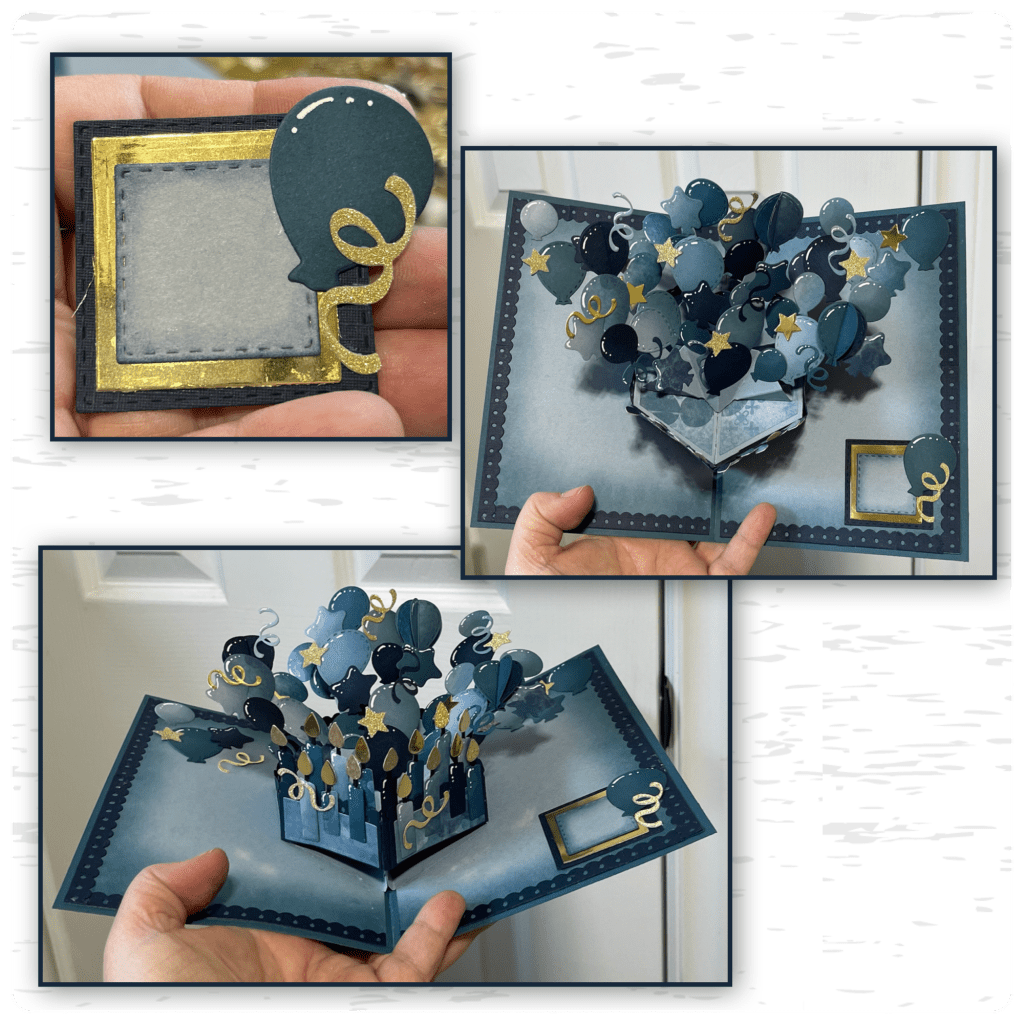
I decided to see if I could fit the Photo Fan onto the Stage Pop up, and to my surprise I was able to fit 2!!!! And add them into a 5”x7” card.
All the fun is in the reveal, to see this card in action please check out my FACEBOOK page, feel free to join if you would like to share your own crafty creations. You can also see a video of this card on my INSTAGRAM page.
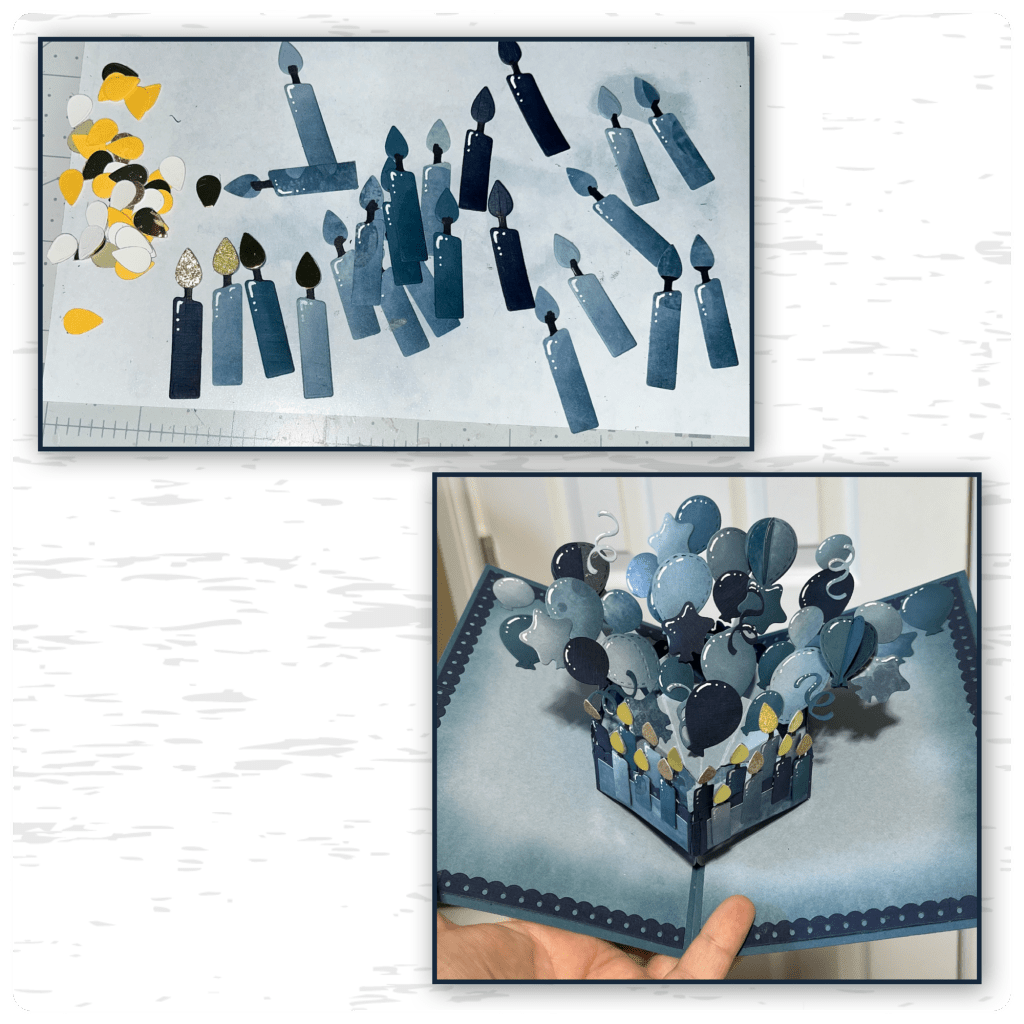
I was trying to pick a colour combo and remember that I had some pre cut candles so I found the patterned paper that I still happened to have and some coordinating colours. The candles in the New Party Stage Add are the same sizes as the candles in the Birthday Candles Add on so you will be able to cut multiples if you have both sets.
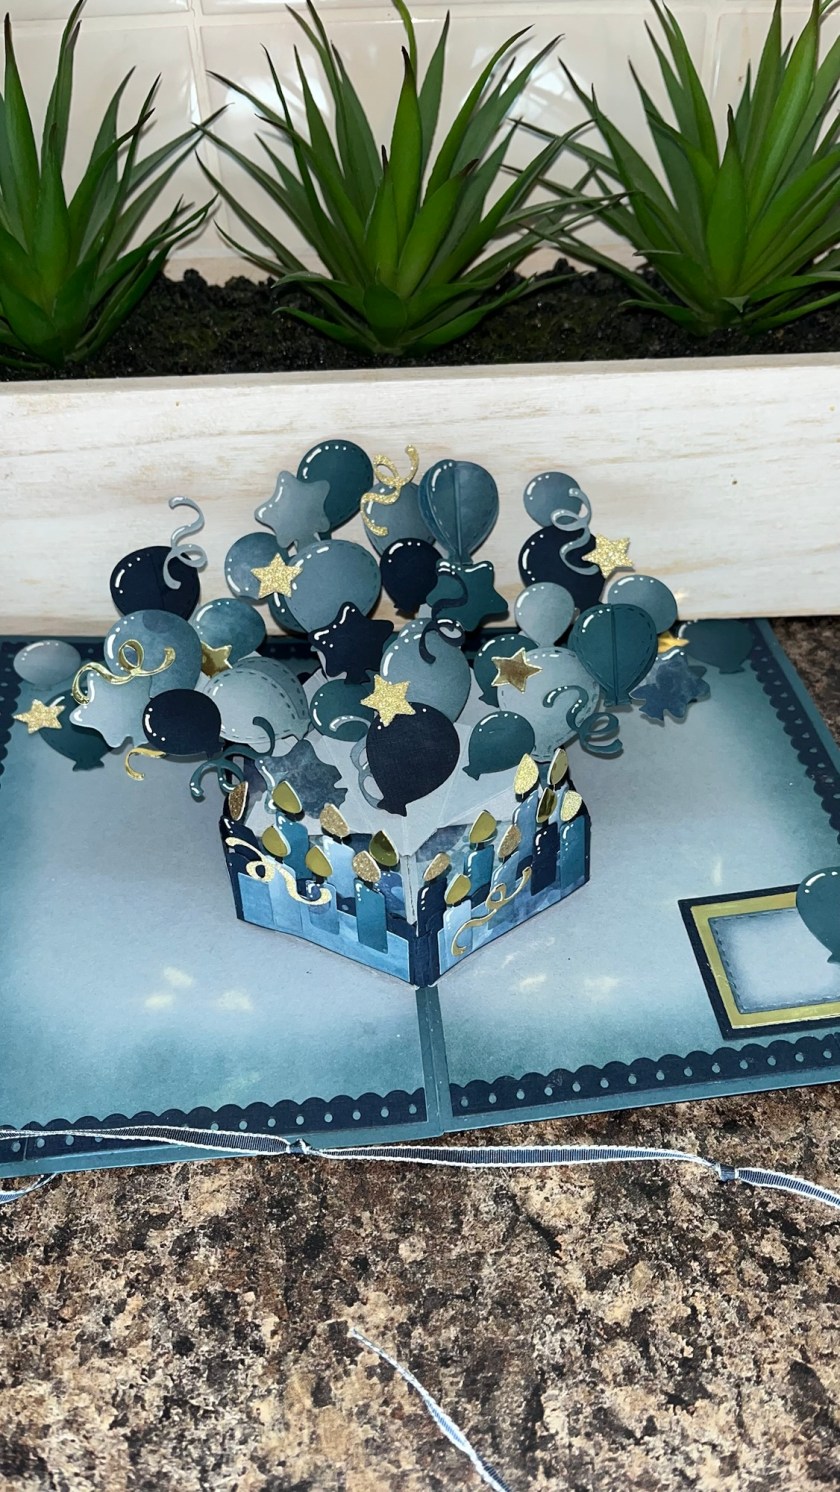
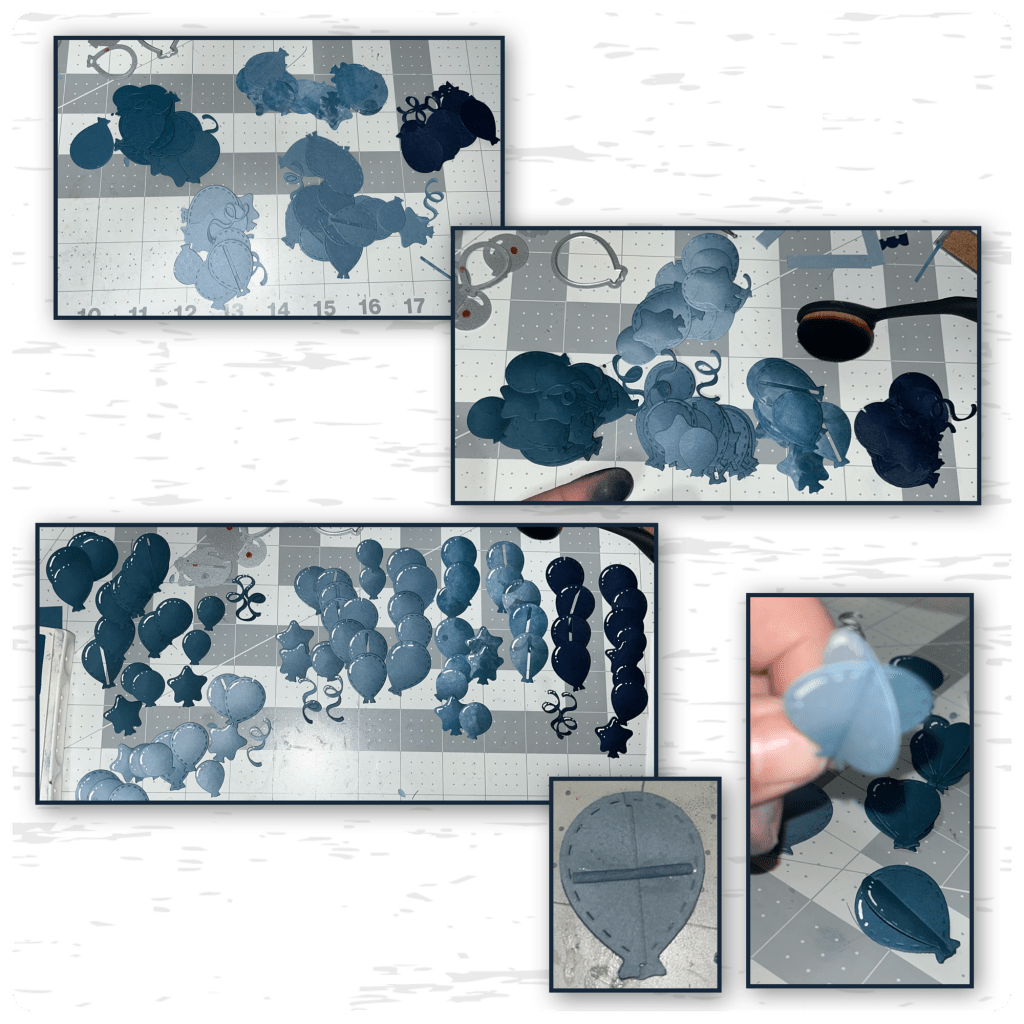
I die cute several balloons from the Balloon Collage Add On and the Party Balloons die sets. I used a brush to add on ink to the lower right side of the balloons, then added white Jelly Roll Pen highlights. I like the look of the layered balloons but sometimes they jam things up, so I add a small piece of cardstock (the piece that falls out the middle of the balloons) and glue it to the back. There is still dimension but it stays in position.
I cut out the pieces of the Stage Pop up and assembled (Karen will have a video tutorial soon) and decorated the top with the patterned paper.
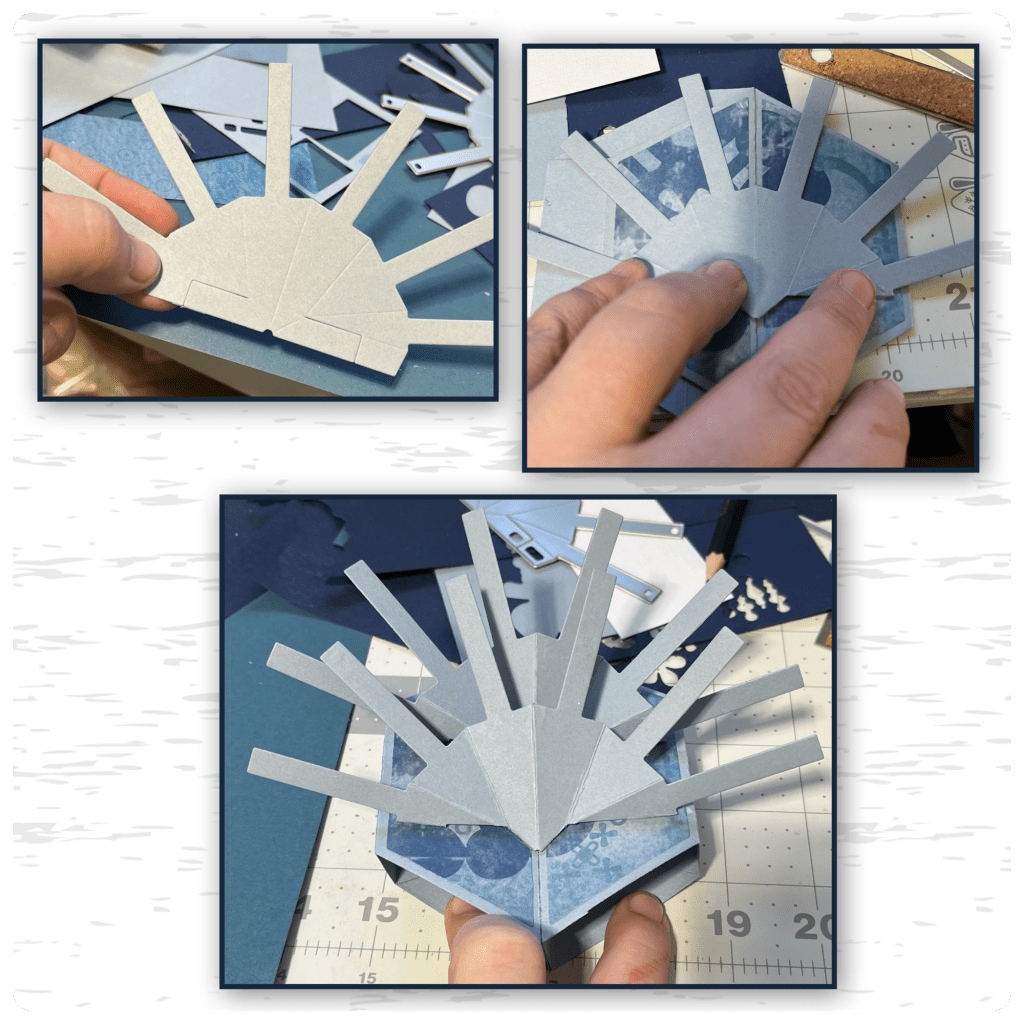
I cut out the mechanism from the Photo Fan Pop Up and checked to see it would fit and it did, then I realized that I was able to fit 2 so I cut and assembled a second one, I added them to the Stage the same way I would attach it to a card. (Karen has a video tutorial on the product page at the link ⬆️ )
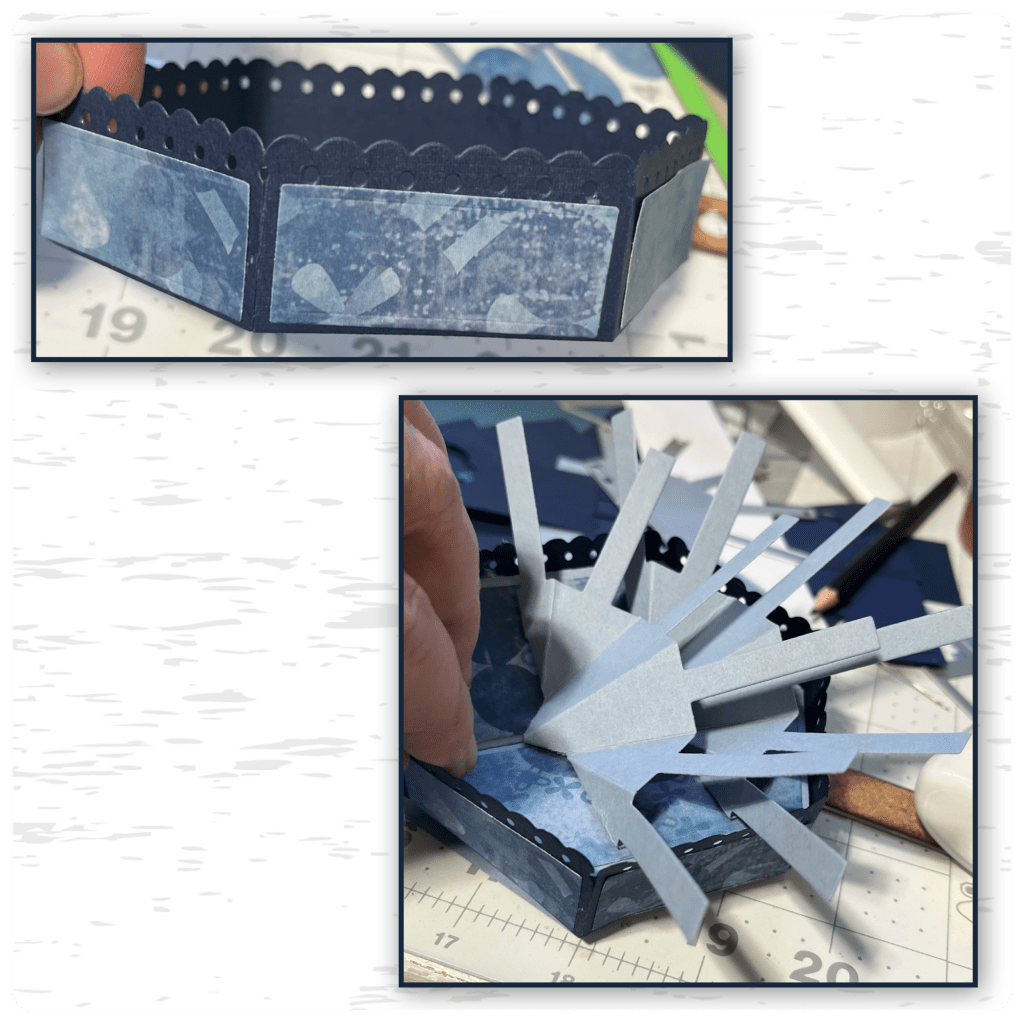
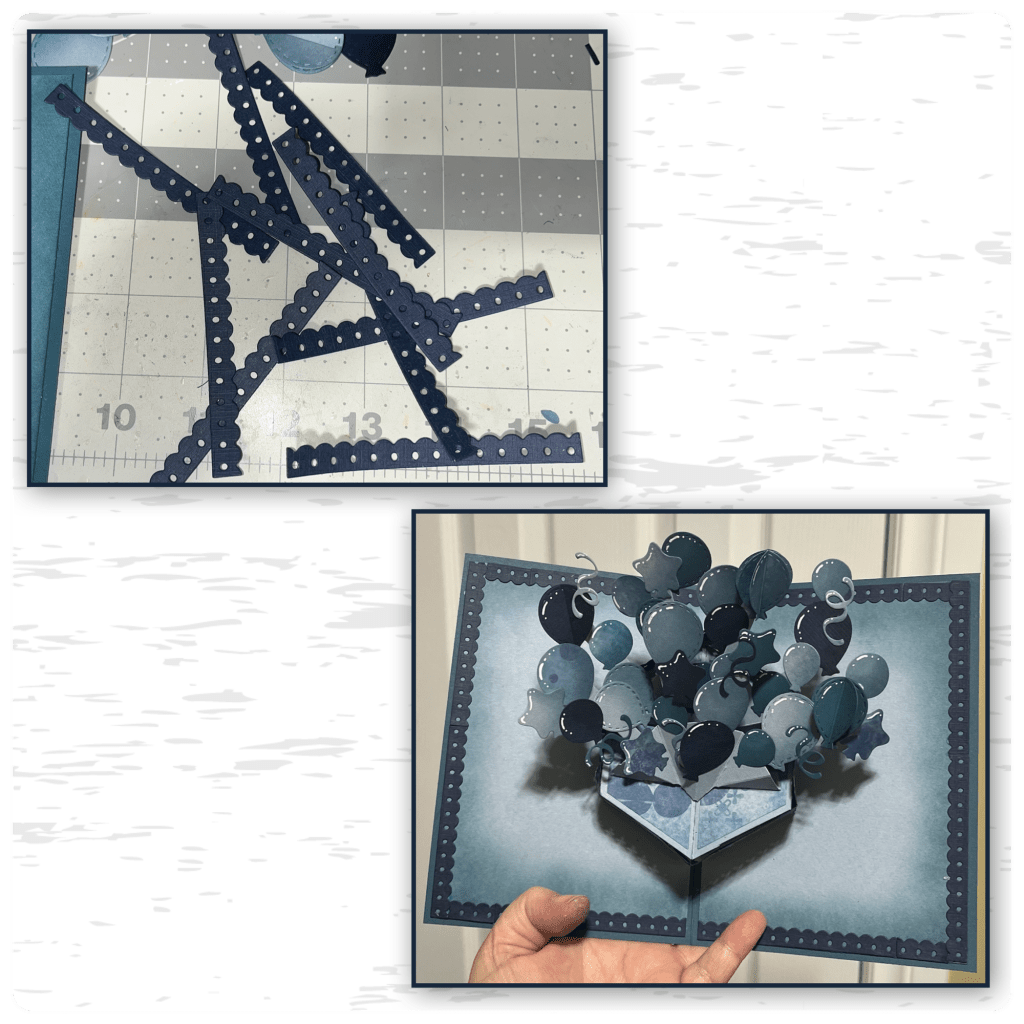
I assembled the band from the Party Stage Add on, then added it to the stage.
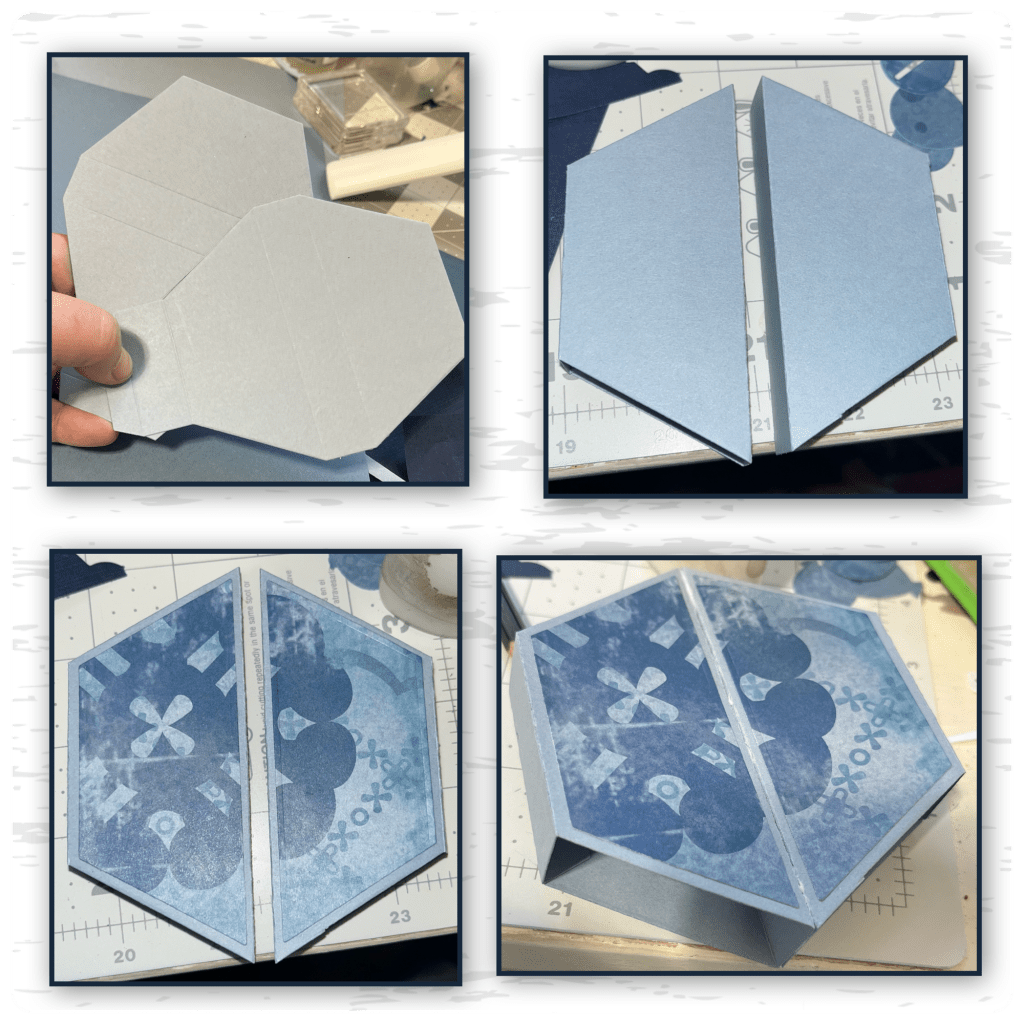
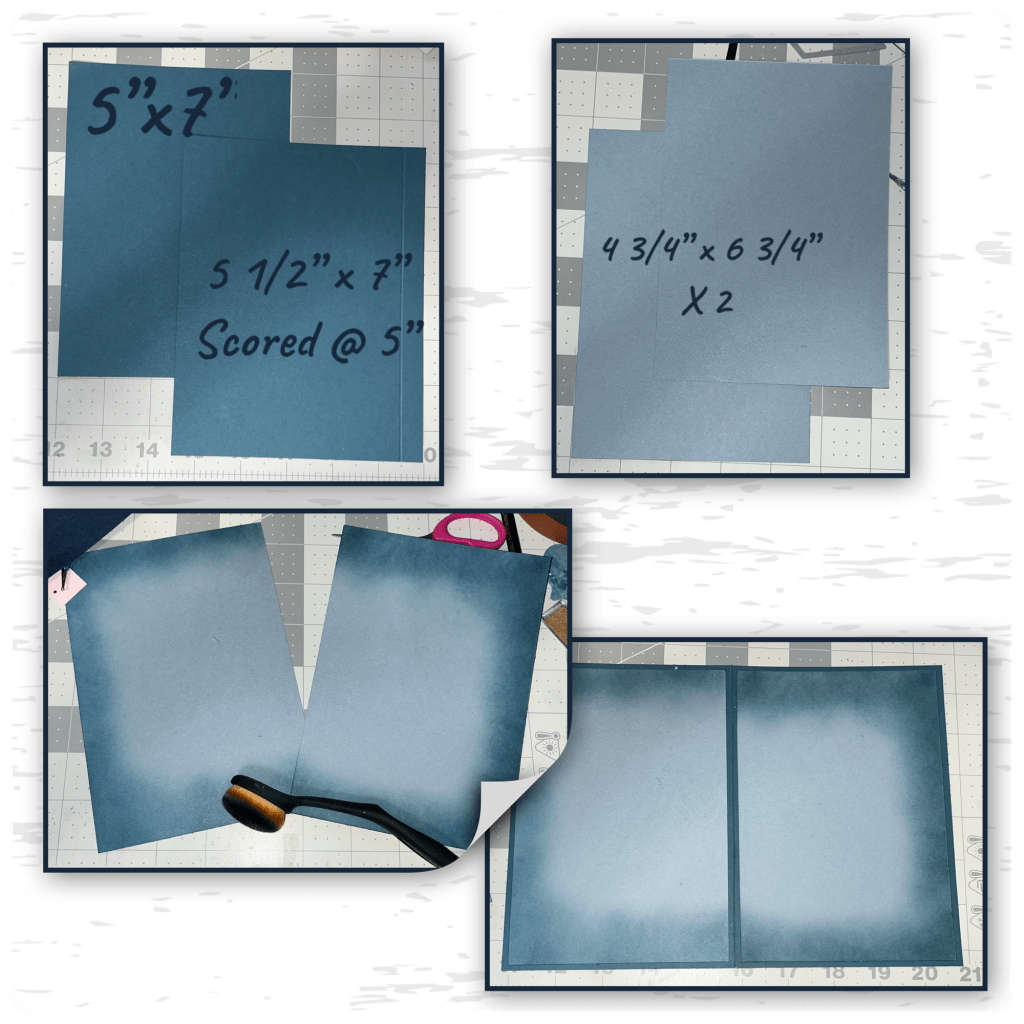
I thought it would be a good time to start the card base. I cut the panels as shown, I cut the base into 2 pieces and then attached them together. I brushed ink around the lighter blue piece and added as shown. I actually cut 3 of the lighter blue panel not 2.
I added the stage to the card base as shown. This is where I realized I had a few issues. Issue one, I had the band a little too tight so the stage would not fully open inside the card. So I cut the band at the front and at the back as shown. Then cut out two small sections using the same Party band as shown. I attached the 2 little sections to the front and to the back to give the band a little more room to open fully.

Issue 2 is the outer arms of the Photo Fans get caught up in the outer frame so I cut them off. I went from six arms per mechanism to 4 but that is still plenty. I started adding balloons and streamers to the arms, starting at the back and working my way to the front.
I thought that it was missing something and I wanted to bring in some more navy so I cut out several pieces of the trim from the Party Stage Add on and added it around the edges
I assembled the candles and added them to the front of the stage.
I thought that I needed a little bit more gold to work with the gold from the candle flames, so I cut some stars and streamers (from the Balloon Collage Add on) and a gold frame. To make the frame I cut the 2 blues using dies from the Greetings Labels and the gold frame was cut using a die from the Postage Add On.
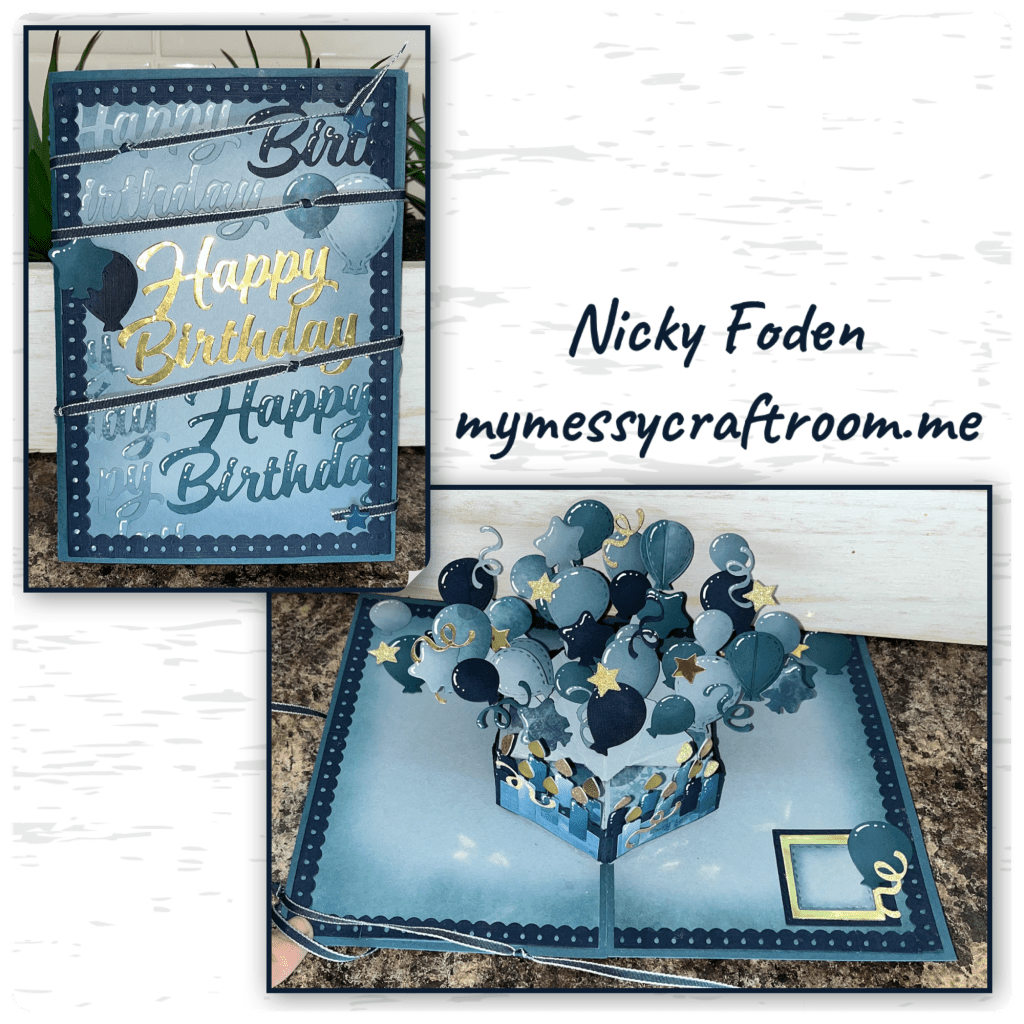
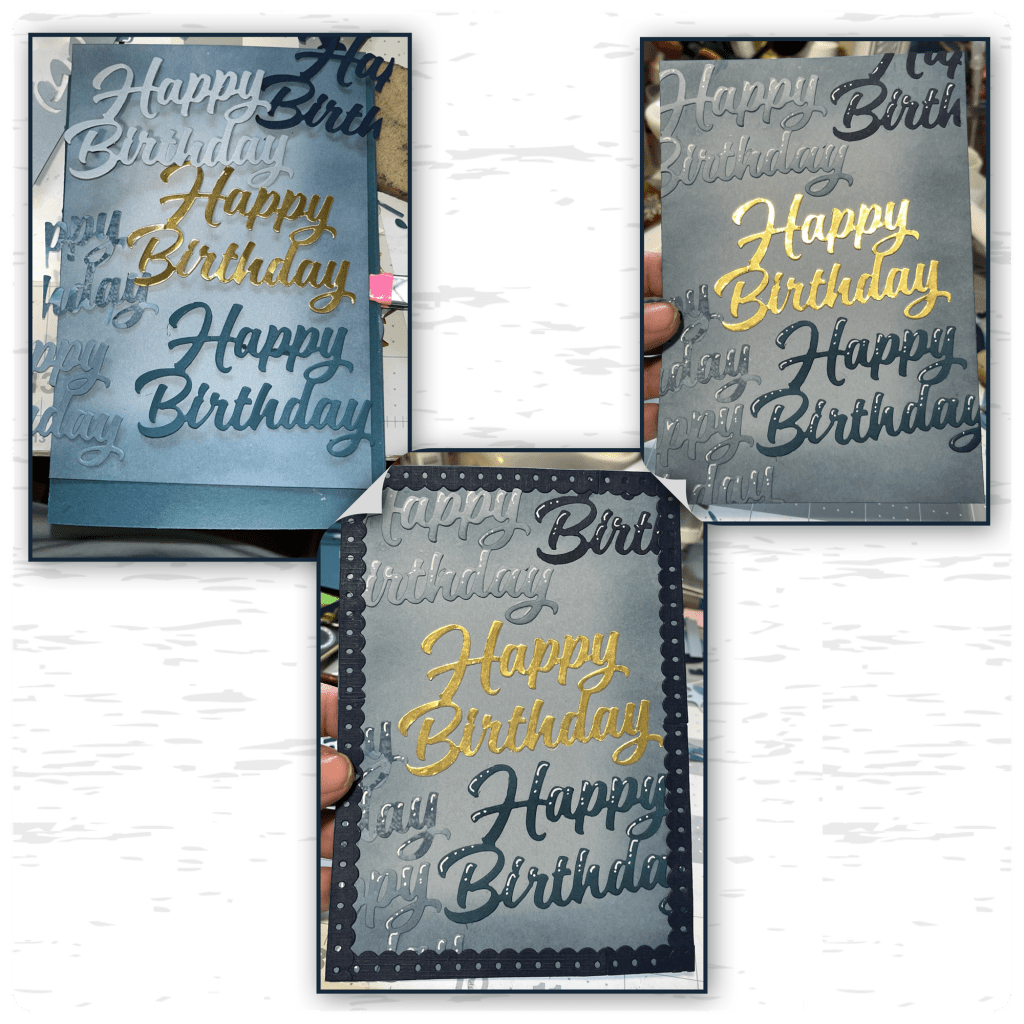
I wanted to use the Happy Birthday in a unique way so I cut it out from all the different blues and the gold and laid it out to cover the front of the panel. I added shading and highlights the same as the balloons then adhered to the panel, and trimmed off the edges. I added matching blue trim.
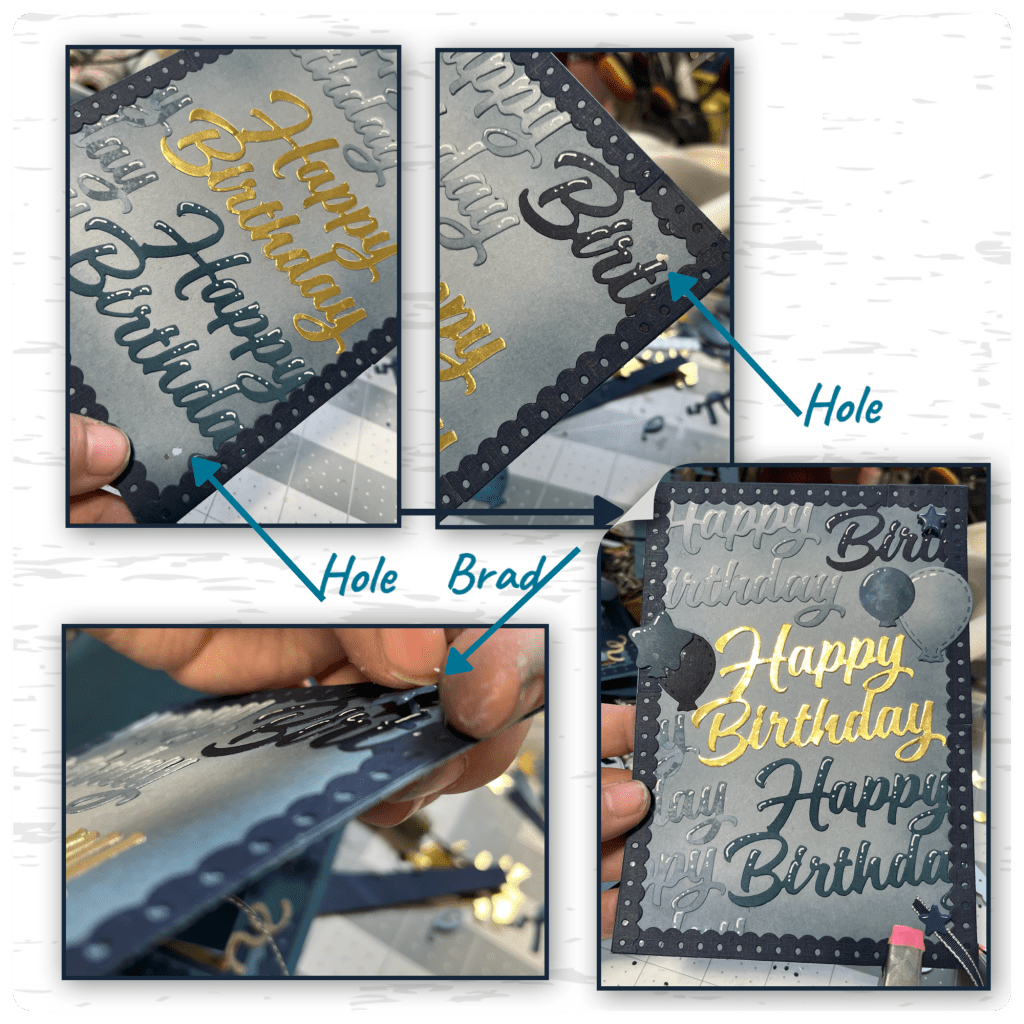
The card needed a little help to stay closed so I thought I would wrap a string around it. I added 2 small holes as shown, the added a brad to each hole. I made sure to leave a bit of a space between he brad and the panel so the string will be able to wrap around. I attached the end of the string to the bottom brad.
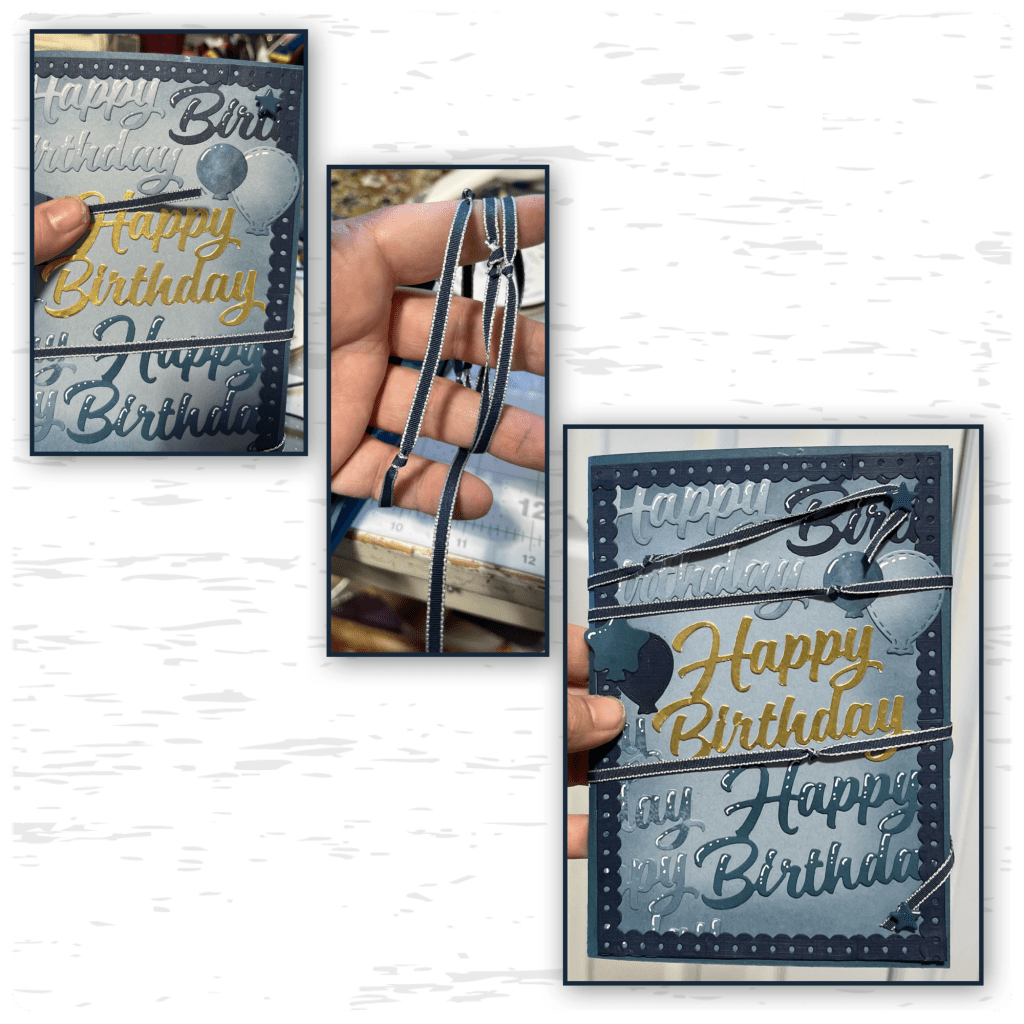
I added the panel to the card front and realized that I didn’t have enough string to wrap around to meet the top brad so i tied another piece to make it longer. I wanted it to look like the knot was a creative decision so I added several more. Then wrapped the string around from the bottom brad to the top brad.

Other Tools used

that is a great card, I love the design and colouring, perfect for any man or especially for your son
Margaret
LikeLiked by 1 person