

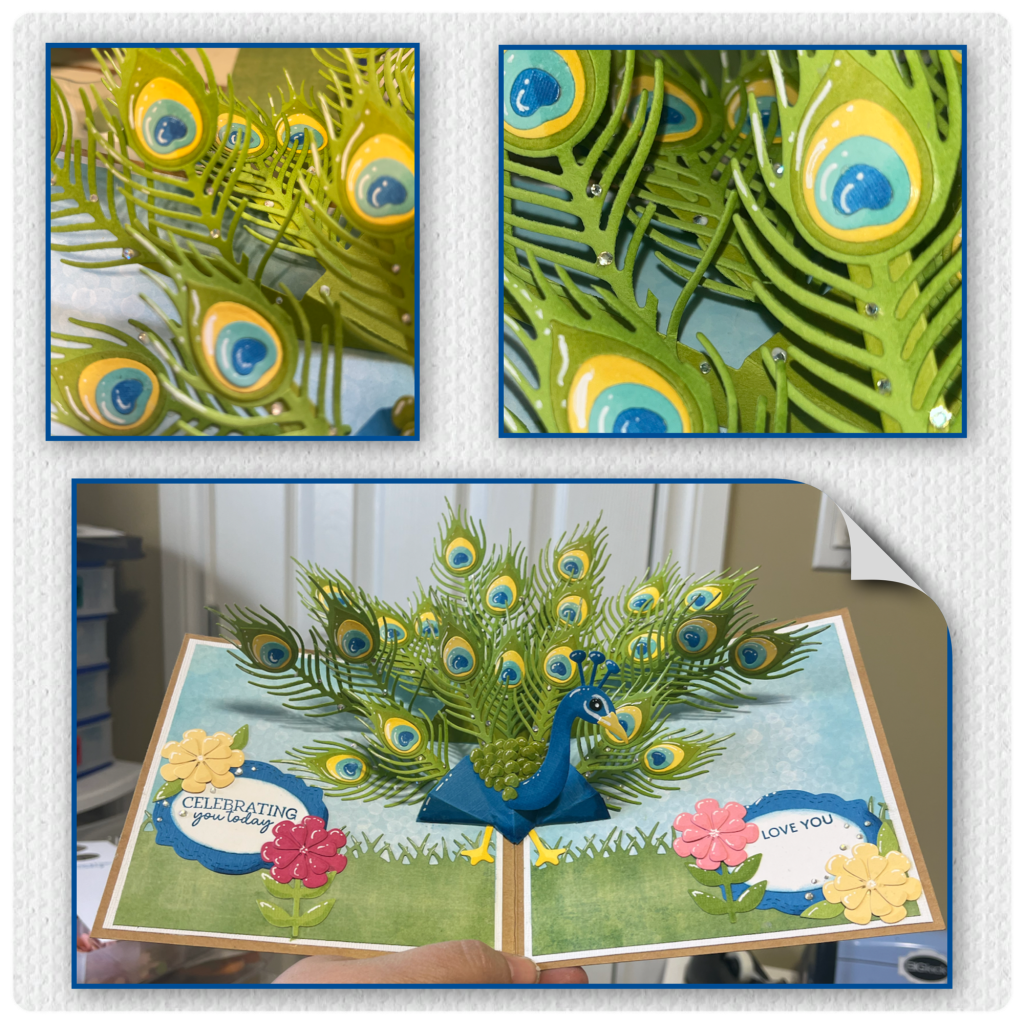
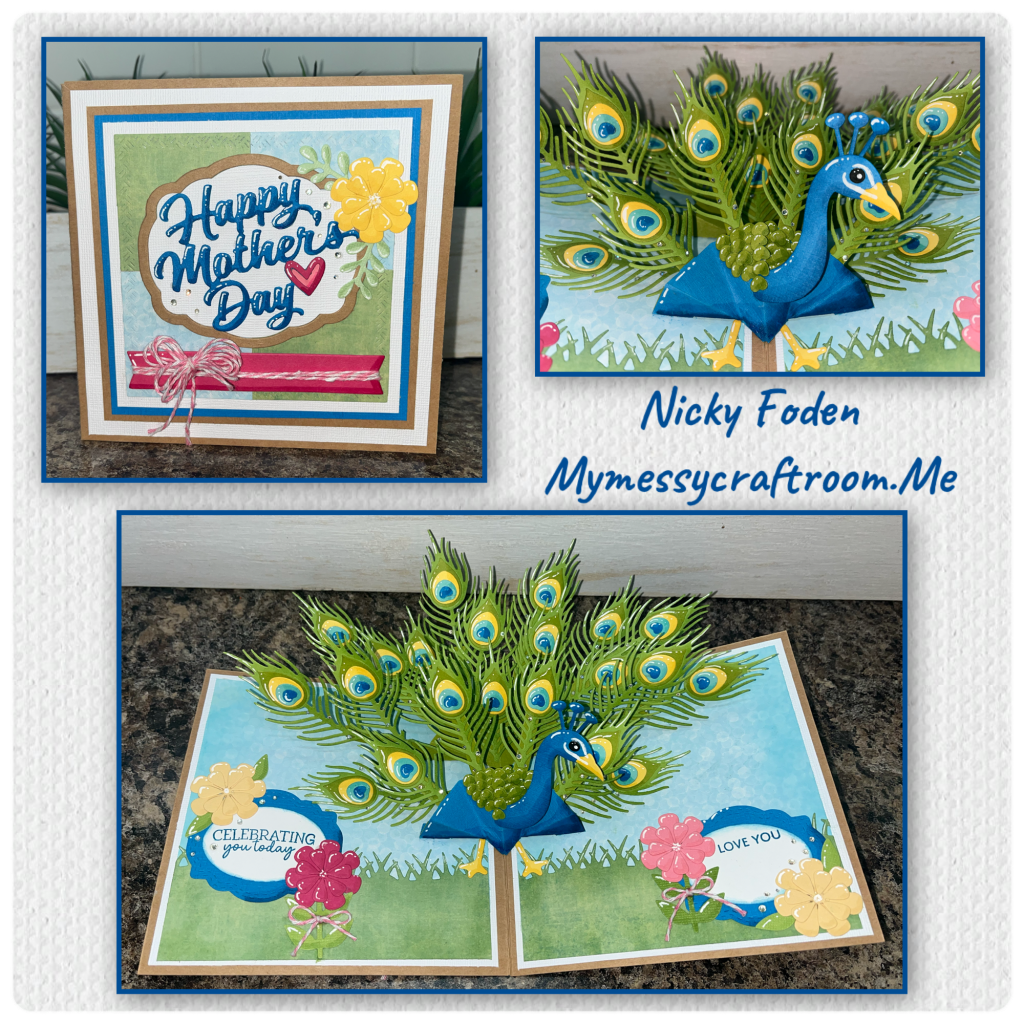
Hello crafty friends, sorry I’ve been MIA for the last bit but I have been away. I’m back now, just in time to create my card for the March Karen Burniston Design team challenge. This month challenge is “For the Birds”, and I decided to see if I could add the Peacock Add-ons pieces to the Photo Fan Pop-up as apposed to the Arch Pop-up that it was intended for. This is what I came up with.

All the fun is in the reveal, to see this card in action please check out my FACEBOOK page, feel free to join if you would like to share your own crafty creations. You can also see a video of this card on my INSTAGRAM page.
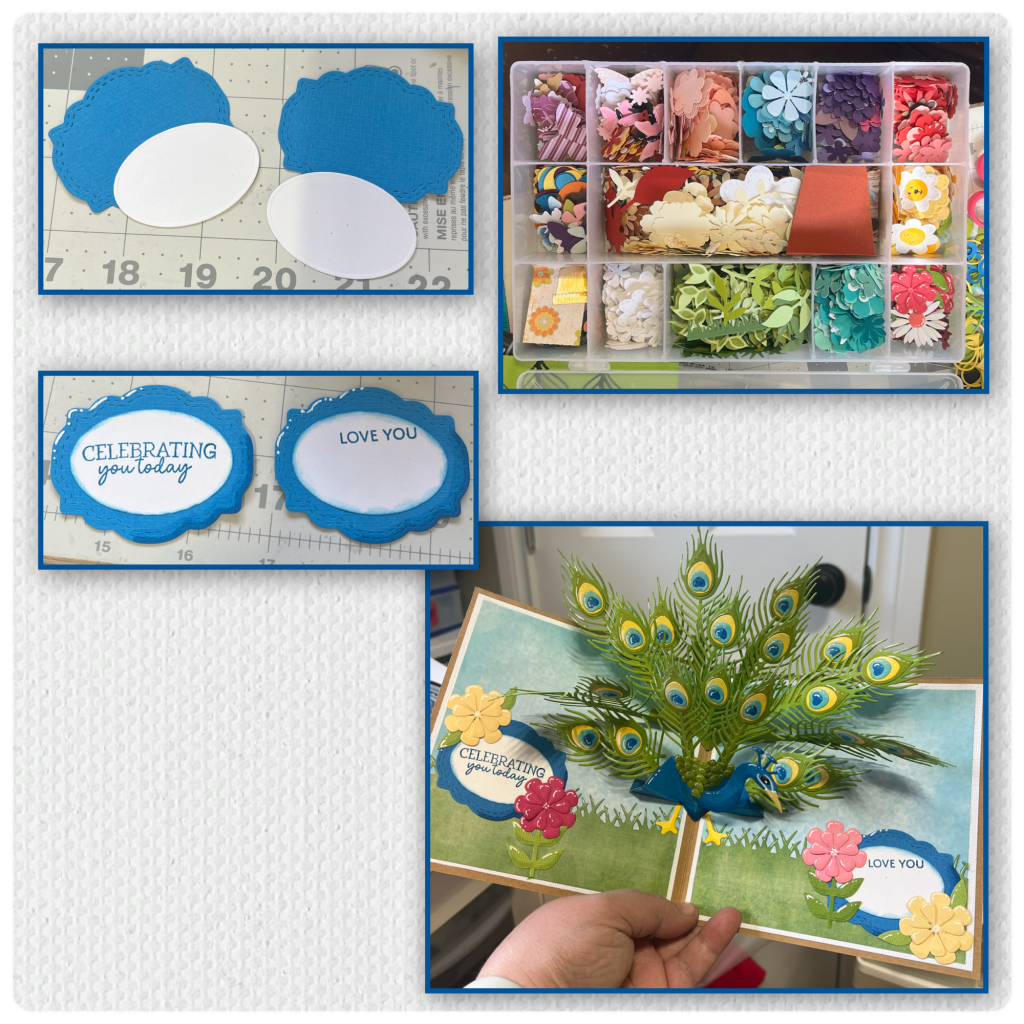
When making this peacock I decided to use a photo as colour reference, then die-cut the peacock pieces as shown below, and assembled the feathers.
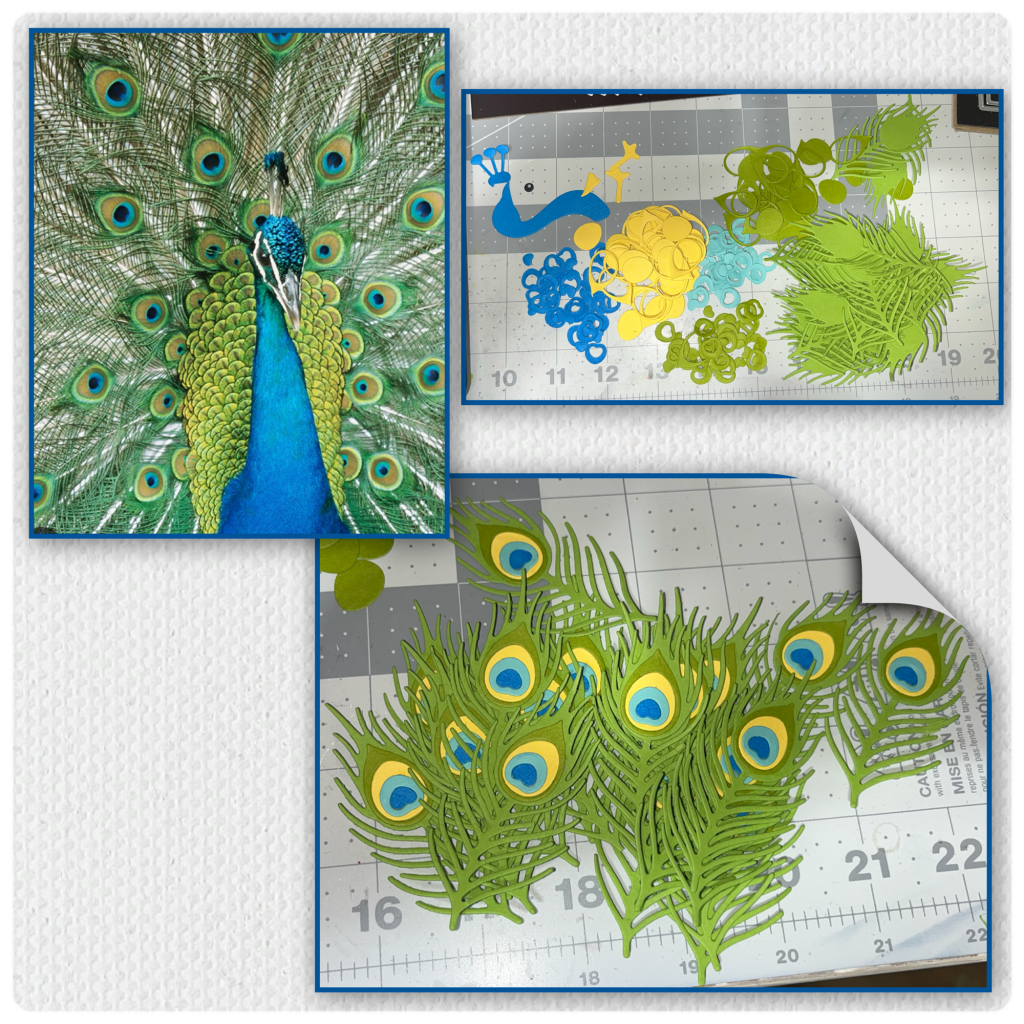
I like to add shading to my die-cuts but I didn’t really have the time to hand colour each pieces so I swiped a Versa Mark ink pad to the right side of the feathers, and used a white Jelly Roll pen to add highlights to the left side. Sorry it is hard to see in the photo. I use a blue alcohol marker to add shading to the head, and added the white pen detail as shown.
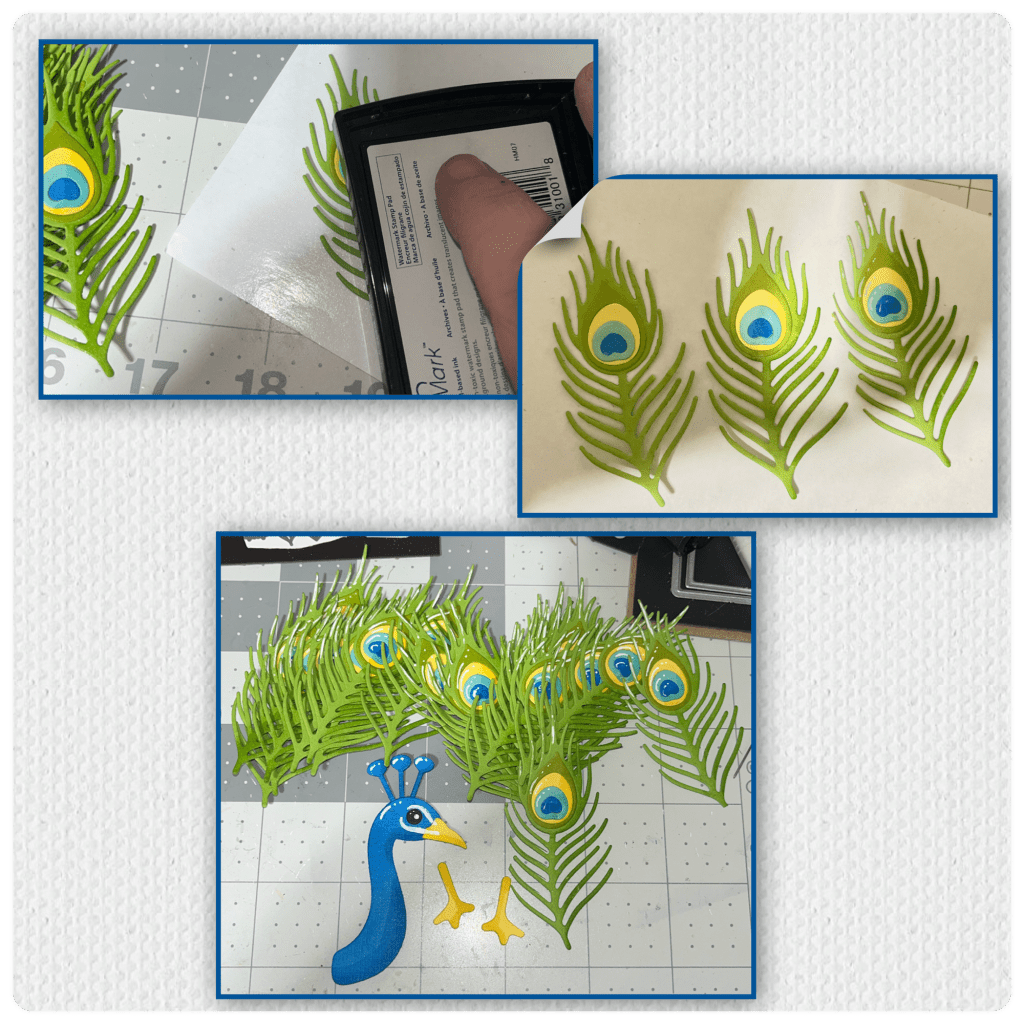
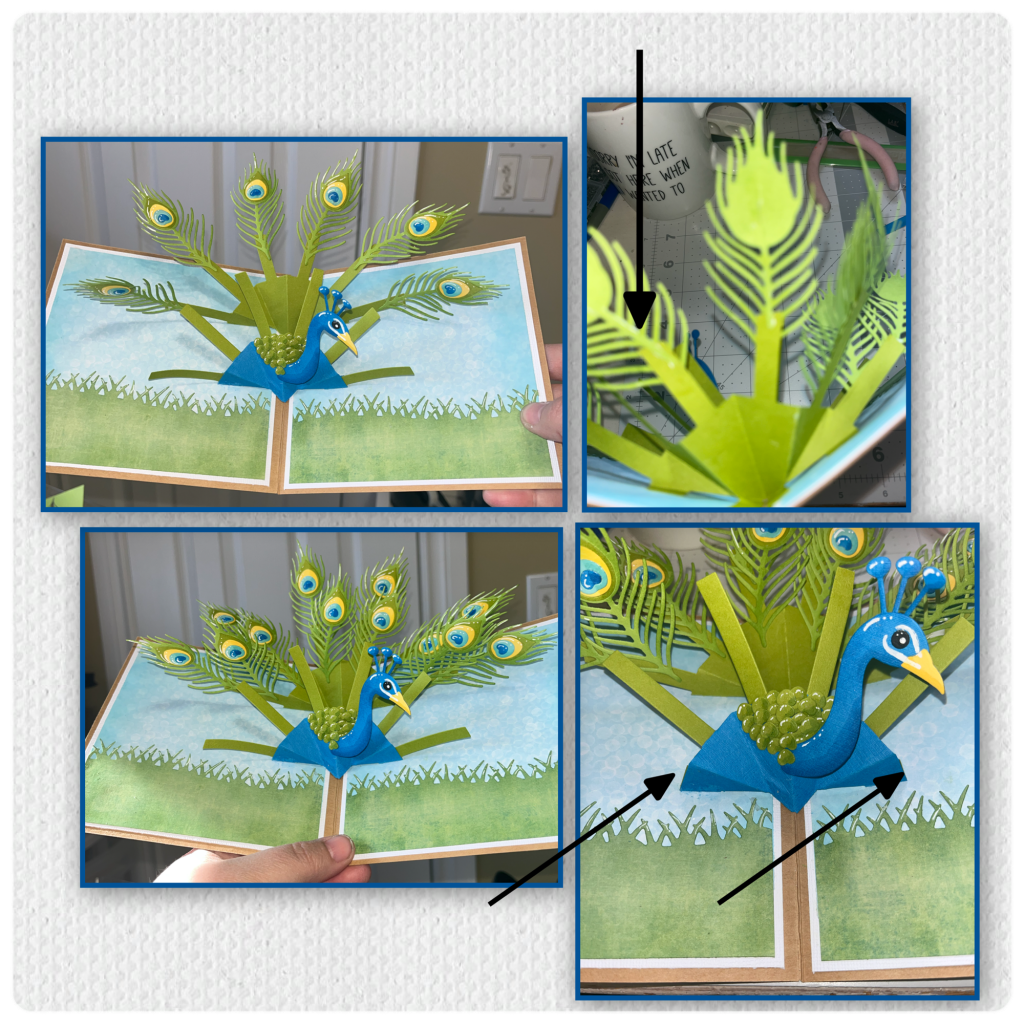
I used the Photo Fan pop-up to make the body. I wanted a blue body, but I didn’t want the blue arms to be visible behind the green feathers do I die-cut green arms and replaced the blue with the green. Later I realized I couldn’t use all the arms so I removed the lowest arm on both sides.
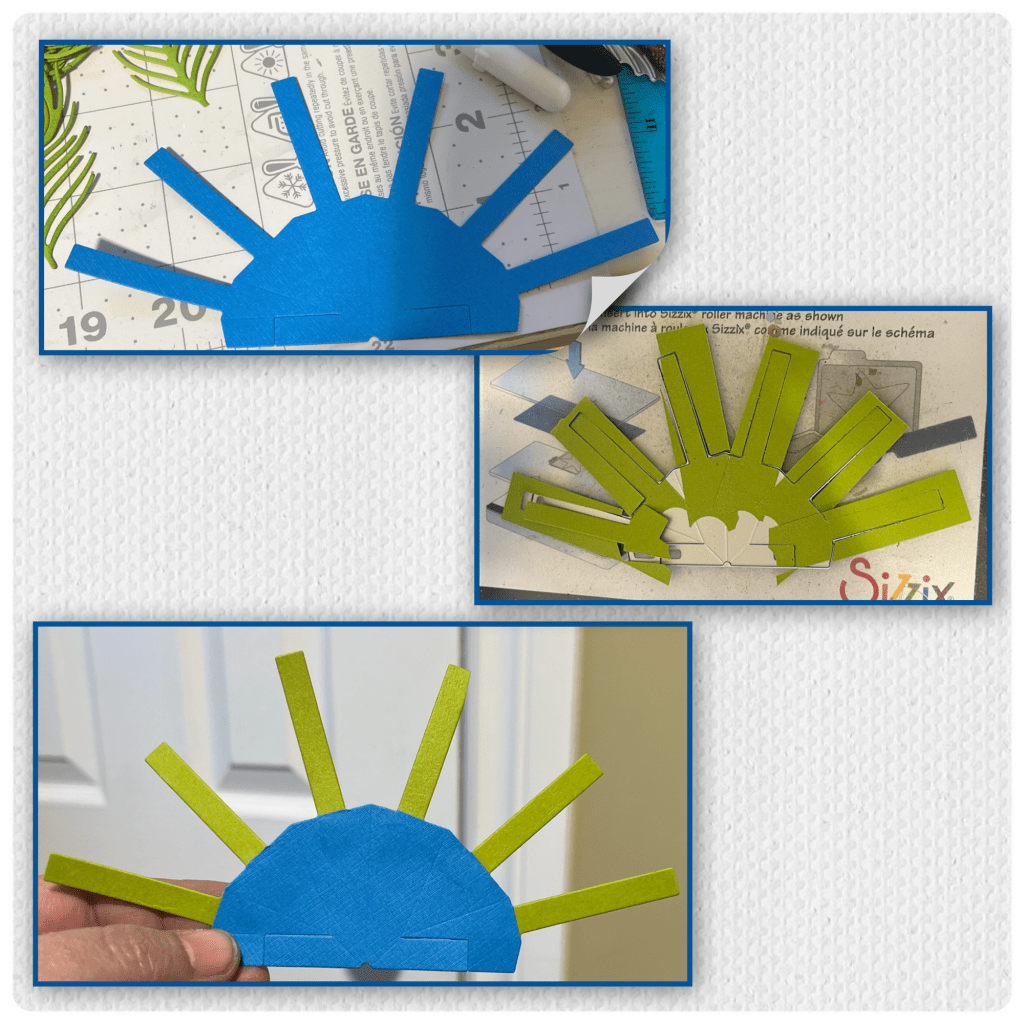
I got the body ready to add to the card and die-cut a second Photo Fan Pop-up from green. I was getting low on the green and didn’t have a piece big enough so the top arms are a bit short, but that’s ok.

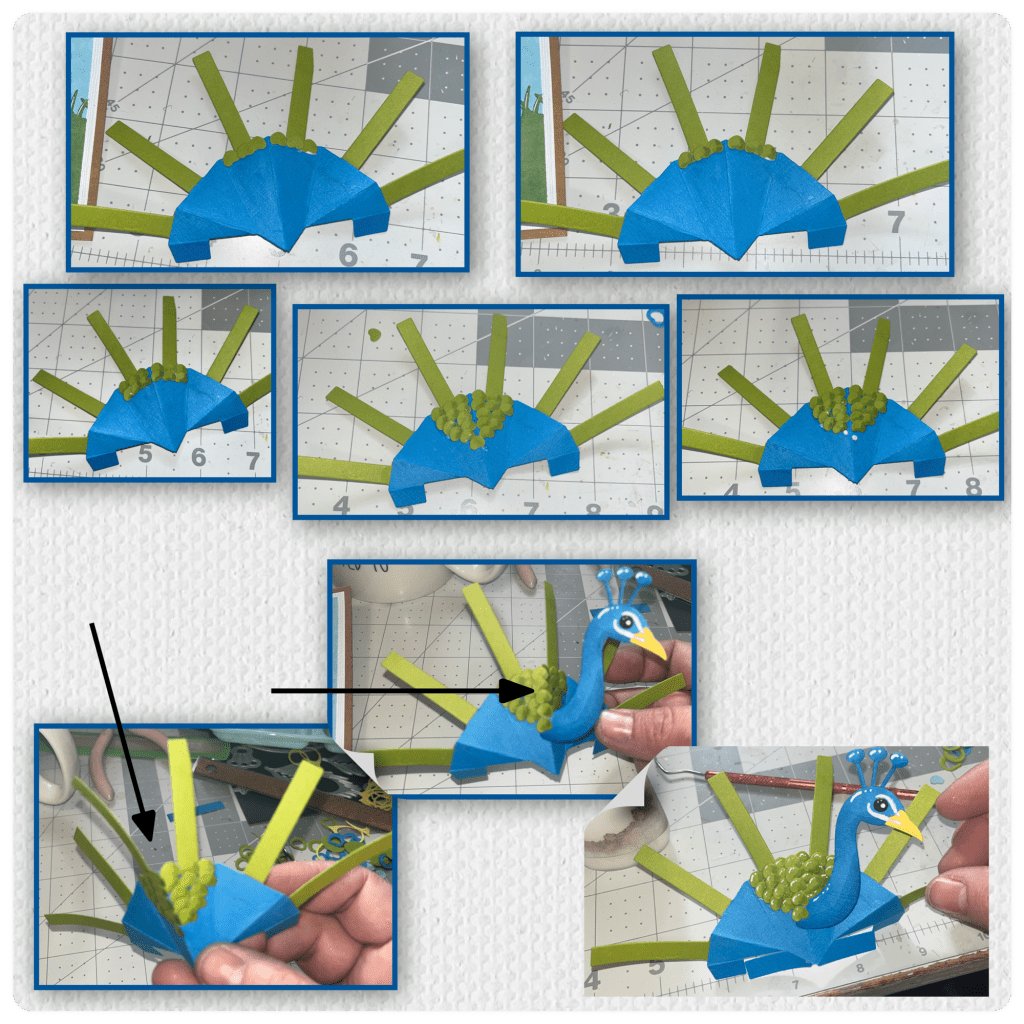
I got the idea from Jennifer Websters Peacock Card to use the little heart pieces from the feather to add the little feathers behind the peacocks head. I started adding them in row by row, adding shading with a green alcohol marker as I went. I noticed the blue gap in the middle was very visible so I added little feathers by ONLY adding glue to the left side of the centre fold, when the card is opened they cover the gap, when the card is closed the feathers lay flat because they don’t have to bend. I added white highlights to the little feathers.
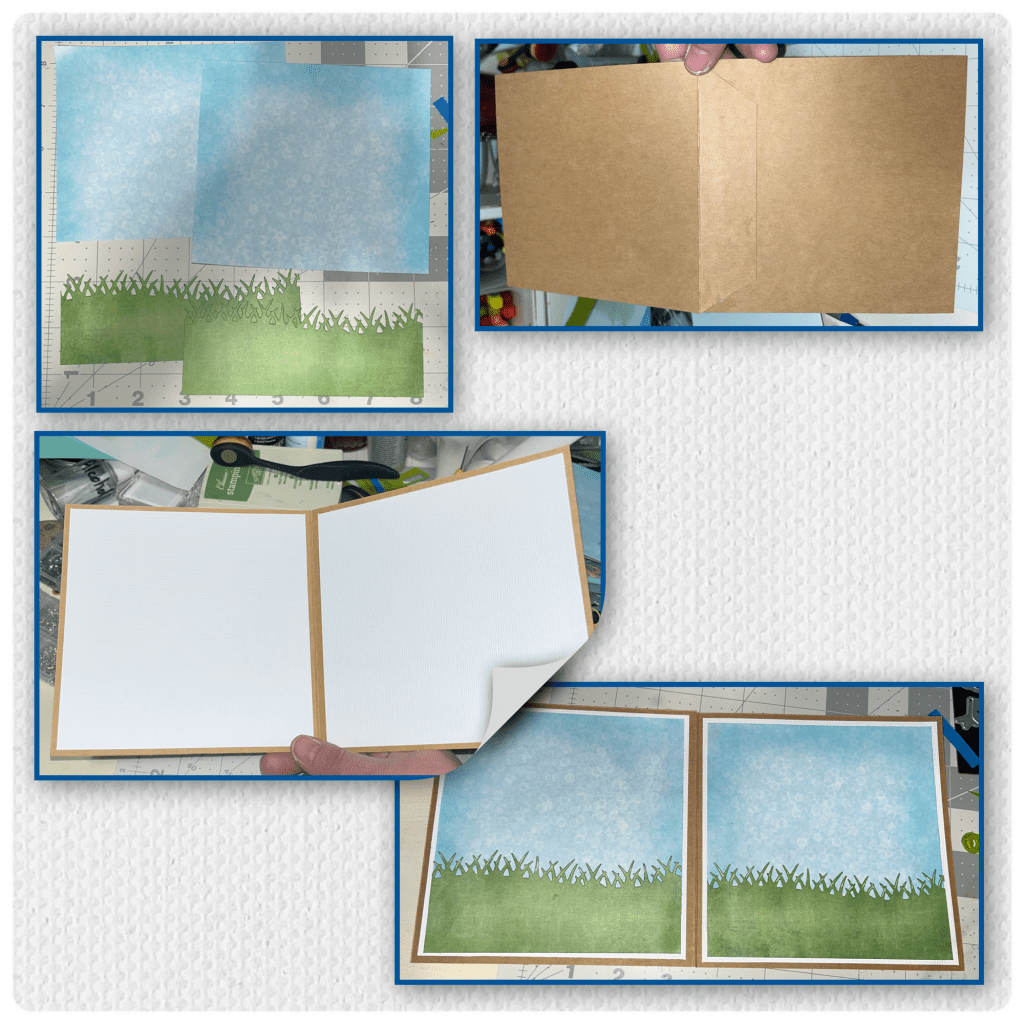
Now I need a cardbase to add my Peacock to so I cut the base and the panels as shown below. I could have cut the green pieces a little shorter.
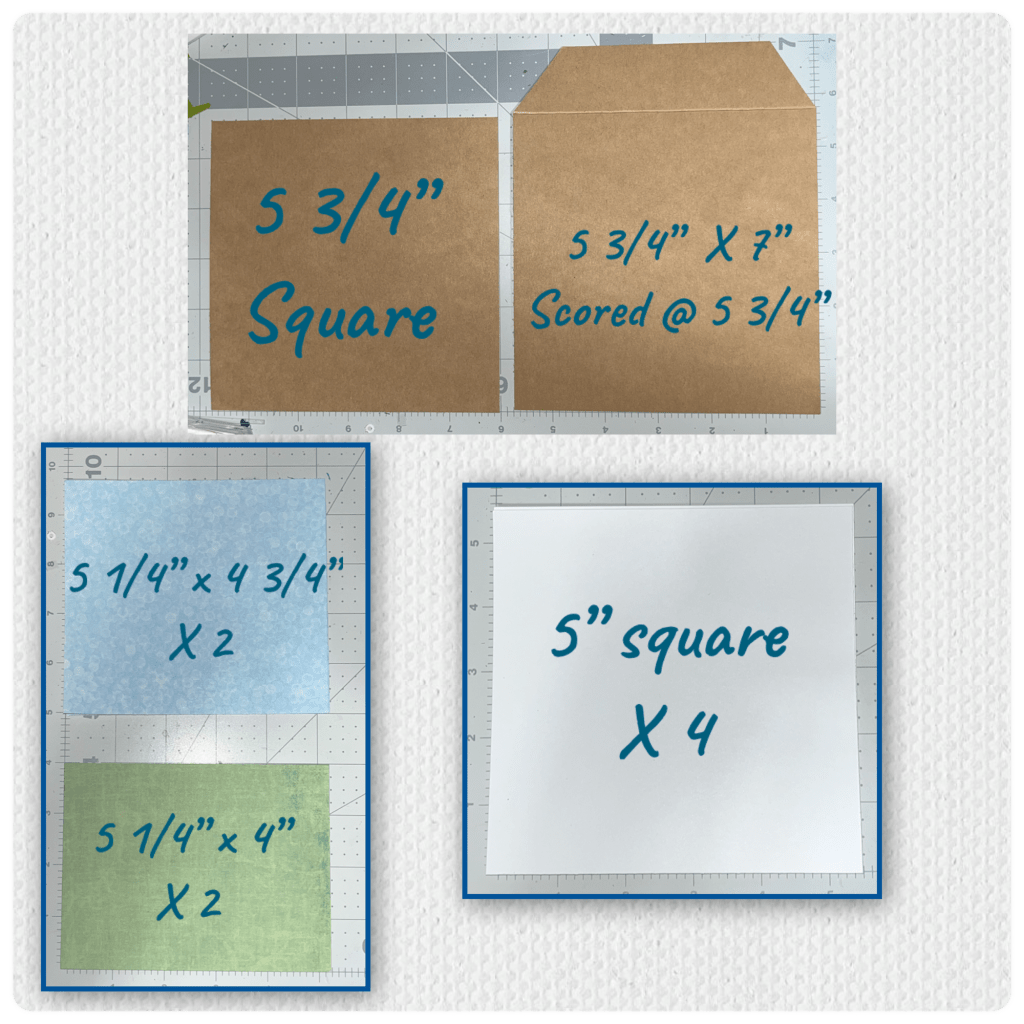
I used a blue ink pad and a brush to add ink to the edges of both blue pieces. I diecut the grass by using the Grass die from the Long Nature Edges, then used green ink and a brush to ink the edges. I used a white gel pen to highlight the blades of grass. I assembled the card base and added the layers as shown below.
I started adding the feathers to the back row. I noticed that some of the feathers were flopping forward so I cut and added little strips of green to the back of the feathers to add strength. Sorry the photo doesn’t show as well as I’d like. I added more feathers along the back to fill in some of the space. I opened and closed the card after each feather to make sure that the feathers weren’t catching on each other and that they stay within the limits of the card when closed and that nothing was peaking out. This is also where I decided that I was going to remove the two bottom arms as shown.
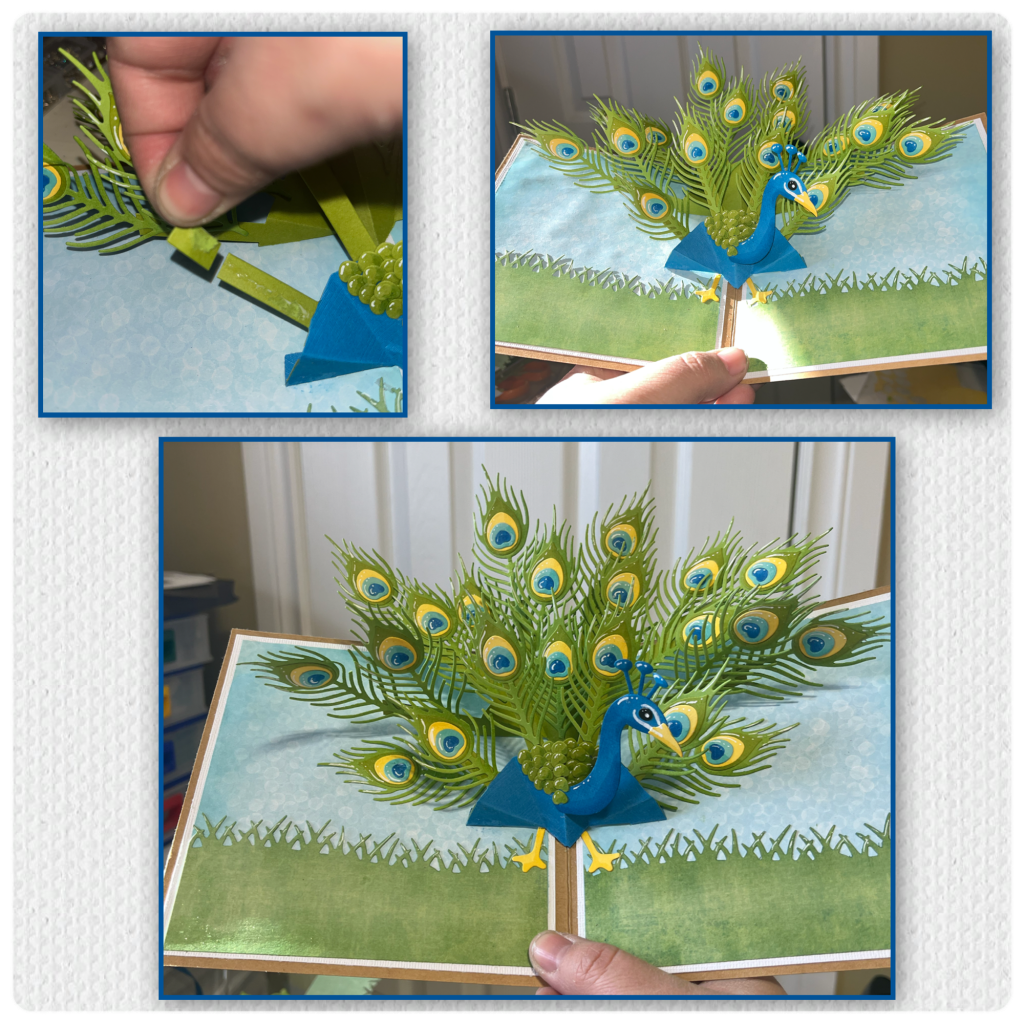
This is where things starting getting a bit tricky, I had to trim the front row arms a little shorter and I had to trim some of the feathers as well because they were catching on the row behind. I added each feather one at a time again opening and closing to prevent catch points. On the bottom row, the feathers on each end are actually glued right to the card, not to an arm.
I have a ton of previously cut flowers so I picked a few flowers, the ones I chose are from the Flower Pot Add-ons
I cut the labels from the Greetings Labels and used stamps from the Stage Scenes Clear Stamps and Bouquet Sayings Clear stamps. I added shading with alcohol markers and highlights with a white gelly roll pen, then added to the card.
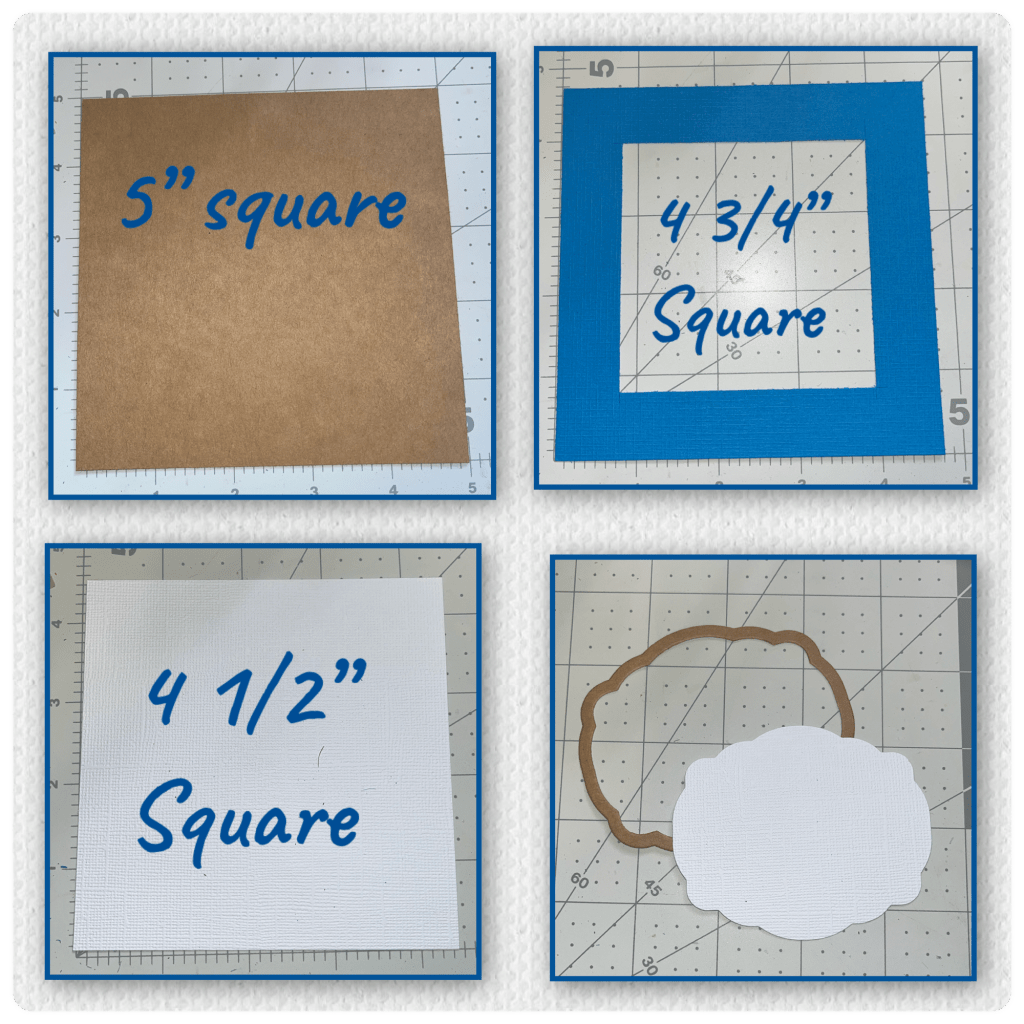
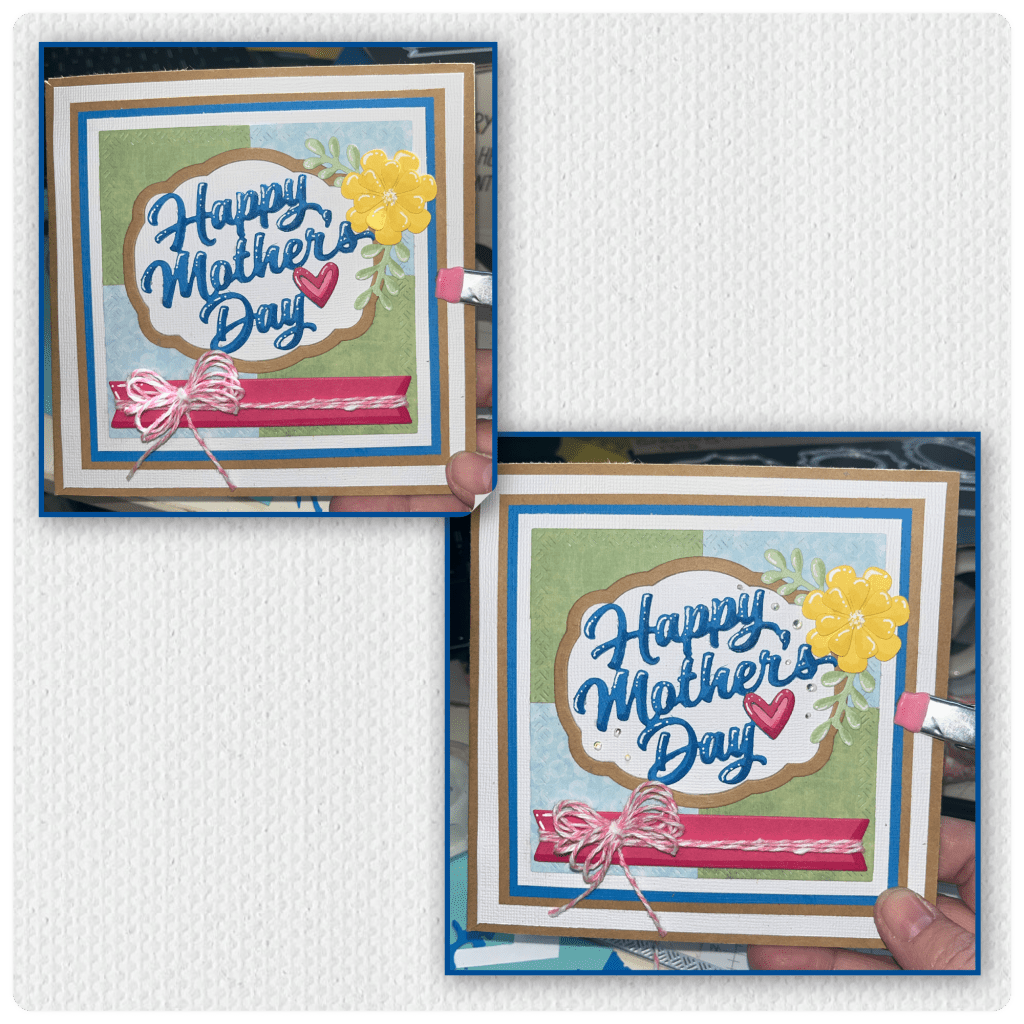
Time to start the front. I had a few scraps so I laid them out to ensure the largest square from the Squares Crosshatch would fit. I taped them together on the back then die cut.

I cut the layers as shown below and the labels from the Labels Crosshatch
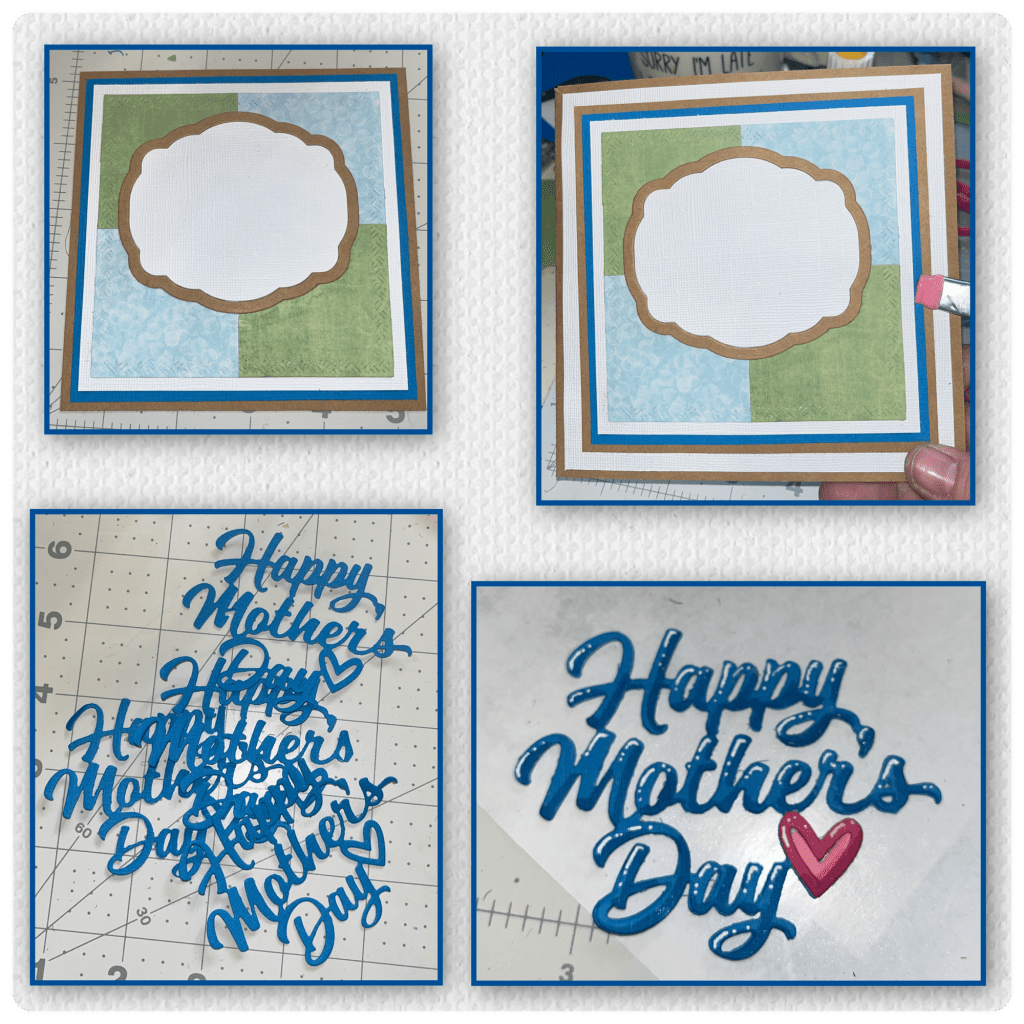
I layered the panels and the labels as shown and then added them to the card front. I diecut Happy Mother’s Day 4 times. I layered them together to add a bit of dimension, and added shading and highlights.
I cut the banner from the Greetings Label, and added shading and highlights. I added double sided adhesive to the back then wrapped bakers twine around then I made a fork bow and added it to the front of the banner then add all the pieces to the front of the card. I used foam adhesive to attach the banner.
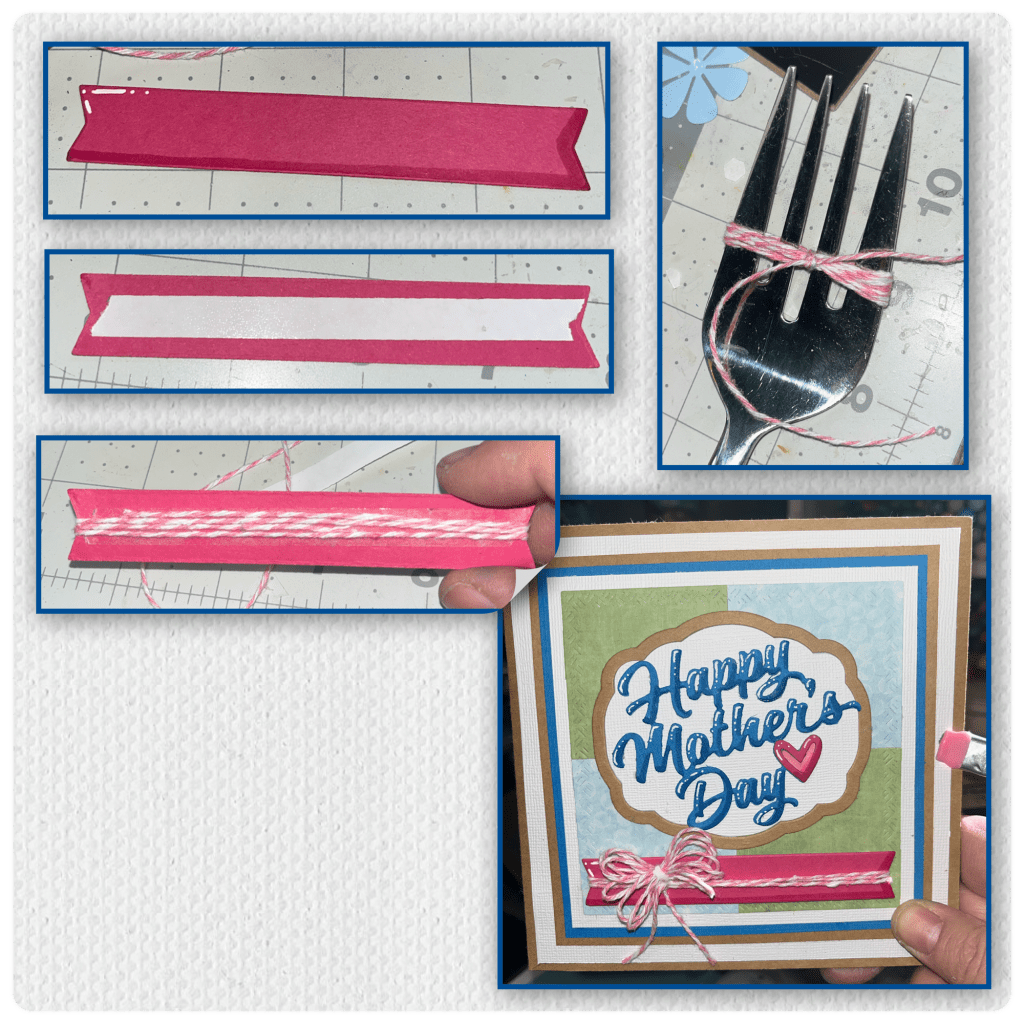
I added the yellow flower and some itty bitty gems.
I was having a bit of an issue with some of the feathers getting tangled so I had to trim a few. If you look close you may notice but looking at the peacock from further back it is hardly noticeable. I added itty bitty gems to the labels and to the feathers.
Other Tools used

Your colors are amazing! I like to use pattern paper for my background.
LikeLiked by 1 person