
It’s been a while since I’ve made a wedding card so I was happy to have the chance to make this one. The picture doesn’t do it justice, the paper frames are very intricate and add a lot of dimension to the card. I was inspired by the invitation and that’s how I chose the colours. Also on the back of the card is a pocket, as we were gifting cash to the newlyweds

The inspiration invitation

The links for all the Karen Burniston products will be at the bottom of the post. All the fun is in the reveal, to see this card in action please check out my FACEBOOK page, feel free to join if you would like to share your own crafty creations. You can also see a video of this card on my INSTAGRAM page.
1- When making a Paper Frames Pop-up card it needs to be a side-fold card. The card base for this card is 4 1/2” x 11” scored at 5 1/2”
2- the layers on this card are different kinds of cards stock and they are all from different companies. The largest panel is Cajun Craze cardstock from Stampin Up. It is cut to 5 1/4” x 4” I cut the center out so I could use it cutting flowers. The peachy colour is from my stash cut to 5” x 3 3/4”. Add the panels to the card front.
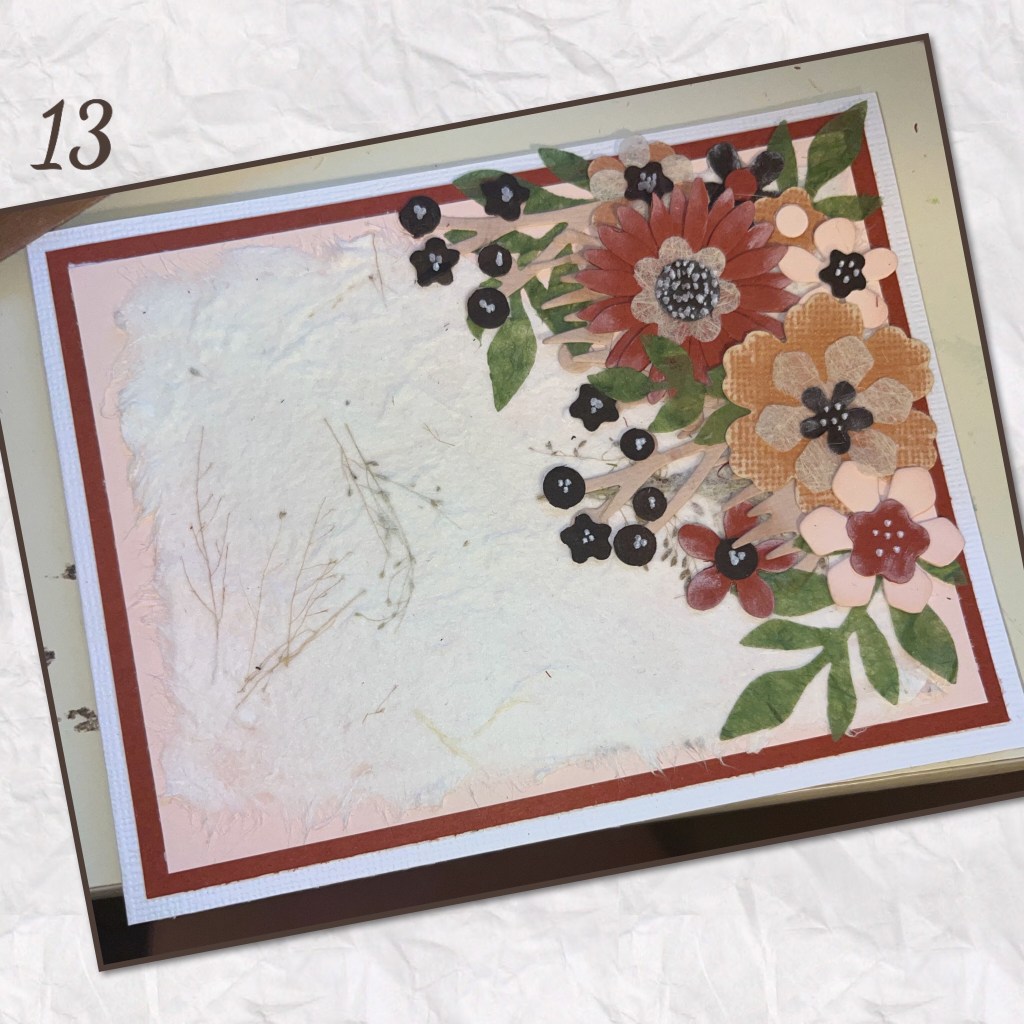
3- I found some mulberry paper and some textured paper that I forgot I had. The Mulberry paper has actually plant stems in it.

4- I had very limited pieces of the same colour of Mulberry paper so I had to be mindful of how I cut it, I trimmed a triangle as shown for the front panel.
5-6- Mulberry paper is very fibrous so if you wet the edges it loosens the fibres for a frayed look. I find it softens the edges.
7- I added the mulberry paper as shown.

7- oops I repeated 7- i die cut the flowers and leaves using the die cuts shown (all links will be at the bottom of this post)
8- I used the grass piece from the Oval Frames to make the grass from a textured paper
9- leaves cut from green mulberry paper
11- oops I missed 10 🤦🏻♀️* is cardstock, # is Core Colour cardstock, ~ are different textured cardstock from the same pack as the Mulberry paper. .
12- to add interest to the flowers I sponged white ink on the edges of the 0 pieces, roughed the edges with an emery board on the ^ piece, and Versa Mark on the + pieces

13-I started decorating the front
14-16- I moved on tho the inside. I cut the panels the same as the front and added them to the inside.

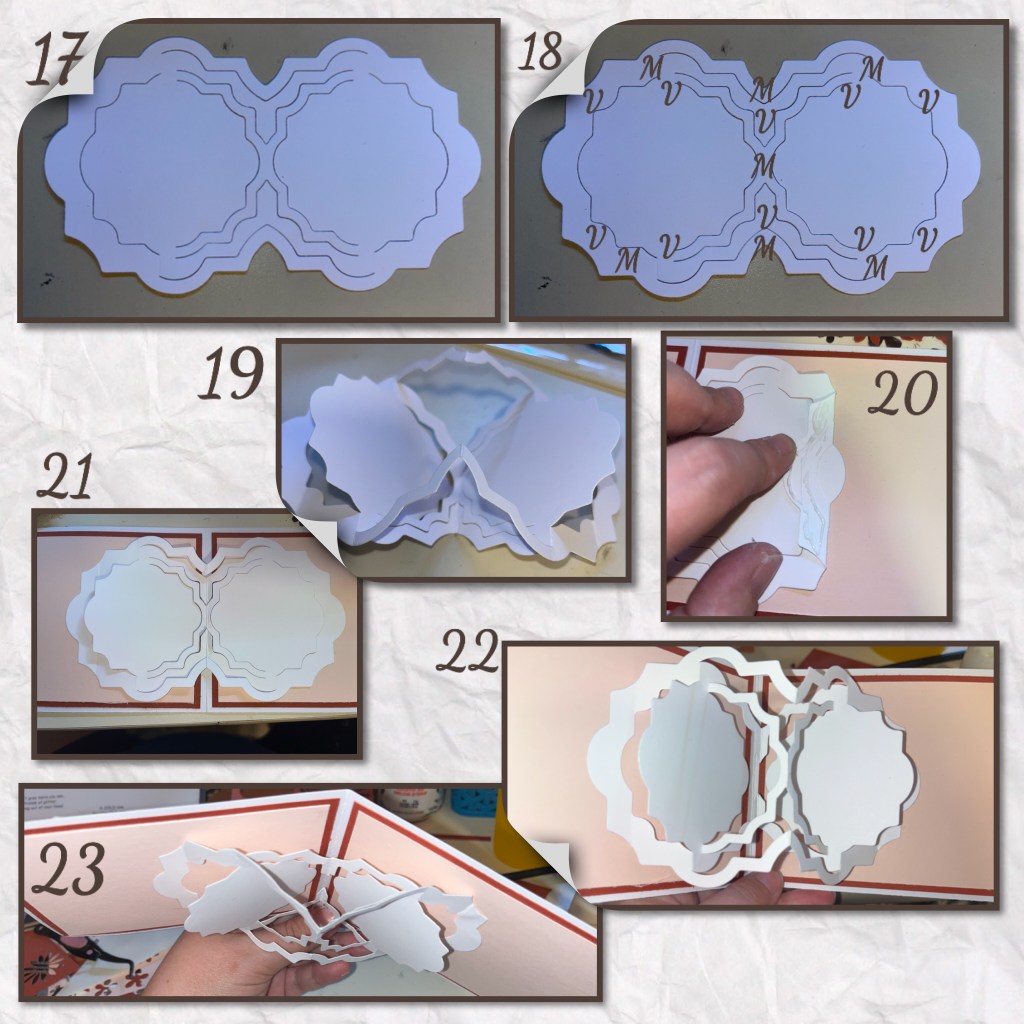
17- die cut the Paper Frames Pop up mechanism
18- it’s hard to explain exactly how to fold. Start by folding it in half, when the mechanism has all it’s folds there should be mountain folds where the Ms are and Valley folds where the Vs are
19- after the middle fold, fold the arms up as shown.
20-21 the sides should fold as shown, and this is where you add the adhesive. Make sure the middle fold of the mechanism lines up with the fold of the card.
22-23- carefully fold the card making sure all the folds are folding the right way.
24- this where I realized that I forgot the mulberry paper layer 🤦🏻♀️
25- I frayed the edges and added I to the card
26- then re-added the mechanism

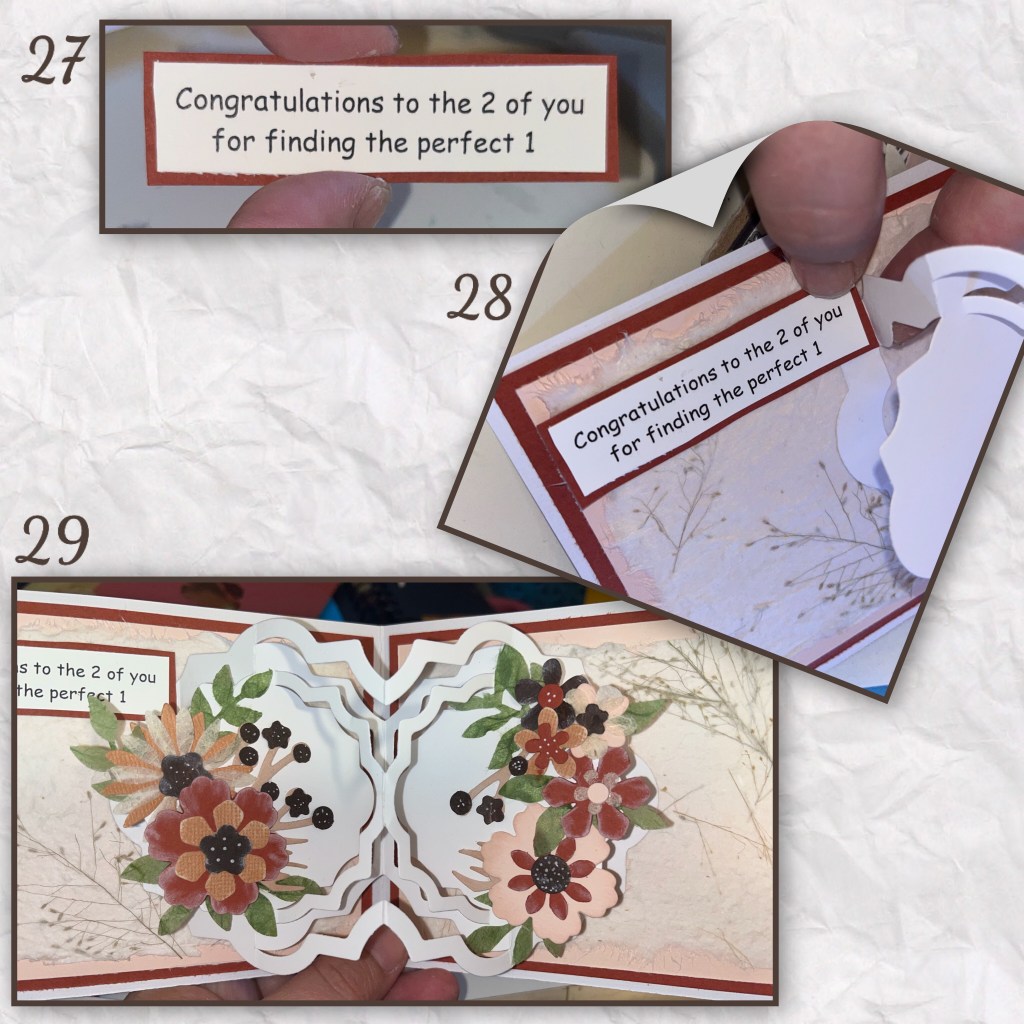
27- I printed out a greeting, then trimmed, and matted it.
28- I had a tight fit, I had to make sure that it didn’t hinder the fold of the mechanism.
29- added more flowers to match the ones on the front.
30 – I diecut “Happy Wedding Day” in the 2 colours of cardstock, and layered them together slightly offset.
31- this is where I realized it wasn’t going to fit so I had to move one of the branches
32- adhere the greeting and added the branches to a different spot.

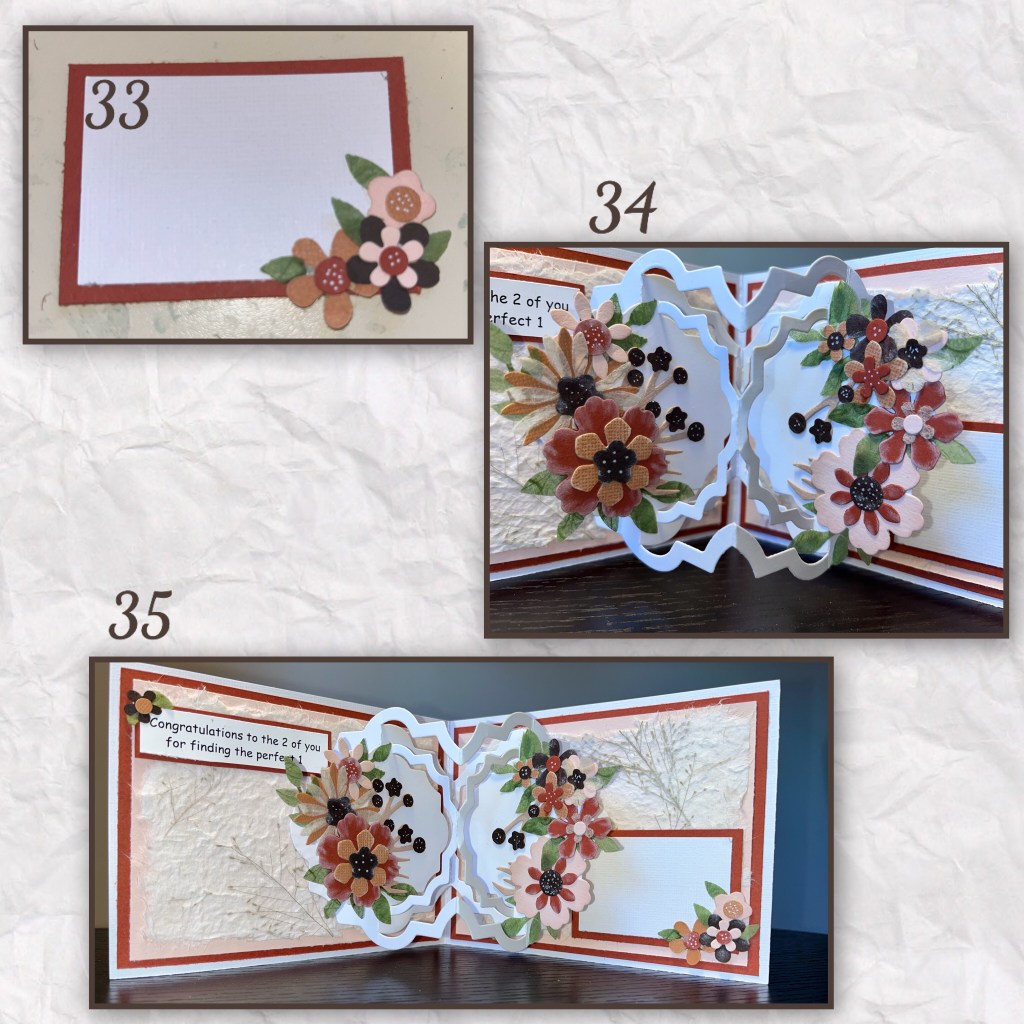
33-35-I used some of the extra pieces to make a little block for signing. I also added a little flower to the greeting.
Now to make the pocket.
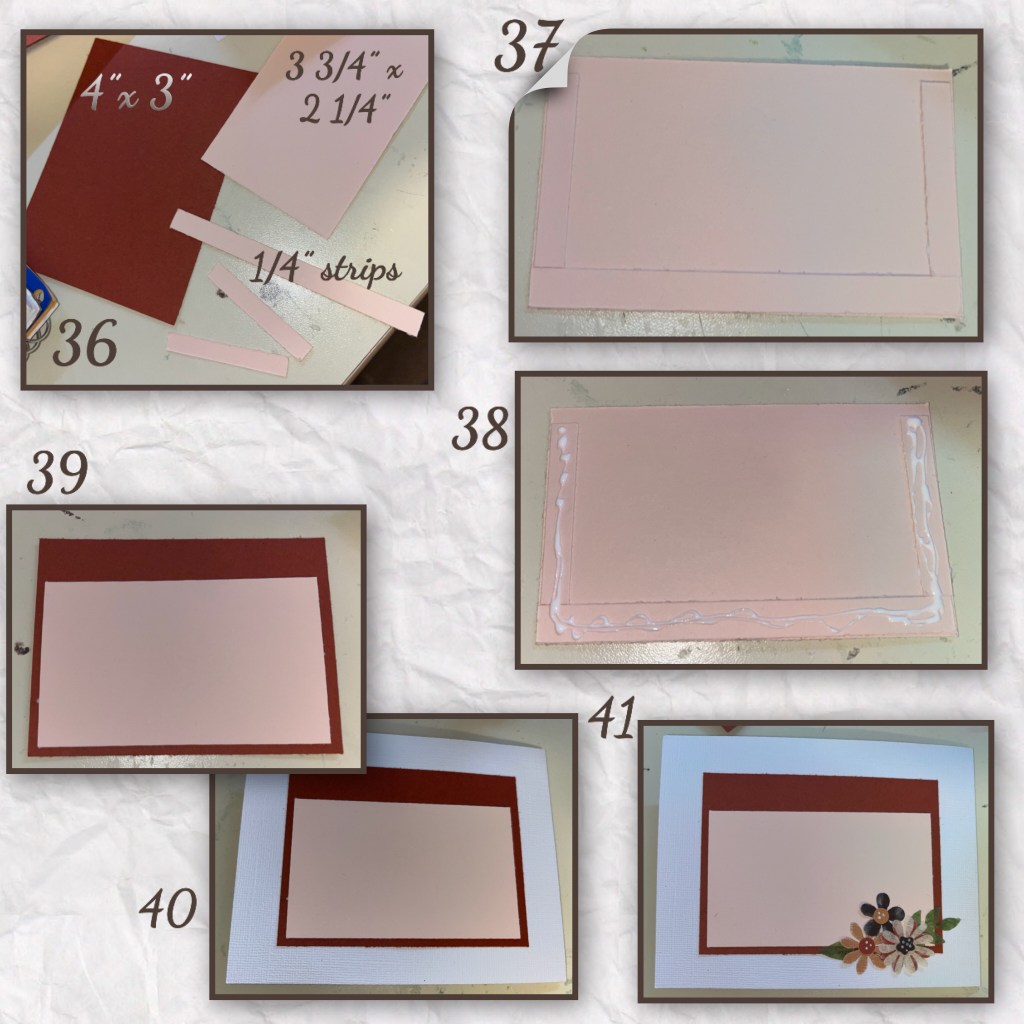
36- I trimmed a Cajun Craze piece of cardstock to 4”x 3” and the peachy cardstock to 3 3/4” x 2 1/4”, and three strips of 1/4” in the peachy colour to fit along the bottom and sides of the peachy piece.
37- adhere the strips along the bottom and both sides as shown.
38- ad adhesive only to the strips that were just added
40-41 add to the back of the card and add some flowers.

To see some other wedding cars please check these out.
World Travelling Wedding Wishes
Products used

Great card and thanks for the fabulous ‘how to’ much appreciated x
LikeLike