

Here today with another NEW release dieset, no, not the Label Charm, that was a previous release, not the Big Birthday charms, have you figured it out yet. It’s the new Labels crosshatch from the New Rectangles and Labels Crosshatch die set. The new labels stack beautifully with the labels from the Label Charm Pop up set AND we now have a frame to go around the front window which gives the card front that finished look. I was pretty excited when I saw it. It is definitely a must-have if you already own the Label Charm set, plus the rectangles in the new set were made to fit 5” x 7” cards. I have used these so much already, you will have to keep your eyes open in upcoming posts.

All the fun is in the reveal, to see this card in action please check out my FACEBOOK page, feel free to join if you would like to share your own crafty creations. You can also see a video of this card on my INSTAGRAM page.
I didn’t know when I started that I was going to use 5 different shades of this Core Color cardstock, all 5 are shown further in the post-photo 20.
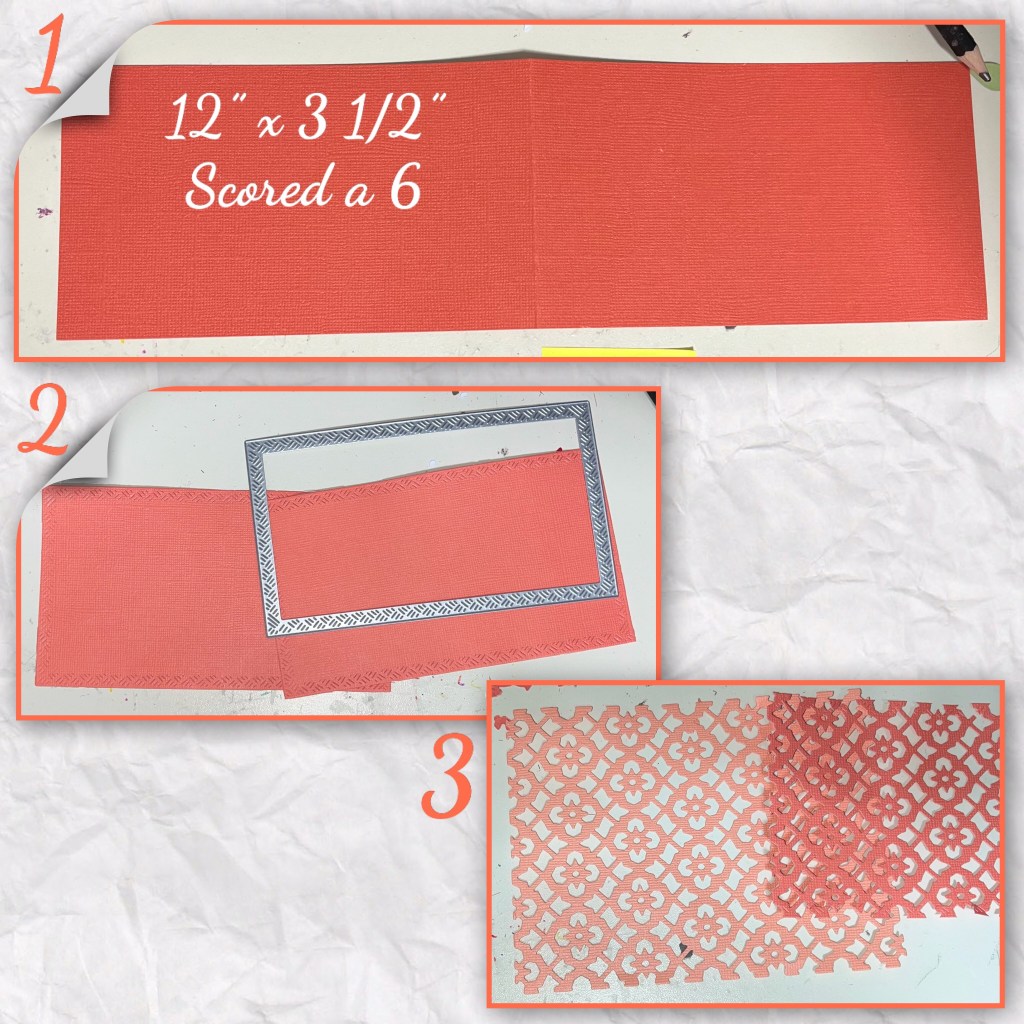
1-cut card base in a darker shade- dimensions below
2- in a medium shade cut 2 of the largest Short Rectangles Crosshatch
3- die cut the panels that were just cut with the Tiles Pattern plate, also diecut the same tiles panel plate from lighter cardstock slightly bigger than the the rectangle.
4- adhere the 2 colours together, slightly off set, and trim off the extra of the lighter shade, so it is the same size as the medium shade.
5- add adhesive to the back as shown, do not add adhesive to the middle as we want the piece to come out on the next step. Add to the card front
6- using the largest die in Label Charm die set cut into the front of the card, you may need to pass it through your diecutting machine several times, it needs to go through both layers of the Tile patterns, and the card front (there will be a link to full Label Charm assembly at the end of this post)
7-using the largest 2 of the Short Rectangle crosshatch die cut a frame from the darkest colour.
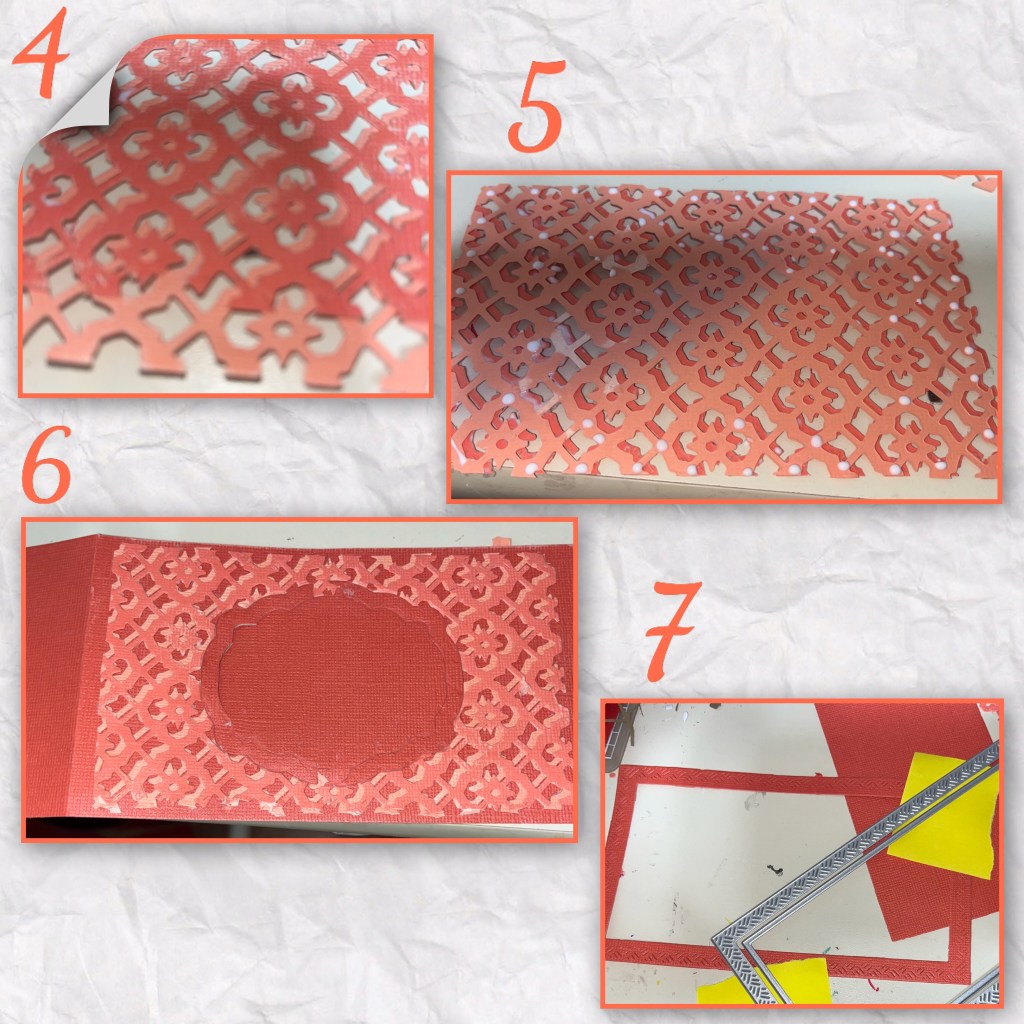
8- add the frame to the front.
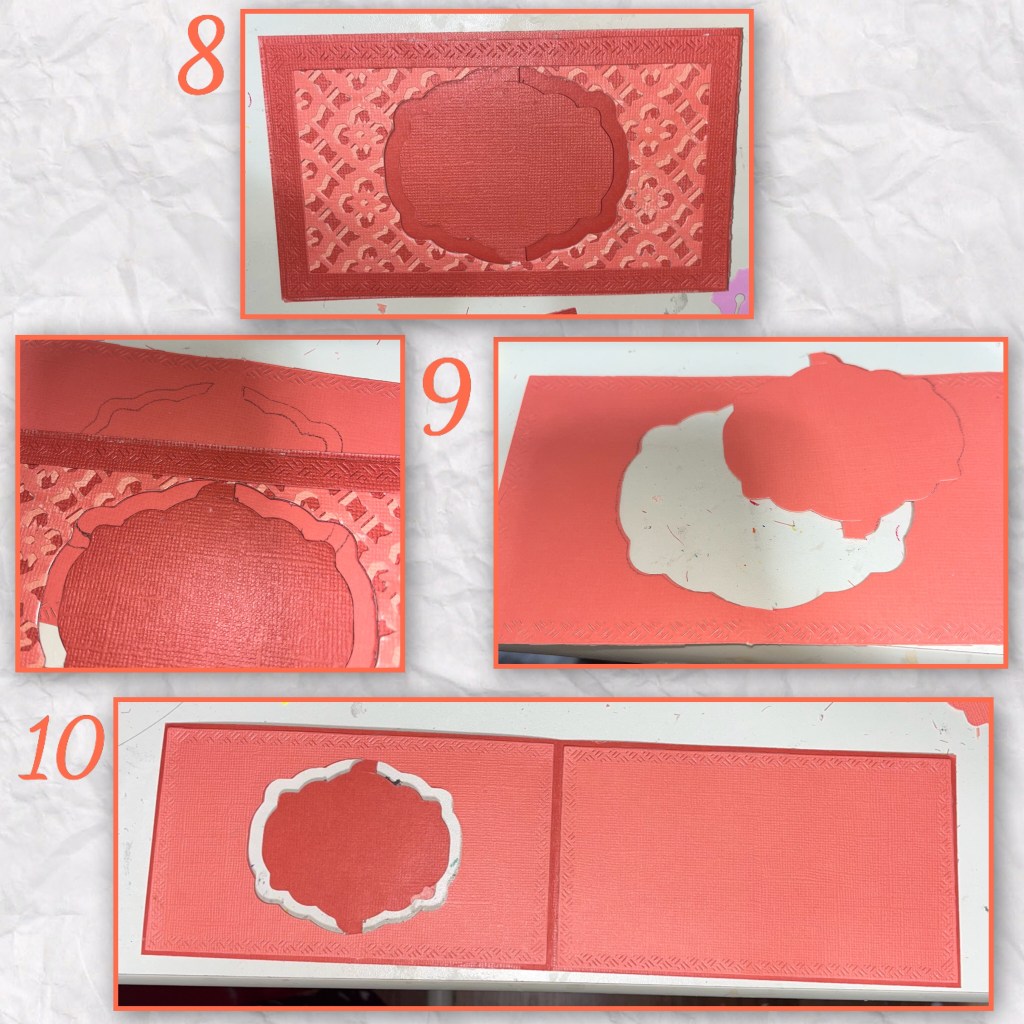
9- I wanted to add a lighter panel to the inside, so I diecut 2 panels with the same rectangle die. It would have been too many layers to cut through had I added it earlier. Line it up in the inside of the card and trace from the outside where the window needs to be.
9-die cut the window, using the same die as the outside
10- add the diecut panel to the left and the uncut panel on the right.
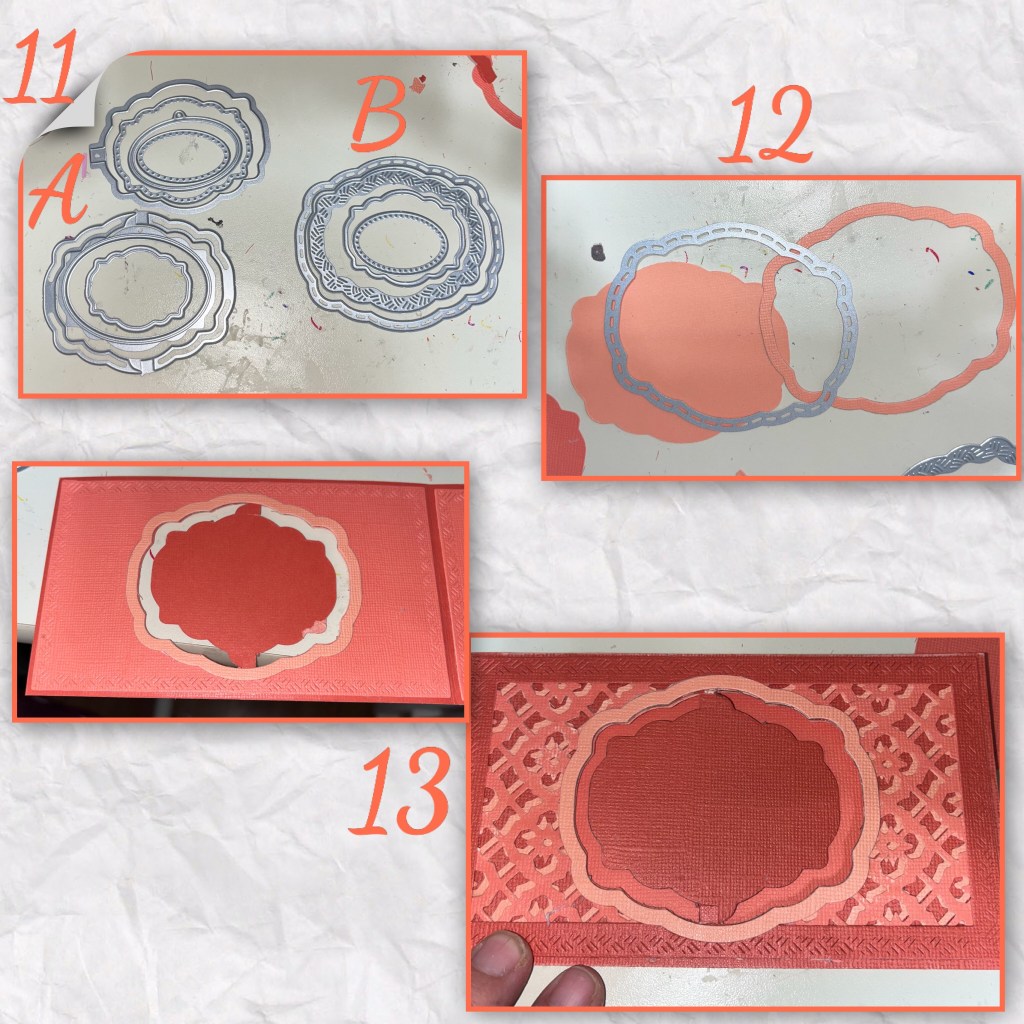
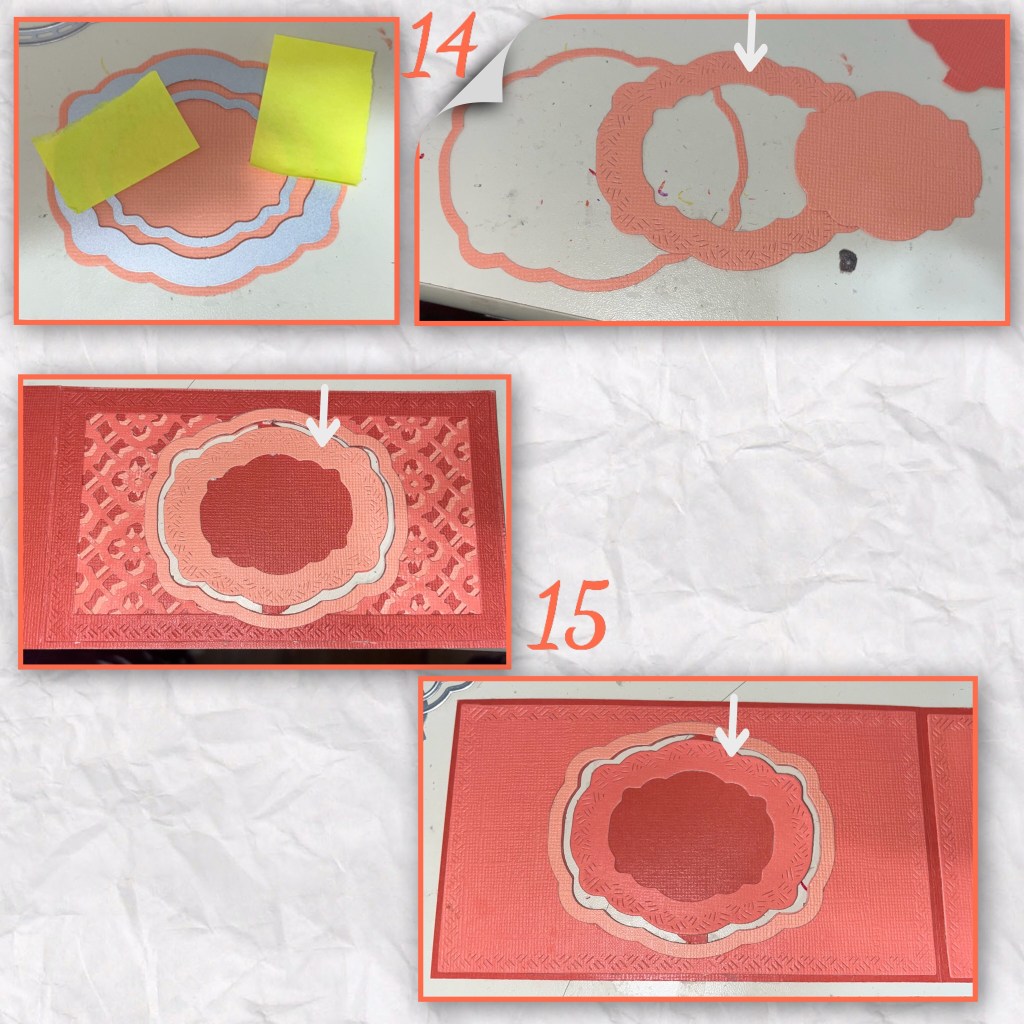
11- this is a good photo of the 2 label diesets side by side. Set A- is the original Label Charm Pop Ups, Set B- is the labels from the new Rectangles and Labels dieset.
12- the largest die from Set B makes the frame for around the opening. I die 2 of these.
13- I added the frame around the front window from the inside and the outside
14- the middle piece that came out of the frame in step 12, I layered the crosshatch label and a smaller label (sorry I didn’t keep track of which set the smaller label came from) and diecut,
15- I added this frame to the front in a lighter shade, and did the same thing with a medium shade for the inside of the card
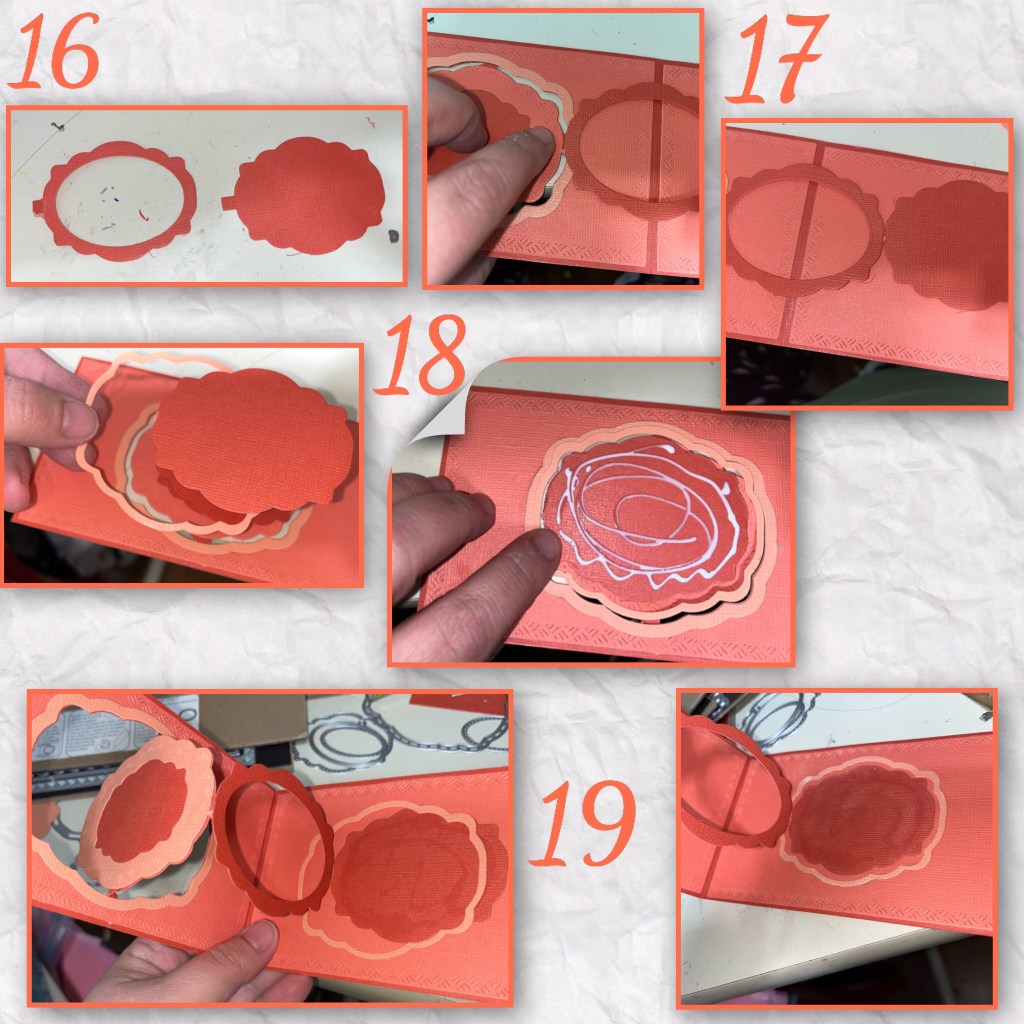
16- using the dies from the original Label Charm set I cut the labels that connect together, I cut the oval out of one.
17- I connected them together.
18- in step 14 there is the thin frame left from when we cut out the crosshatch label, I looped it around the label charm panels (I will adhere it to the back in the next step) fold up the mechanism and add glue to the back of the last panel and close the card
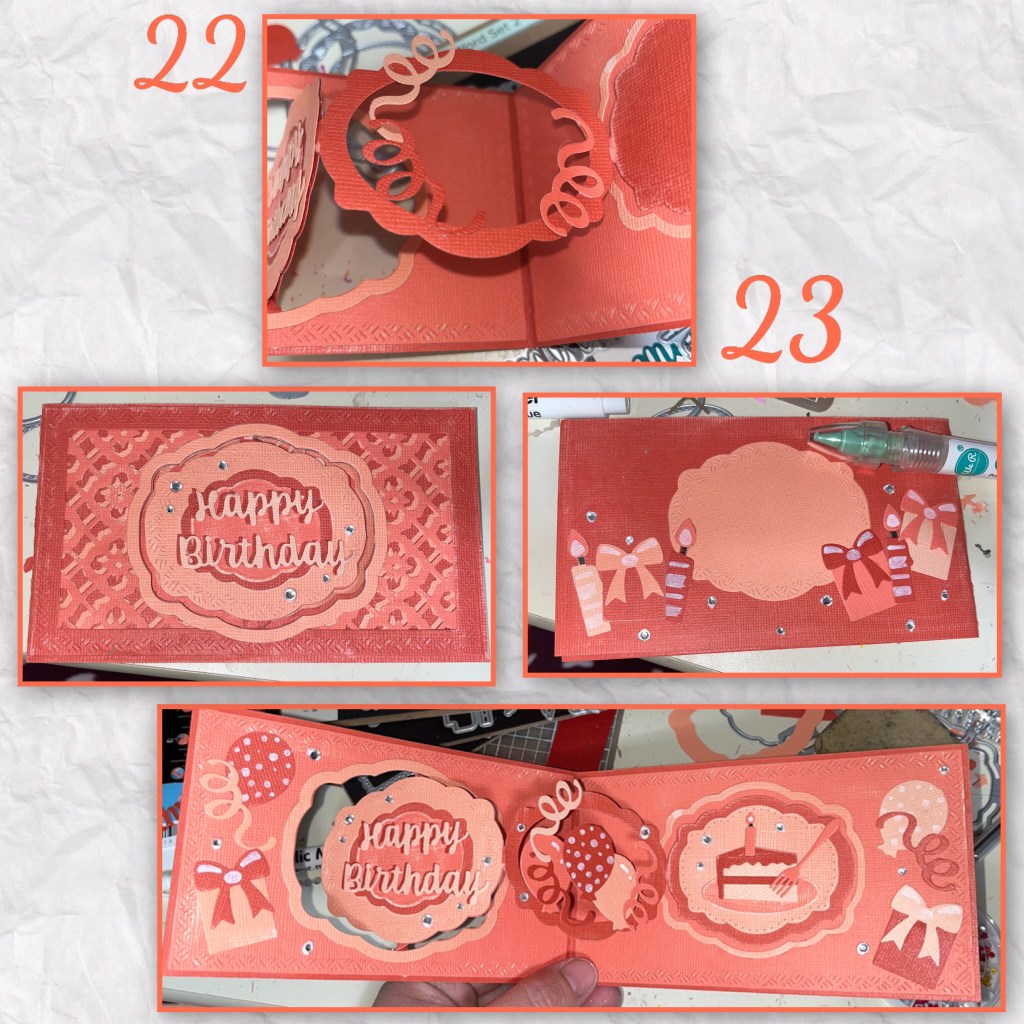
19- add adhesive to the back of the thin frame and stick it down around the glued down panel.
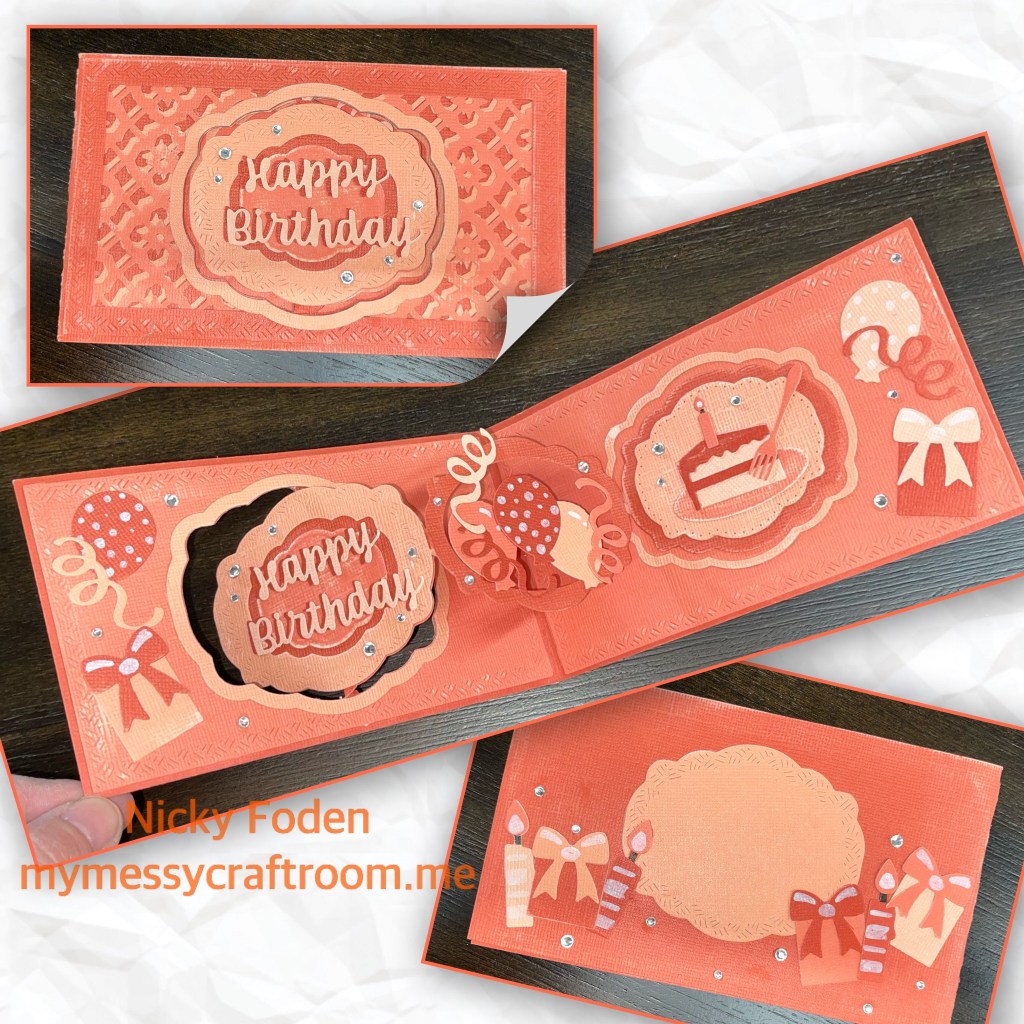
20- here is the photo of all 5 shades, I die cut multiple pieces from the Big Birthday Charms in all the colours. I also die cut Happy Birthday from 2 colours.
21- I added another small label in the middle of the card front, and I roughed up the cardstock with a sanding block, after all this is Core Color cardstock.

22- when decorating the open window label I like to add the streamers first, to give a place to attach the other elements.
23- added the rest of the pieces to the front middle and the back. I added a place to sign on the back. I also added some bling to give it a bit of sparkle.
All the diesets are from Karen Burniston
Label Charm Pop up Karen’s video can be found on this page
Rectangles and Labels crosshatch
Word set 2 Birthday Happy Birthday
Tools
