
Ever since I got the Paper Frames die set I wanted to work out how to have 2 of them in a slimline card. I am quite pleased with the results.

All the fun is in the reveal, to see this card in action please check out my FACEBOOK page, feel free to join if you would like to share your own crafty creations. You can also see a video of this card on my INSTAGRAM pag
1- die cut 2 of the Paper Frames and start folding on the score lines. They need to be folded the same as if you were just using one, Karen has an amazing video I will link on the bottom.
2- take the 2 pieces and glue them together as shown making sure only to glue the out side edges as if you were gluing them into the card.

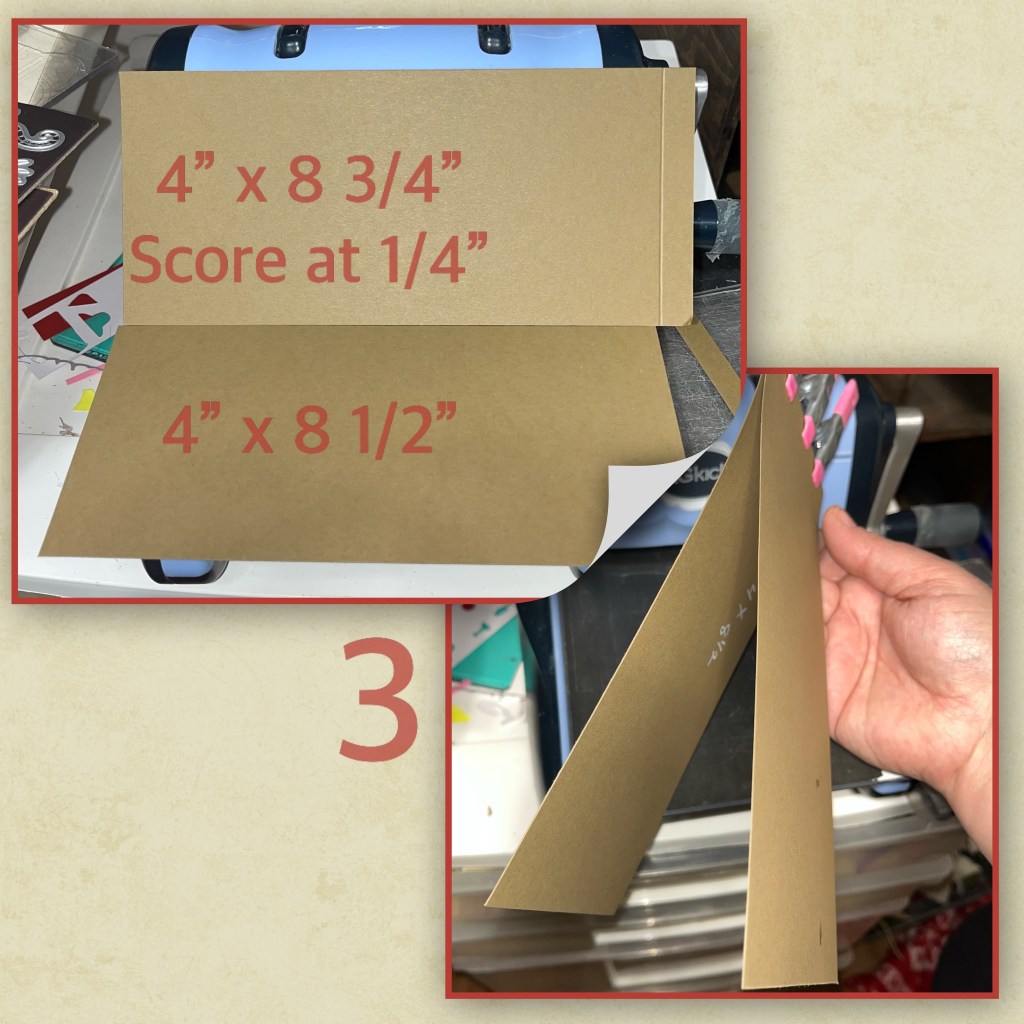
3- cut 2 pieces as shown and glue together to make the card base.
4- I cut the green matts as shown, I didn’t have a large enough piece of patterned paper so I used 2 and cut them to fit inside the green matt with 1/8th” around the outside.

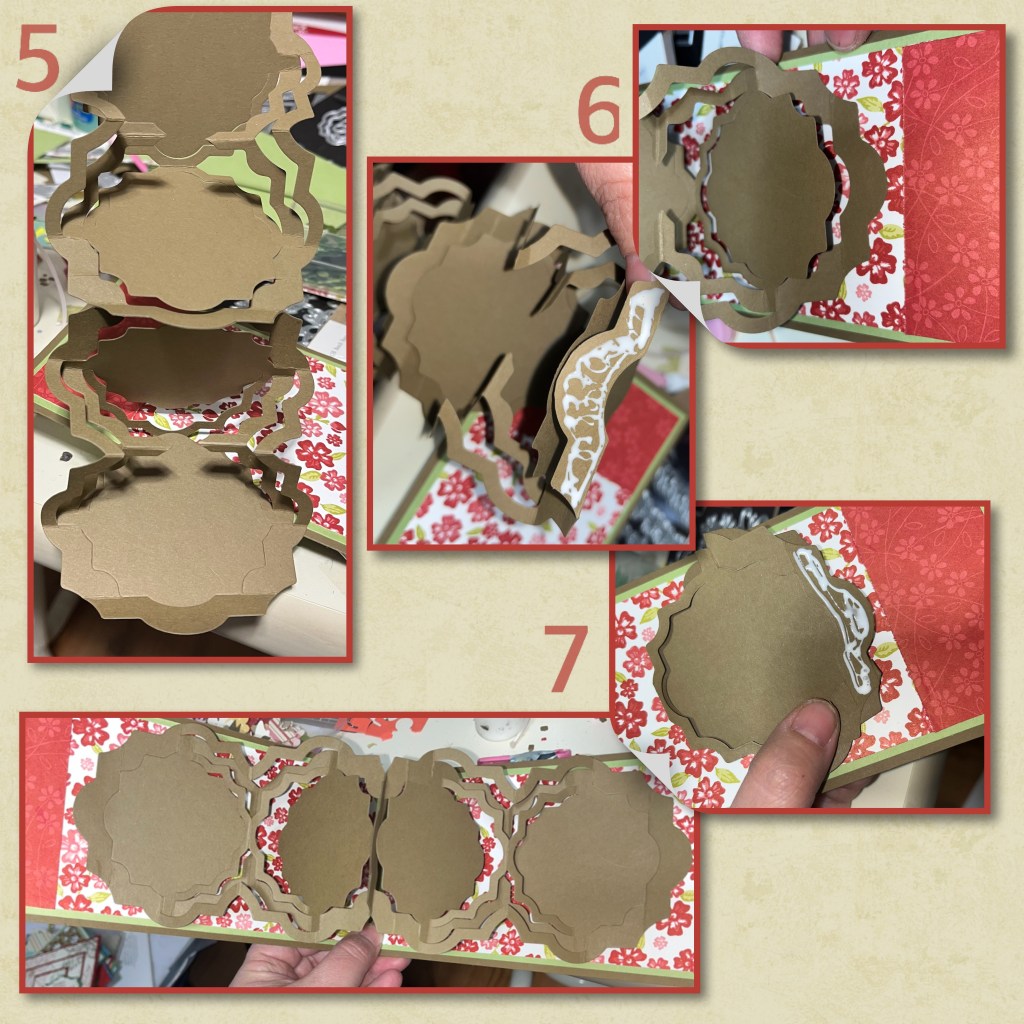
5-work the folds make sure it will collapse together
6- add glue to one of the outside edges and adhere to the card base.
7- collapse the mechanism, add glue to the outside edge, and close the card, adhering the mechanism to the other side.
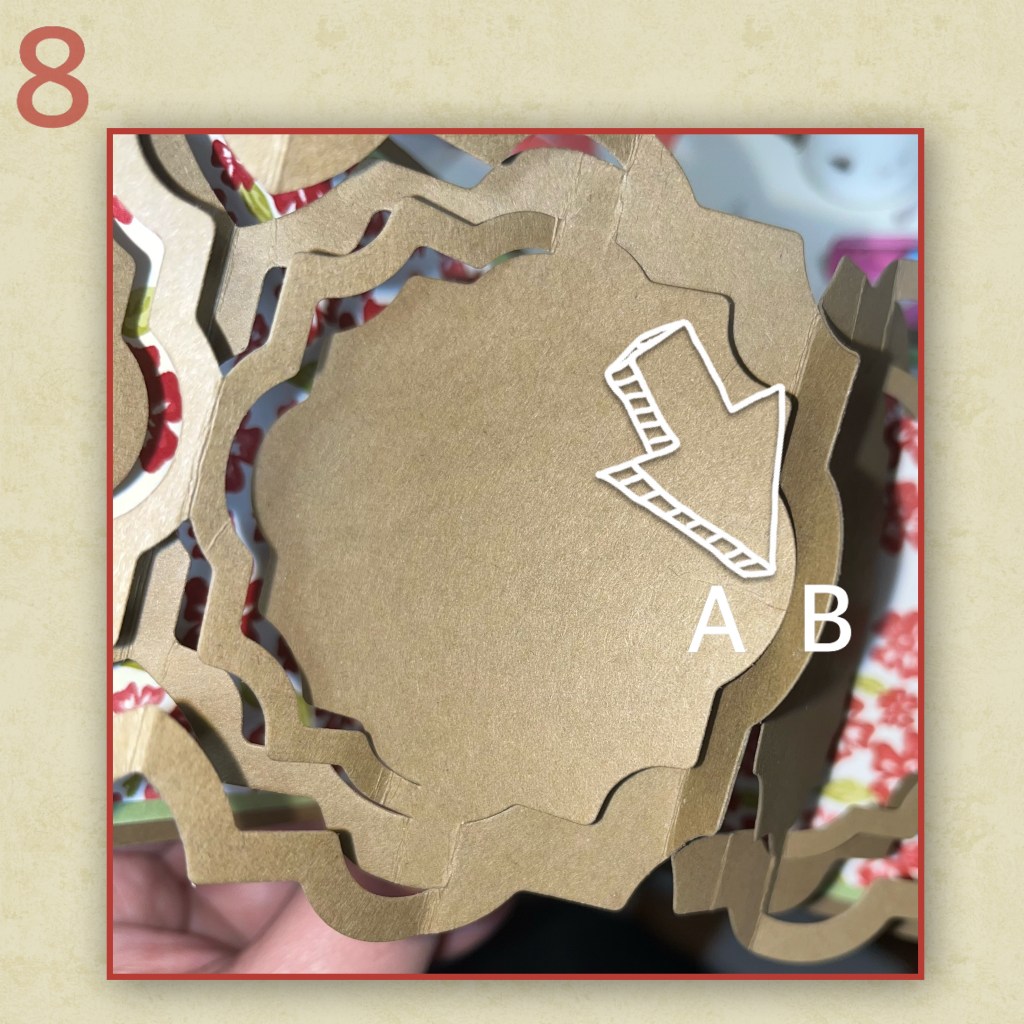
8- make sure that in the center where the 2 mechanism meet that the inside label (marked A) is over top of the frame pieces (marked B) on both sides. If they go under the frame then the mechanism will bind up when you try to close the card.
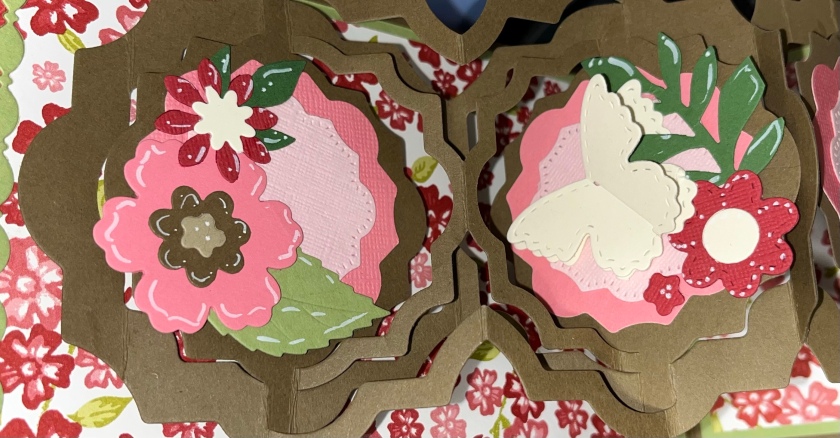
9- dicut 4 of the labels in 2 shades of pink in the 2 sizes and layer. I like to sometimes off set them like I did here.
10- I dug out some flowers, butterflies, and leaves that I have in my stash. I did diecut a few more leaves.

11- I diecut a few trims from the Border Blends Party set in the same green as the matts and adhered them to where the 2 patterned papers meet, on the front and the inside.
12- I added white highlights to the diecut embellishments and added them through out the card.

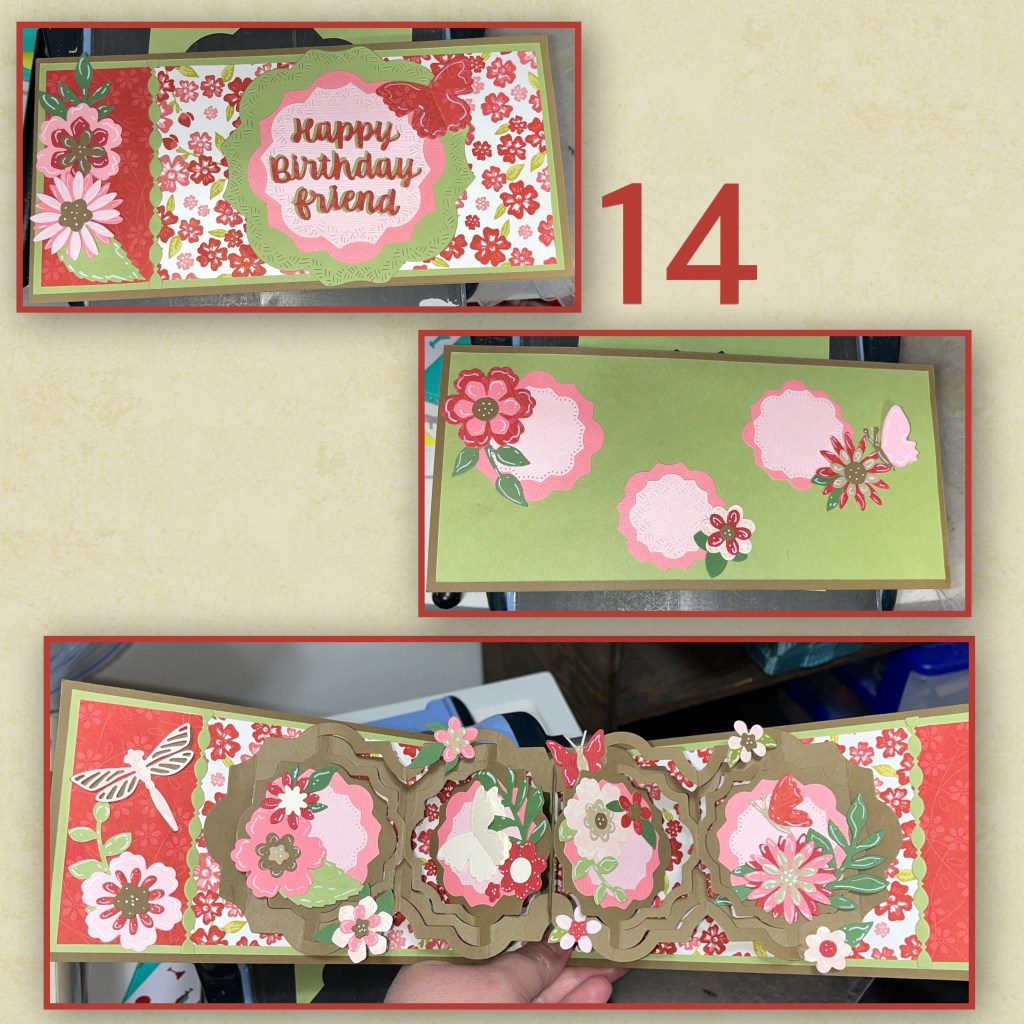
13- I diecut some labels from the Labels Crosshatch set to match the smaller ones on the inside. I also diecut “Happy Birthday Friend” from red and green, adhered them offset to the largest label. I then added that to the largest Crosshatch label in green.

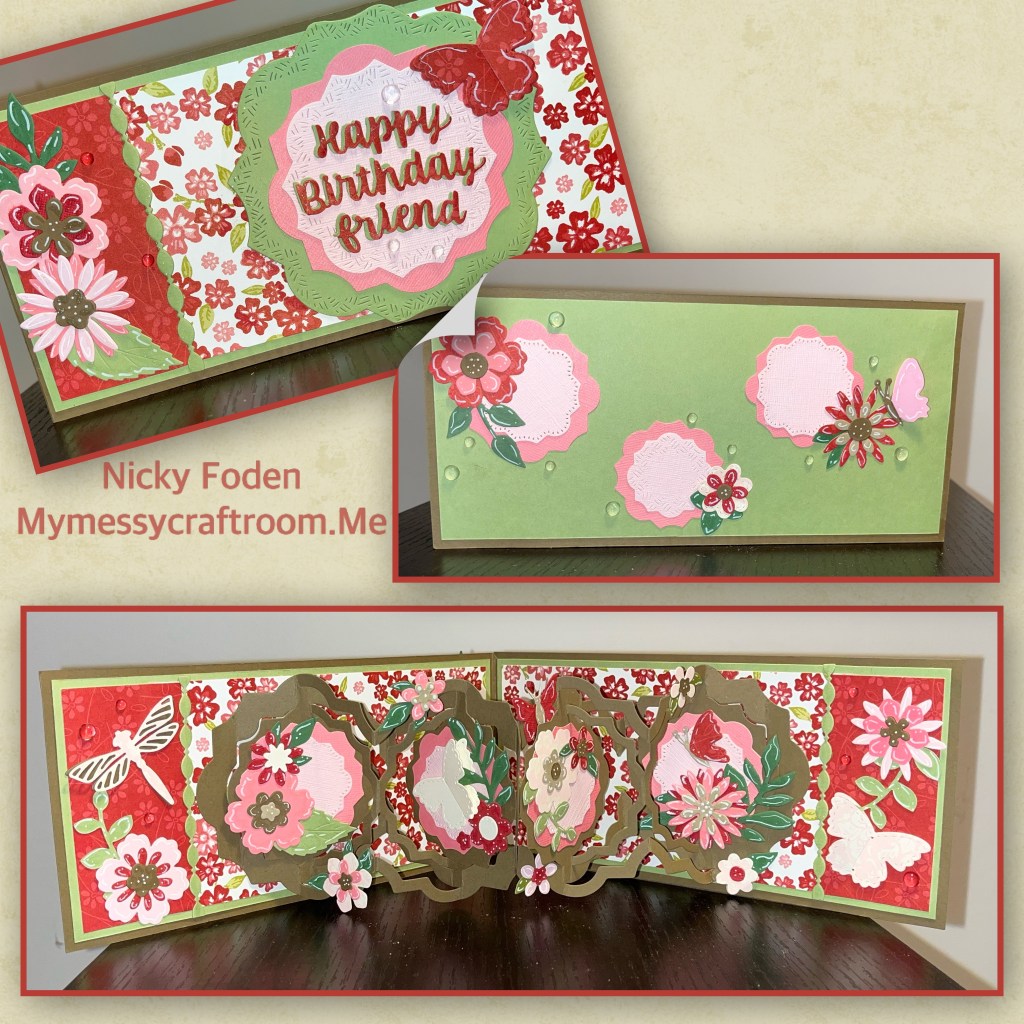
14- I decorated the front, back and inside of the card.
Lastly I added some clear half bubbles and it’s hard to see but I also added Wink of Stella around the embellishments.
Die sets used are
Paper Frames Karens video can be found here
Flower Pot Pop up Flowers and leaves
Woven Basket Box card pop up flowers and leaves
Flip Frame pop up flowers and leaves
Autumn Elements leaves
Flutter Charms flowers, butterflies, and dragonfly
Word set 1 Greetings “friend”
Word set 2 Birthday “Happy Birthday”
Tools

This is fabulous and love the gorgeous way it opens up x [aNNie]
LikeLiked by 1 person