

Hi Crafty Friends,
Welcome to our Karen Burniston Products – KB Riley LLC December Release Blog Hop. The Design Team have come together with Karen today for a fun blog hop to celebrate the release of 7 new dies. Sneak peeks of the new release started last week, and the dies are available to order NOW!

This release includes:
• 2 new Add-ons Die Sets
• 1 new Pop-up Die Sets
• 1 new Tag Die Set
• 2 new Stand Alone 3D Die Sets
• 1 new Sentiment Shadow Die Set
Dies are available to order now on the website.
GIVEAWAY:
To celebrate the release Karen Burniston and each of the Karen Burniston – KB Riley LLC Design Team members will be giving away a $25 Gift Certificate to some lucky person who comments on our blog posts, so make sure you join the hop and comment on everyone’s blog post. Winners will be randomly chosen from ALL of the blog hop comments received on our blog posts by Monday,18th December 2023. Lots of chances to win some goodies, so just leave a comment on this post or any other blog hop posts to enter! Don’t forget to leave some way for us to contact you, in case you are a lucky winner!
I thought it would be funny if I made my sister a birthday card that has a candle for every year she is old, lol and I think it is hilarious, (I shouldn’t laugh too hard as my cake would have 2 more candles than hers) also her daughter counted the candles and she thinks I’m funny too

All the fun is in the reveal, to see this card in action please check out my FACEBOOK page, feel free to join if you would like to share your own crafty creations. You can also see a video of this card on my INSTAGRAM page.
Karen will have video tutorials on the product pages at the links below
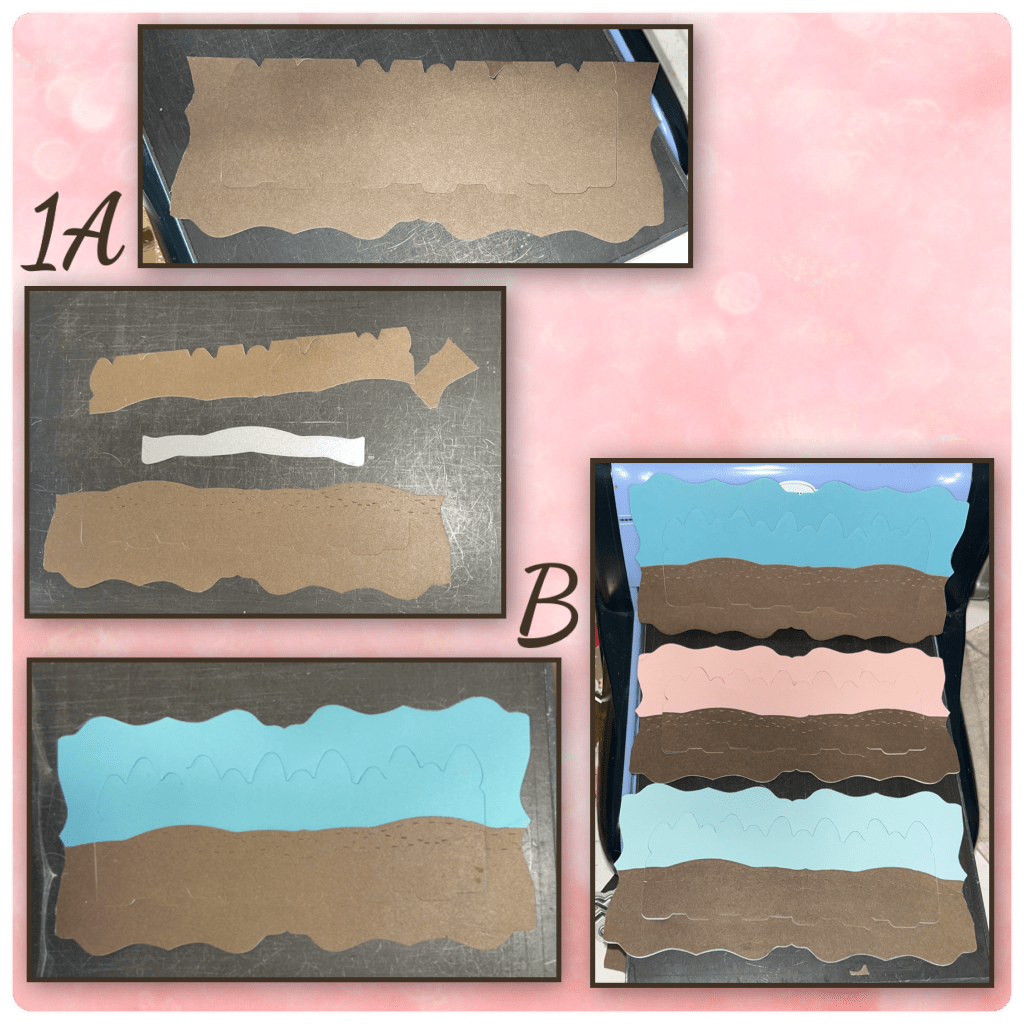
1A- I started off by cutting the panels of the Birthday Candles Add on from 2 shades of blue, a shade of pink and brown paper. Because of the all the layers you would want the brown layer to be thin. I used a border from the new Topper Tags set to trim down the brown layer a bit. I’m trying to make it resemble chocolate cake.
B- add the layers to the panels as shown.
2A- I diecut the candles from multiple pieces of matching double sided patterned paper (long retired Stampin up pack) and matching coloured cardstock.
B- using a brown alcohol marker and alchol blending pen I added shading to the left side of the candles,
C- I used a black maker to darken the wick
D- I added white highlights to the left side using White Gelly Role Pen, and I dripped LINECO Neutral PH ADHESIVE over the tops of the candles to represent dripping wax. It’s hard to see in the photos. I also decided to forgo the yellow and orange flames and changed them to the glittery gold flames.

Because I cut out so many candles, I decided to lay them out on the card panels
3A- I found it easier to add the candles to the card
B- then I added the flames
C- add the highlights
D- then the glue to make the wax look.

4A- I cut out 8 of the Fancy Label Accordion panels. 2 each of 2 shades of blue, and 2 shades of pink.
B- I cut out multiple of the Fancy Winter Frames in the same colours as the panels, the patterned paper, and gold. I did all of these because I wanted the dots in the border to match the candles.
C- I cut out the card panels from the brown paper x 9, and I used the same tag border die that I used in step 1

5A- I added the frames to the panels as shown. I didn’t want to add the whole frame to try to keep the bulkiness down.
B- then I added the brown frames that I cut out in step 4C. I also inlaid all the little circles cut in step 4B into the frames.
C- to prepare the card panels for the candle add on panels trim away the section shown. Each * shown below is the 2 panels that need to go together, then the candle add-ons will join them together.

6A- use a straight edge to help with folding the fold in the middle of the candle panel, and fold them all back and forth.
B- add the candel panel to 2 Fancy Frame accordion panels as shown.

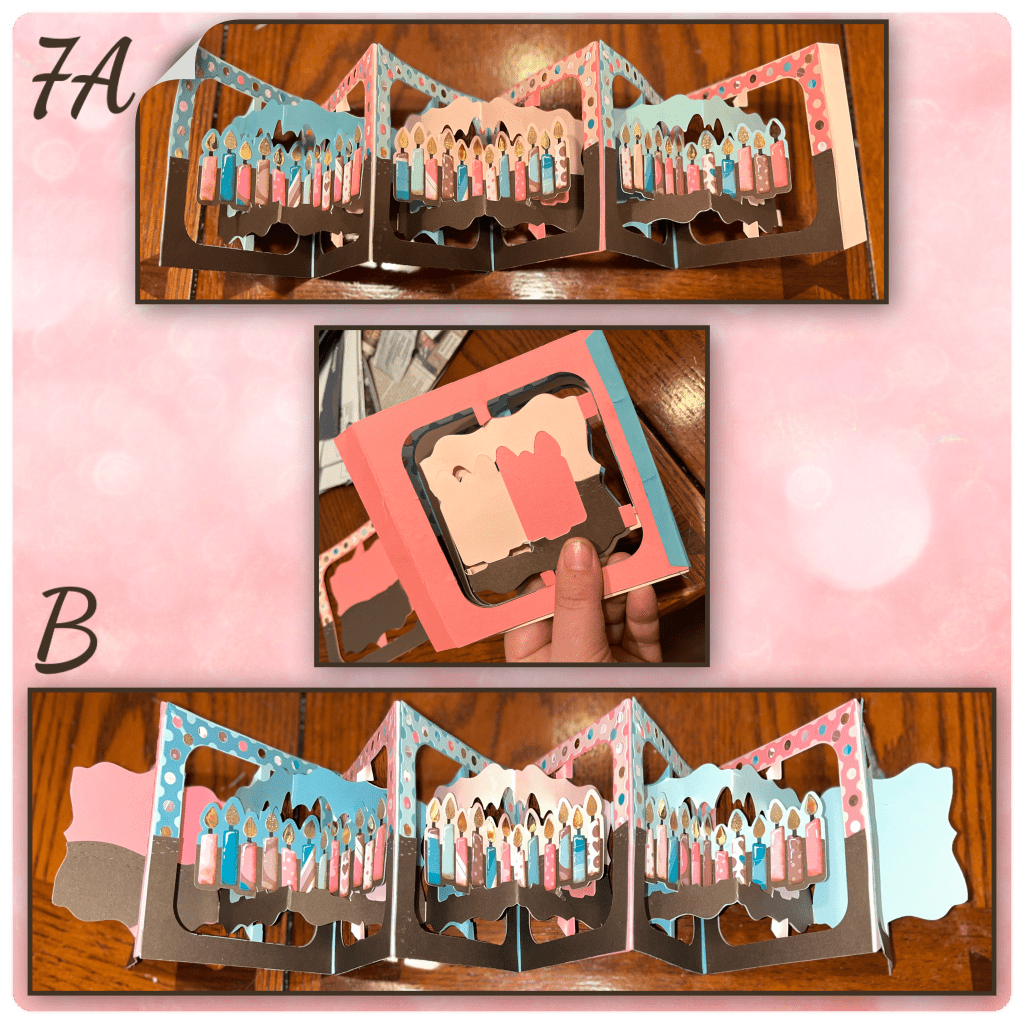
7A- add the panels together as shown. Connect them together on the back side of the card
B- add the last 2 Fancy Frame panels, one that will be the first, and the other will be last.
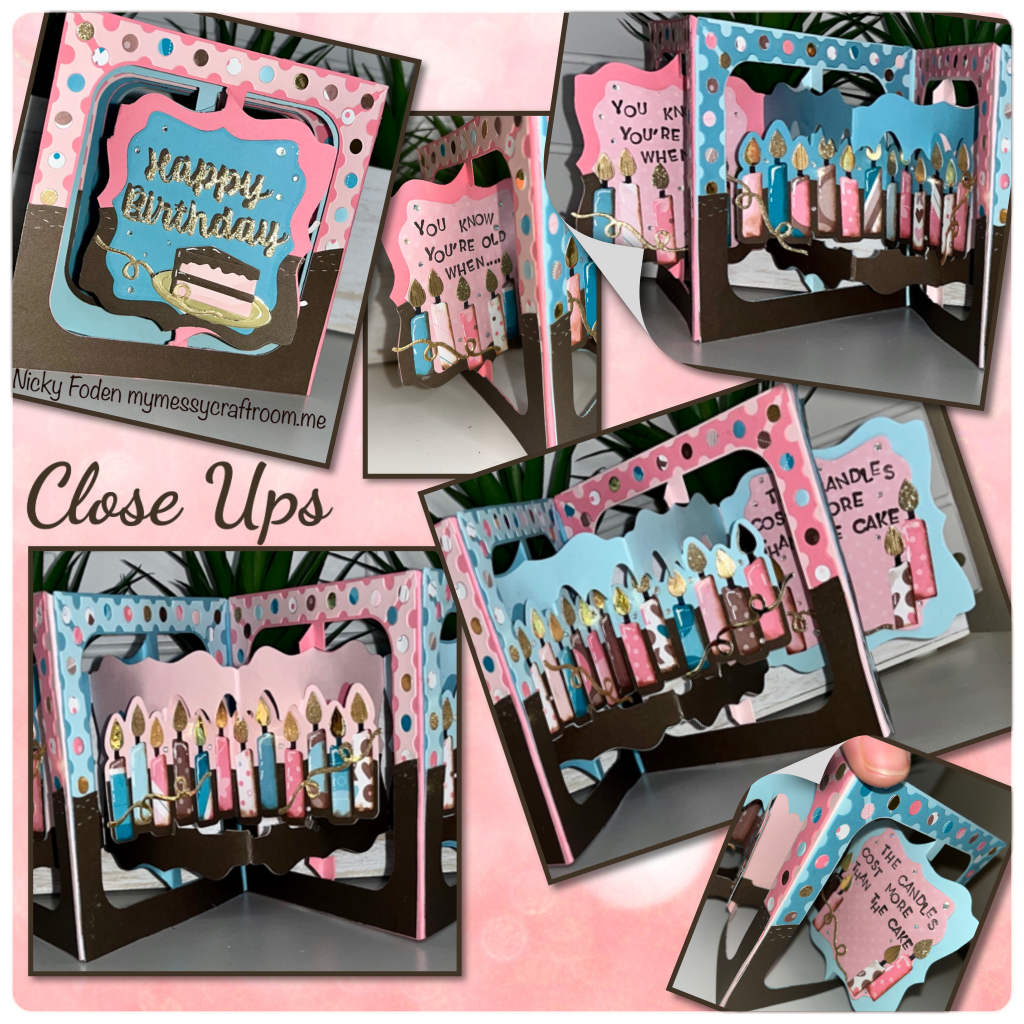
8A- I decorated the front of the card using dies from Word set 2 Birthday and the Big Birthday Charms
B- using a older stamp set I stamped out the message on to pink paper.
C- add the stamped message to the inside far left and inside far right of the card, and add a few more candles.


Raising Flatform – gold swirls
Other Tools used
Check out the rest of the blog hop
Nicky Foden- Here Now

Nicky, your card is amazing!!! LOVE that you used 4 sets of the frames and all of the fab candles!!! Love your tips and that sentiment is to die for!!
LikeLiked by 1 person
I LOVE this candle die! Imagine all the Birthday cards! Love your choice of papers and colors!
LikeLiked by 1 person
Love your cards, I always use them for inspiration!!
LikeLiked by 1 person
Such a fun card! You never disappoint!
LikeLiked by 1 person
Great card!
Carole Lovill
carolelovill@yahoo.com
LikeLiked by 1 person
Such a happy card! The recipient will be thrilled with this card! Great job!!
Carole Lovill
carolelovill@yahoo.com
LikeLiked by 1 person
aMAZING creativity xx
LikeLiked by 1 person
Love your colour combo adorable creation
LikeLiked by 1 person
Such a fun card with all the candles! Great colors and sentiment too! I love your card!
LikeLiked by 1 person
Your card is so fun1 Thank you for always sharing and inspiring me.
LikeLiked by 1 person
Great card; love the color combo!
LikeLiked by 1 person
What a fun card! Love that you did all the candles!
LikeLiked by 1 person
I love this card – so much fun! Thanks for showing how to make it – it’s a terrific idea – Thanks! This Dec release will be so much fun to play with using these great ideas!
LikeLiked by 1 person
I ADORE the candles! Great colors! What a fun card!!!
LikeLiked by 1 person
Sometimes we need a lot of candles! love the colors
LikeLiked by 1 person
Lovely!
LikeLiked by 1 person
Love the creativity of your card. This is perfect for some upcoming birthdays for friends that have a 70th & 90th birthday
LikeLiked by 1 person
Love your card, your cards always out of this world! Love them.
LikeLiked by 1 person
Love this so much! So perfect for the “seniors” in my family! They would definitely get a laugh out of all the candles!
LikeLiked by 1 person
Love your card, Nicky. You always go far beyond the usual/
LikeLiked by 1 person
Another great card! Thank you for the step by step, it’s always helpful. And thank you for the inspiration in using the new release.
LikeLiked by 1 person
Another masterpiece! I really appreciate your humor :). You give great details and instructions to inspire (ie let me copy) your great ideas. Thank you.
Lisa_monken@cox.net
LikeLiked by 1 person
Very professional job. Cool idea to pick on sis and have the number of candles coincide with her age. As you mentioned your card would have more.
LikeLiked by 1 person