
Sooooo I have been not so patiently waiting to post this card as I was waiting for my friend to receive it in the mail, It would probably help if I mailed it in time 🙄 but I got the go ahead so here goes…….
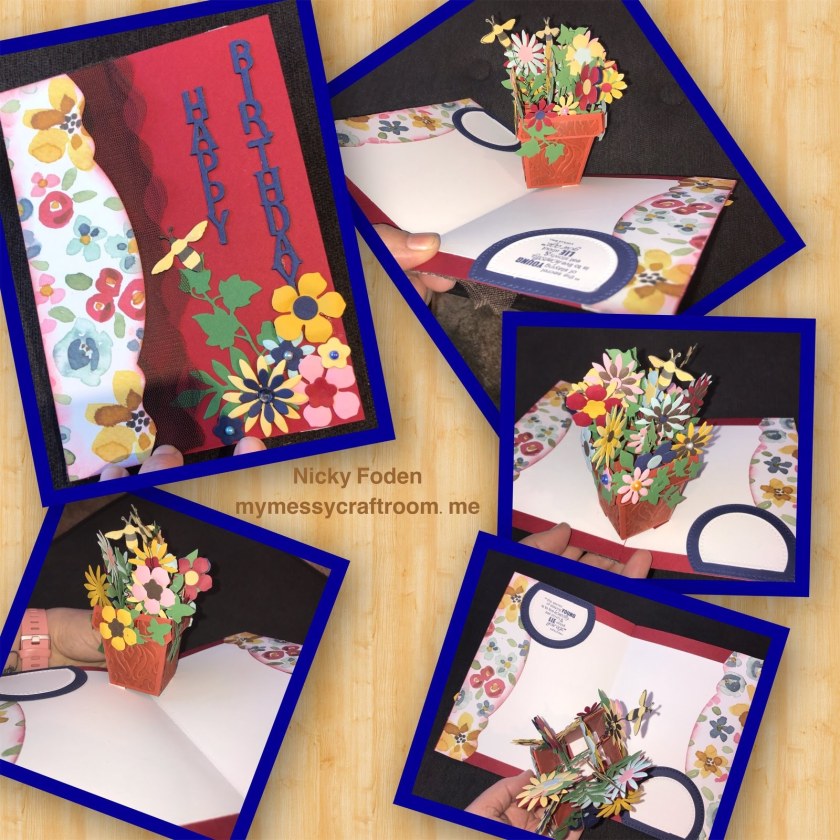
This is my first attempt at a Flower Pot Pop up Card and I think it turned out pretty good if I do say so myself, I think the next time I will probably try to centre it a little better, I was concerned If I had it too high in the card the flowers were going to come out of the top of the card, it turned out that I had a little more room than I thought 🙂
Click “read more” to see more
Ok so when I started this card I knew that I was going to use my new from Christmas (I have awesome kids) Flower Pot pop up card die set by Karen Burniston, but I needed a starting point soooo, after digging through my designer paper I found a pretty flower patterned paper and matching card stock.

All the paper and cardstock are from Stampin’ Up. The cardstock colours are Cherry Cobbler, Pretty in Pink, Crushed Curry, So Saffron, Garden Green, Night of Navy, Soft Sky, Cajun Craze, and Whisper White.
I assemble the majority of the card as per Karen Burnistons directions see video https://youtu.be/PYGMHlQuOvc
When I cut out the flower pot sections I thought I wanted them to have a little extra detail so I ran each section through my Big Shot in an embossing folder (Stampin’ Up), taking care to place all four sides the same way in the embossing folder so they would all have the same design , then I sponged the designs with Cajun Craze ink to give it a 2 toned effect.


Next, I cut out all the flowers and the bees from the coloured cardstock. The bees I just cut out of the Saffron Cardstock and I coloured in the black sections with a black marker. Most of the flowers are included in this die set, but I also used a couple of flowers, and leaf dies from my stash to create a little more variety.
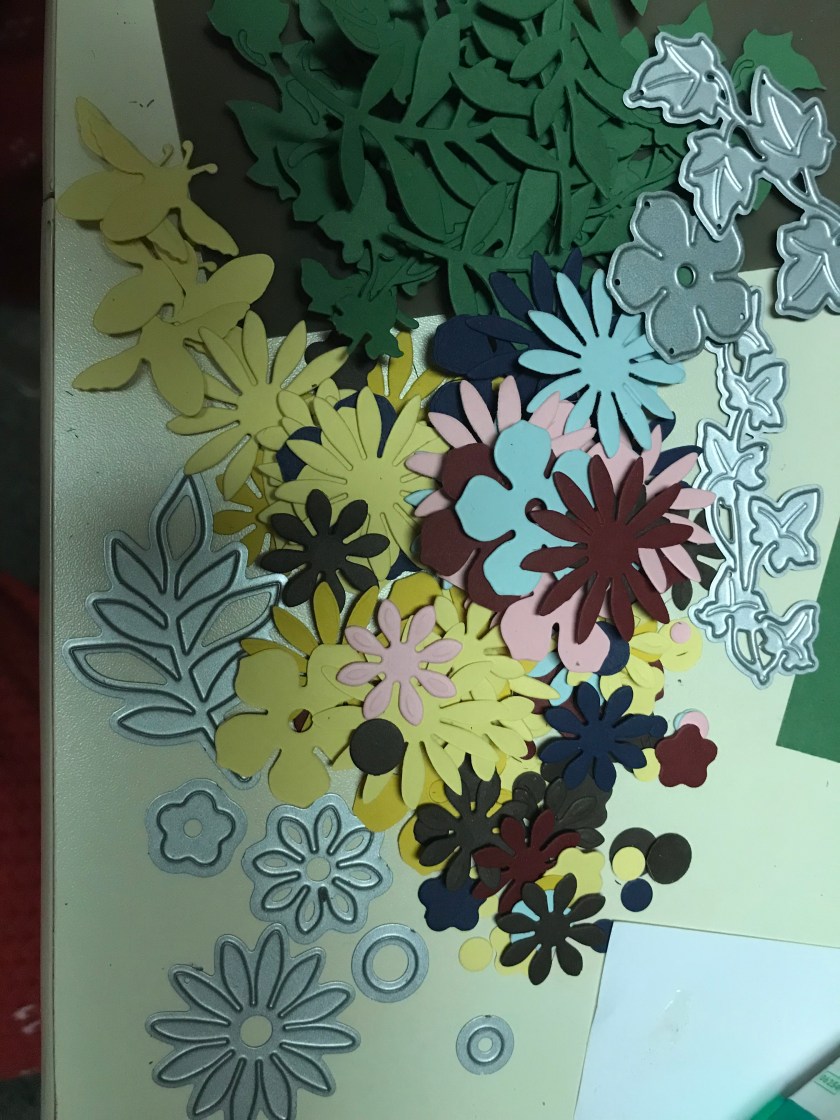
I layered a lot of the flowers for dimension and added 1/2 pearls and faux water drops (dollar store treasures) in the centres of some of the flowers.

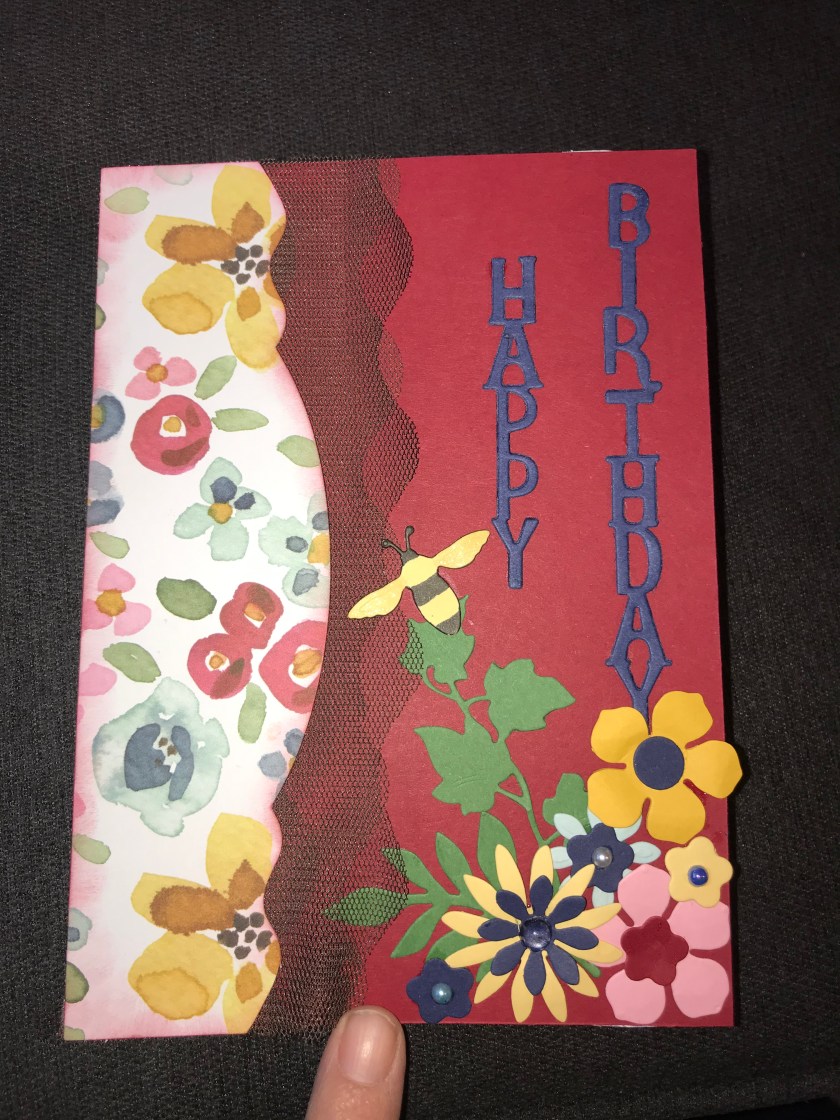
To create the card front I first wrapped a really wide double layer of Early Espresso Sheer Ribbon (Stampin’ Up) across from the back to the front to cover the open spine of the card as I had to cut it to allow the card to open flat.

The Patterned paper border was trimmed with a Stampin Up edge die, it wasn’t quite long enough so I had to trim the ends with scissors. I cut three, one for the outside and two for the inside and I sponged them all with some Cherry Cobbler Ink.

I decorated the front with some of the leftover flowers, leaves and a bee. The Birthday greeting is from my stash.

Wow, this is fabulous, great project and a brilliant step by step, thanks for sharing xx
LikeLike