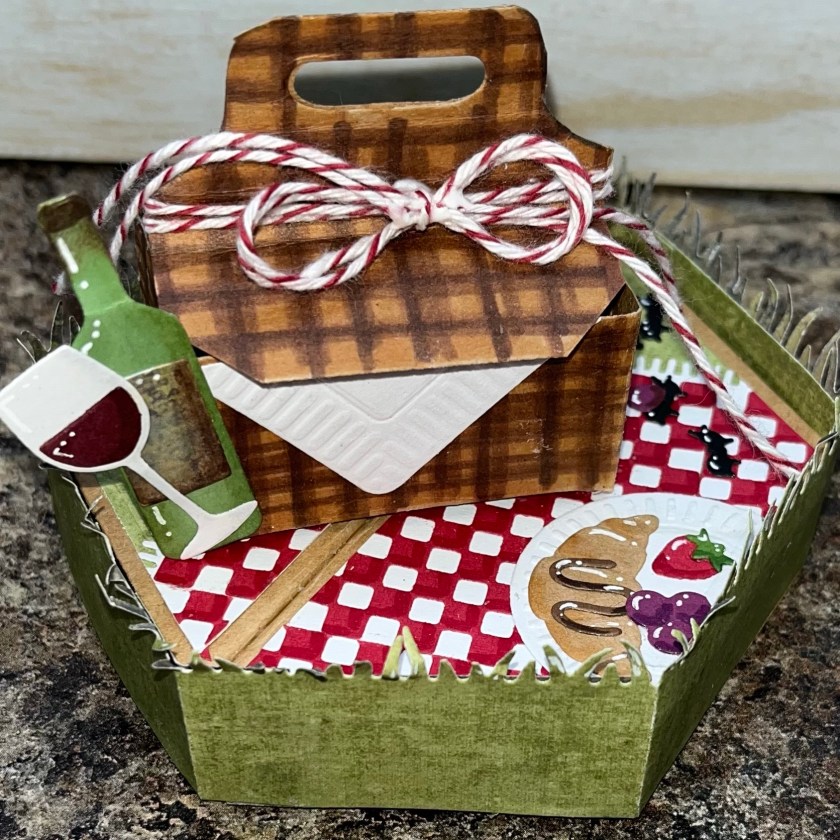
How is it August already, this summer is just flying by. I almost forgot to make my August design team challenge card 🤦🏻♀️. This month’s challenge is “Meal Time” and we were challenge to make a card with food on it. I was originally going to make a card using the stage but with the elements from the Picnic Elements die set, but then I thought the basket was a little small for the look I was going for and then it hit me….. with a little tweaking I can make the new Tool Box into a picnic basket and that’s what I did…..

All the fun is in the reveal, to see this card in action please check out my FACEBOOK page, feel free to join if you would share your own creations. A video of this card on my INSTAGRAM page.
I choose a slightly patterned green paper for the grass and I cut the top layer for the Stage Pop up, and the band from the Grass Stage Add on. I wanted the picnic blanket from the Picnic Elements to cover more of the stage top and to be more in scale to what was going to be the basket so I cut 2 and assembled. I cut one of them not quite in half, I wanted the pattern to be correct so I had to take a strip down the middle out and then lined them up as shown below. I glued to the green panels then trimmed around the panels as shown. It is hard to see in the picture but I added a little bit of shading to each red square with a red alcohol marker to the bottom right corner.
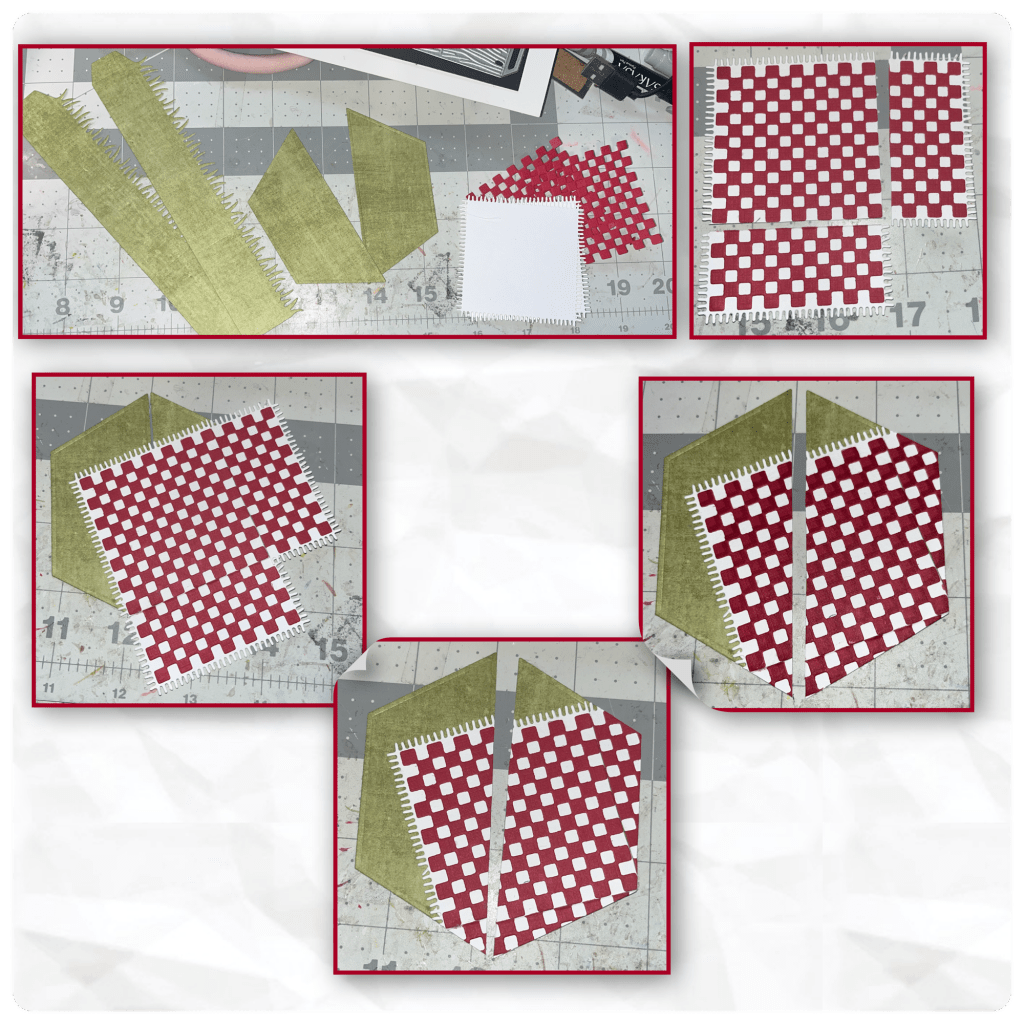
I cut out the pieces of the Stage Pop up (Karen has a video tutorial on the product page at the link ⬆️ ) and assembled as shown below

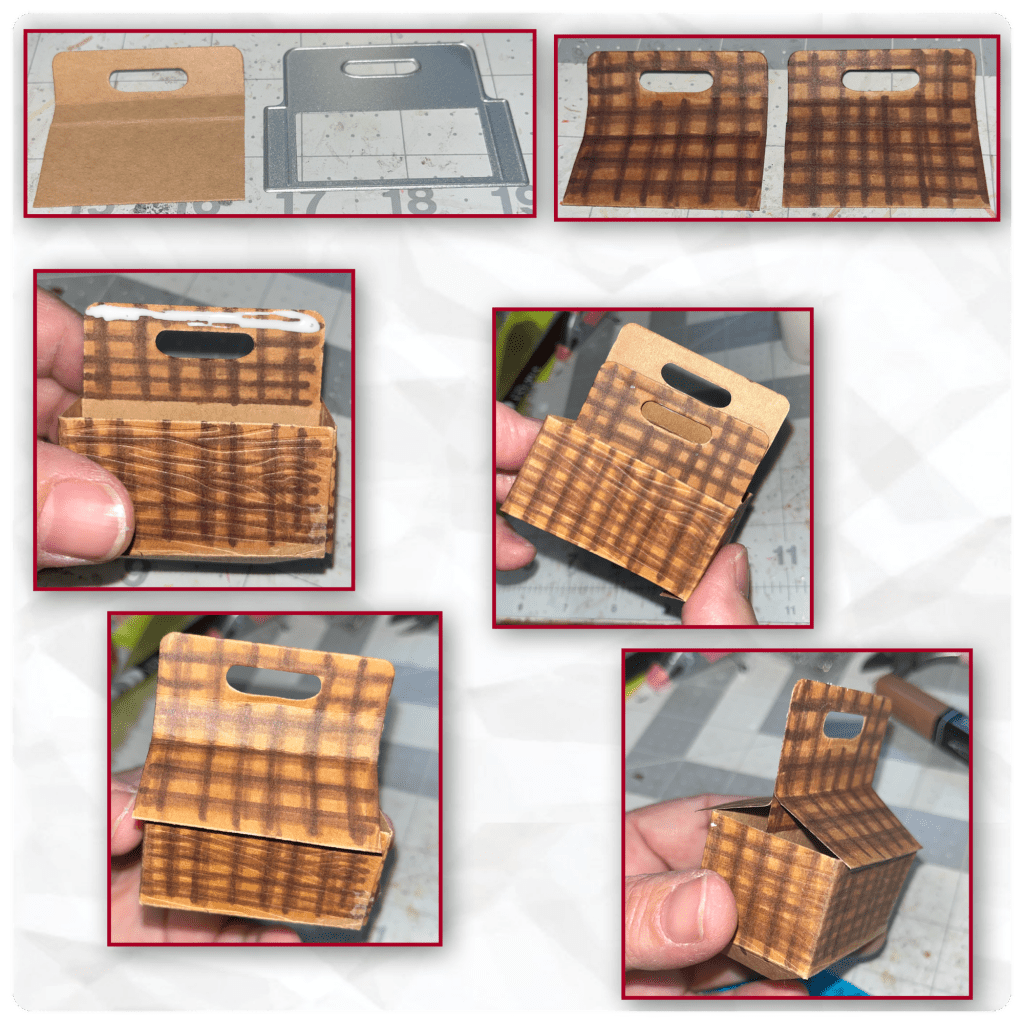
So I typically figure things out as I go, and that’s what I did here, no practice shots for me. I cut out the main piece from the Tool Box, and the 2 inside supports (not shown here) and the middle section from the Six Pack Tool Box add on. To make it look like a wicker basket I used alcohol markers. I’m definitely no expert but at started with drawing lines with a dark brown, them a medium brown then coloured the whole thing with a light brown. In retrospect I didn’t need to colour the middle section piece as it will be covered. I trimmed off the upper parts of the sides using the using the bottom half of the diecut as straight edge.
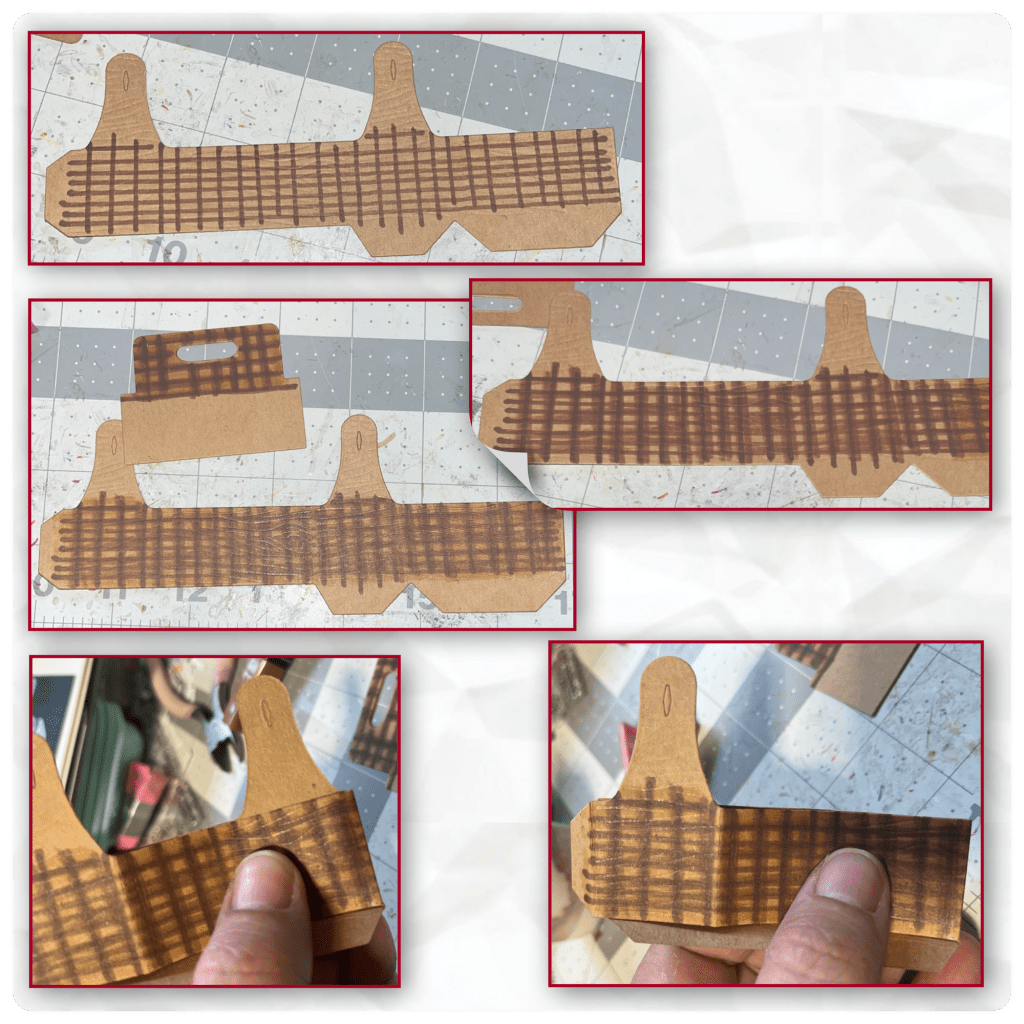
I assembled the main part of the baskets using Karens directions from her Six Pack Tool Box Add on video. I wanted the baskets to have flaps that opened so I cut out 2 more of the center handle piece from the Six Pack Tool Box Add on. I trimmed off the sides and coloured to match the rest of the basket. I scored them just below the handles. I glued the first one by adding glue to basket as shown, then I glued one of the pieces as shown with the handle slightly above the top of the original handle piece. I glued the second piece exactly the same way on the other side.
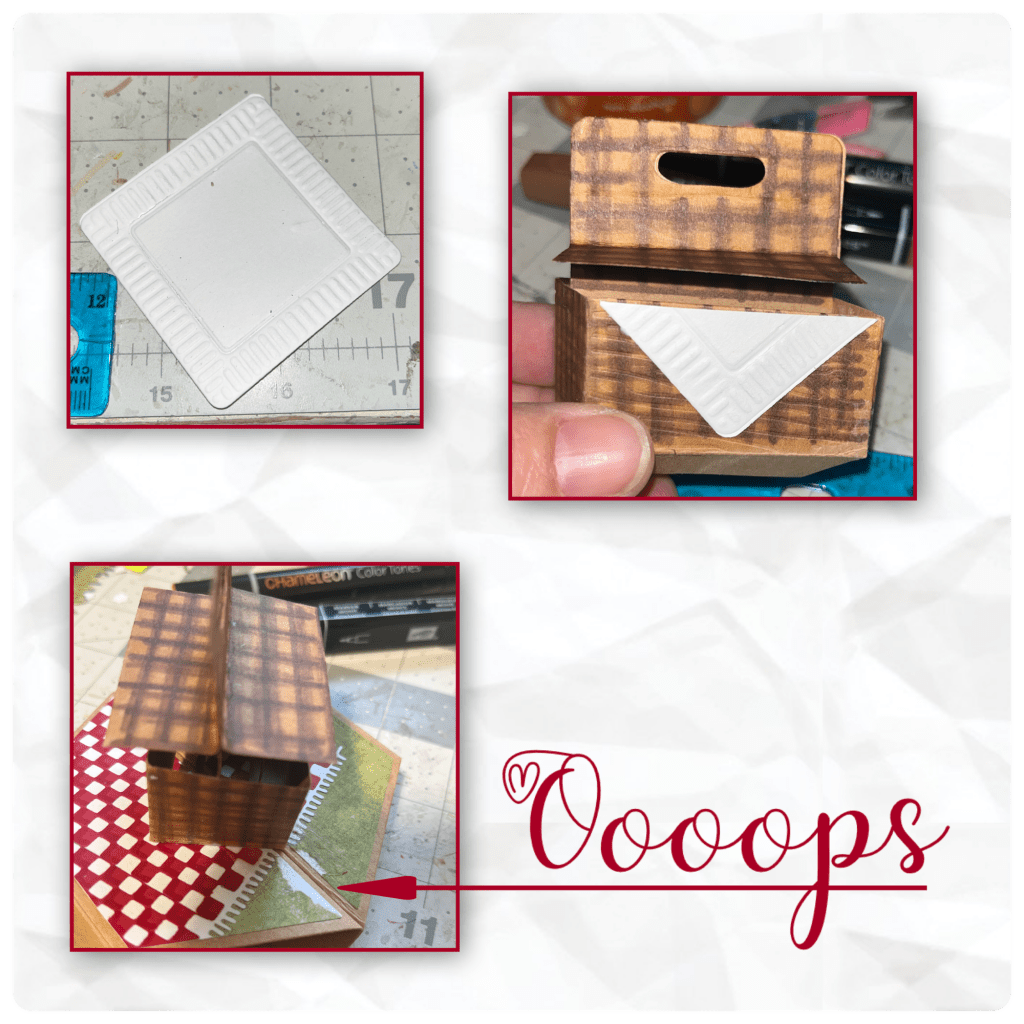
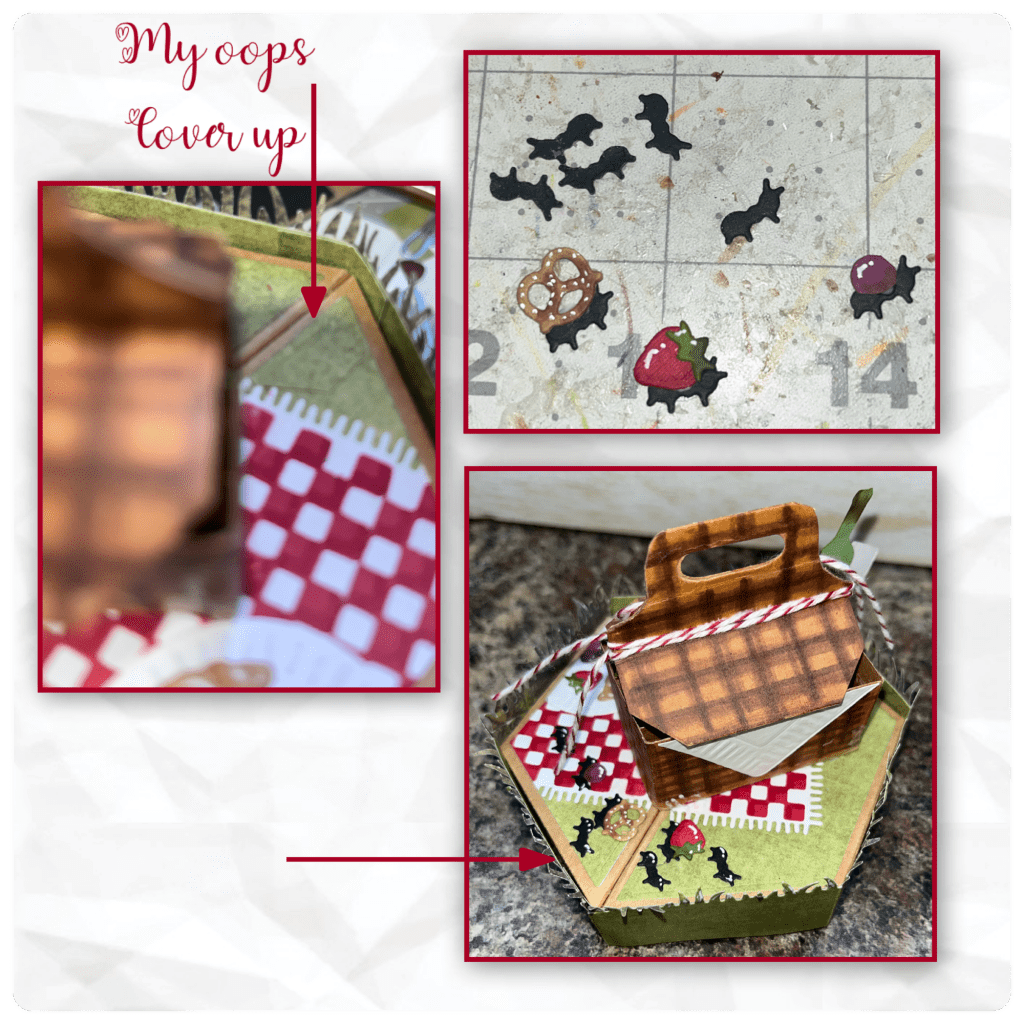
I cut the small square plate from the Dessert Elements and trimmed it to fit as if it were a napkin folded over the side of the basket. I added one to each side. This is where I decided to add the basket to the stage by memory 🤦🏻♀️ and my memory isn’t as good as it once was, and I had and oopsie and ripped my paper, that’s a later problem lol.
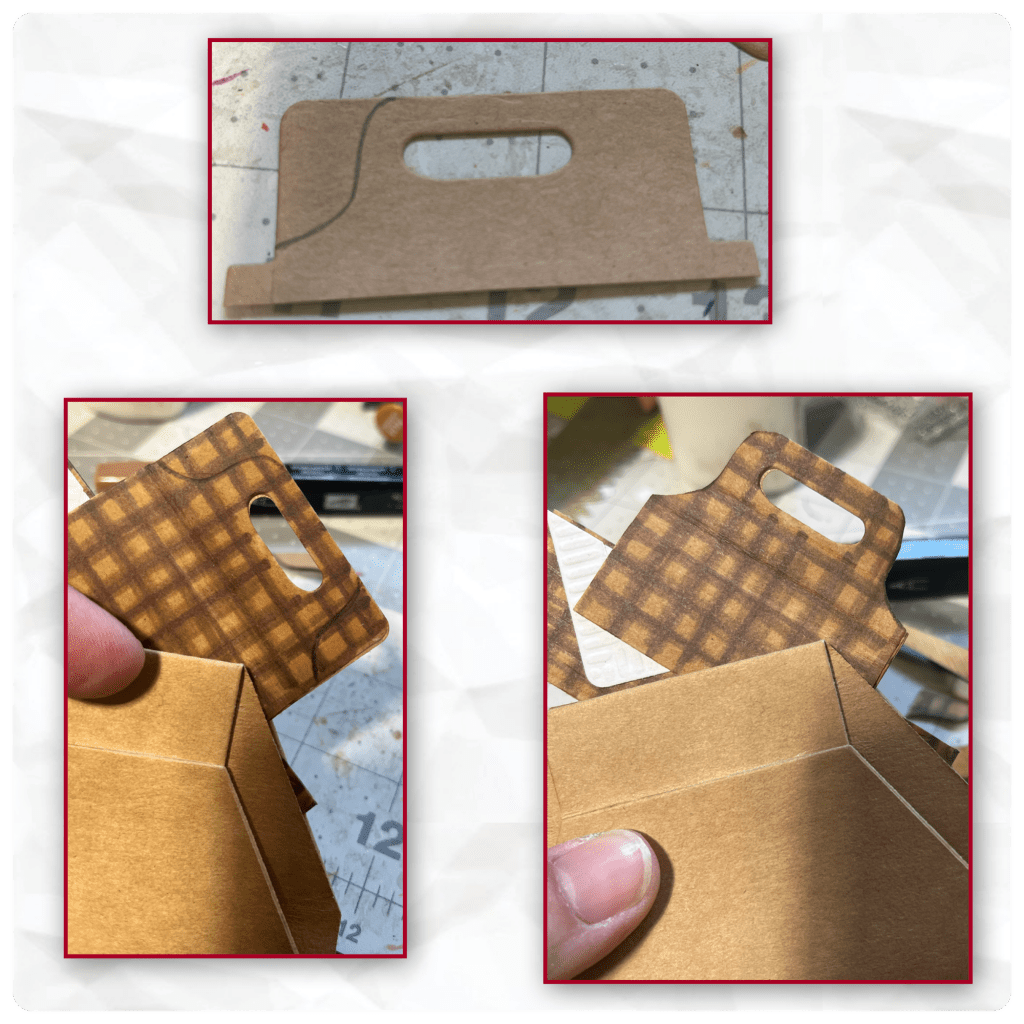
I wasn’t loving the look of the handle it wasn’t looking very basket like so I cut out a another piece and made a template so that when I cut it, it would be the same on both sides.
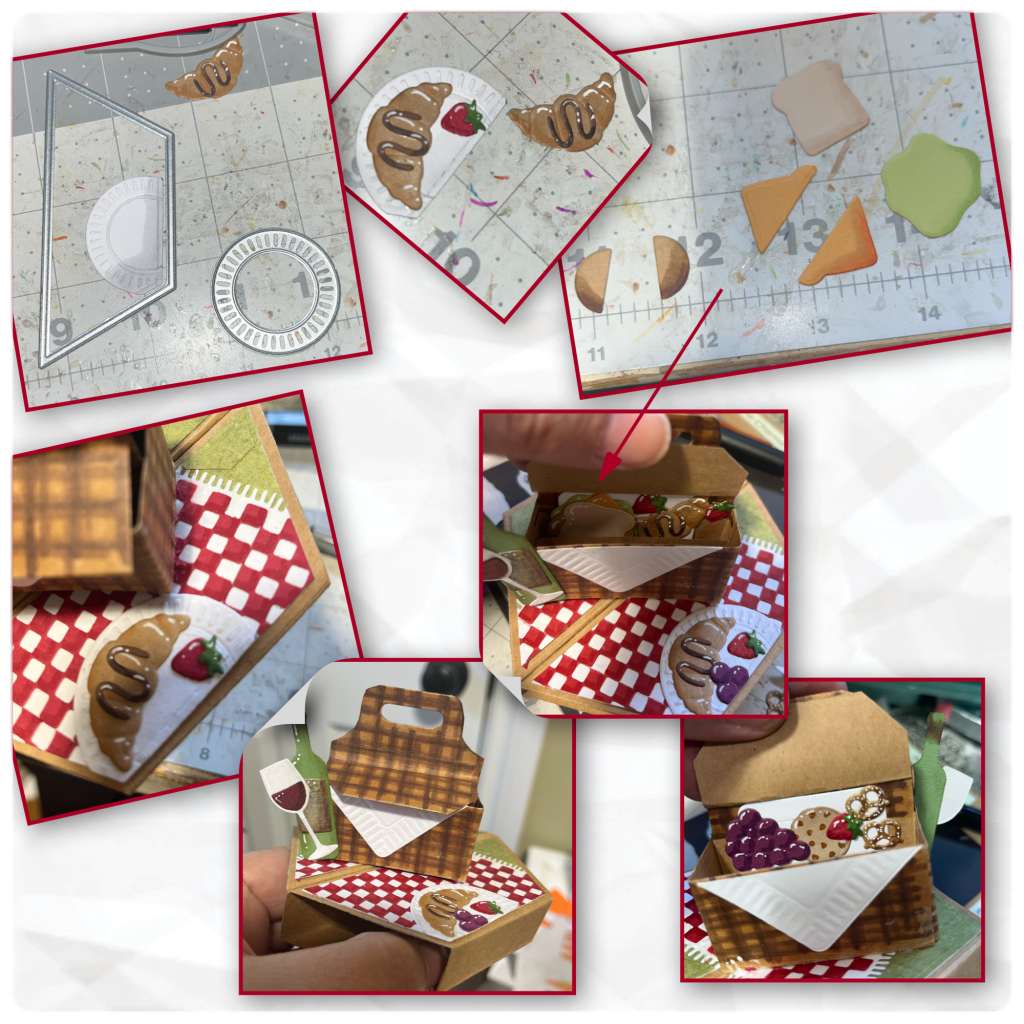
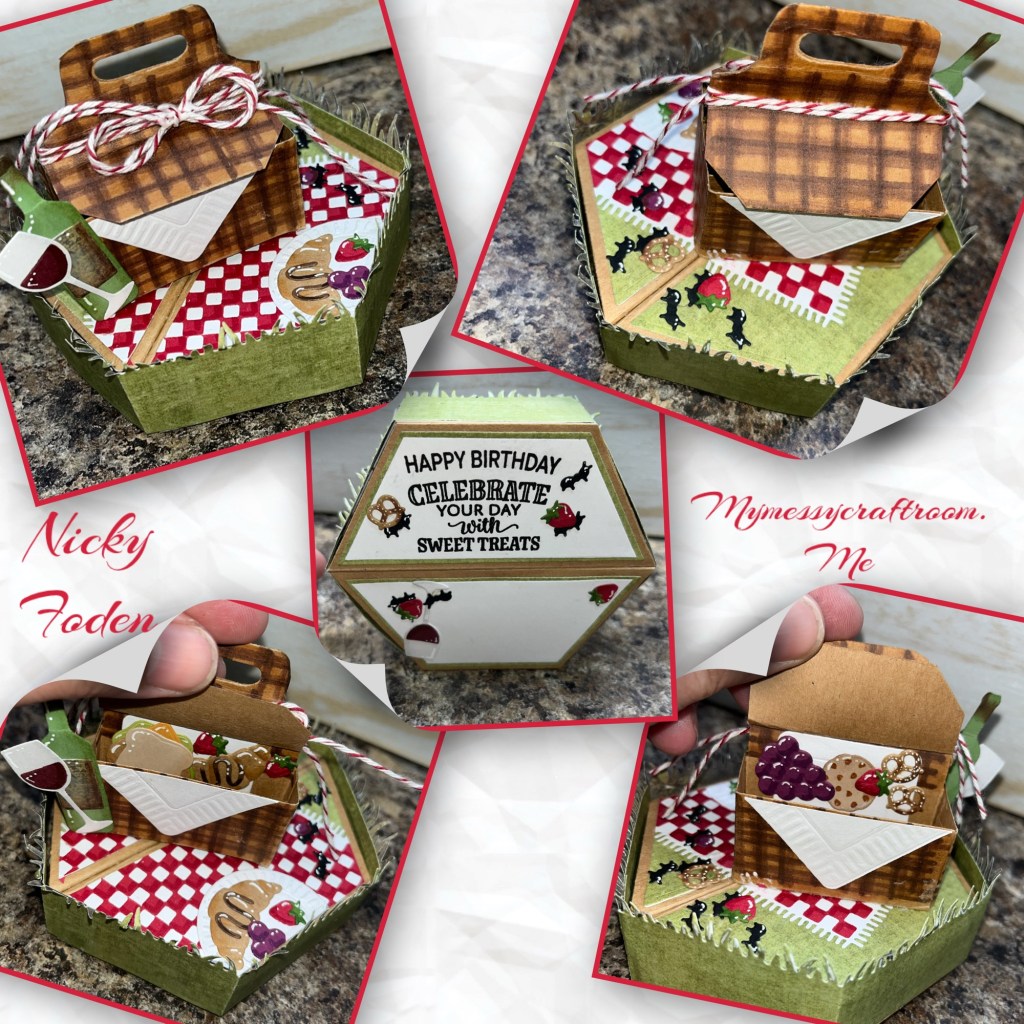
The round plate is front the Meal Time elements , I coloured and trimmed as shown. The croissants, strawberries, and cookie are all from the Dessert Elements, the sandwich pieces, and the pretzels are from the Mealtime Elements. The wine bottle, glass and the grapes are from the Wine Charms. I added shading with alcohol markers and highlights with a white Gelly roll pen. I added white squares inside the baskets so the colours of the food would be contrast against it. I added the food as shown. This is also about the time when I decided that I I wanted to cut the corners off the flaps on the basket. I just eyeballed it with a small pair of scissors.
Now it’s time to fix my ripped paper, I made little patches to cover the rip but it was still quite noticeable. So I cut a bunch of little ants using a die from the picnic elements set. I added them strategically to cover the lines in the patches then added more to the picnic to hide the fact that the ants are hiding something. I also added the grass band around the outside of the stage.
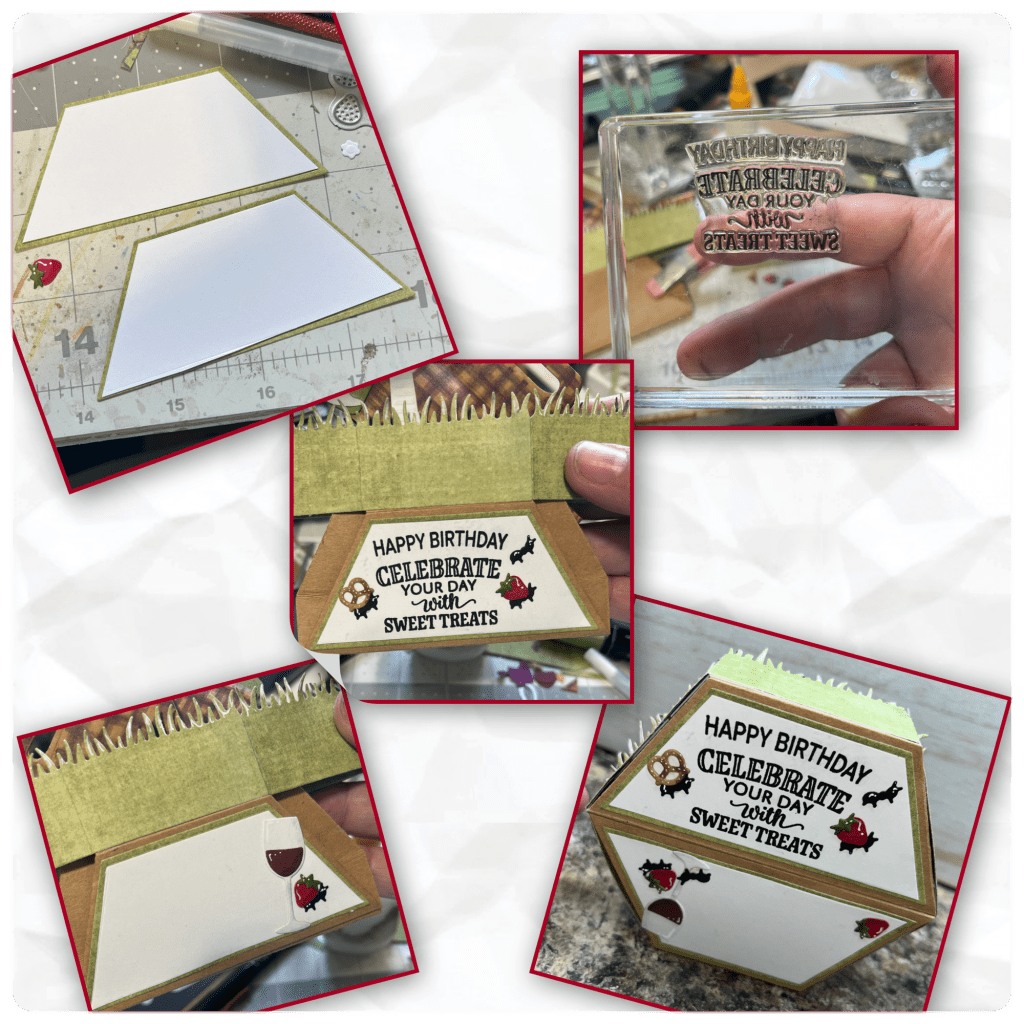
Now for the underside. I cut the 2 green pieces and the 2 white pieces using the same die from the Stage pop up. Then I carefully trimmed a bit off of each side of the white pieces. If you look close I had to cut another one as the bottom one is crooked. Karen came up with a better way to cut this layer, it can be found Here. Then I took the “Happy Birthday” from the Whirley Wheel Words clear stamps, and the “celebrate your day with sweet treats” from the Sweat Treats clear stamps and added them to the same block as shown, and stamped with black ink. The other side I left blank for a place to sign. I added a a few left over embellishments.
Oh and somewhere along the way I added a bakers twine bow.
Other Tools used


OMG! Nicky, you really out did yourself. I love you picnic basket and all of the embellishments. Thank you for sharing.
LikeLiked by 1 person