
Ok, so I’m a bit late with this post, I did have the Craft Roulette card done in time for the challenge, just didn’t get the blog post done until now. The Craft Roulette parameters are ⬇️. I was also greatly inspired by Sandy Diller’s Card, she created a beautiful bouquet that I just wanted to give a try.

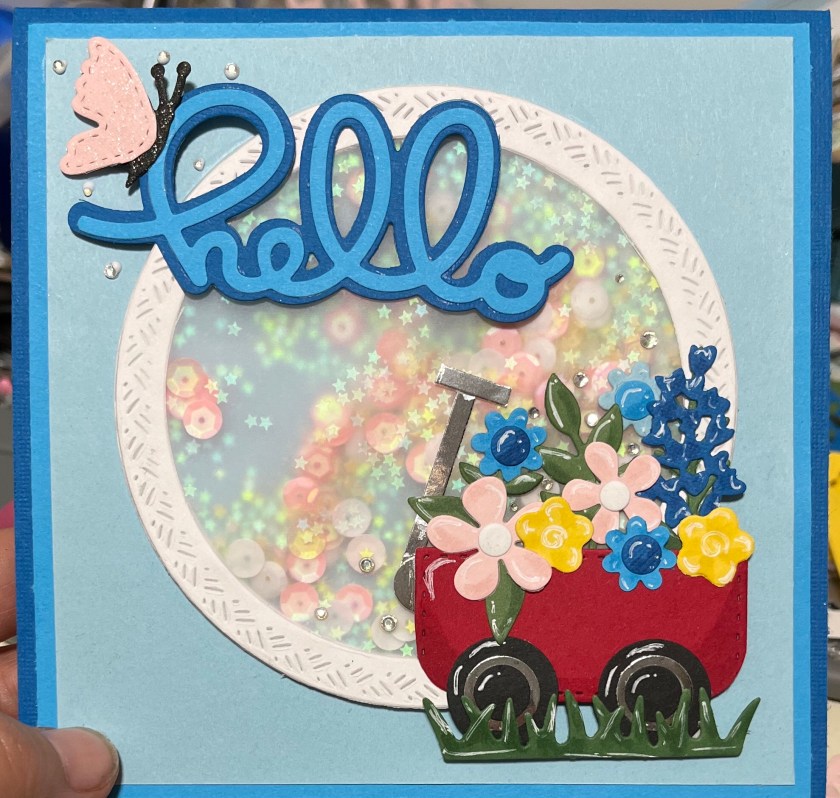
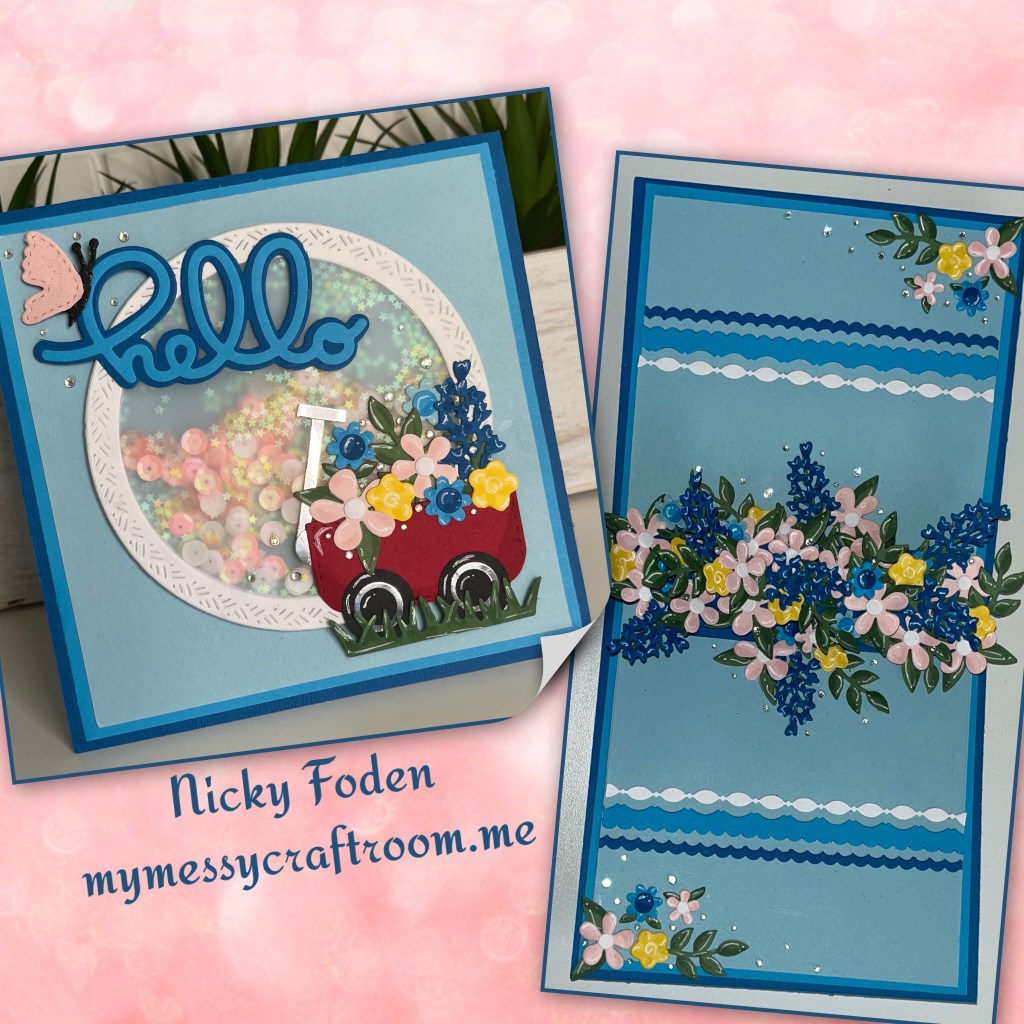
I know I did a vellum shaker last week, but I really loved how it looked and the supplies were still on my “mesk” so I went for it again. The “circle” on my project is the large shaker on the front, the “Wizard of Oz” colours are – ruby RED slippers, emerald city GREEN, YELOW brick road, Dorthys BLUE dress, and Glindas PINK dress, Tin Man’s SILVER, and the movie starts in BLACK & WHITE. The wagon is something that can be found “on the road”, and I added wings with the butterfly.

All the fun is in the reveal, to see this card in action please check out my FACEBOOK page, feel free to join if you would like to share your own crafty creations. You can also see a video of this card on my INSTAGRAM page.
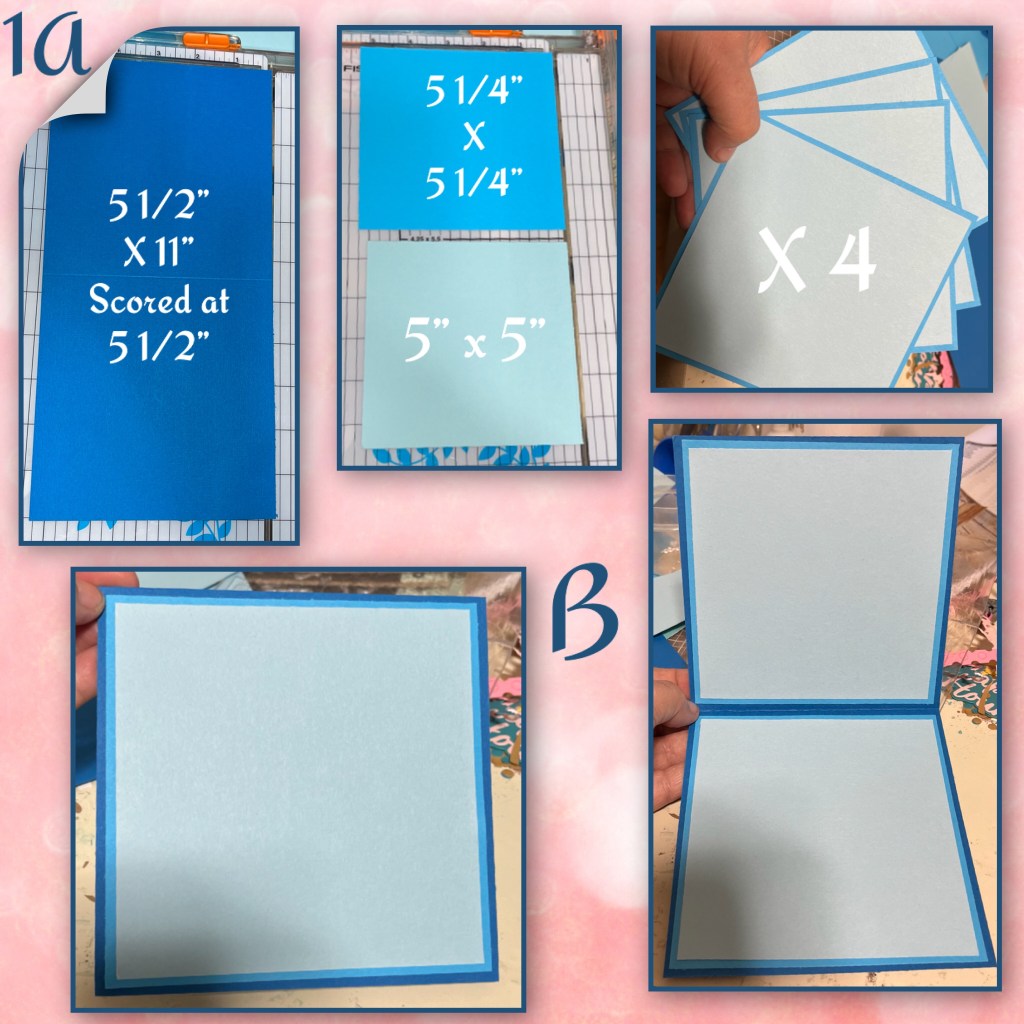
1A- most of the card stock I have is pretty thin, so I decided to add panels to thicken it up. The panel and card base dimensions ⬇️
B- I added the 4 panels to the front, back and inside of the card. (I should have planned the inside a little different because I ended up having to cover a seam)
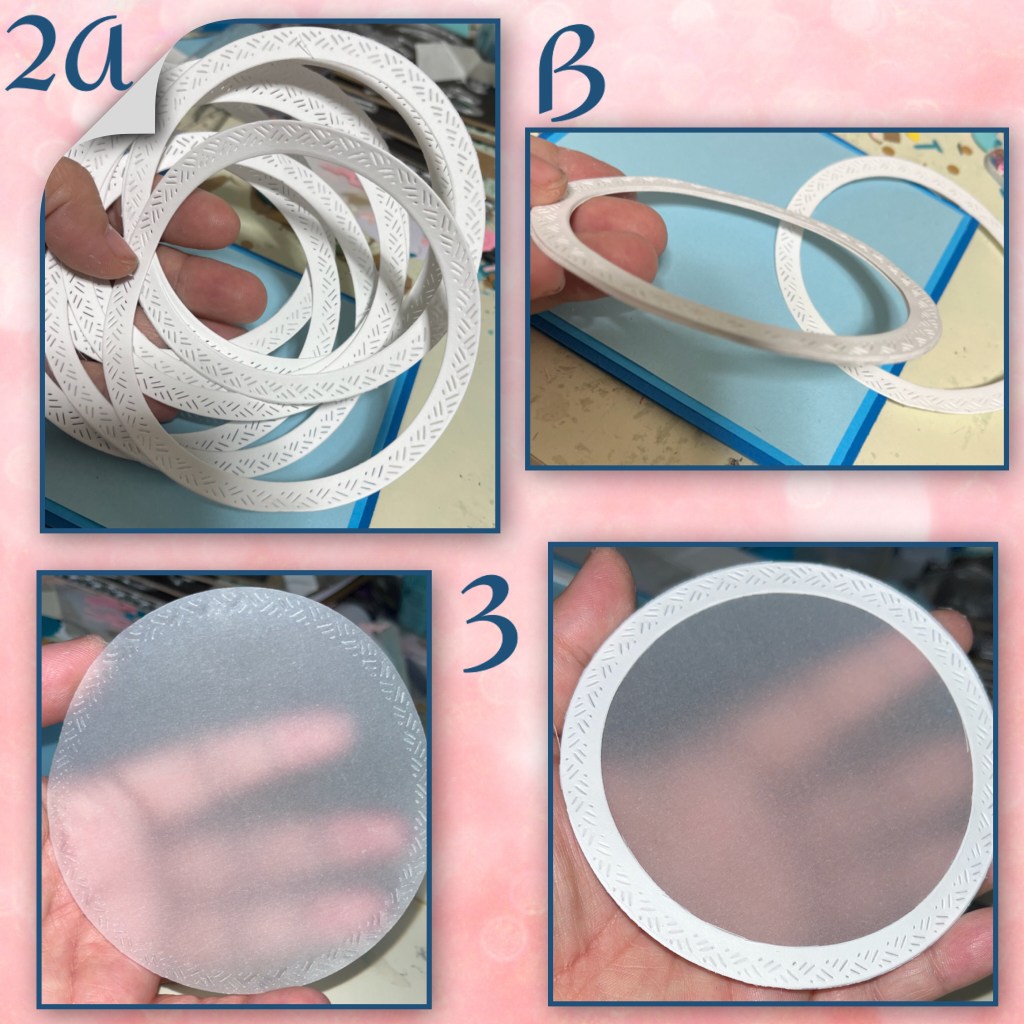
2A- I didn’t want to mess with foam tape so I diecut 8 circle frames using 2 circles dies from the Circles Crosshatch
B- using a strong liquid adhesive glue 7 of them together.
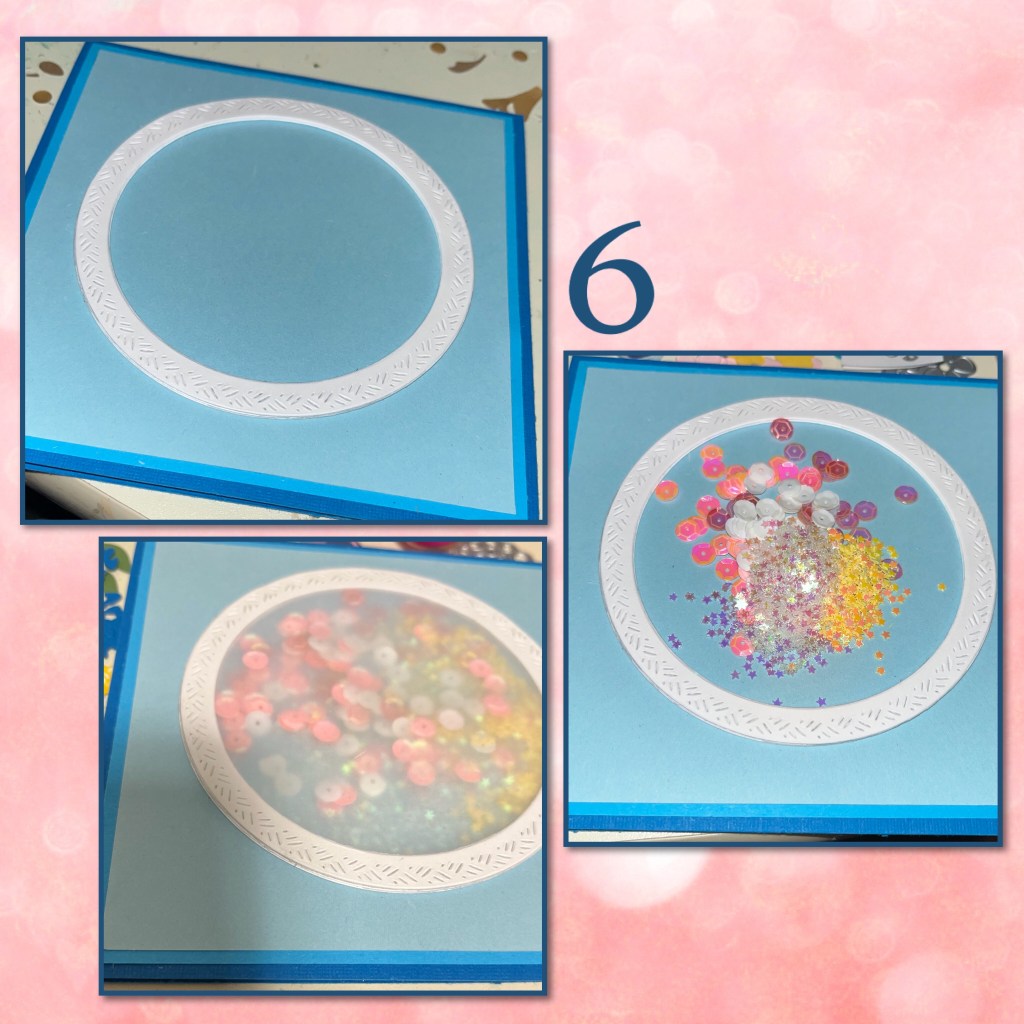
3- using the largest circle die cut out a vellum circle and adhere it to the last circle frame.
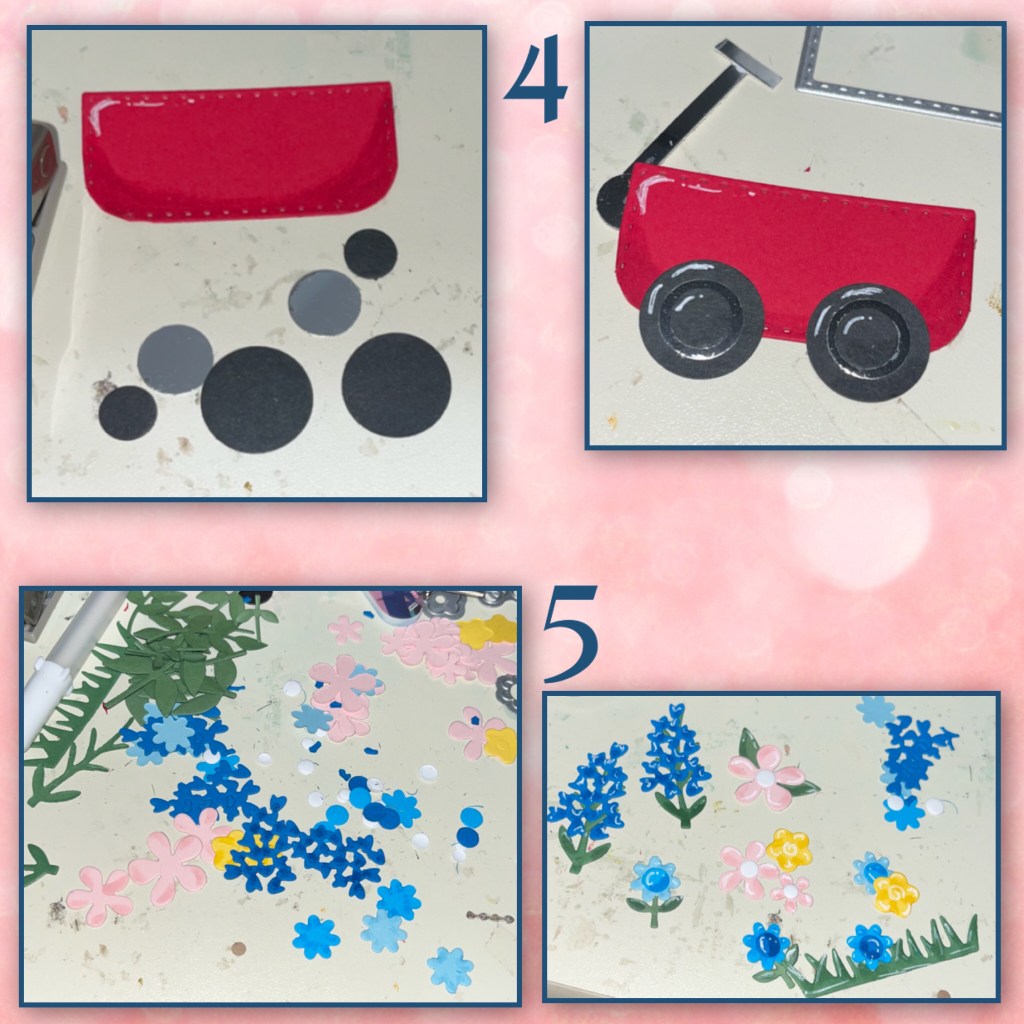
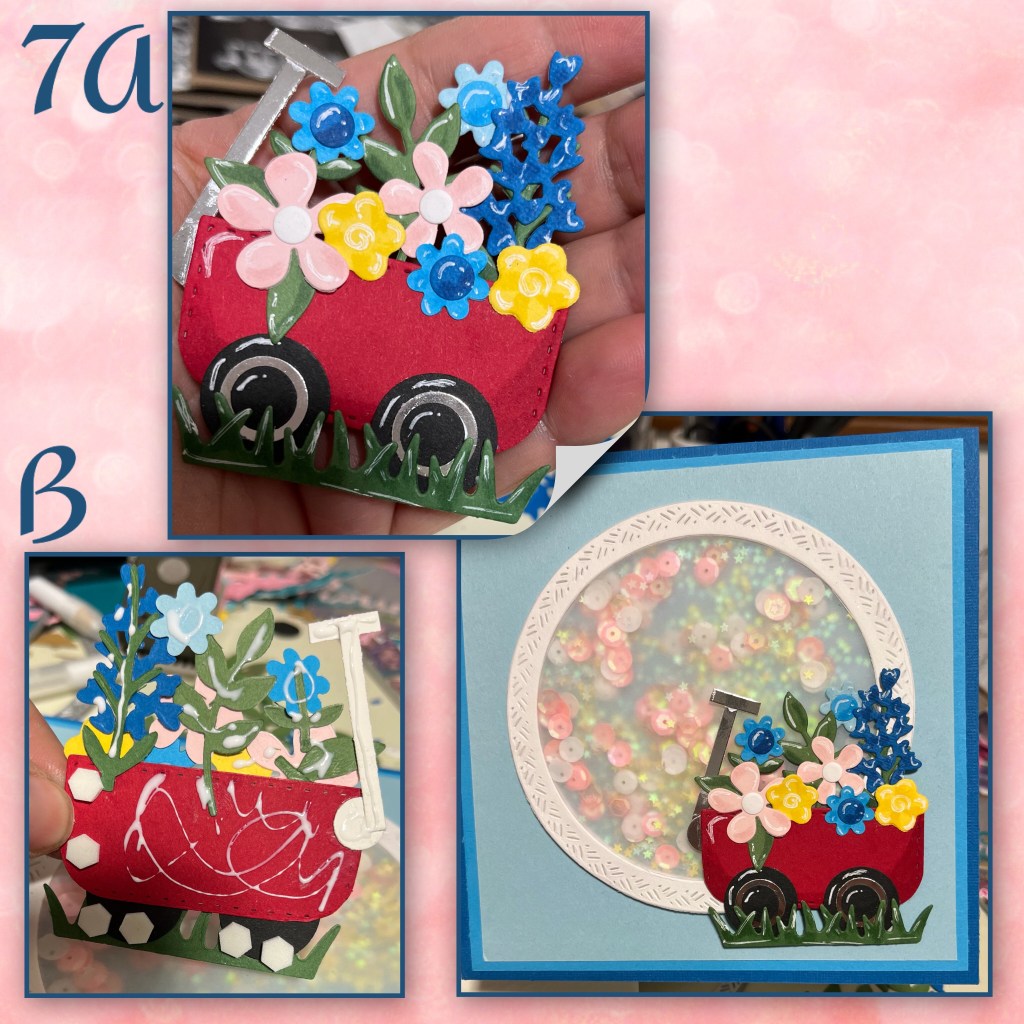
4- to make the wagon I diecut a red rectangle from the Slim frames, I used an old Creative Memories corner rounder to cut the 2 bottom corners. The Wheels are Black 3/4” and 3/8” and silver 1/2”. Layered black silver black. I used the 3/8” punch to make a small silver circle and silver strips to make the handle. I coloured the bottom of the waggon with Versa Marker and added some white highlights.
5- most of the flowers and leaves are from the Fence Add on and the Fun Flowers, but the yellow flower is from the Flower Pot Pop up. I used the Versa Marker to add shading and white gel pen for highlights.
6- I added the shaker ring to the middle of the card. I went through my stash and found some pink and white sequins and some yellow and iridescent stars and added them to the card. I closed it with the vellum circle.
7A- I added some flowers to the wagon.
B- to add the wagon to the card front I added liquid adhesive to the side that will be on the shaker, and foam adhesive to the side that will be attached to the card front.
8A- die cut the mechanism for the Little Twist Panel and add to the card. (Karen has a video tutorial on the product page at the link ↖️)
B- I wasn’t thinking when I added the panels before the mechanism. I don’t like how much of the darker blue is showing so I cut 2 smaller light blue panels to cover up.
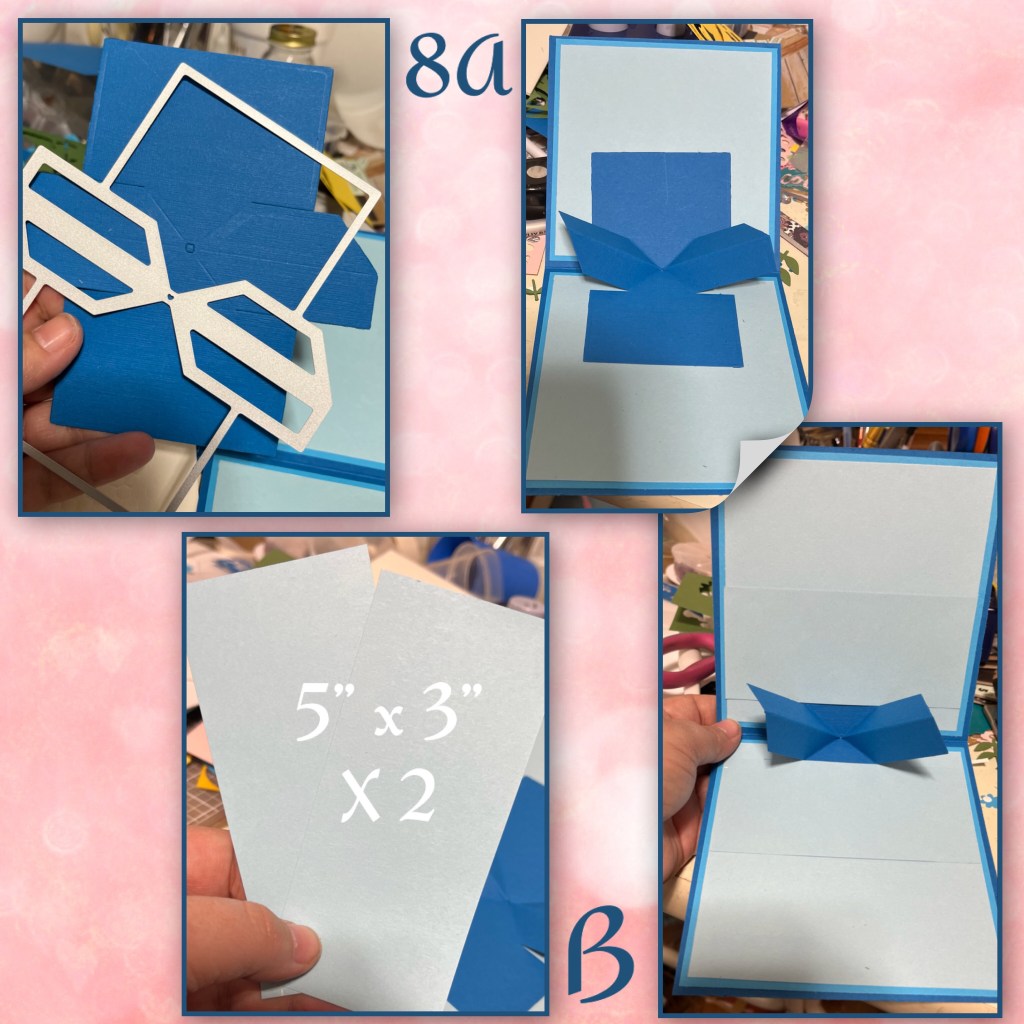
Sorry photos were edited out of order. I cut the panel below before I added the mechanism shown above. It doesn’t really matter.
9A- this is where I got the idea from Sandy Diller. This long panel is where I would typically add the square panels that come with the dieset, but I trimmed it as shown
B- add the cut panel to the mechanism. I made sure on the left side what was left of the panel was lined up on the top and the left side of the mechanism arm, And on the right make sure the side and bottom are lined up with the arm of the mechanism. Because of the missing piece of the long panel I over lapped the edges where they connect to the mechanism with flowers.

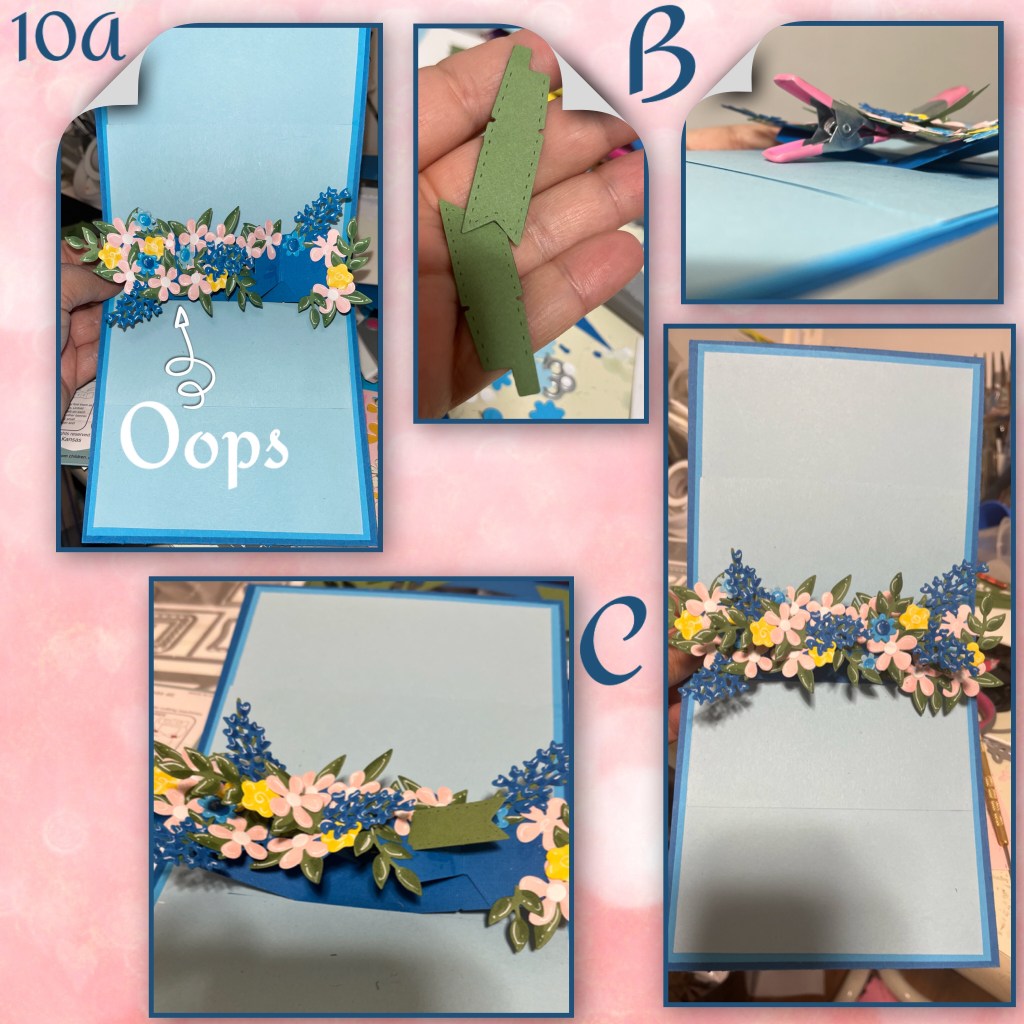
10A- I continued to add flowers when I realized I had forgotten to add the banner arms. I decided to cut them in green so any sections that would be peaking through would look like leaves. If I was making this again I would make the long panel that I trimmed in green as well. It is tricky to add the banners after the mechanism is attached to the card but not impossible
C- I continued to add flowers to the long panel and the banner arms. open and close the card offer to make sure nothing catches.
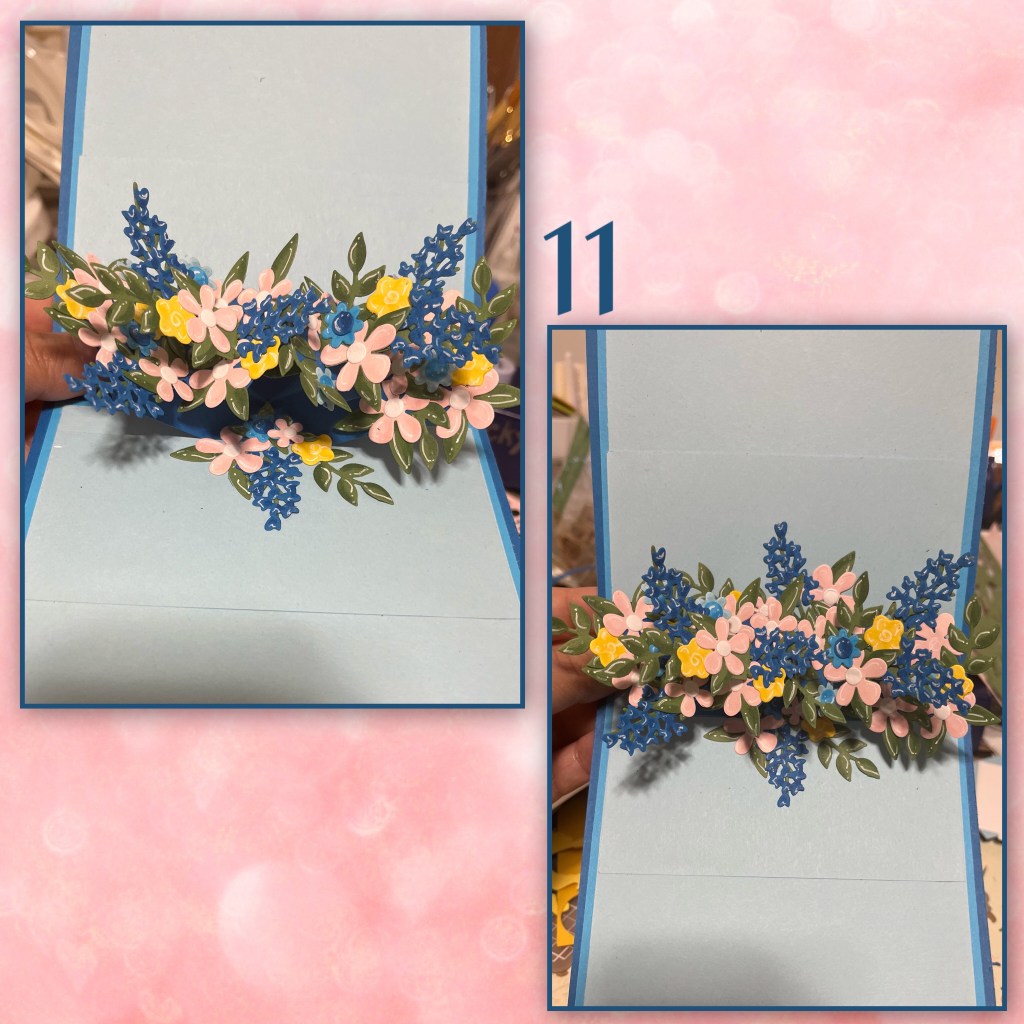
11- to make the bouquet look fuller I added leaves and flowers above and below the mechanism making sure they don’t create catch points.
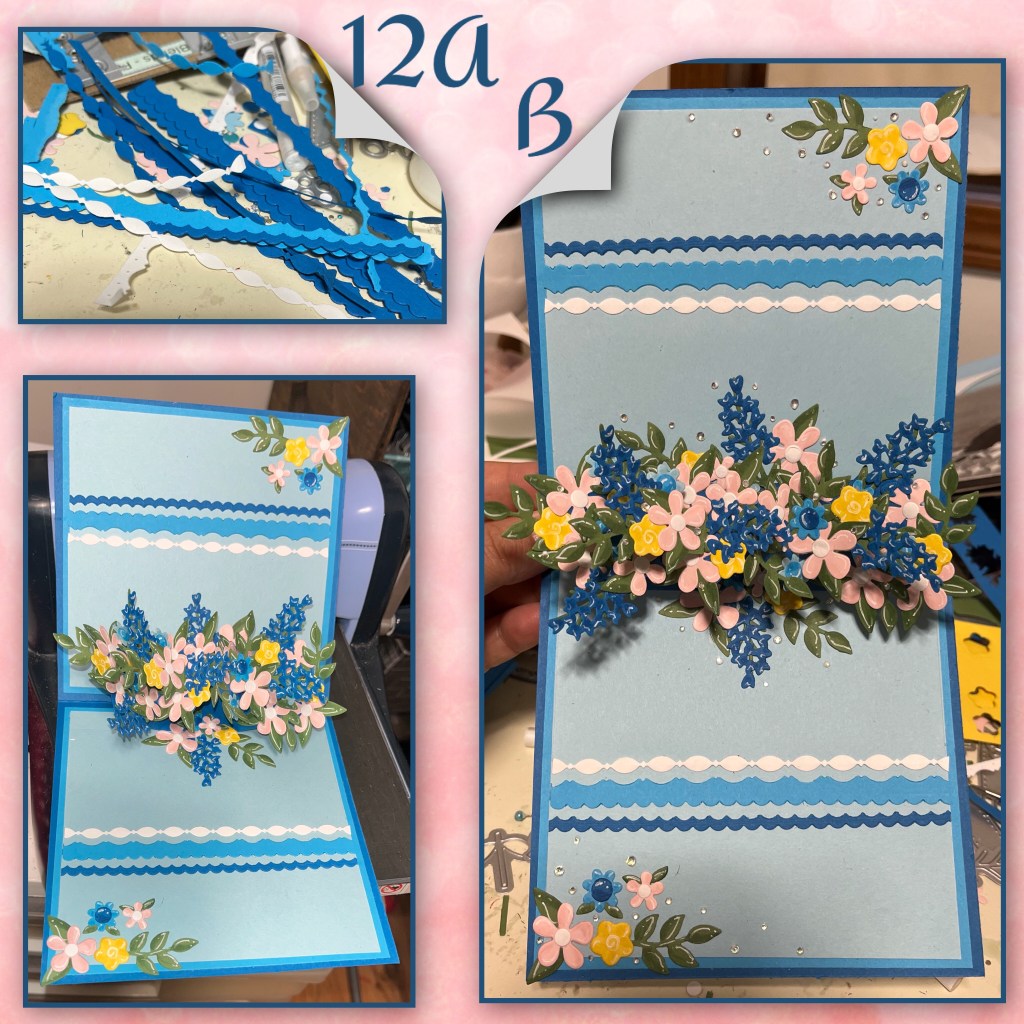
12A- I chose one die from the Border Blends Argyle and one die from the Border Blends Party, combined them and cut from white and the 2 shades of blue and added them to the card.
B- I added some flowers and leaves to the top right and bottom left, I also added some little gems that I got from Amazon.
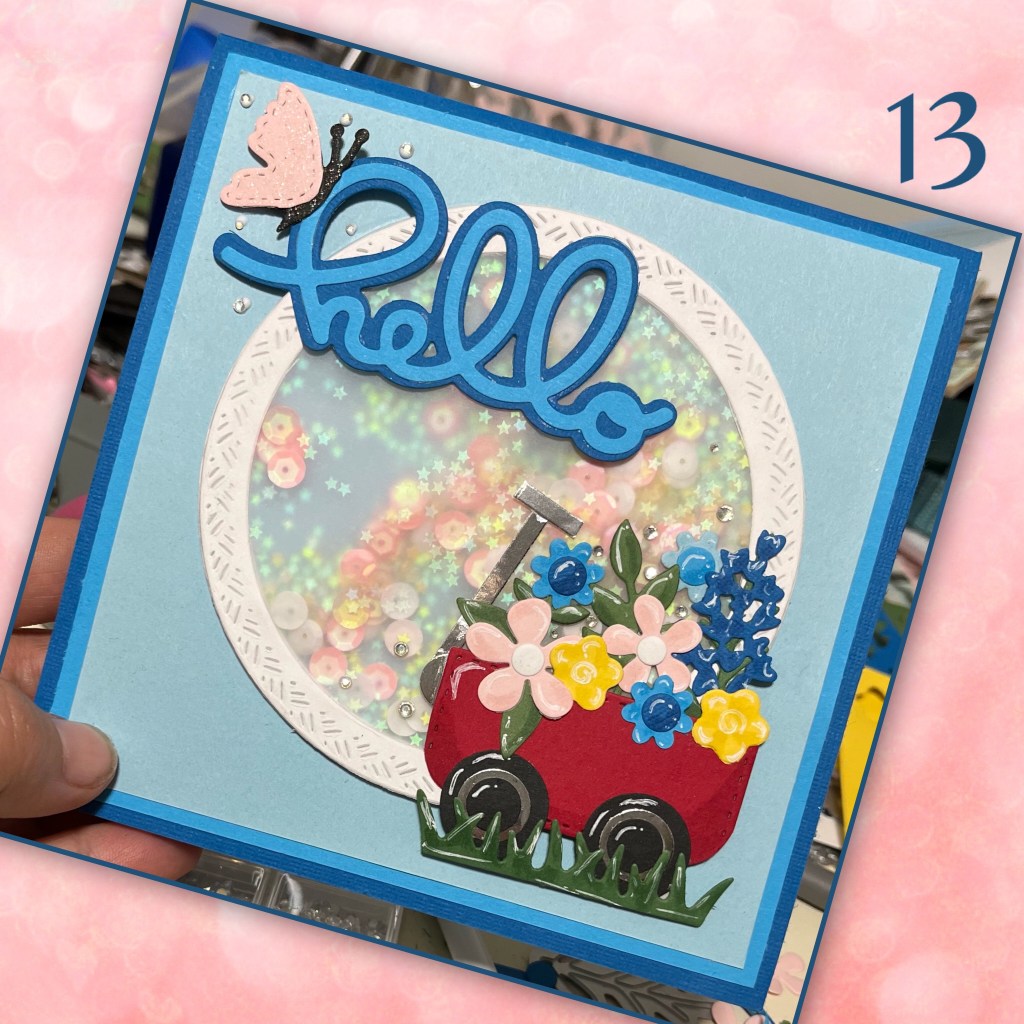
13- I finished off the front with Hello and a butterfly from the Butterfly Collage add o, I also added a few gems
Other Tools used

Love this! Thank you for the very detailed tutorial…definitely plan on giving this card a try!
LikeLiked by 1 person