

It’s Craft Roulette time, I actually just got the card done in time for the Sunday night deadline, lol, so I didn’t get my blog post done until now. I found this weeks parameters a little bit tricky. Parameter 1- was a Dutch Door card, meaning the front had to be split having a top and a bottom. I chose to have my bottom open to the left and my top open to the right. Parameter 2- the colours had to be campfire colours, Parameter 3- had to be a page from a book and Parameter 4- it had to have a hat or cap. My gnomes are all wearing hats, but I could not cut a page out of a book. So I decided to take a page out of a colouring book, and colour the flowers in yellows, oranges and reds. I don’t colour often so this was my time consuming part lol, I’ll explain more in the details below. And of course my own parameter was to make a pop up card.
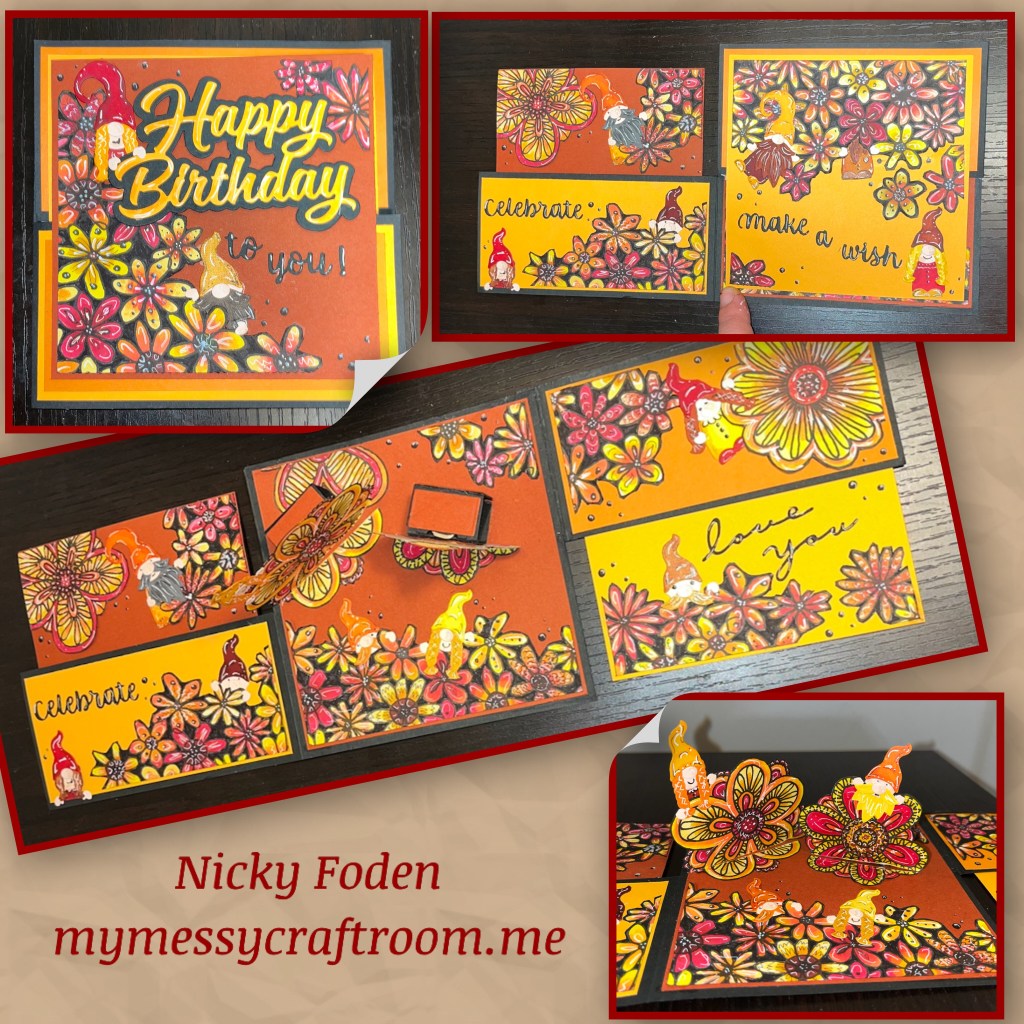
All the fun is in the reveal, to see this card in action please check out my FACEBOOK page, feel free to join if you would like to share your own crafty creations. You can also see a video of this card on my INSTAGRAM page.
1- I chose two pages from this Crayola adult colouring book, I thought they would complement each other when they were coloured and the card was finished.
2- I chose these colours of Chameleon Markers as well as their black fine liner and their colourless blender, I also used a White gel pen
3- I coloured the flowers as shown, I was just playing around I am really not great at this, no to flowers are alike but that’s how I roll.
4- I wanted the colours to pop so I use the black fine line pen to colour in all the white
5- to give the images some depth, I added some black details and some white details. I thought the block details would help it match up with the bigger flowers a bit better. And the white seems to give it a little dimension. I cut out the large flowers.
6- using a brush tip marker I go around all the edges of the cut flowers.

7- Cut out and assemble the card base as shown. The flap gets attached to the upper ride side.

8- my bad, I was concentrating so hard on getting all the measurements right for all the layers that I forgot to take photos. Hopefully the diagram below explains how they were layered. The dimensions are correct and you could probably follow along at the other steps if this diagram doesn’t help.
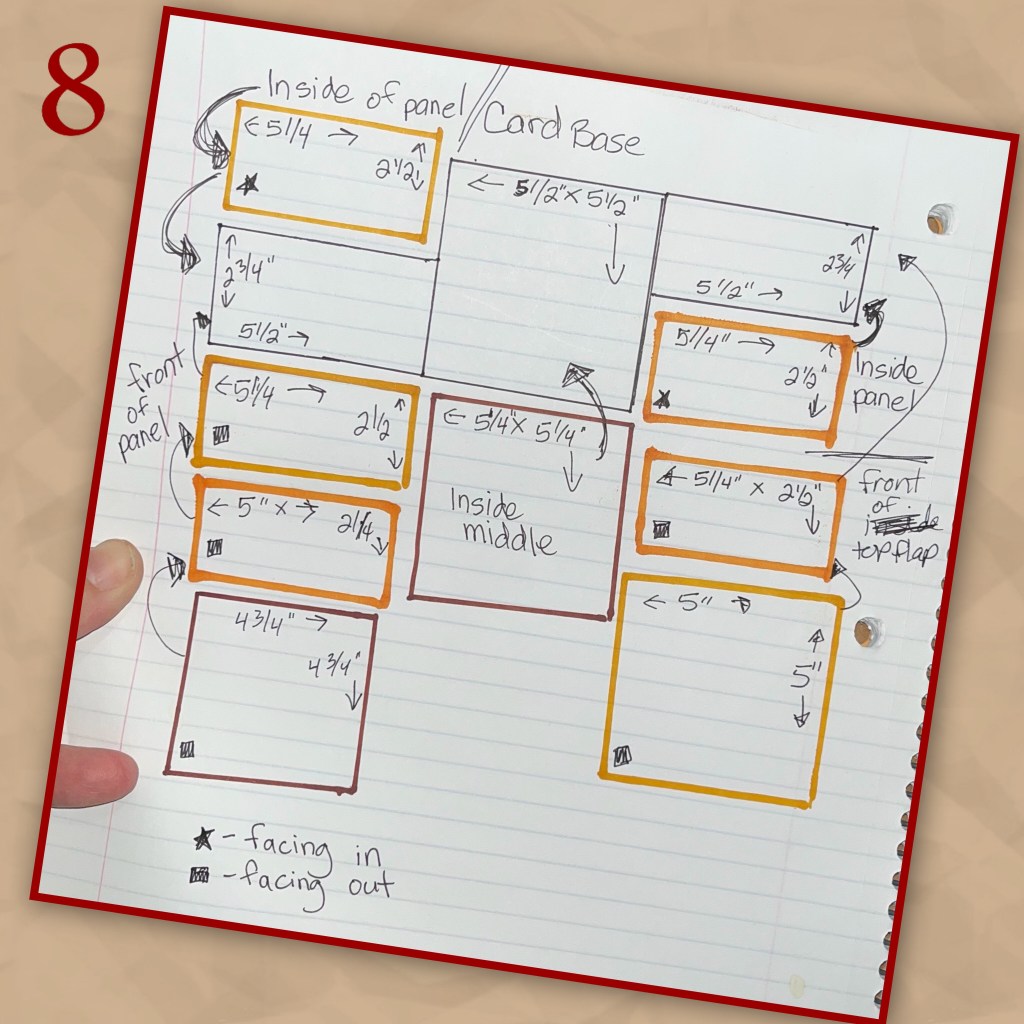
9- because the front was going to be so heavy I decided to add an extra layer to the back, it is 5 1/4” x 5 1/4”
FO means Facing Out, FI is Facing In

10- I fussy cut borders for the different sections.

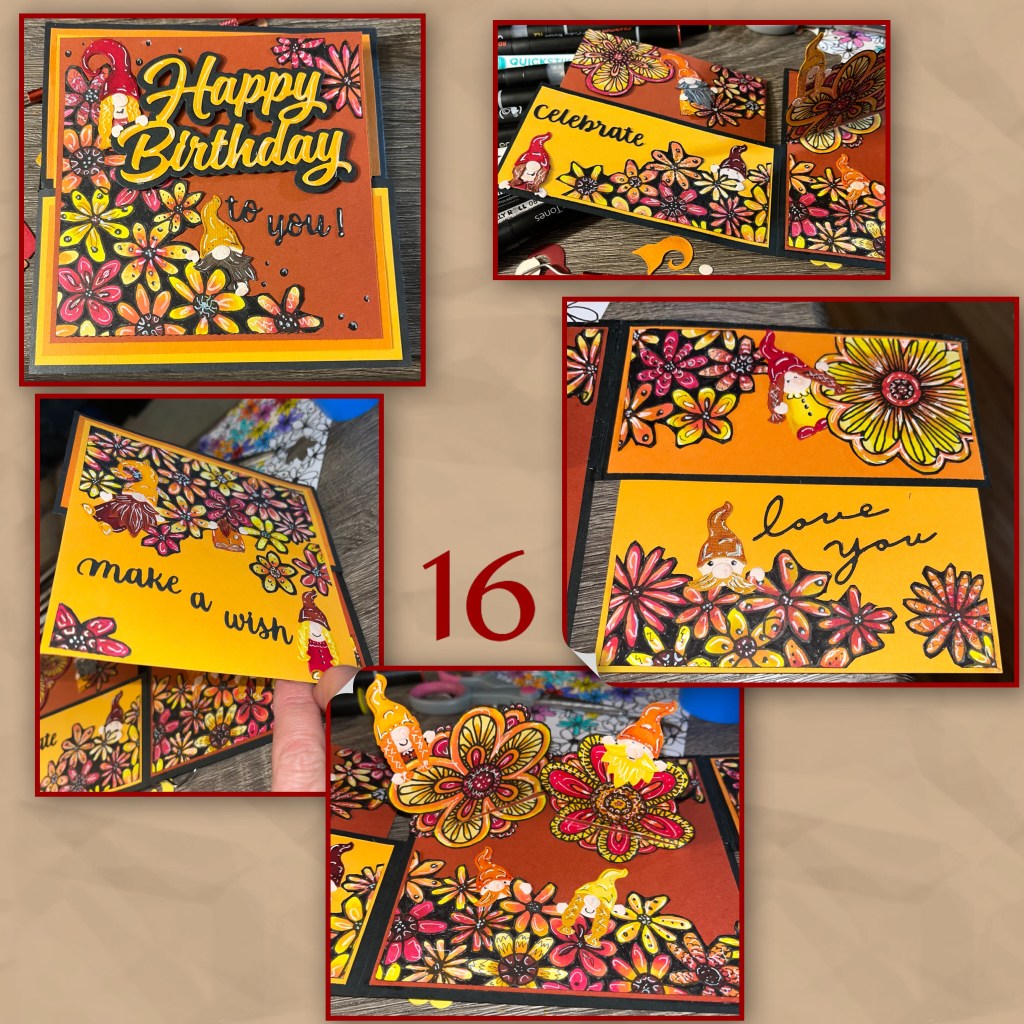
11- assemble 2 Bam Boxes (video at link)
12- I added the extra pieces to the Bam boxes and added the first one. Making sure the large flower will fit when card is closed. ( In the photos the Bam boxes is folding to the back, I turned it around so it will fold to the front)
13- I cut the flower so it wouldn’t buckle when folding then adhered as shown, I added 2 to the inside

14-I added some flowers and the Happy Birthday and the Happy Birthday Shadow
15- cut out most of the words from the Word set 2- Birthday and Tiny Gnomes from multiple coordinating colours.

16- when adding the gnomes I coloured them with the Chameleon Markers as well so they would match better. I added the words, and I also added the “love you” from the Pop n Swap set.
I added little black dots with the black marker and I highlighted them with a white Gel pen.

Other Tools used

wow what a card and a half, brilliantly designed with awesome colours.. x
LikeLiked by 1 person