

It’s that time, time for the May Karen Burnistons Design Team Challenge. This months challenge is “Bejewelled” , we need to incorporate something Shiny or Sparkly. I wanted to find a fun way to used the Swirls Pattern plate in a different way, I thought it would be pretty to make a swirly rainbow shaker card. And can you believe or, it’s not a pop up card 😳

Please check out my FACEBOOK page, feel free to join if you would like to share your own crafty creations. You can also see this card on my INSTAGRAM page.
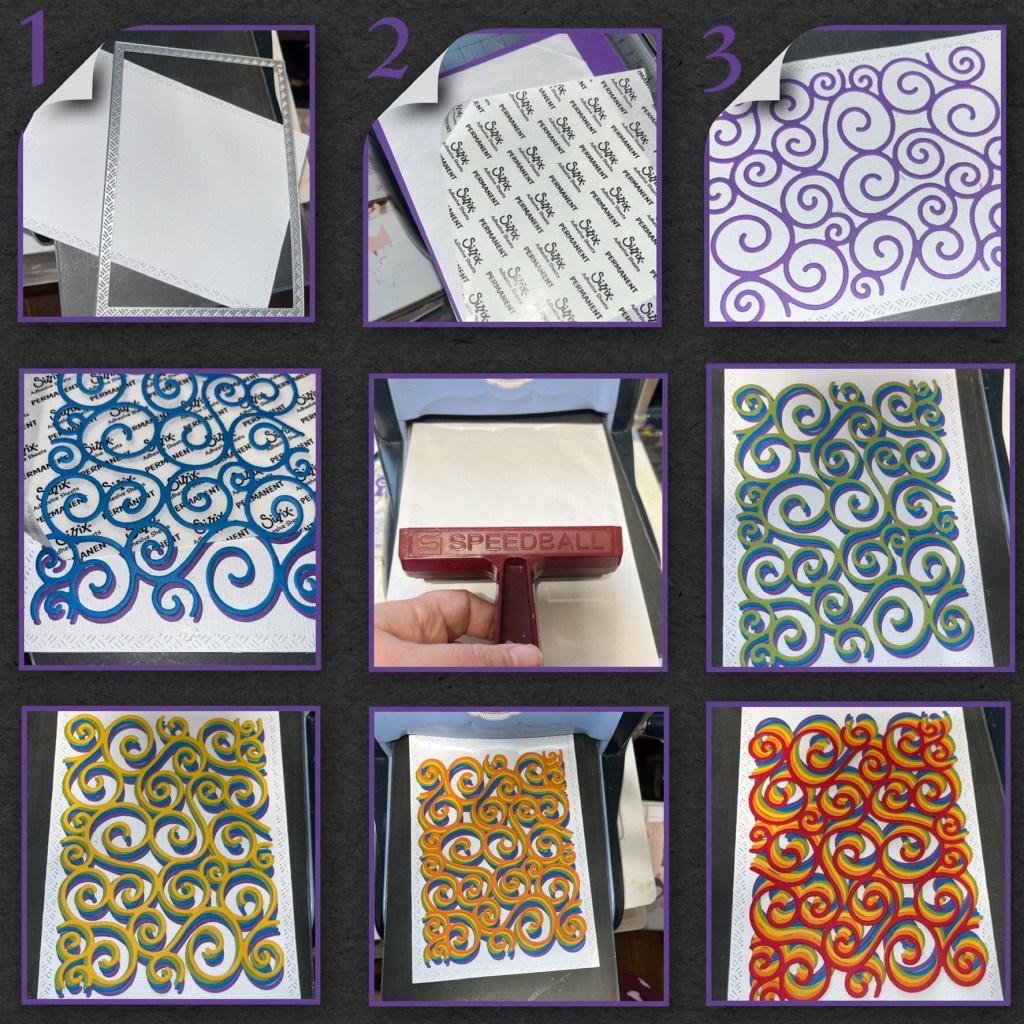
1- dicut a the largest rectangle from the Rectangles and Labels Crosshatch dieset from white cardstock.
2- add double-sided adhesive to the back of all the rainbow colours of cardstock. I think all the coloured cardstock is from Stampin Up. Make sure the pieces are large enough to fit the whole .Pattern Plate Swirls then diecut.
3-I started with purple and adhered it to the white rectangle. Adhere it a little off center to one side. When added the rest of the colours you want to lay them slightly offset from the colour before it. I found it easiest to peel the whole backing off the coloured swirl piece then lay the backing paper over the previous laid piece, line-up how you want that colour to be then slowly pull out the backing paper. I found rolling a brayer over the piece (with a piece of paper over the piece) to get it all stuck down. Repeat with each colour.
4- die cut a white frame buy nesting 2 of the largest rectangles from the Rectangles and Labels Crosshatch set. Cut a clear piece of acetate to fit and add it to the frame, then add some strips of foam adhesive to the back side of the frame.
5- I found this sequin pack at the dollar store, and added a bit of each to the rainbow background and then put the acetate frame over top.

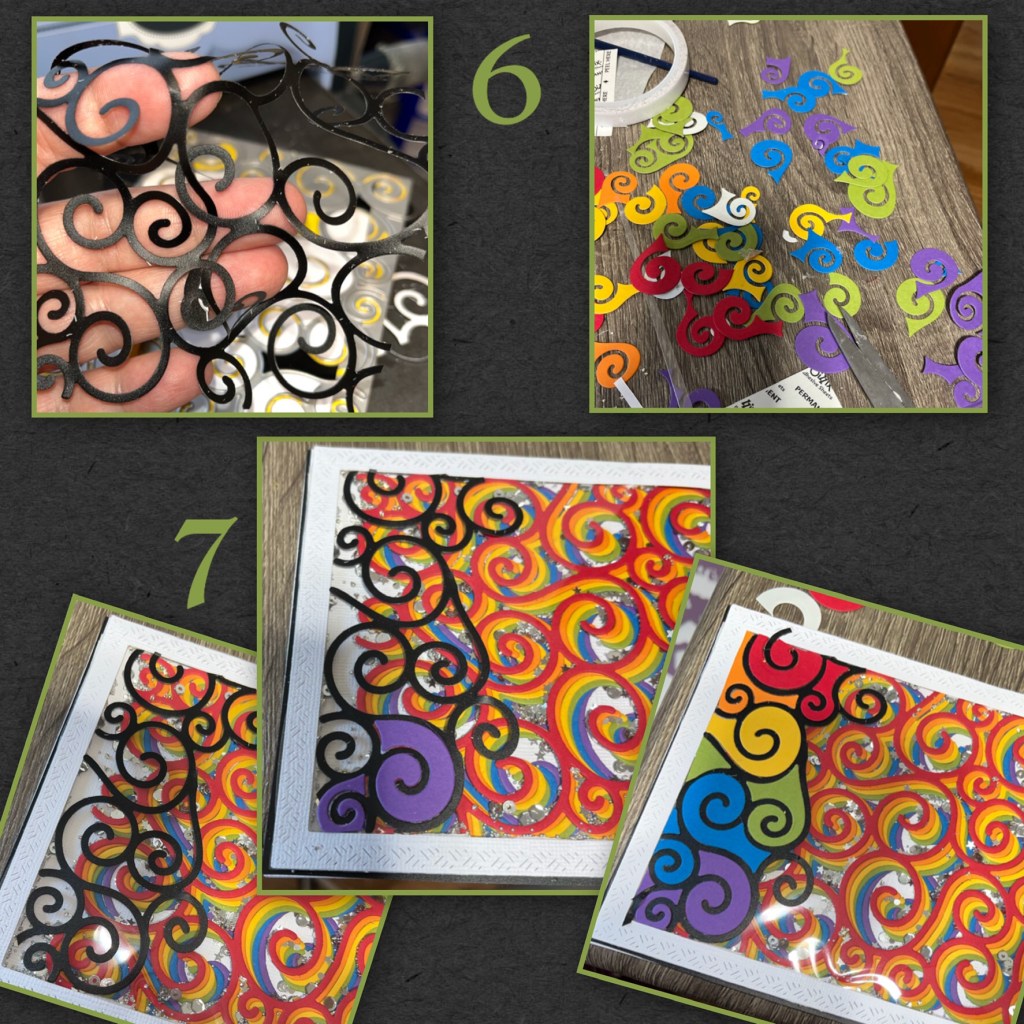
6- I diecut the Pattern Plate Swirls from black chalk board paper with adhesive backing. Trimmed it and added to the left side. When I diecut the coloured swirls I had all these extra pieces.
7- i added some of the extra pieces in rainbow order.
8- I wanted a black frame so I diecut a black frame, this photo shows a chalkboard sticker paper frame, I did end up changing it for a black card stock frame.
9- diecut the card base (dimensions below) I also cut some thin strips of black cardstock. add the thin strips around the shaker frame covering the white foam adhesive. I originally tried using a black marker but it just looked gray I found the black strips give it a much more finished look.
10- I diecut Sending Love from black and white and added to the card front.

11- I die cut another white frame and a white scalloped rectangle using dies from the Rectangles and Labels Crosshatch and added it to the inside of the card.
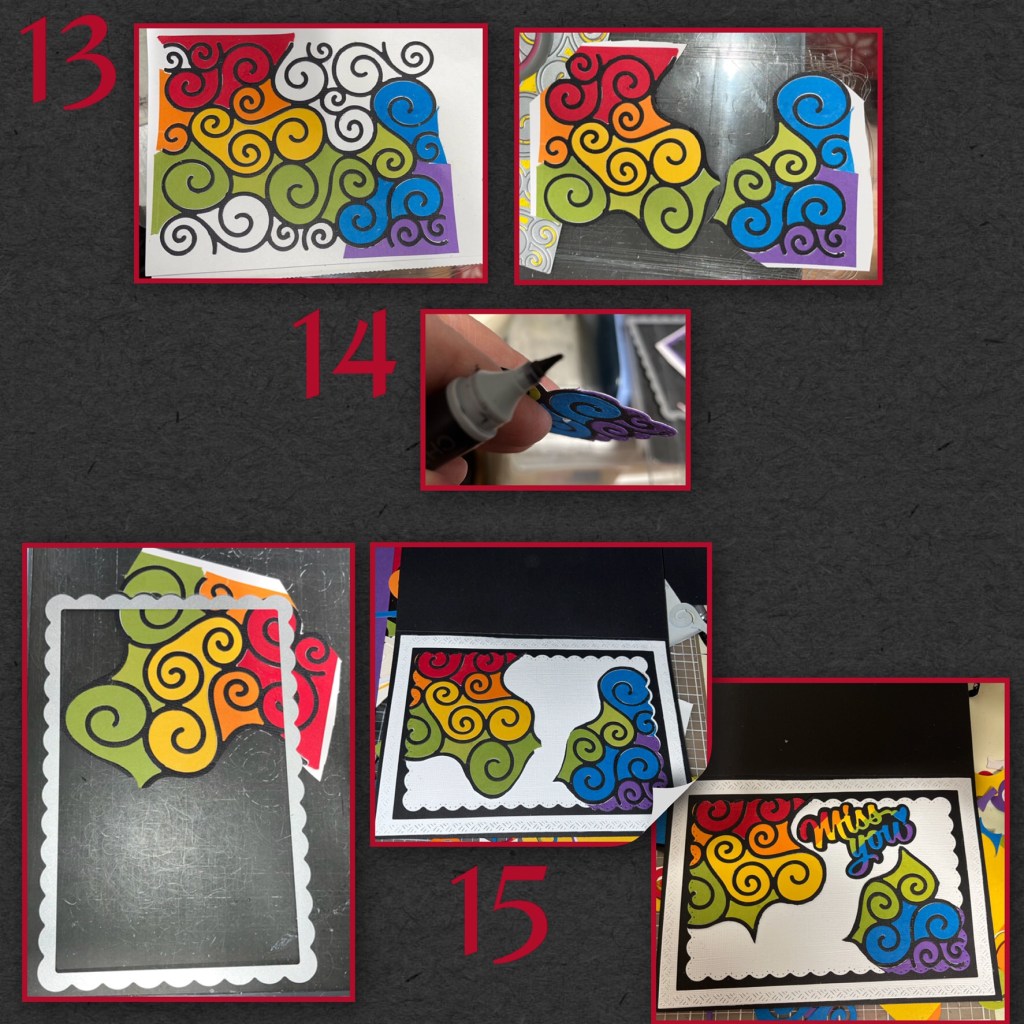
12- adhere thin strips of all the same colours already used to a piece of card stock. Then I die cut “Miss You” from Wordset 14 Hugs Asking sure to add the shadow.

13- Add another black swirl to white card stock, add some of the extra rainbow coloured pieces again and trim.
14- I choose a black marker around the cut edges, it gives it a more finished look.
15- I use the same scallop rectangle to cut the pieces that will be added to the inside. I added one to the top left one to the bottom right I cleaned up some of the edges added the “miss you”.
I was going to finish the car there but then realized the top half of the inside needed a little something something too
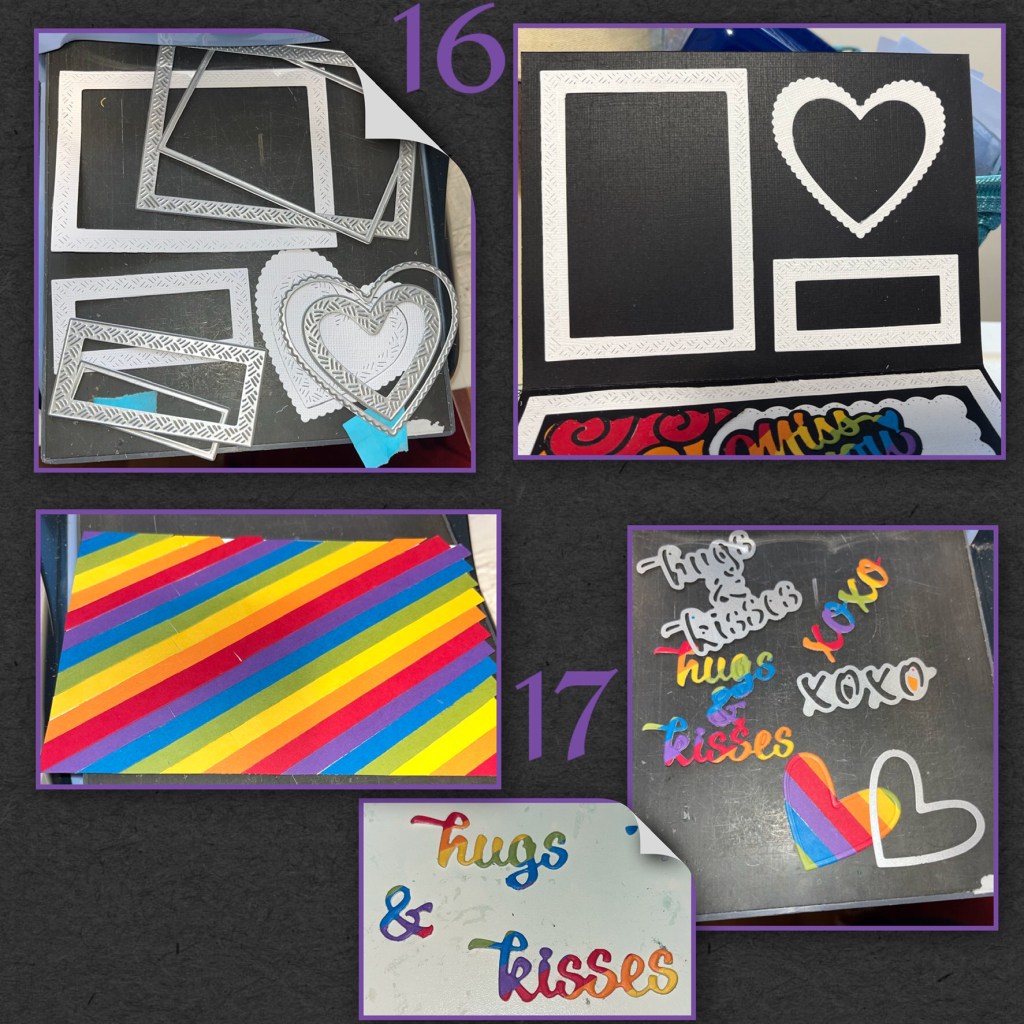
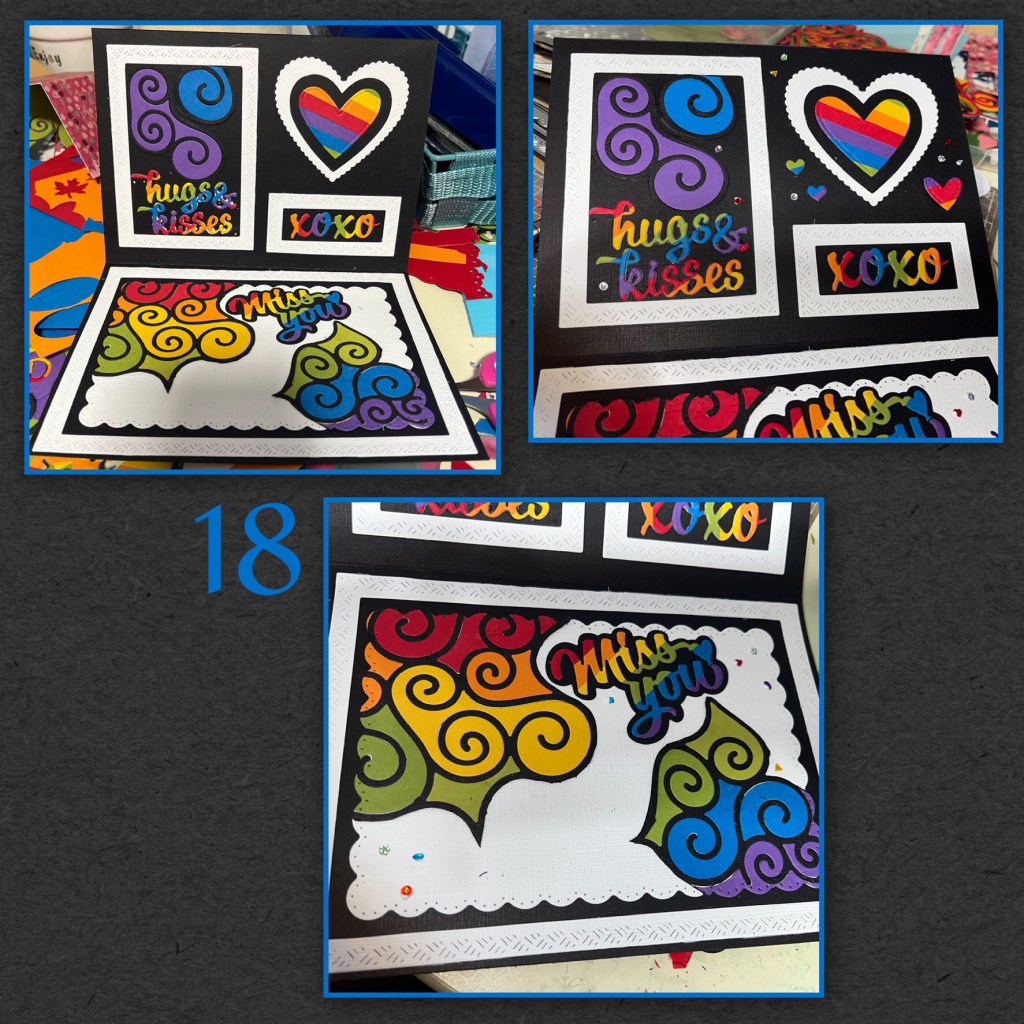
16- I wanted to have three frames, the large one uses rectangles from the Rectangles Crosshatch the smaller rectangle is from the Rectangle and Labels Crosshatch and the hearts are from the Hearts Crosshatch
17- I didn’t hear it more rainbow strips to white card stock and die cut “hugs and kisses” and XOXO from the Word set 9 Love set the heart is from the Hearts Crosshatch set. I trimmed the “hugs and kisses” apart because they would not fit in the space that I had made.
18- add all the pieces as shown. I also added some colour gems and some clear gems, the colour gems, believe it or not came frame a nail kit from the dollar store. I believe the clear gems came from the dollar store as well. To make the orange gem I coloured a clear gem with orange sharpie.

Other Tools used

Such a bright and fun design! Love it. Yum to pineapple!
LikeLiked by 1 person
Love the colors and your step by step tutorial was great!
Yuck for pinneapple.
LikeLiked by 1 person
very colorful and Yum pinapple pizza
LikeLiked by 1 person