

This is my 4th entry for the Craft Roulette card making challenge. Again this is a card I don’t think I would have ever made without being challenged to create within these parameters. The parameters this week were to create a “Peek a Boo” card, colour theme was “first grader”, the element is “Rain” and the random is “Distress edges”. And for those who follow me know it’s a given that the card will also have a pop up mechanism.

All the fun is in the reveal, to see this card in action please check out my FACEBOOK page, feel free to join if you would like to share your own crafty creations. You can also see a video of this card on my INSTAGRAM page.
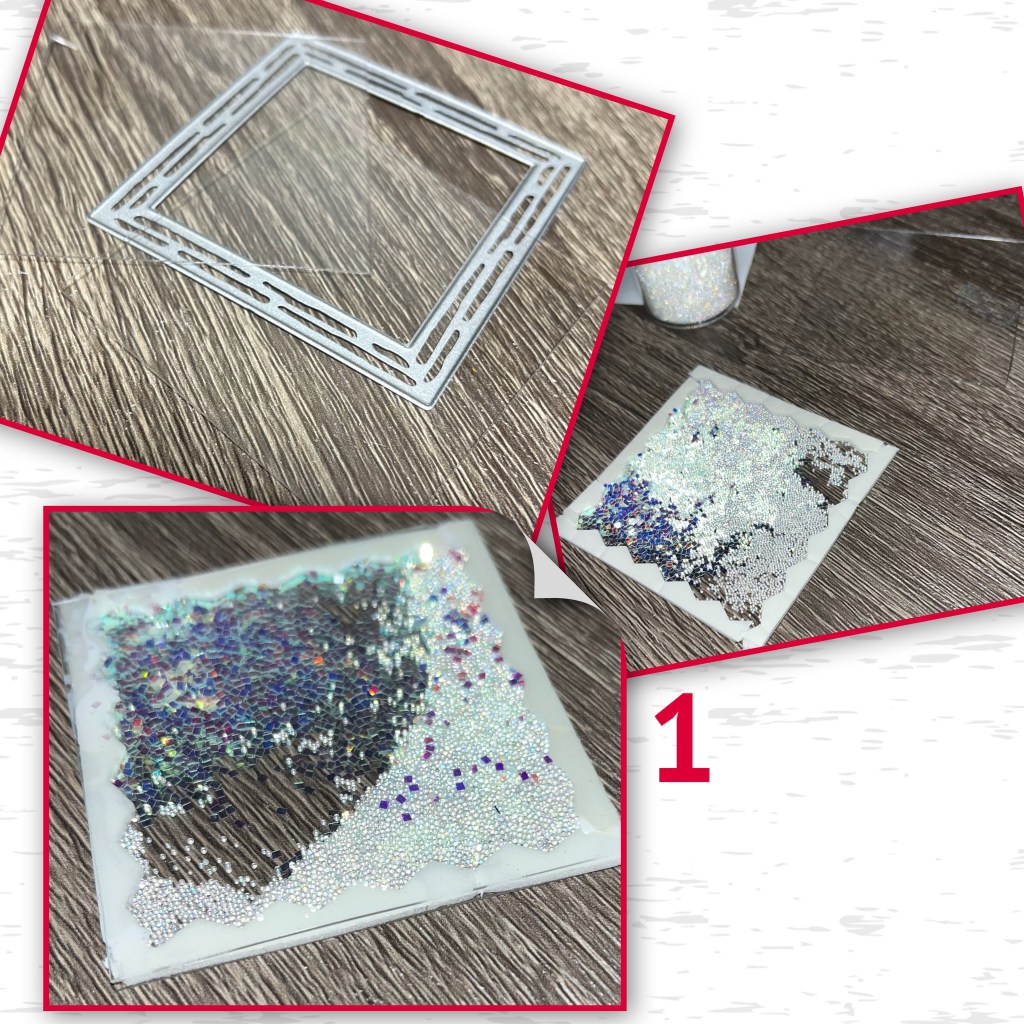
1- I cut 2 pieces of clear plastic so that it would fit inside the Frame die that I was going to use at a later step. Believe it or not but this plastic is from the cover of a Costco Muffin container lol. I used some foam adhesive around the edges of one of the clear squares and filled with itty bitty sequins and micro beads. I added the second clear square to close the shaker box.
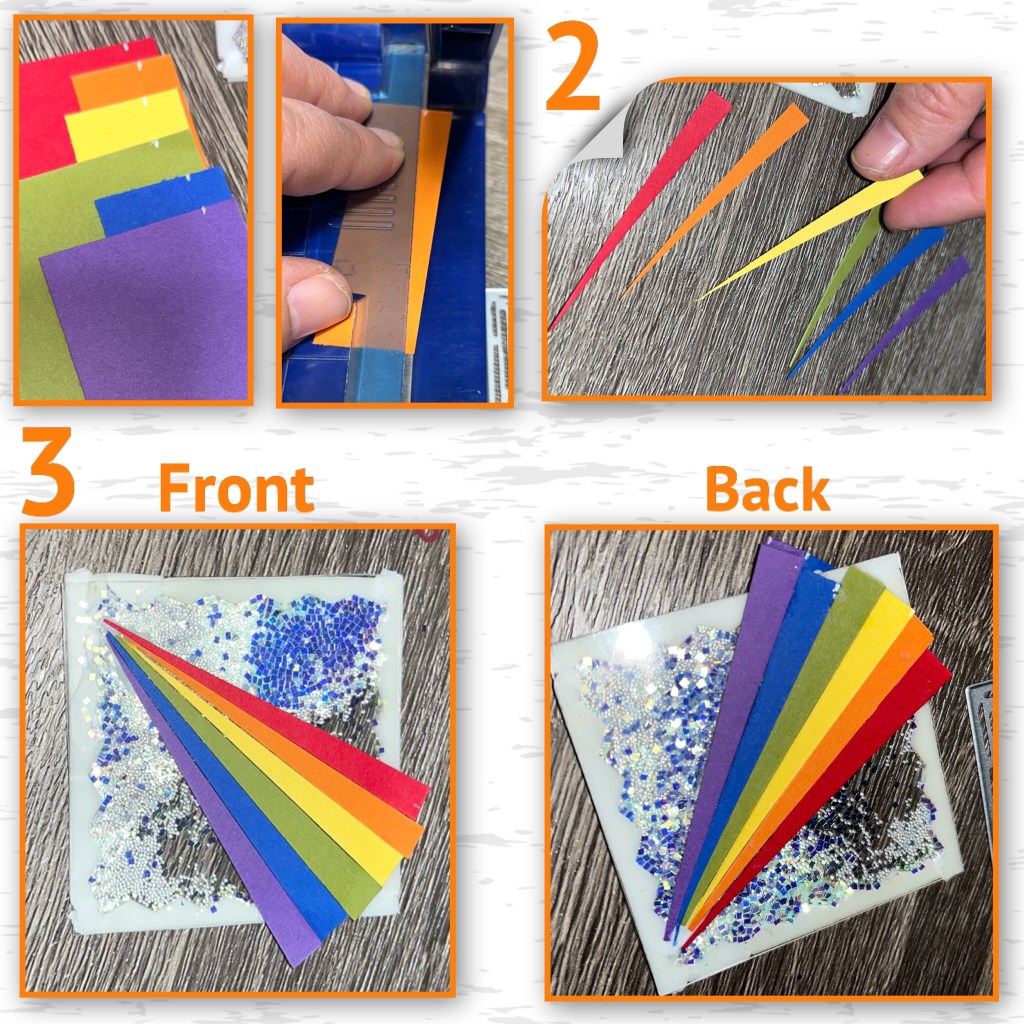
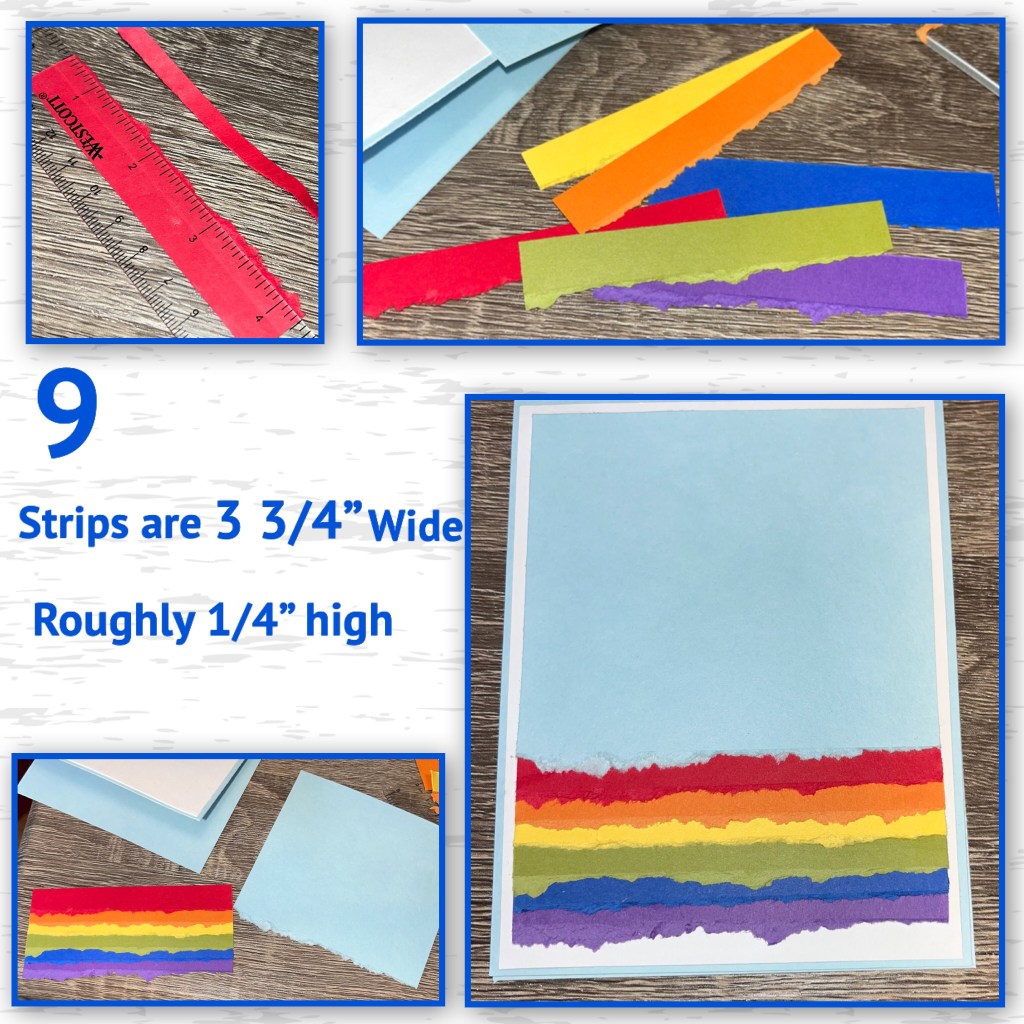
3- I cut the rainbow colours to 3 3/4” long and marked them @ 1/4” I cut them on an angle at the mark to cut them into even sized wedges. Then added them to the front and back of the shaker box as shown. The rainbows will be back to back.
4- i die cut the pieces for the Frame Pull Pop up mechanism (there is a video on the link) . The piece marked with * will not be used the same as the video.
5- diecut 2 large frames using the Frame Pull Pop up from wood grain paper.
6- take the large square * from step 4 and line it up with the mechanism piece. Mark this piece just below the score line from the piece beside it. You can see a pencil tick mark on the photo. Cut on the tick mark and also cut the width to be about as wide as the frame. You will be left with a short strip to attach the framed shaker box to the mechanism piece. If the shaker wasn’t clear on both sides we wouldn’t need to do this step.
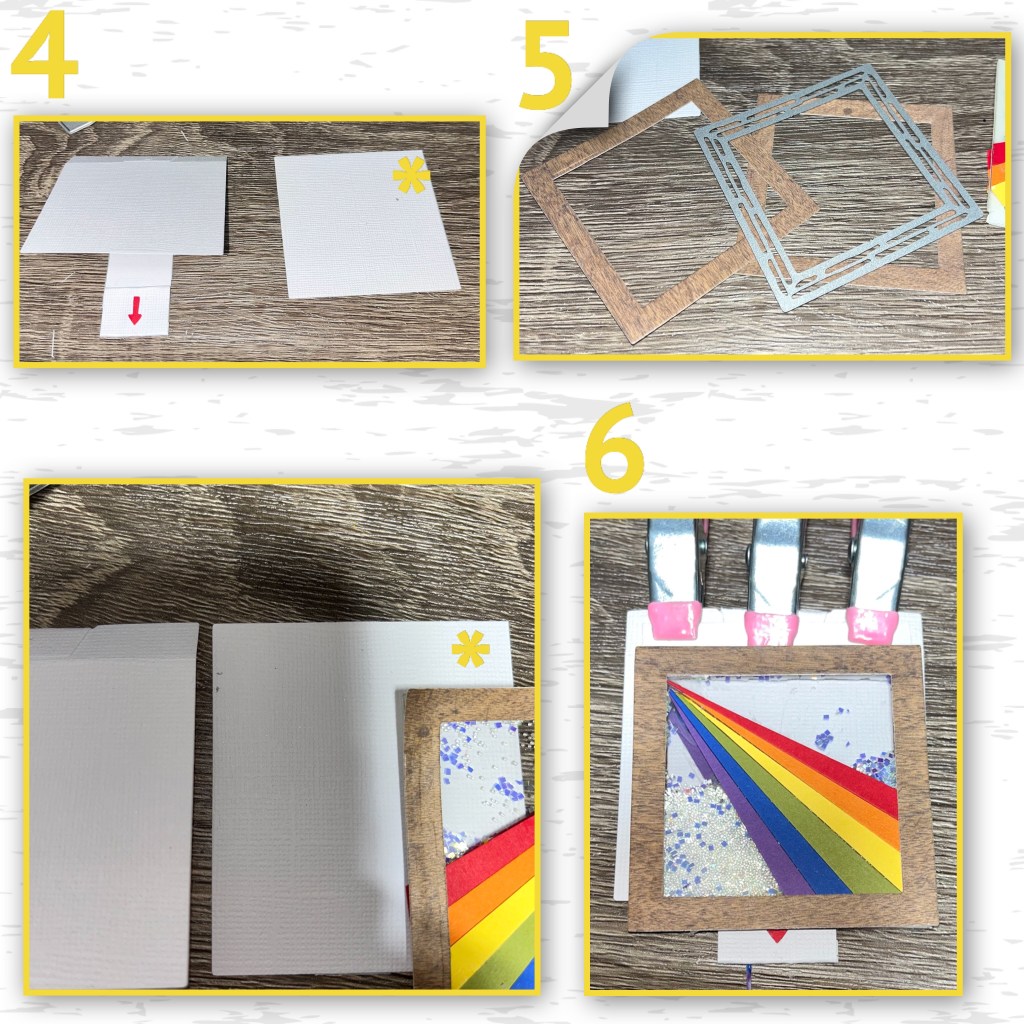
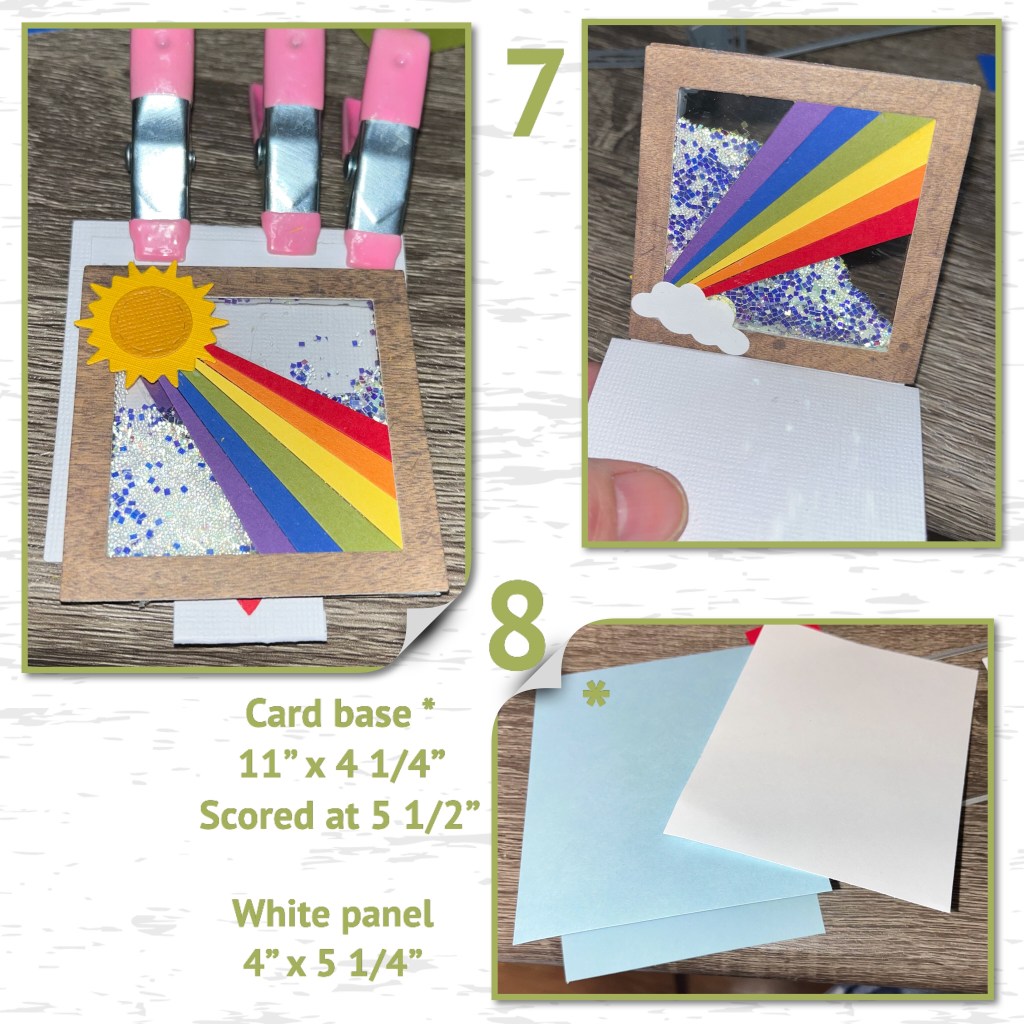
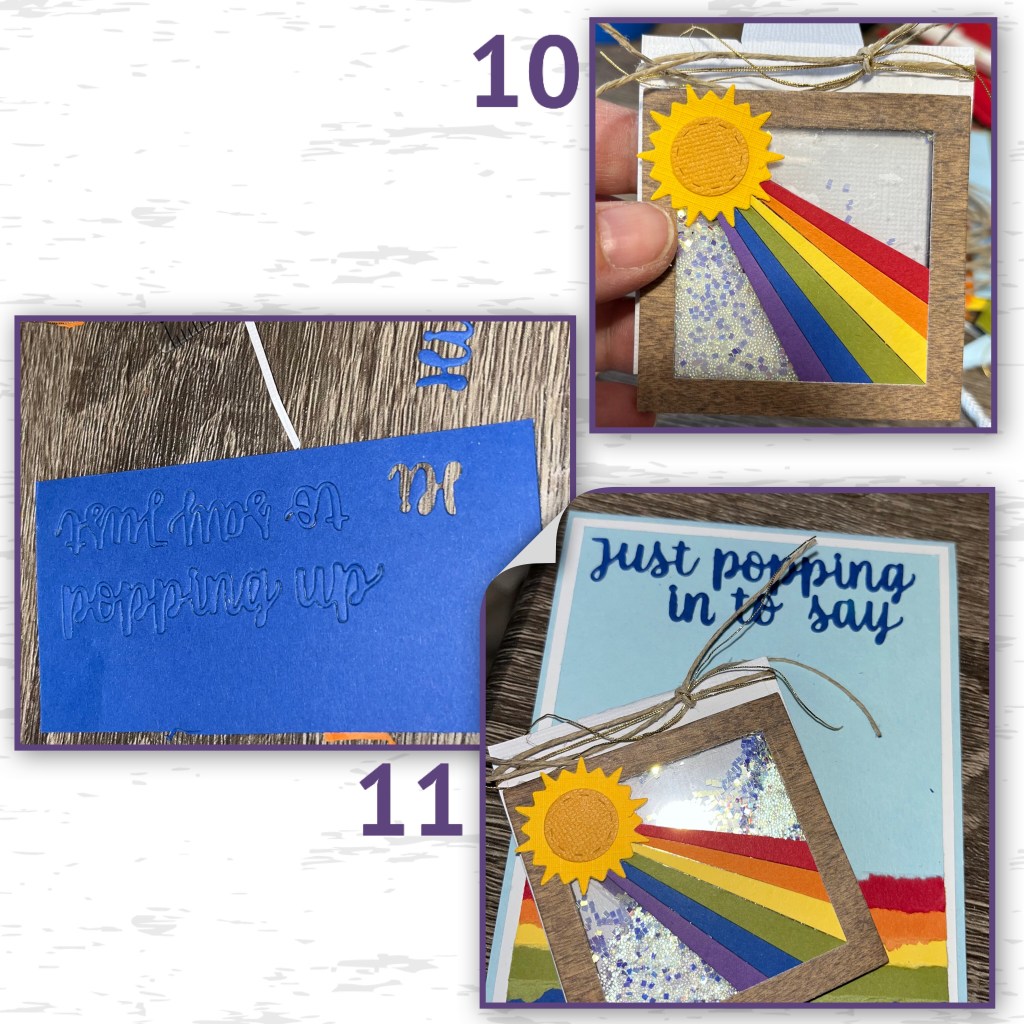
7- the sun is from Tropical scene die set, and the clouds are from the Castle Pop up. When you add the paper frame on the inside, add it after you attach the shaker to the mechanism, then the mechanism piece will be sandwiched between shaker and the frame.
8- cut the card base and white panel- dimensions below.
9- cut the rainbow strips as described below. The sky is the same width as the rainbow, but I ripped it to fit once I saw how much of the space the rainbow took. Add to the card front.
10- the white piece of the mechanism was showing so I wrapped it withba piece of twine and gold thread.
11- die cut the greeting using Word set 4 Just a Note, and add to the card front.
12- staple the mechanism in as shown. Using the a die from the Pull up Frame I added the blue layer. The chick is from the Spring Animals dieset
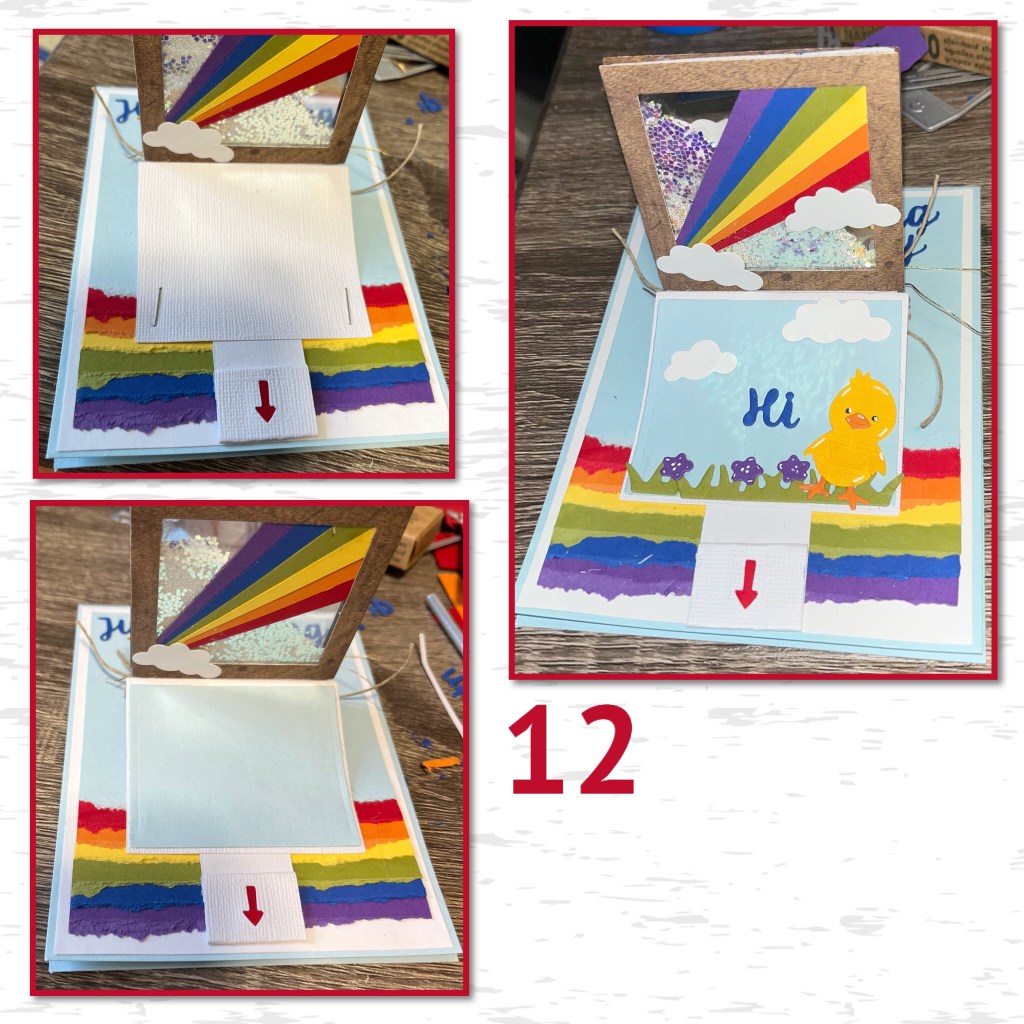
13- i had to cover the staples on the inside so I cut 2 white panels the same as the front.
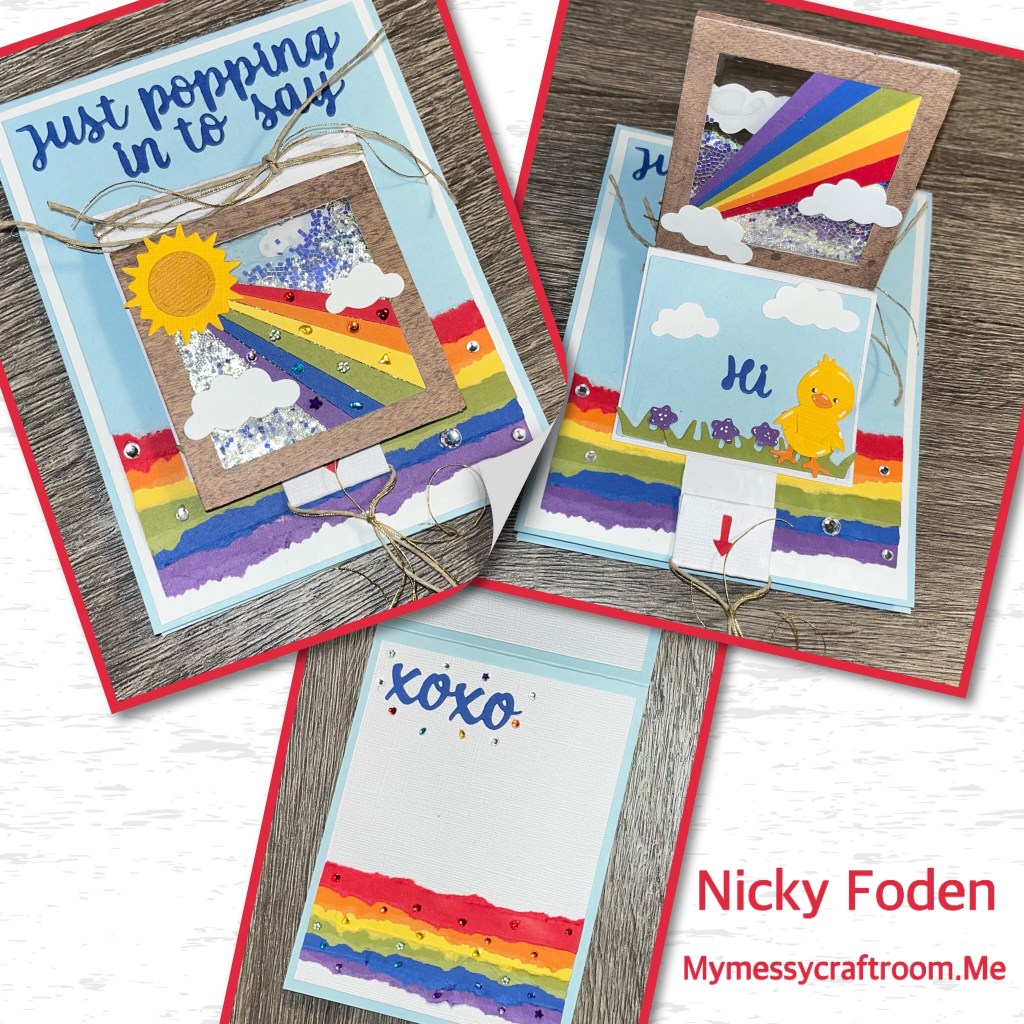
14- I decided to add a rainbow on the inside as well. The xoxo is from Word set 9 Love set.

15- I found the pull tab a little short so I opened it a bit and added a matching piece of twine and gold thread.
16- I decided to add some rainbow coloured bling. I didn’t have orange so I used an orange sharpie to make one. The colorful gems I got from a dollar store nail kit.

Other Tools used

Happy Easter Nicky, love this your attention to detail is always so interesting to follow and how you design and the result… amazing x
LikeLike