

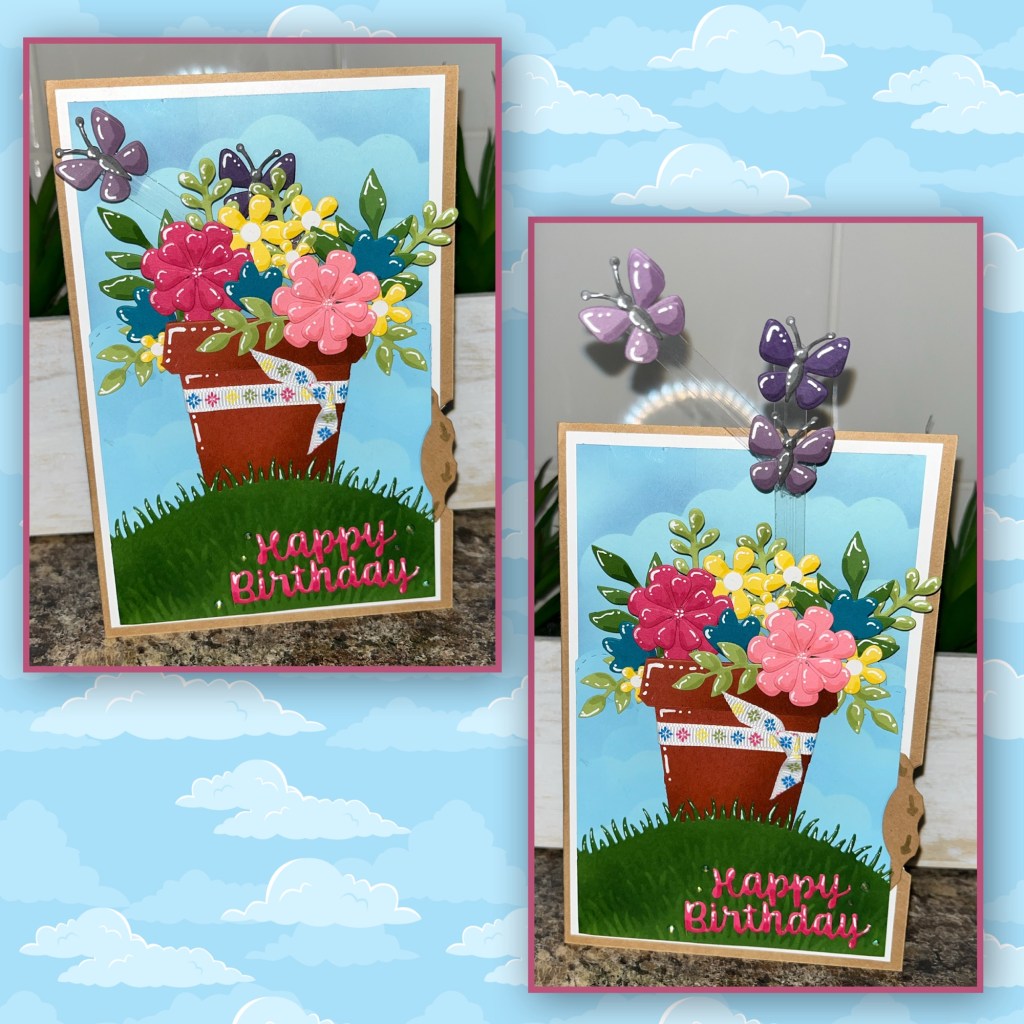
Hello crafty crafters, today is the day, the Karen Burniston June release, and let me tell you it is such a fun release. I didn’t even know where to start and what to share first. I thought this card was a bright and fun so I am sharing it first. But check out all these awesome dies, and stamps!!!!⬇️⬇️⬇️⬇️⬇️

And to see Karen’s preview with these dies in action check THIS VIDEO
To animate the butterflies on this card I used the new Whirly Wheel. When you turn the wheel the butterflies go up and around, it’s so cool.

All the fun is in the reveal, to see this card in action please check out my FACEBOOK page, feel free to join if you would like to share your own crafty creations. You can also see a video of this card on my INSTAGRAM page.
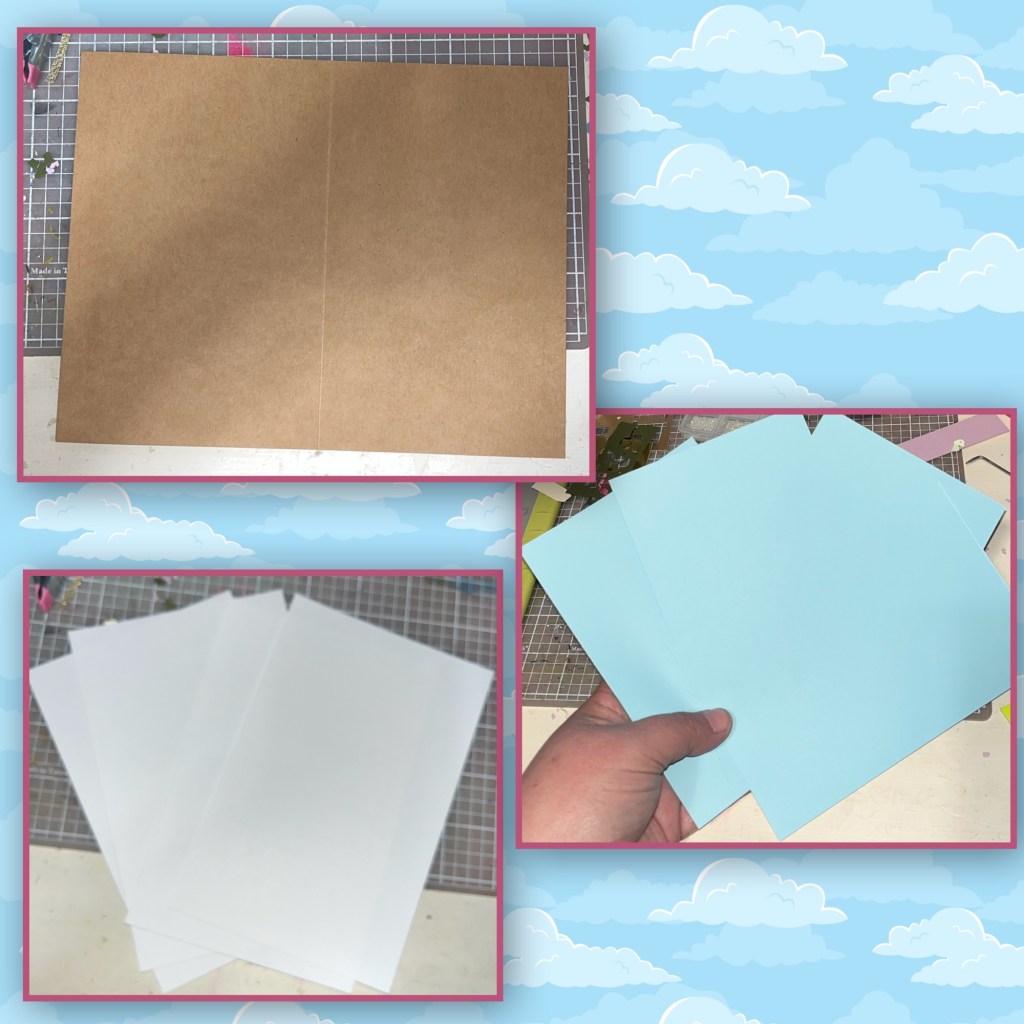
This post will be a little different. Typically I give the dimensions of all the piece that I cut (card base and panels) but I gave this card to my daughter and I lost my notes. But exact measurements aren’t really needed for the card base anyway. It’s smaller than a 5”x 7”, I think it’s 4 1/2” x 6” side fold card. The white panels are 1/4” smaller that the card front and the blue panels are 1/4” smaller than the white panels.
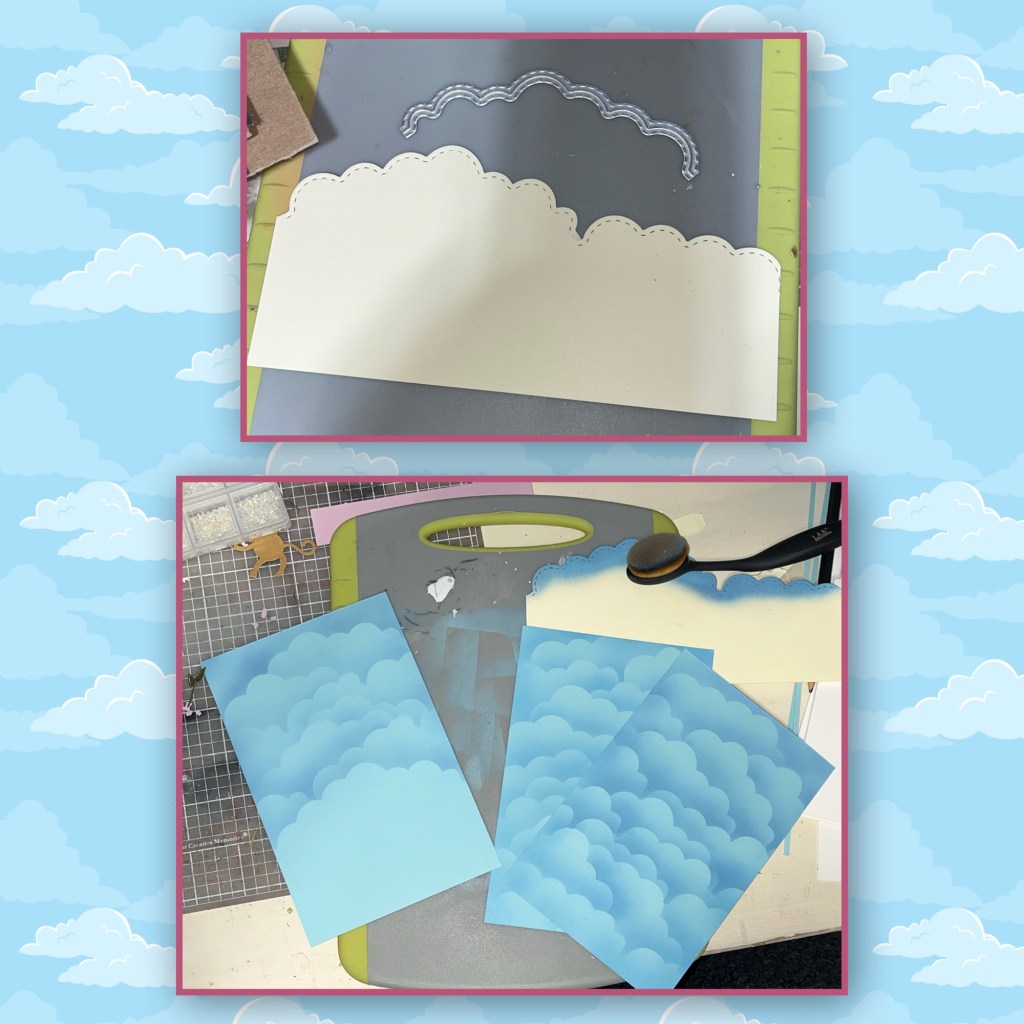
I used the new Curved Edges to make a stencil, which I used to brush on a cloud scene background. For the panels that will be on the inside I covered top to bottom. For the panel on the front, I only covered 3/4 of it. I did not bother adding clouds to the back panel. To brush on the ink, I started from the top and brushed across the top of the stencil, moving the stencil down with each layer.
I glued the blue panels to the white panels. But because I have so many panels with layers I know that they die that cuts the half circle out of the side will never cut through it all so I have to do this in stages. I marked 2 inches up from the lower right side and laid down the half circle and marked it. I laid down the first layered panel and used post it tape to hold it in place then diecut.
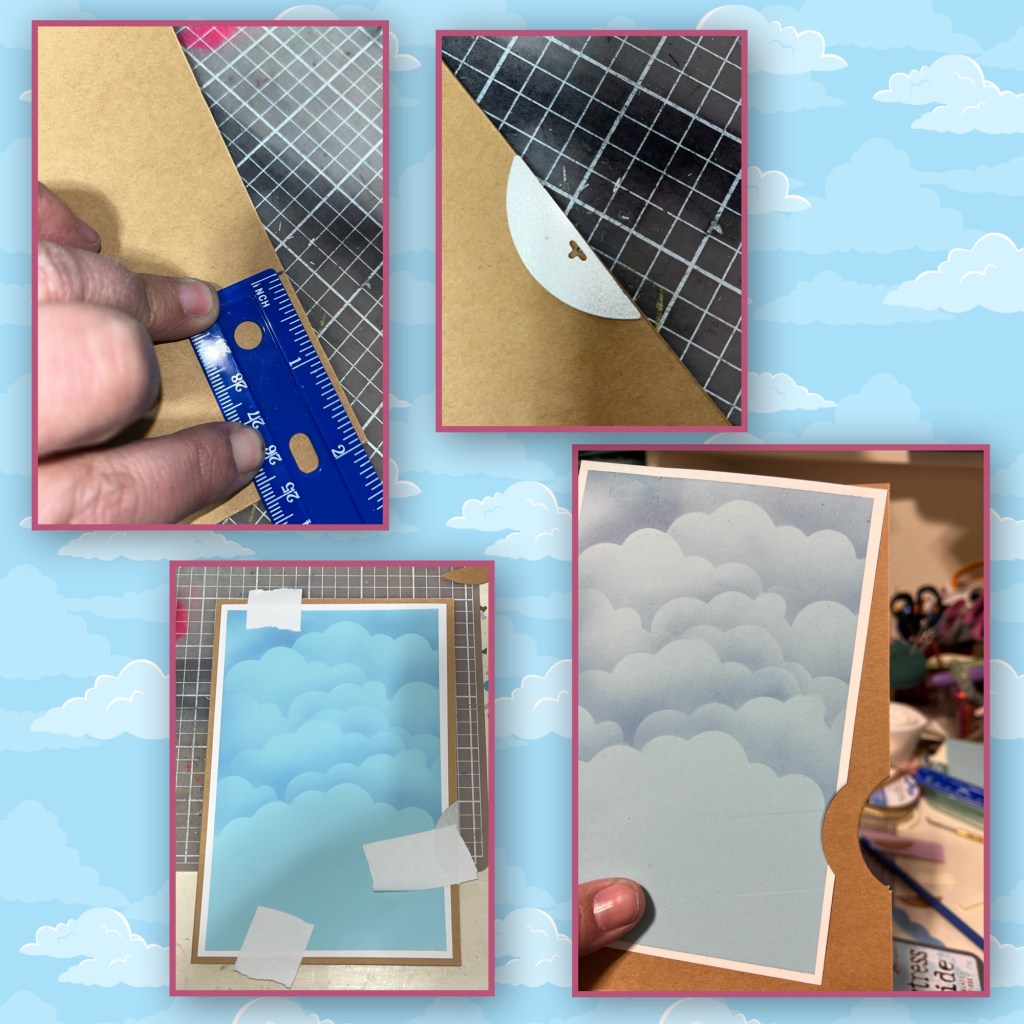
I repeated the same steps with the other three panels. Lining them up where they’re supposed to go, taping them down, and then making sure the half circle die is lined up perfectly with the original slot. Then added all four panels to the card base.

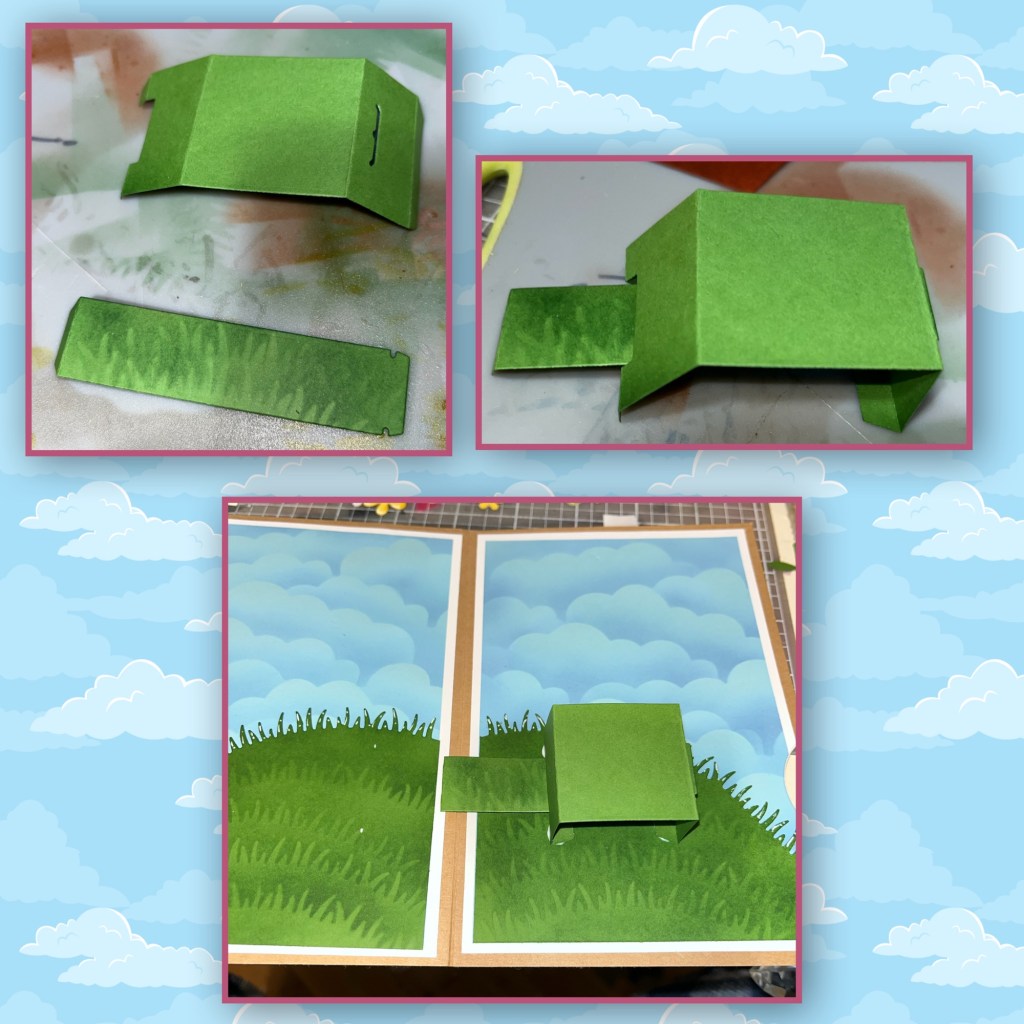
Using the curved edges again, I cut another panel the same width as the original blue panel. Brushed clouds on it as well. This will be the panel that covers the Whirly Wheel. I lined it up with the original base where it is going to go, and I diecut a half circle piece out of it as well it’s just a sliver on this panel.

I cut out the mechanism pieces for the Whirly Wheel. The arms I cut out of acetate. It’s hard to see, but I cut out two arms. I used the stencil feature in the die to add the arrows to the wheel. Karen will have a full video tutorial shortly. The little circle with the hole in it gets added to the back using the little tabs that are cut in the middle of the wheel. The first arm is added to the hole from the front, using the little tabs at the end of the arm. To add the mechanism to the card just add a little glue to the little circle on the back only, and place it next to the side cut out. Before adding the cover panel make sure the hole for the arm is at the bottom of the wheel.
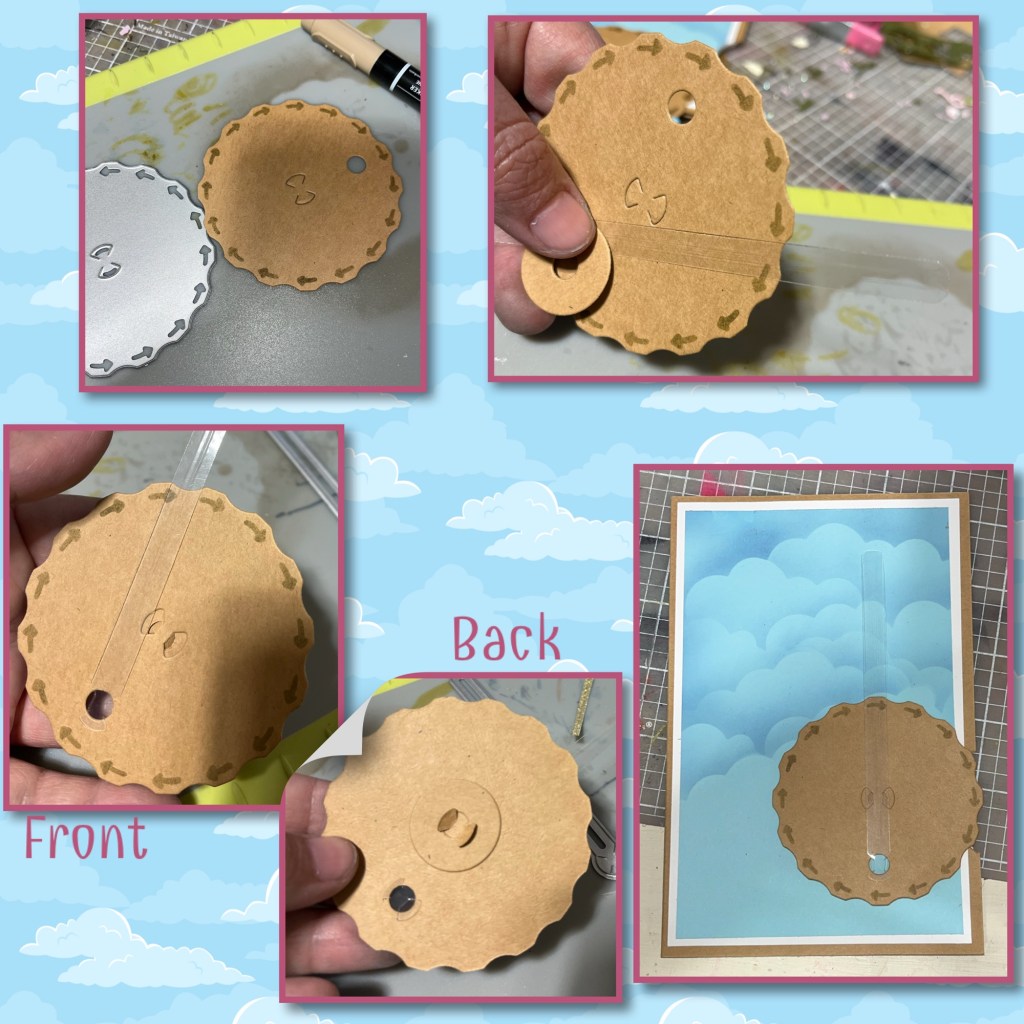
There is a die in the Whirly Wheel that makes a little band. I’m going to use this to support the arm, so it doesn’t flop all over. I added foam adhesive to the sides of the panel and the bottom of the card making sure to not obstruct the wheel at all. When adding in the little band, I have it slightly behind the cloud, make sure the acetate arm is through the band before you glue it in. 

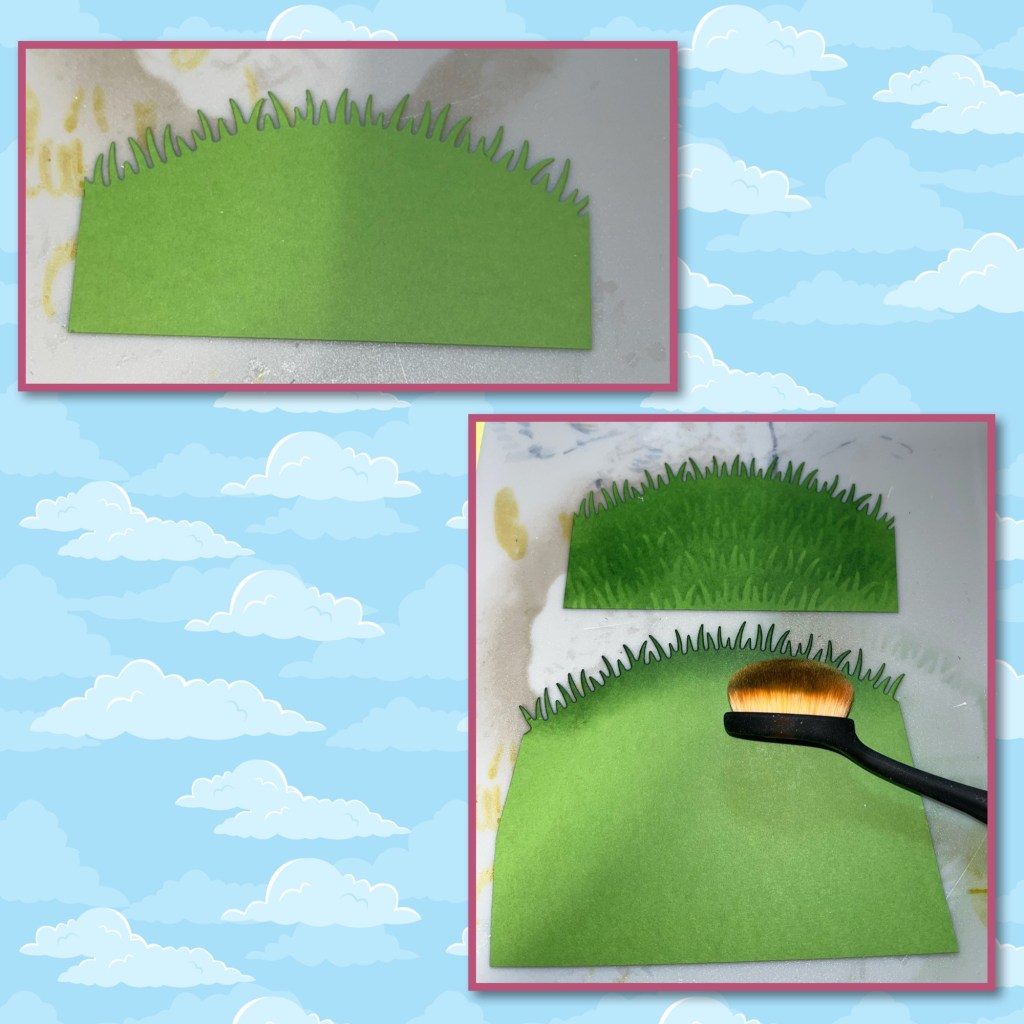
Using the Curved Edges I diecut the grass hill. I also made a grass stencil to brush grass onto the hill. I started from the top and worked my way down.
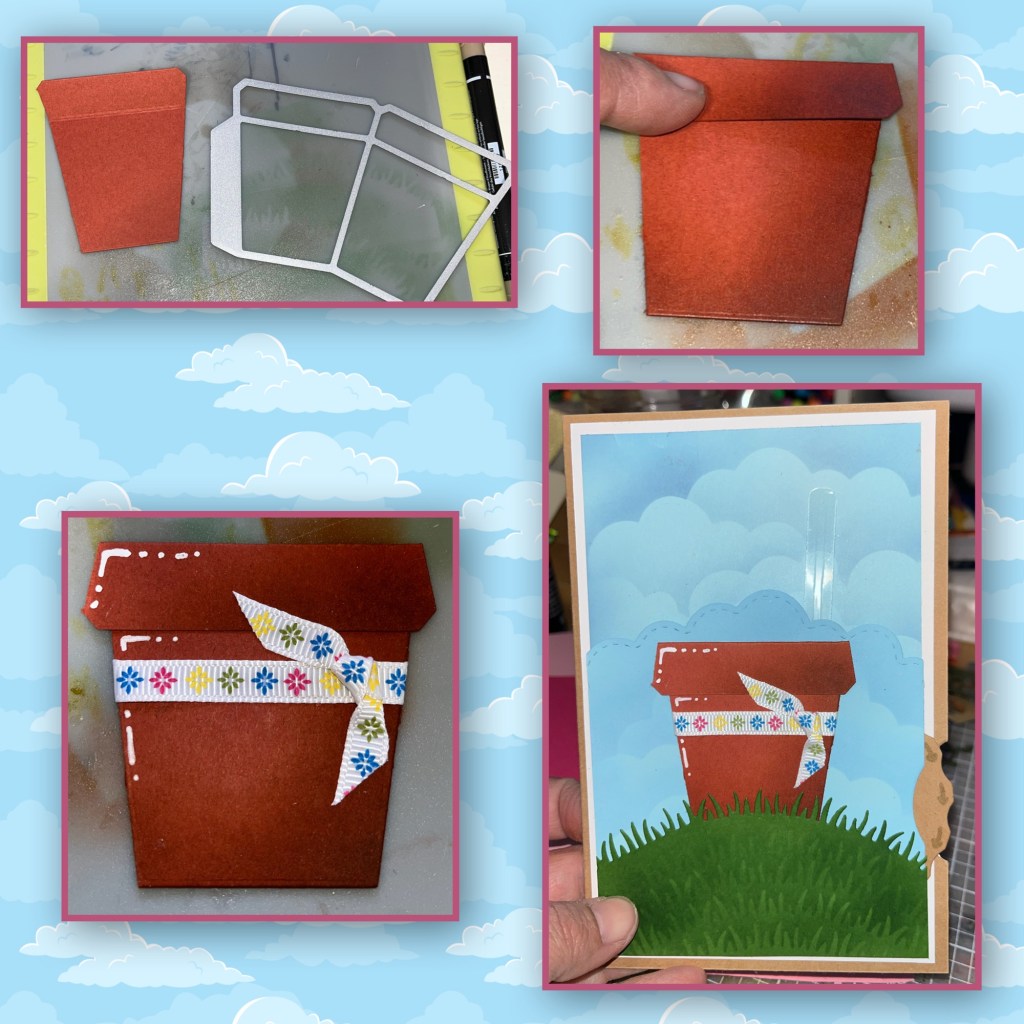
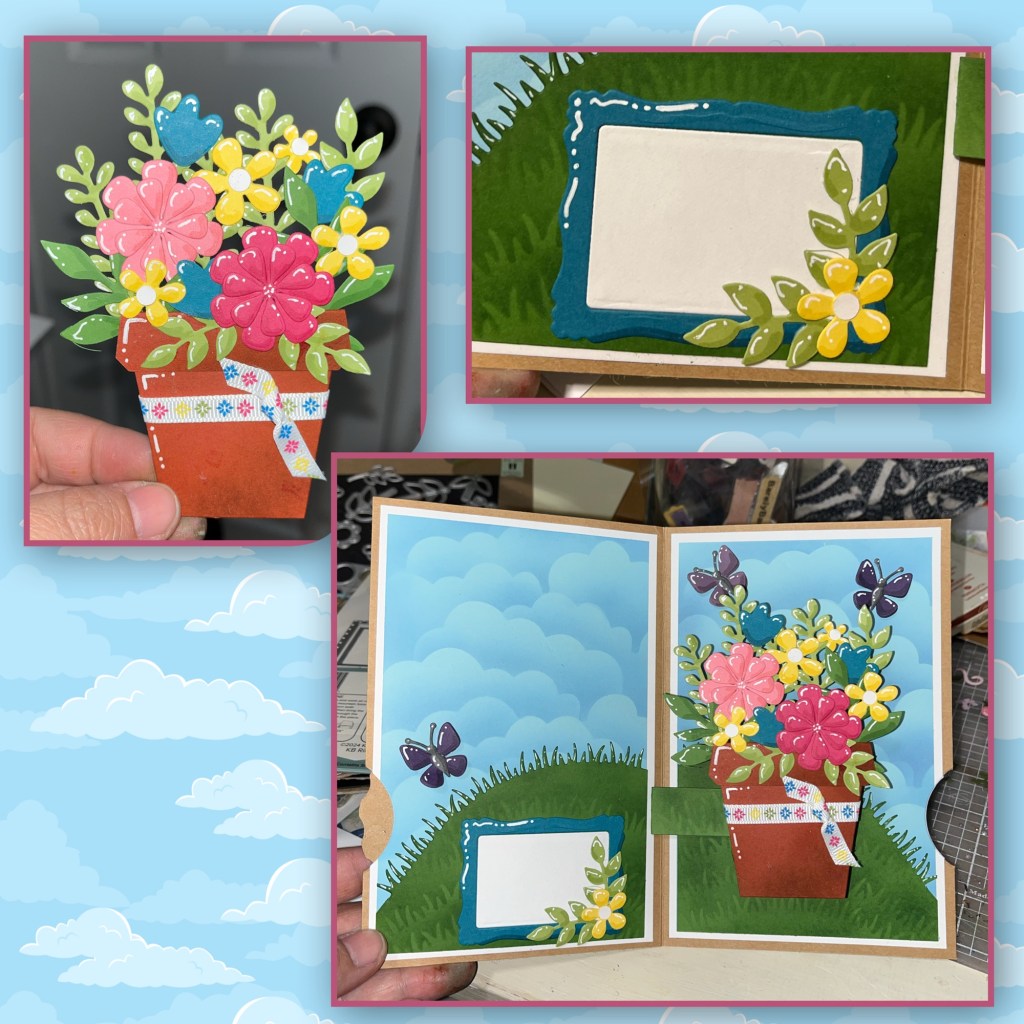
I diecut a flower pot from the Flower Pot Pop Up, I cut out one and added shading with a darker ink and a brush. I added shading to the bottom right of the pot, and the bottom right of the top lip of the pot. I added highlights with a white Gelly Roll pen. I found this pretty ribbon and tied it around the pot before adding the pot to the hill. I slipped it behind the grass. I made 2 of these flower pots, put one aside.
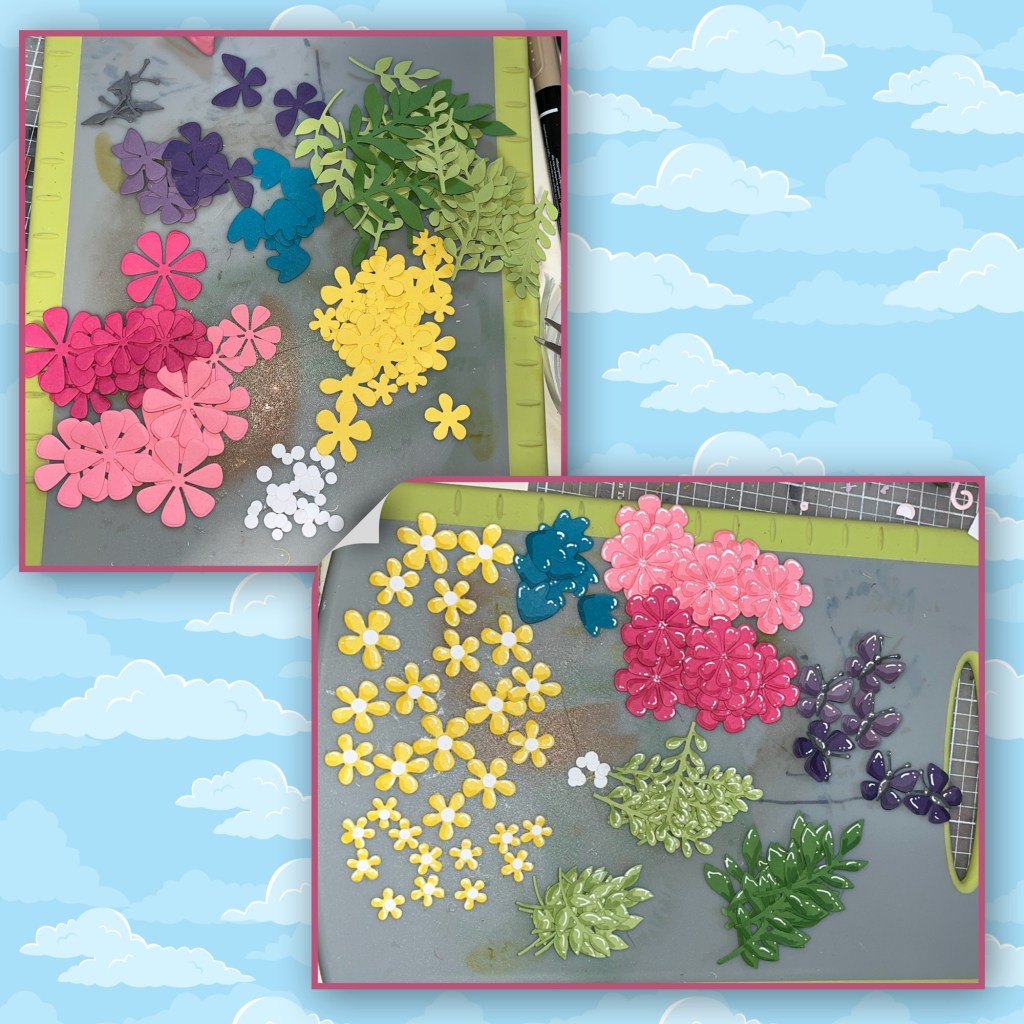
When choosing flower colors, I decided to match them with the little flowers on the ribbon. I die cut the flowers, butterflies, and leaves from the Flower Pot Pop up, The Flower Pot Add On, and the Fun Flowers. I assembled and I added shading with a Versa Mark Marker, and highlights with a white Gelly Roll pen
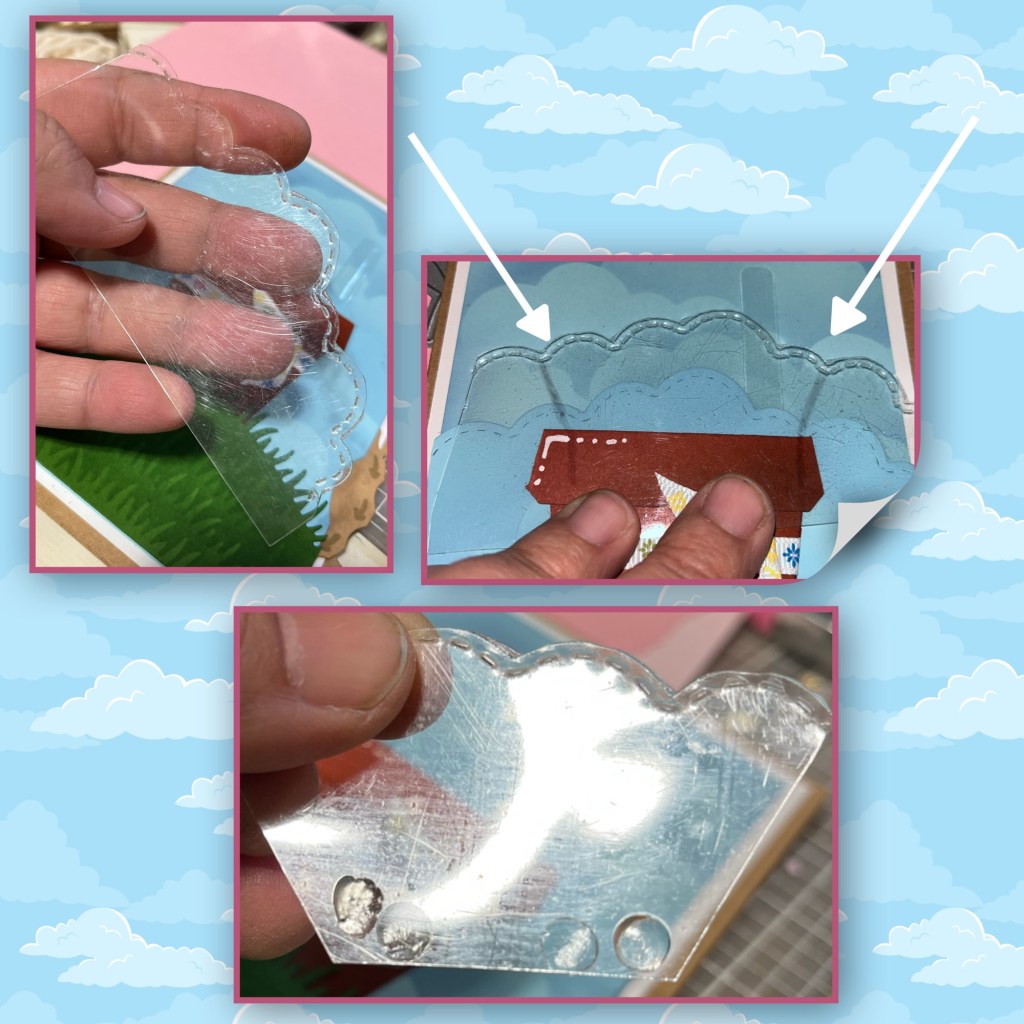
I had a feeling that if I just added the flowers to the flower pot they could cause a catch point so it cut out the Curved Clouds from Acetate, marked it where to trim it and cut the sides off. I added glue dots to the front and back snuck it in between the pot and the top of the cover panel. It will come out higher than the original cover panel by a couple inches.
I added the flowers and leaves to the acetate. Ok I missed a a couple of pics. I added a butterfly to the end of the acetate arm. I took the second arm and cut it in half. I connected the 1/2 arm to the main arm, going out in an angle to the left. Make sure when you glue down the second arm to make sure that when the wheel spins it doesn’t get hung up in the little band. I put a butterfly at the end of the second arm and over the spot where the 2 arms connect. If you’re using acetate, it is best to use glue dots. I added Happy Birthday from the Word Set 2-Birthdays. I added shading with a Versa Mark Marker, and highlights with a white Gelly Roll pen

This photo shows where the butterflies are when the are all the way in, the second photo shows where the butterflies are when all the way out. The bottom purple butterfly is where the arms connect.
Now for the inside. I cut two green panels the same width as the blue panels, and marked just below where the side cut out is. I used the grass die again and cut the hill as shown. I also stencilled grass onto these pieces. Add them to the inside of the card.

I cut out the mechanism pieces from the Postal Pop Up, added grass to the arm and assemble. Add to the card. (Karen has a video tutorial on the product page at the link ⬆️ )
Add flowers to the second flower pot and add to the mechanism. I made this cute little signature block using the frame from the Whirly Wheel. Add all the pieces to the card. I also added a couple extra butterflies.

Other Tools used

Nicky, I love butterflies! Thank you for your creative inspiration with each and every project you make!
LikeLiked by 1 person