

It’s been a few weeks, but I finally get to play an episode of Craft Roulette. I got to have fun using a few of the new diesets so this week is double the fun. Here are this weeks parameters

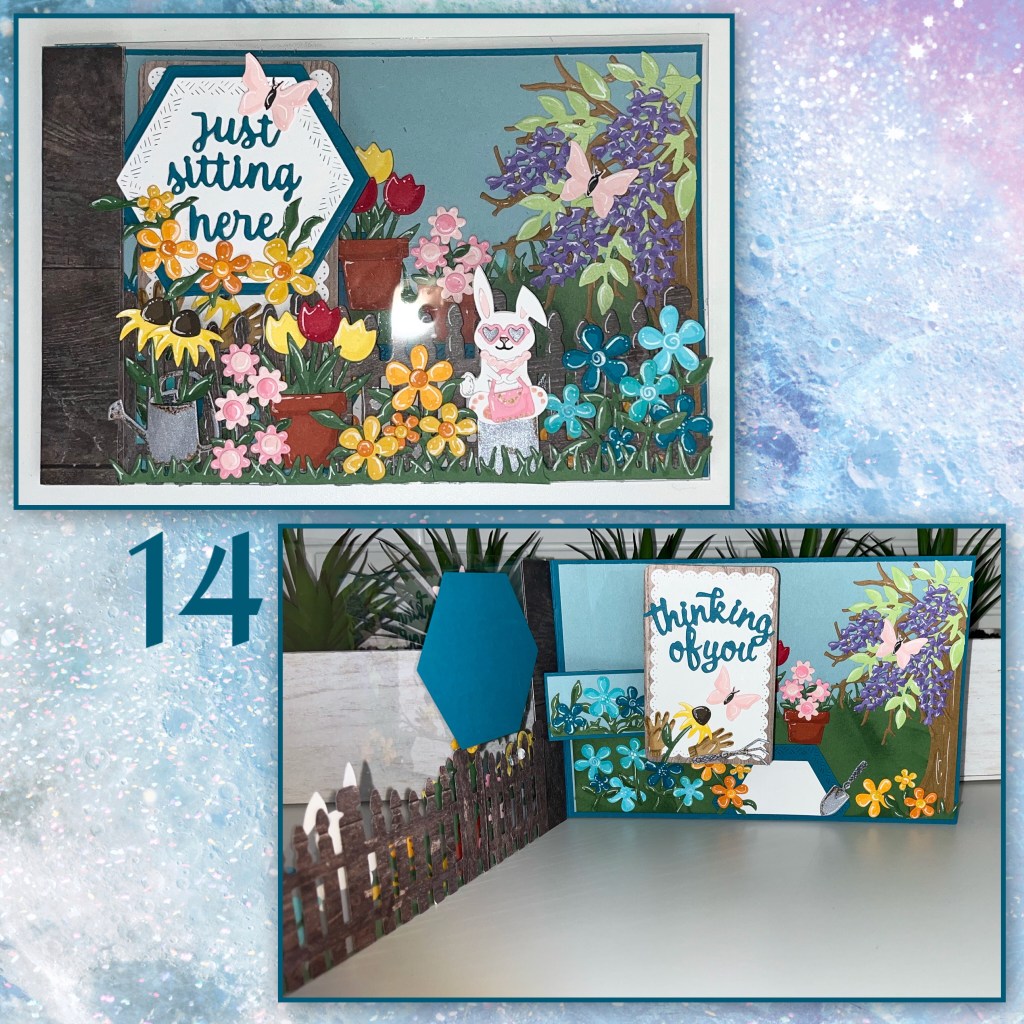
For see through I used clear plastic for the front, colours are Rustic Garden, so I made the whole card a garden. For fashion I dolled up my bunny, and I have hexagons on the front and 1/2 a hexagon on the inside for writing a message.
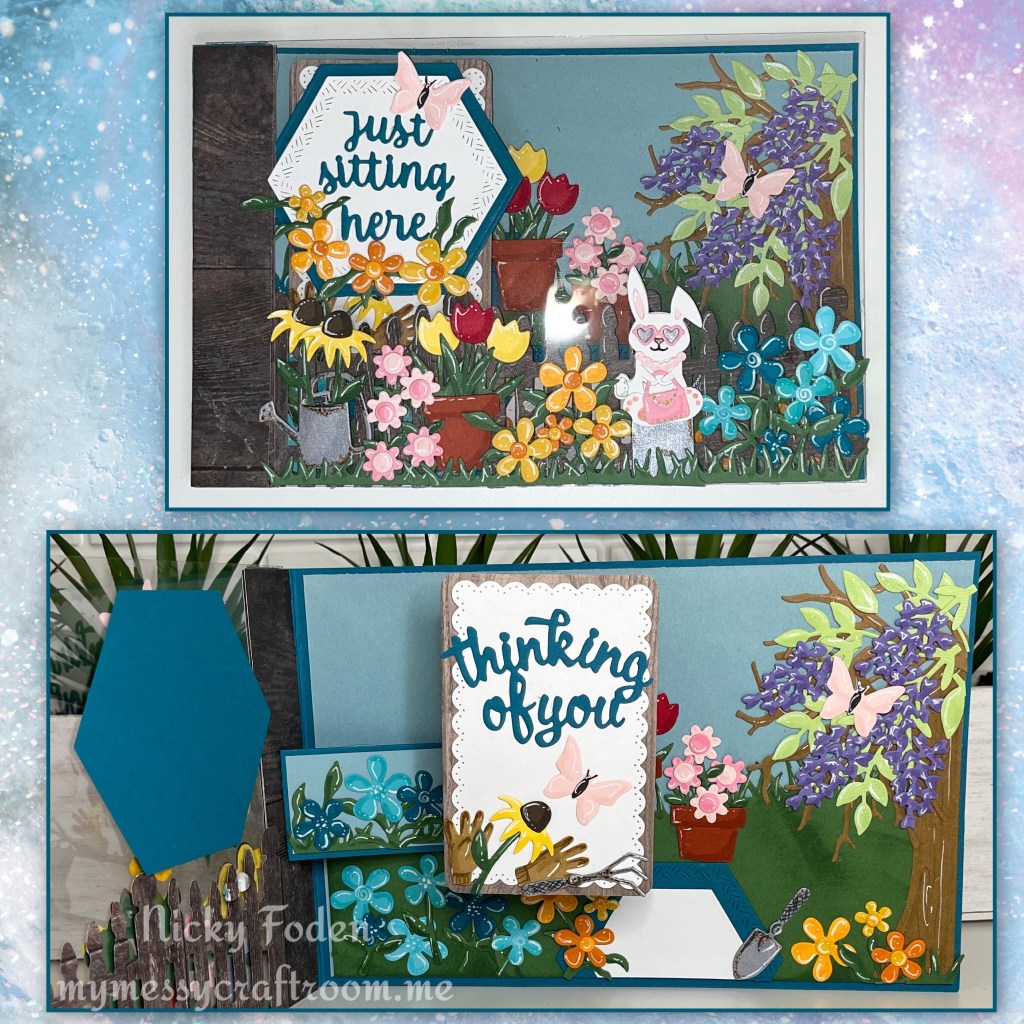
All the fun is in the reveal, to see this card in action please check out my FACEBOOK page, feel free to join if you would like to share your own crafty creations. You can also see a video of this card on my INSTAGRAM page.
I’m sorry my photos kind of suck, and I forgot to take a few but I’ll lo my best
1- die cut pieces from the Fence add on , the fence is cut from a wood grain patterned paper, flowers and greenery. Fun Flowers, and the Garden charms , I also dug out some flowers that I had precut.
Not shown, I coloured the right side with Versa Marker, and the left with a white gel pen, for shadows, and highlights. (You will see in the photos further down)
2- I used the Long Nature Edges to cut this grassy hill for the inside. I rubbed Versa Mark ink on it.

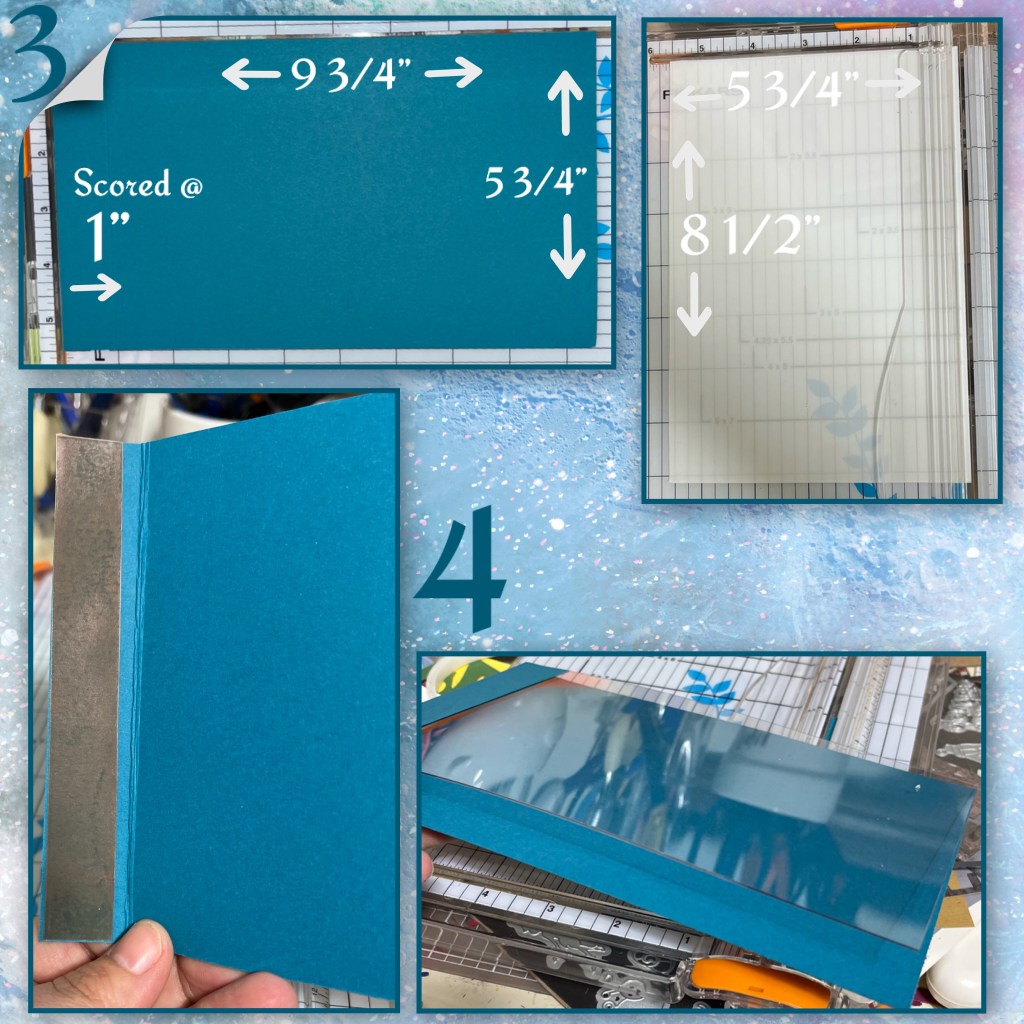
3- cut the card base as shown. The photo on the right is the plastic with the liner still on. It’s a couple of millimeters thick, I’m not sure where I got it but I know similar products can be found on Amazon.
4- I used Red Liner adhesive to adhere the plastic to the card base.
5- I cut a piece of blue for the inside (dimensions below) I added it to the inside of the card with the grass that I have previously cut out.
6- I cut out 2 borders that match the fence and added them to the front left, and inside to cover where the plastic meets the cardbase.

7- I die cut the mechanism for the Rockin Rectangle ( Karen has assembly video at the link)

8- I took sticky strip and added it only to the bottom FRONT of the fence, and I adhered it to the inside of the clear plastic, facing out.
9- I die cut 2 more pieces from the Rockin Rectangle in a lighter shade of wood grain. The bigger piece is the main rectangle and the smaller piece is for the support.

10- I diecut Word set 10 Thinking of You, a few Hexagon Crosshatch pieces, and the white scallop rectangle is from the Rockin Rectangle as well. Add the pieces as shown, “Thinking of You” is on the rectangle that is attached to the Rockin Rectangle.
11- add Red Liner adhesive to the back of the white hexagon, and the front of the blue hexagon. The blue hexagon will be added to the inside facing out. And white one will be centred over the blue one on the front

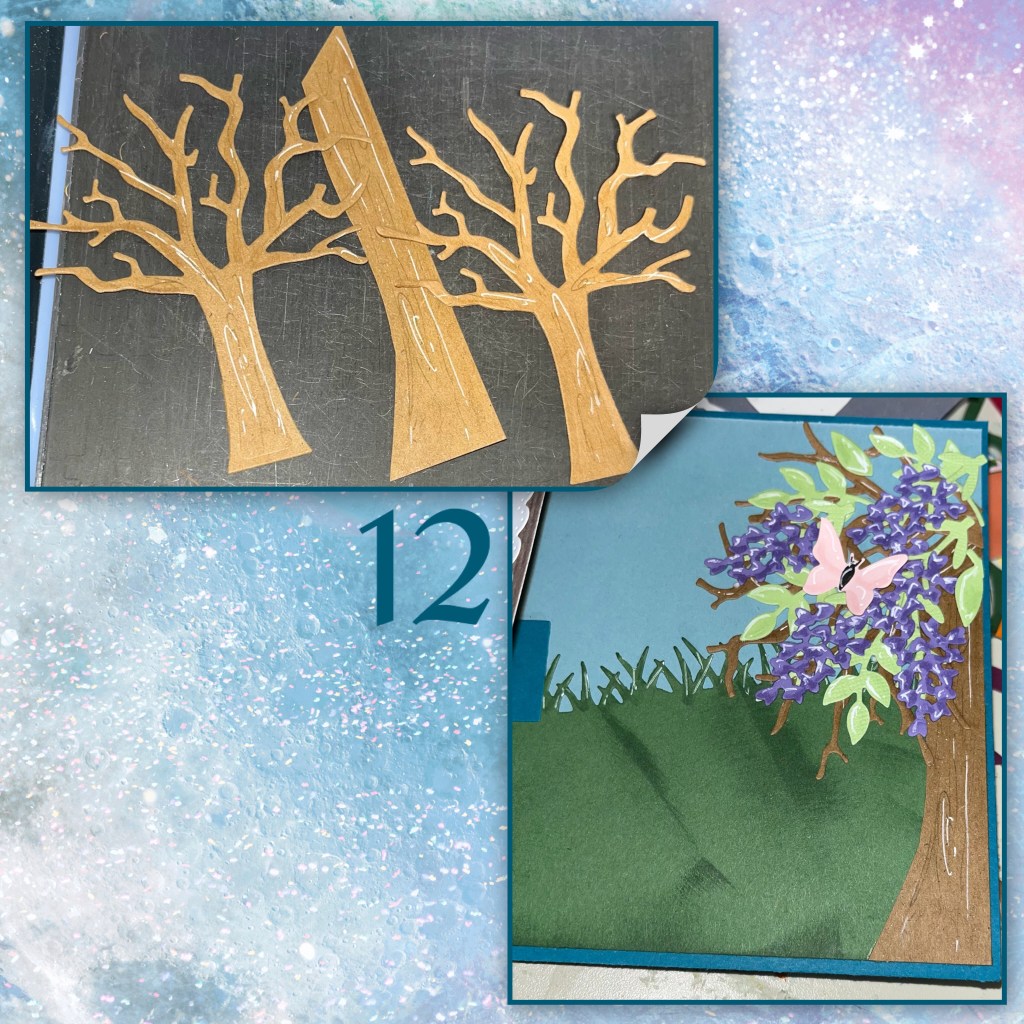
12- I cut a couple of trees from the Tree pop up, and a free I handed the trunk, also added a few pen details. I add the tree pieces and and the purple flowers , leaves and butterfly to make a lilac tree.
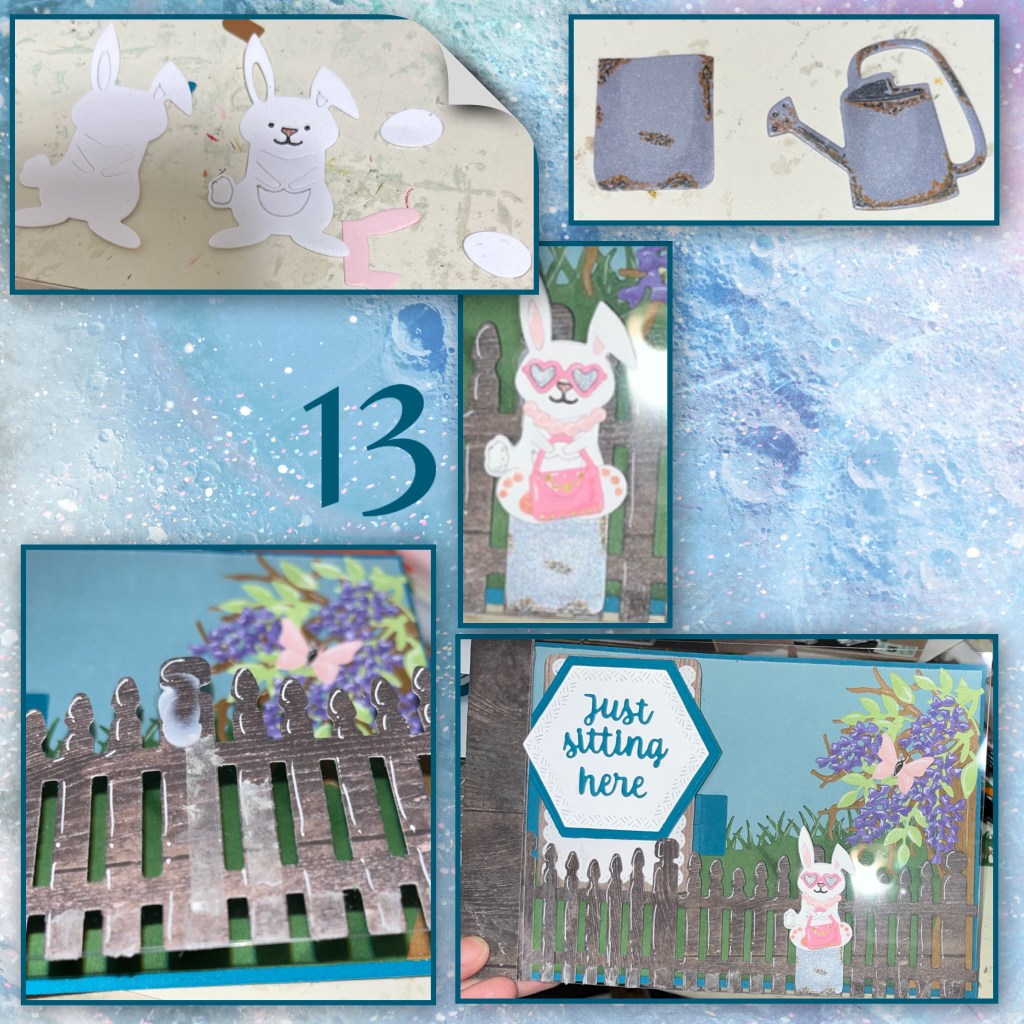
13- the Rabbit is from the Spring animals dieset, I double him so he would have a white back. I also cut 2 eggs that I will turn into feet. To make rust on the watering can and the can, I added little black and brown spots with fine point pens. I glammed out the rabbit using pieces from the Tiny Accessories 2
When adding the bunny to the front I only added adhesive behind the fence posts. I also add adhesive to the fence post where it is hidden by the bunny.
14- I added all the flowers and accessories to the front and inside. Continuing to try to hide the adhesive between the flower and the fence post. I also added the 1/2 Hexagon for a place to sign.
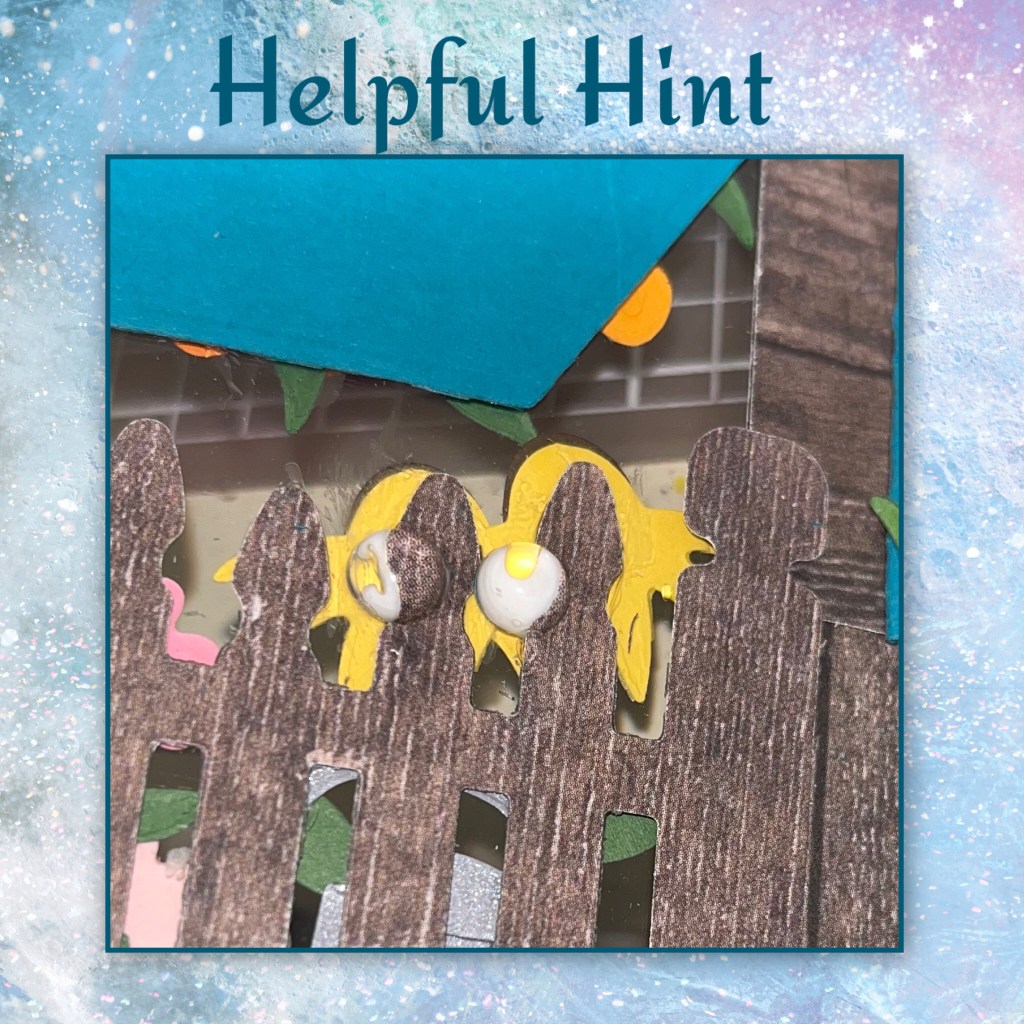
HELPFUL HINT
The bottom right corner of Rockin Rectangle was catching on the fence post so I added the little bubbles on the fence post to help the corner not catch.

Other Tools used

I loved this on FB and IG and had to come here too. I cannot believe how much work went into this card but, if you are like me, you loved every minute. It’s a beautiful card.
LikeLiked by 1 person
This is so AMAZING love all you do and your step by steps xx
LikeLiked by 1 person