
When I saw Karen Burnistons video on how to make a Double-High Tag book card I knew had to give it a go. I actually made this card a year ago so I really hope I remember all the details 😊

All the fun is in the reveal, to see this card in action please check out my FACEBOOK page, feel free to join if you would like to share your own crafty creations. You can also see a video of this card on my INSTAGRAM page (sorry posting videos here takes up too much space)
I went stash diving for the card stock for this card. I’m pretty sure it is all retired Stampin’ Up!
The die set I used to make the card base and the majority of the card is the Tag Book Pop up
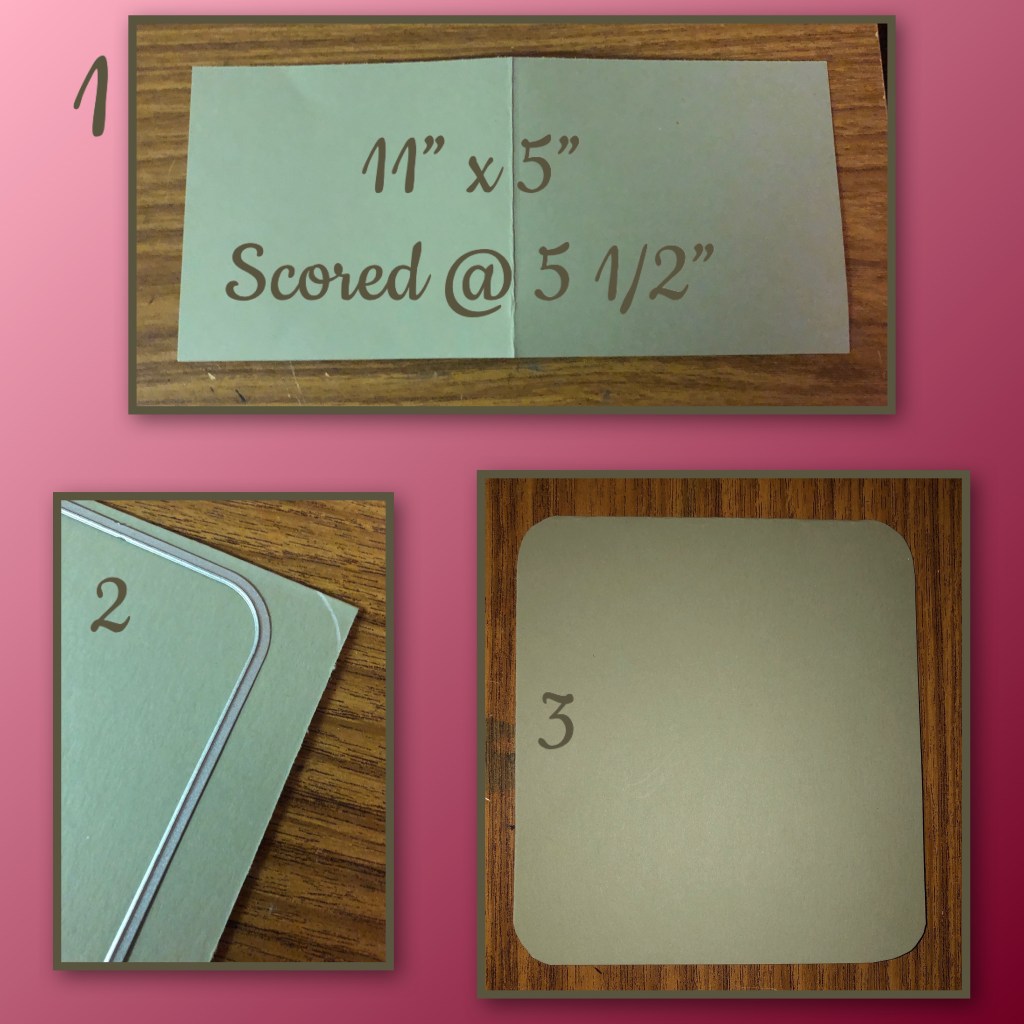
1- cut the card base at 11”x 5” score at 5 1/2”
2- I used the largest die in the set to trace all 4 corners of the card base.
3- I used really sharp scissors to cut off each corner on the draw line. If you have a really good corner punch like a corner chomper you could probably use that. It would have to be able to go through two layers of cardstock
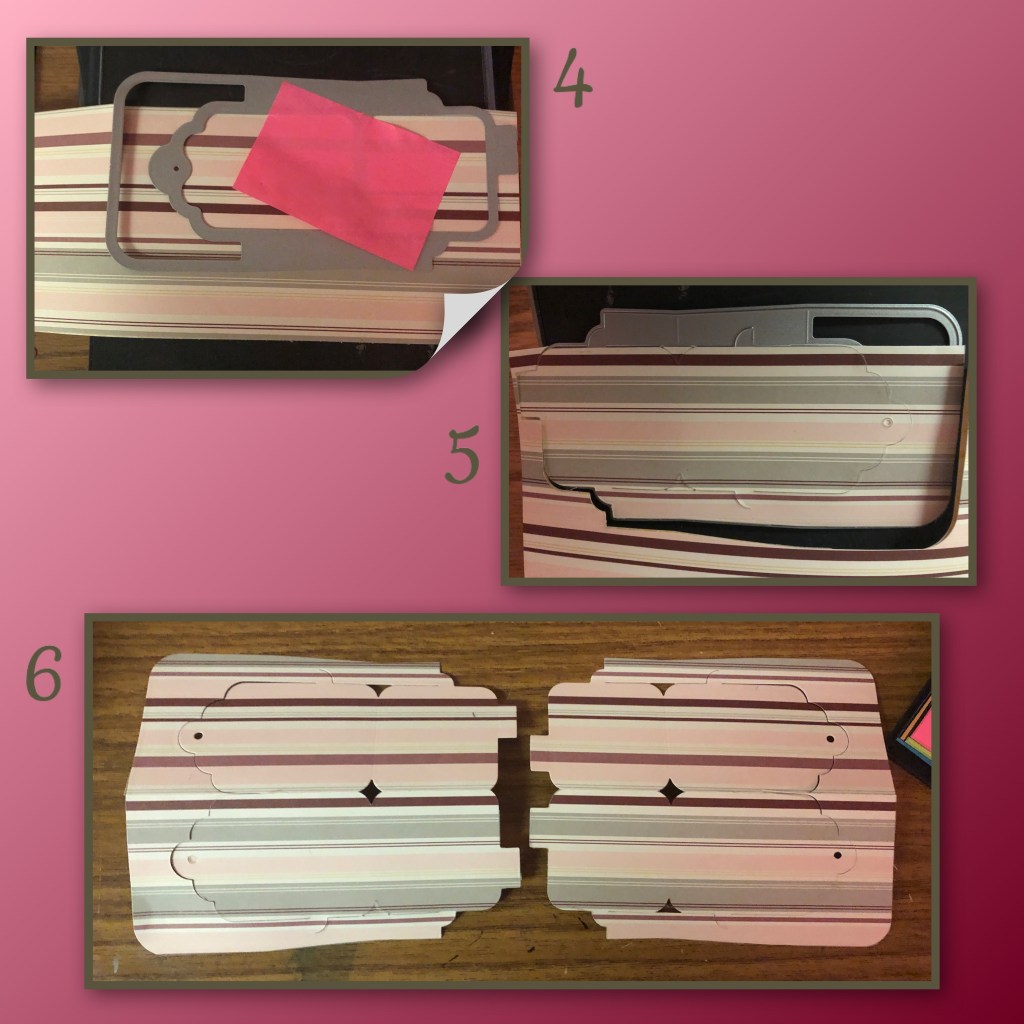
4- I chose a striped pattern paper, and folded it in half, take the die that cut for the mechanism, and line up the top cutting edge of the dye just above the fold, as shown in the photo above. Probably a good idea to tape it down
5- because I was using a striped paper and I wanted the stripes to line up all the way across I cut the right side from the backside of the folded paper as shown in the photo above
6- when you put the panels side-by-side they should look like this, look close at how the tabs in the middle offset each other

7- I like to place the panels on top of each other facing each other, (the yellow pattern is the back side of the striped paper)making sure the tags are perfectly aligned. Then I will fold the little tabs.
8- adhere the little tabs to the opposite panel. The left should adhere left to the right on the top and the same on the bottom
9- your two panels should look like this from the front when they are attached together.
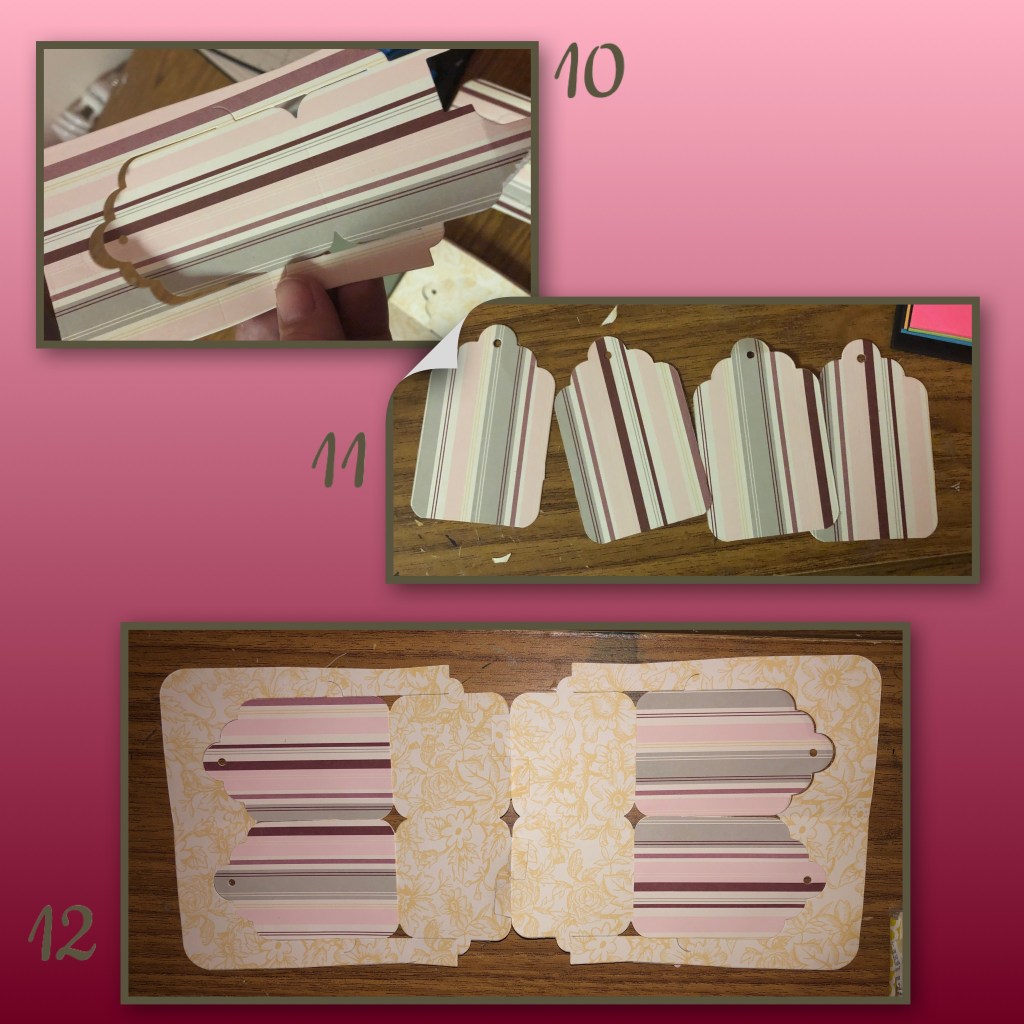
10- Using scraps from the lined paper I cut out four sections of the mechanisms but just to cut out the tag portion.
11-when you trim them off the mechanism they should look like this
12- I attached these tags to the back of the mechanism as shown. Because when you open and close the card you can see the backside and the yellow paper wasn’t what I wanted to see.
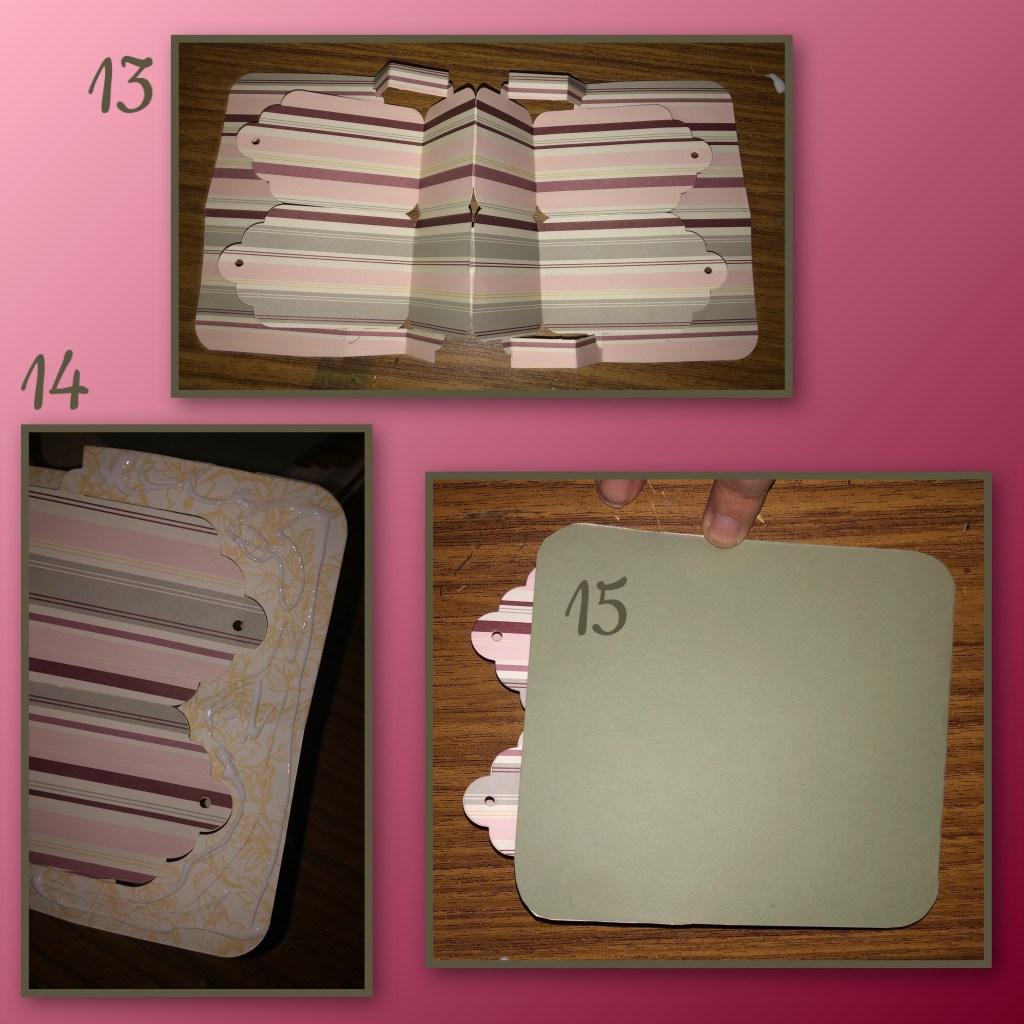
13- fold the mechanism as shown
14- add adhesive only to what is shown in the photo. It is the backside of the mechanism, on both ends. But only as shown
Apologies, I missed a photo. I am adding the mechanism into the cardbase doing my best to match up the round corners of the mechanism to the round corners of the cardbase.
15- when closed the card should look like this.

17- cut out the braces for the skinny arms, they do really add support
18- Cut out two squares from the matching striped paper, slightly smaller than the card base (if I remember correctly it should be 4 3/4” x 5 1/4.”) Trim the corners like you did the cardbase. Adhere one to the front and one to the back of the card bace)
19- This is what the card should look like when it’s open.

20- I used an old die from Stampin’ Up! to die cut this shape. It looks like a Polaroid photo. but any square with a frame around it would work.
21- I can’t remember where the dies came from to make the ground and the clouds but I added them to the square that came out from the last step.
22- I die cut the squares and tags from tag book pop-up die set. Added cloud and ground like I did in step 21 but I also added trees from Oval Frames Pop up die set and the bushes are clouds from the Castle Pop up die set.

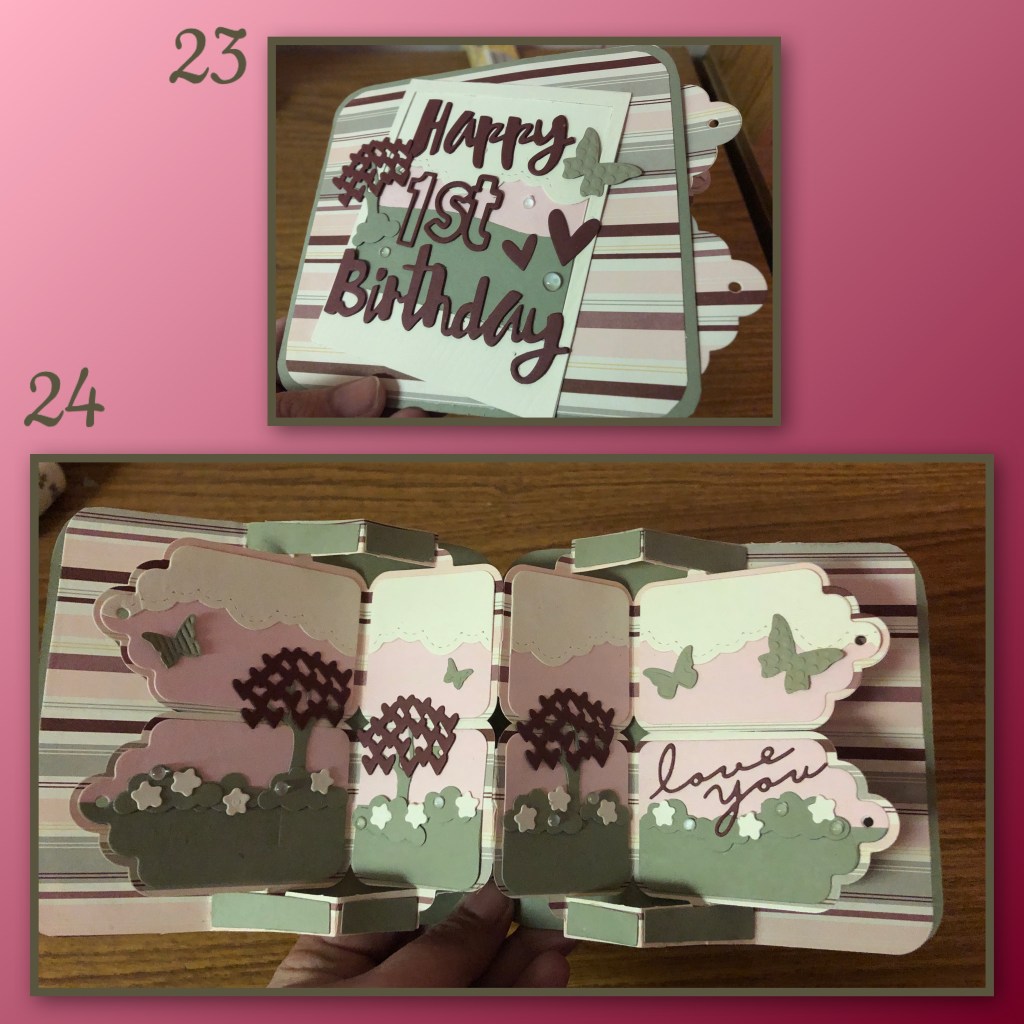
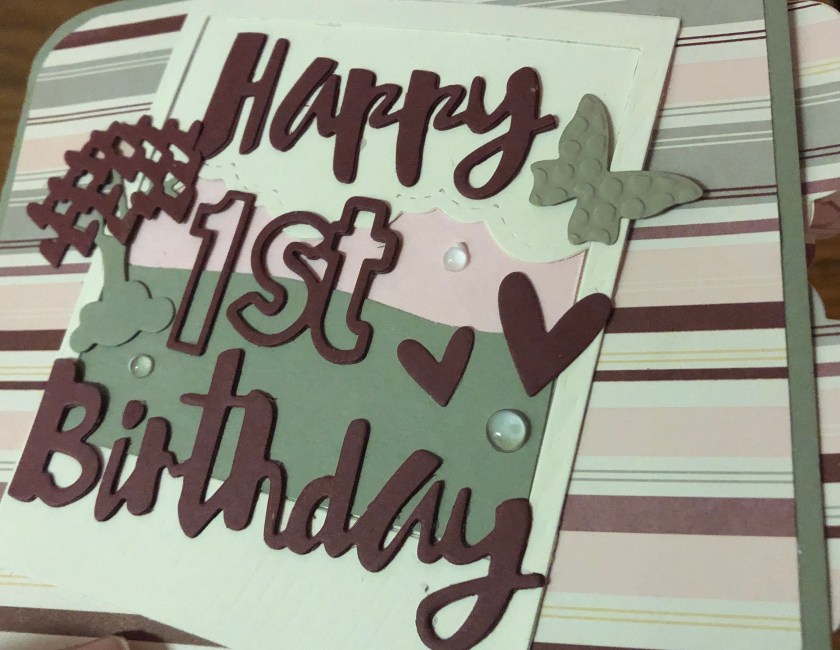
23- I added the Polaroid piece to the front of the card slightly offset and added happy 1st birthday.
24- I added the tags and squares to the inside of the card as shown and decorated with the flowers from the Flower pot pop up die set, the “love you” is from the Swap and Pop die set. The butterflies are retired Stampin’Up.
25- not exactly shown but I added a cream coloured ribbon to the tags and some little clear half bubbles randomly around the inside and front of the card

To see other Tag book cards check these out
