

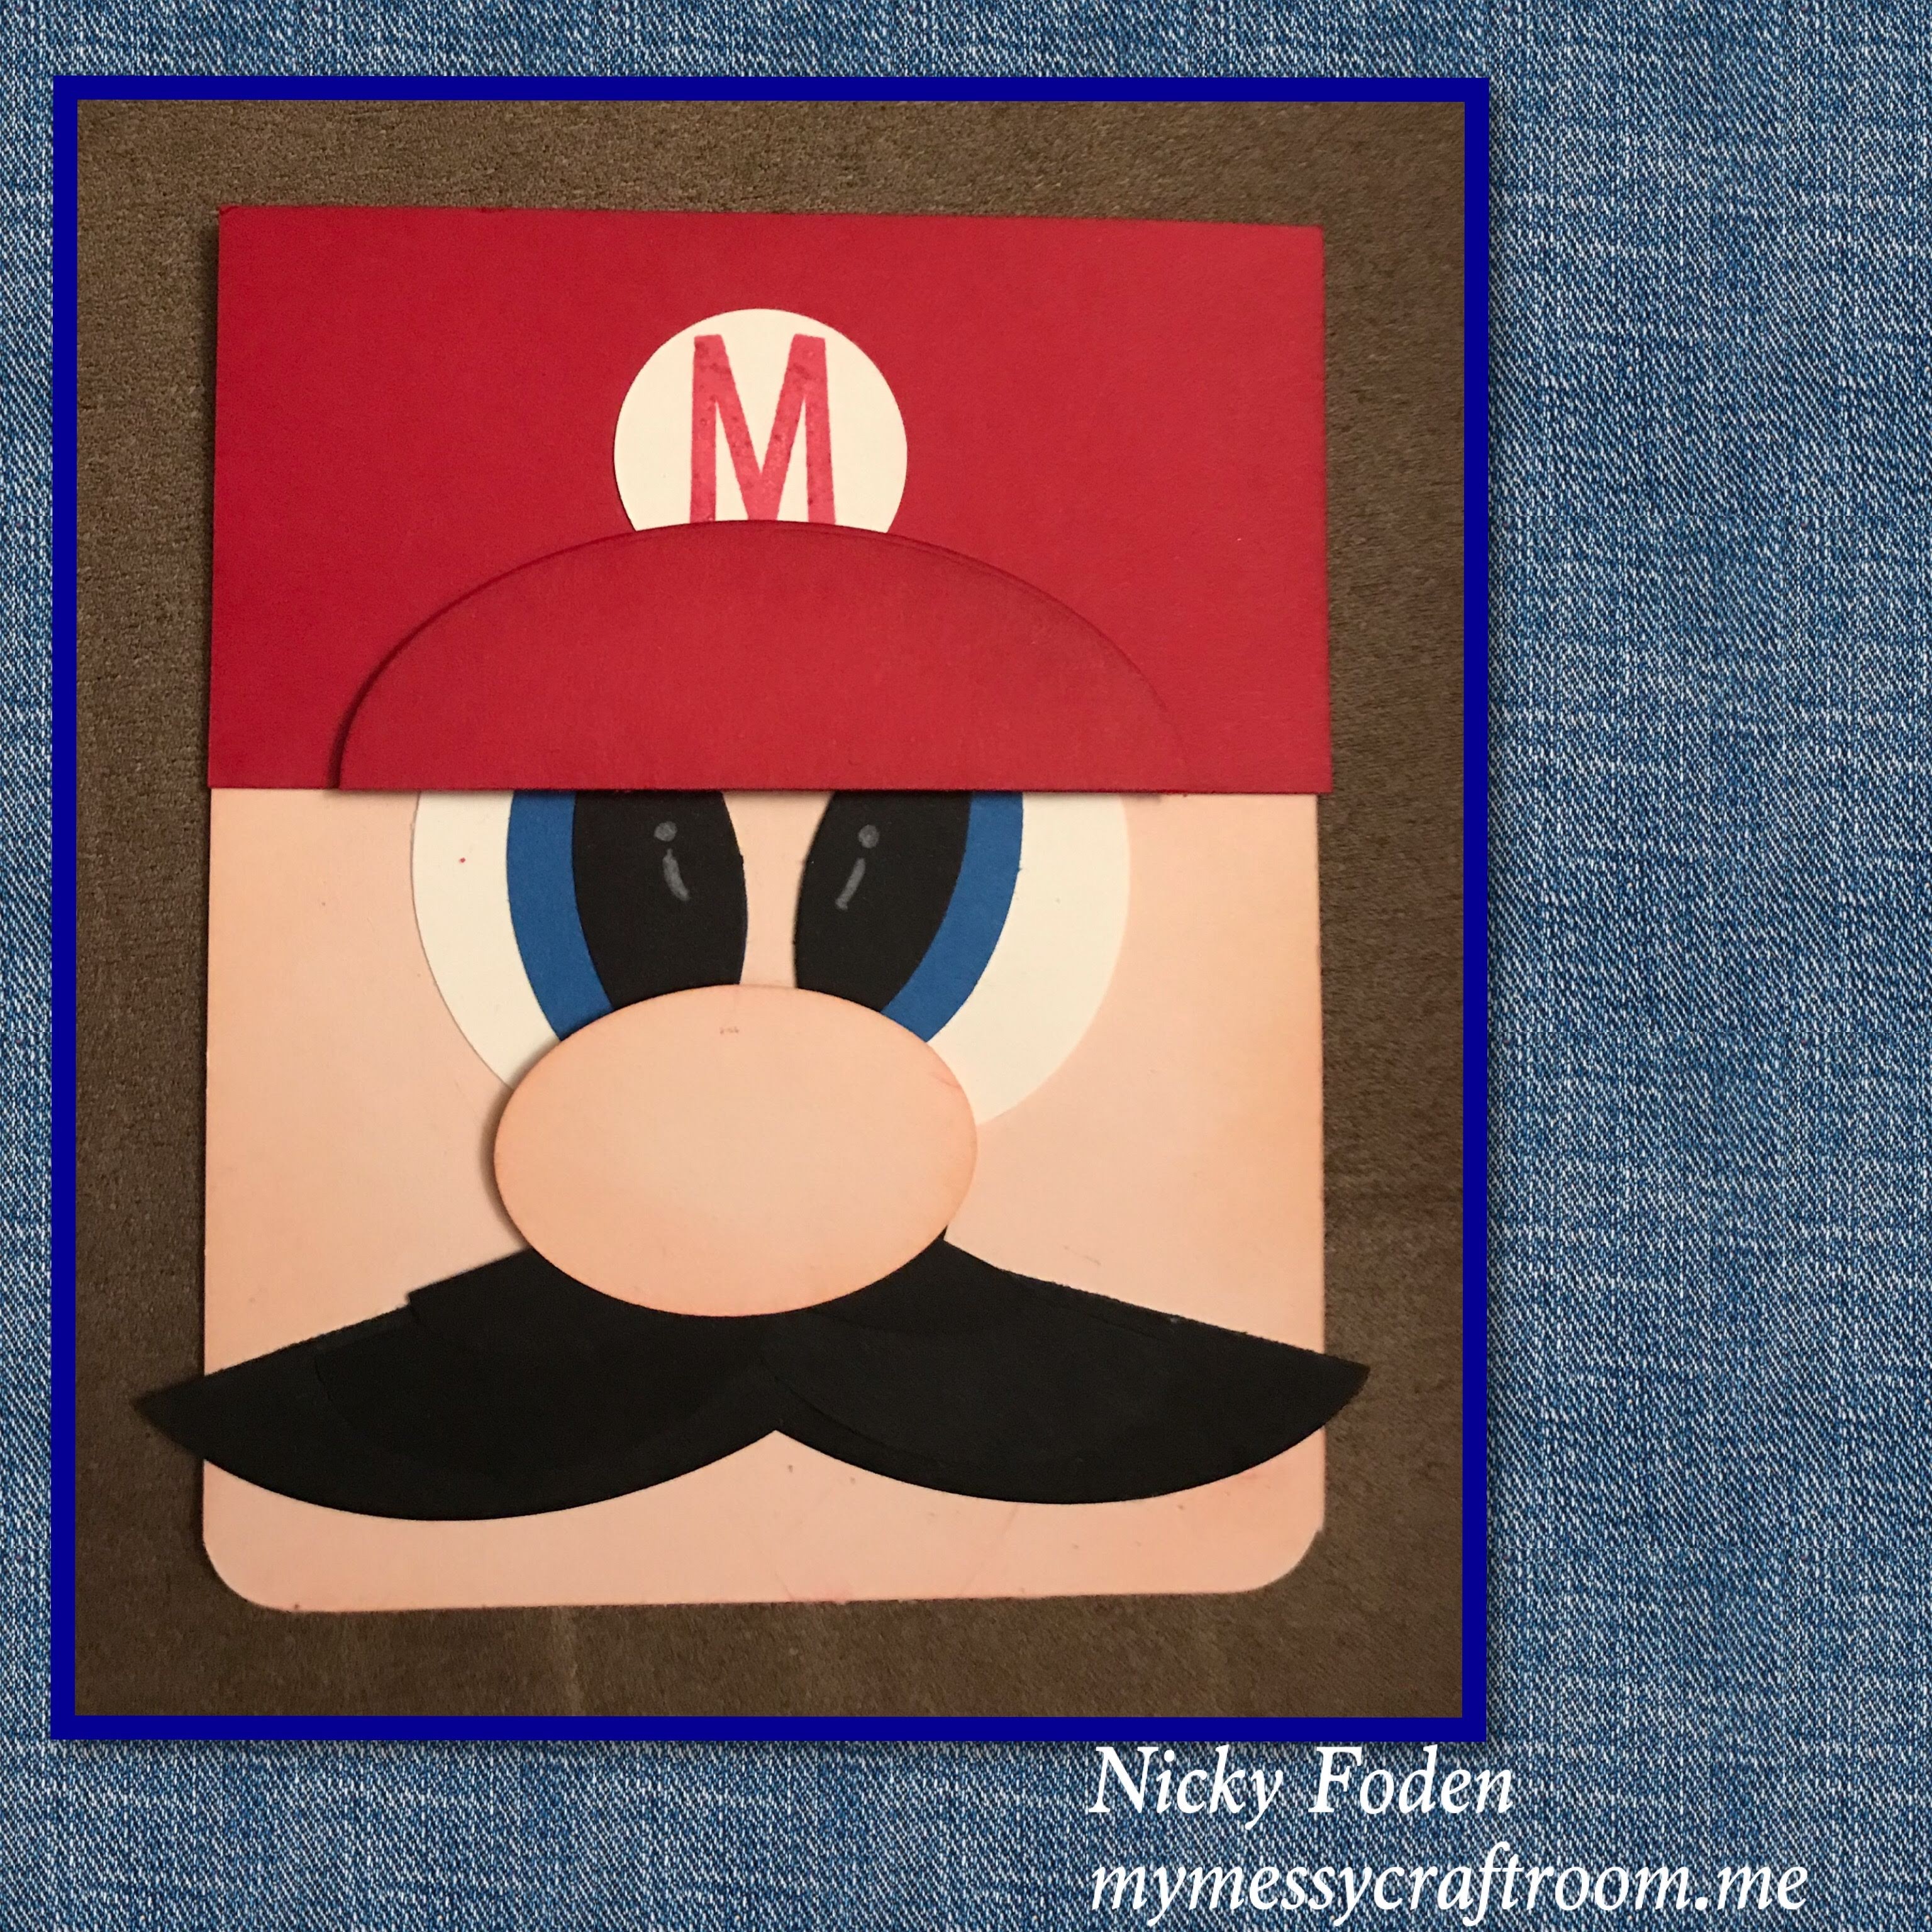
Well I had a busy weekend making cards, I am currently working on three and not one is finished yet. So I dug into my older cards again (sorry) and I found this cutie, it is a card panel that I used for a gift card. When my kids were younger I would make gift cards like this when I knew that wanted a video game (usually for Christmas) but I wasn’t sure want they wanted or what they may have been getting from family. Much cuter than an actual gift card and it entitled them to one free game. We always wrote a note on the back. I can’t take credit for this dude as I CASEd him from Leena Girsa from alacards.blogspot.com way back in 2013, I tracked down her blog and she still has it posted http://alacards.blogspot.com/2013/03/lots-to-show-you.html there are a few slight differences but otherwise its a pretty close CASE
Continue Reading for all the fun details
This card front is soooooo easy to make, it needs vary limited supplies. The Cardstock I used is from Stampin UP . I used Real Red, Blush Blossom, Pacific Point, Whisper White, and Basic Black.
I cut the Blush Blossom Base to 4 5/8″ x 5 7/8″ ( I know an odd size but I wasn’t planning on putting it an envelope so I didn’t really pay that close attention to the size). I took a corner rounder and rounded the two bottom corners. I also used the Wide Oval punch from Stampin Up for his nose ( it is a 2″ wide oval) I used Blush Blossom ink to sponge around the edges of his face and nose.
I cut the Real Red for his hat to be 4 5/8″ x 2 1/2″, I also cut a 3 1/2″ Red Oval with an oval die and cut it in half. I sponged Real Red ink around the edges as well.
I used the Wide Oval punch to cut the White, Blue, and Black pieces to his eyes. I would have cut the Blue buy punching it once, then sticking the punched oval to a piece of Post It note and slid it back into the punch to cut the side off to get the desired shape, I would have done the same with the black of his. I layered and glued them together. I used a white pencil crayon to give him the sparkle in his eye.
His mustache was made by taking a small oval punch ( 1 1/4″ wide) and cutting it out of Black cardstock, then I cut it in half. Next I cut the Wide oval out of Black (2″ wide) and cut it in half, and then I cut the 3″ oval and cut it in half. I trimmed a little off of all the ovals to give them the shape I wanted then I layered them biggest to smallest. Half for the left side and half for the right side.
I laid all the pieces out where I wanted them and I glued the eyes down first. I added the hat slightly over the eyes and I added the brim with Stampin Dimensionals to give it a bit of a lift. I glued down the mustache and then the nose, also with dimensionals.
Last but not least I used a 1 1/4″ circle punch and cut out a white circle and stamped a Read Red “M” in the middle of it. I adhered it above and slightly tucked behind Mario’s hat brim. Voila
If you would like to see some more fun punch art check these out
If your creative and or crafty and want to share what you love please feel free to join my Facebook group https://www.facebook.com/groups/MyMessyCraftroom/

This is a fab card hun xx
LikeLike