

I pulled this card together pretty quick, my daughter needed a Birthday card for a friend who loves basketball and I was trying to think of how I could make a really neat basketball themed card and then it came to me, I could make a pop-up basketball net out of the Coffee Cup Pop-up and I did 🙂 I had to feel my way through making this card as the sizing was a bit off so I had to make some adjustments along the way, but all in all, I think it turned out pretty good.
Click “Read More” to see more
I started off with a 4 1/2″ x 5 1/2″ long card base cut out of Basic Grey cardstock.

Next, I cut out the Coffee Cup Pop-Up out of clear acetate, and the pieces to attach the coffee cup piece to the card out of Basic grey (so it would blend in with the background)

I made sure the creases were folded well, I used a bone to make sure.

Next, I attached the clear cup to the card base as per Karen’s video directions.

I cut out some rounded corner rectangles, 1 Real Red, 1 Going Grey in the same size as the Red and 1 Going Grey a size smaller.

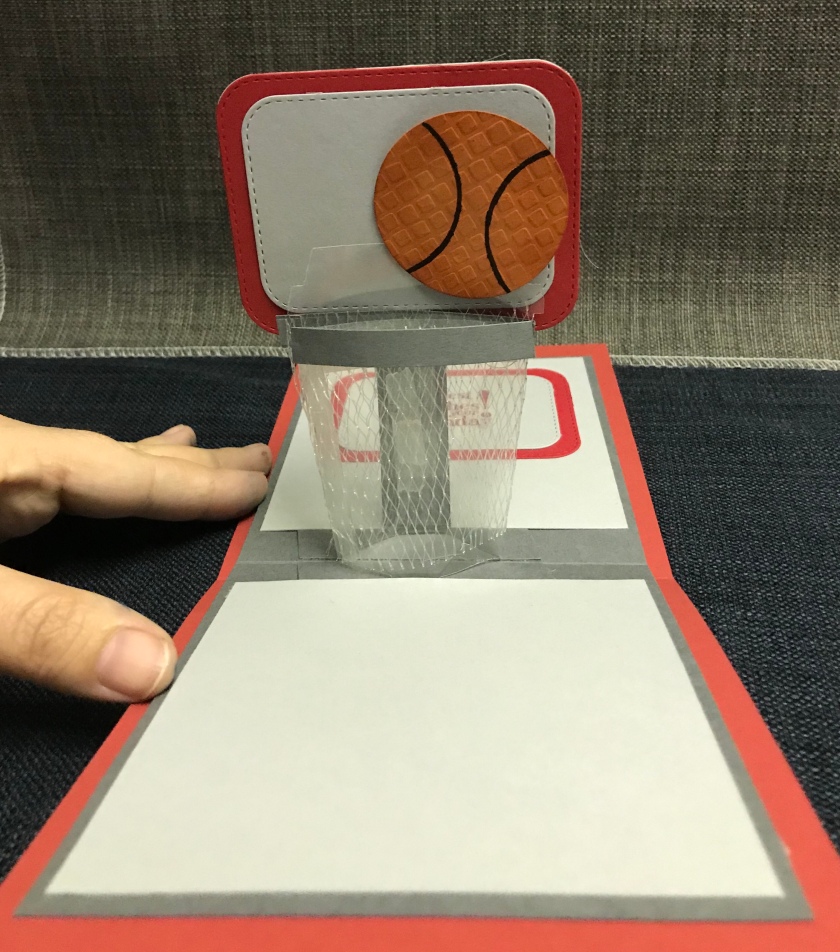
I stacked the smaller rectangle on top of the Real Red rectangle and then stacked them on top of the larger Grey Rectangle, I made a backboard for the basketball hoop.
I used sticky strip to adhere some mesh to the clear acetate (it was a mesh marble bag)

I cut 2 strips of Basic Grey to make the hope and to cover the sticky strip that was visible.

I attached the backboard to the back of the net and added a piece of grey cardstock up the back as a support.

Now I need a basketball, I cut 2″ circle out of Really Rust cardstock.

I ran it through my Big Shot with a textured embossing folder, sponged the edges with Really Rust ink, and used the circle die to trace the 2 black lines with Basic Black marker.

and added it to the net, by sticking it to the clear cup rim the ball is on a slight angle.

So here is problem # 1, when I close the card the backboard pops out the end 😦

so first I moved the backboard a little bit further down, but it still sticks out, so I cut a card base 5″ x 6″

2nd problem, when making this kind of pop (object pops up the middle when the card is open flat) you really can’t put a folded inner card and attach it to an outer card base, when putting a fold in a fold the card will generally buckle and not open all the way, but I was too far into this card to start over so I added adhesive strips to only the two ends of the inner Grey cardstock and added it to the Red outer piece, I made sure that the card would close all the way before sticking it together. When opened, the card does lift a little in the middle but it’s not that noticeable and I’m ok with that.

I lined the inside of the card with Going Grey cardstock then I stamped the Birthday Greeting (retired Stampin Up) with Real Red Ink on to a tag that I made to match the backboard.

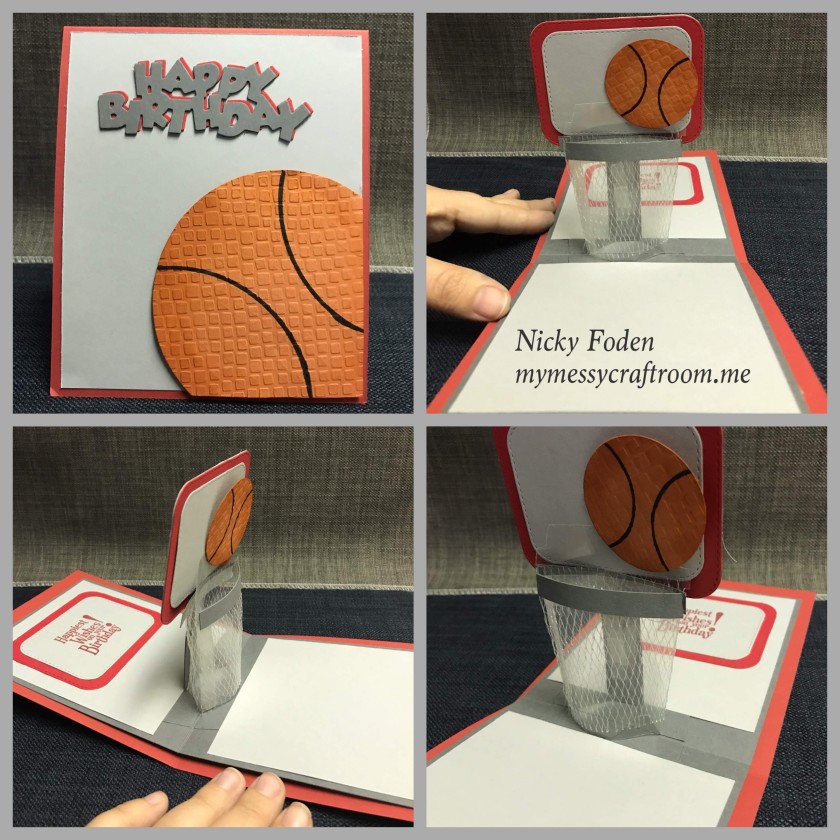
the complete inside.
Now for the outside. I started by adding a Going Grey panel over the Red card base.
I used a 4 1/2″ circle die to cut a circle out of a corner of Really Rust cardstock

I ran it through my Big Shot with this embossing folder and inked up the edges.

I used the die to help trace the black lines

I added foam to the back to give the ball a little lift.

I cut out Happy Birthday twice from Basic Grey cardstock and once from Real Red cardstock.

I layered them together, leaving a little bit of the red showing and added it to the card


Finished card front.


to see other fun cards, check these out “Anniversary by the Beach”
Mothers Day Twist Panel Pop Up Card
Strips & Scraps Pop Up Birthday Card

This is brilliant! Great work on the card 🙂
LikeLike
So creative! Love how you utilized your dies for something different…and the use of the mesh bag!!! Excellent job!!!
LikeLike
Wow, this is brilliant, what a fabulous card, thanks for sharing xx
LikeLike