

I can’t believe we haven’t even gotten past Halloween yet and I’m already stressed about Christmas cards. So when this week Craft Roulette parameters came up I knew I was making a Christmas card. This weeks parameters ⬇️

This is the card I made, I used Kraft, Vanilla, and red cardstock, the “not cardstock” pieces are the acetate, the patterned paper, the ribbon, and the glitter. Santas work shop colours, I’m sure there would be wrapping paper in Santas work shop and my colours match the wrapping paper in the front. Santas coat would have a collar even though his beard is in the way. I added gold bow collars on the itty bitty Teddy Bear, and last but not least I used a Zig Zag ribbon on the inside borders.

All the fun is in the reveal, to see this card in action please check out my FACEBOOK page, feel free to join if you would like to share your own crafty creations. You can also see a video of this card on my INSTAGRAM page.
1-cut the card base and panels to the dimensions below

I used the Oval Frames Pop up dieset from Karen Burniniston. All the ovals I cut are also from this dieset
2A- I chose to cut out the Santas from a patterned paper (retired Stampin Up) I used the Oval die that cuts the Oval the the frame. I tried really hard to not cut off his hands. I moved a small cutting pad around the image to cut different sections but not all of the image. I then fussy cut around the areas I didn’t want to cut out of the oval (the mitt)
B- I accidentally cut off the one hand so I taped it from behind. There will also be a weird gap under the skates but I already have a plan to fix it.
C- this is what all the Santas look like.
D- I added Iridescent glitter all over Santas white trim on his coat and pants. The glitter will cover the line where I reattached the hand.
Put these aside until the from the glitter is dry.

3A- I used the largest square from the Crosshatch Square set and I cut out the Christmas tree paper. Then using the largest 2 squares I. Ade a red frame. One of the dies slipped on the way out so there is a weird missing piece, BUT I will continue and not waste this frame. I already have a plan…
B- I decided to fussy cut some gifts from the extra tree paper, and I wanted a teddy bear on the front so I fussy cut one from an extra piece of the Santa paper. I added another gold bow to the bear
C- I used foam adhesive to add the fussy cut pieces on to the square for the front.
Put this aside until the glue on the teddy bear is dry.

4A- add the panels to the inside. I also added a double panel to the front of the card and the last red panel is on the back.
B-cut out the mechanism pieces and all the red rings using the dies from the Oval Frames Pop Up
C- start assembling the mechanism. (Karen has a video tutorial on the product page at the link ⬆️ )
D- I added the Santas to the Kraft Ovals before attaching to the card, I added extra glitter to cover the gap between the skates and the frame.
E- I added the red rings to the front section of the mechanism before attaching to the card.
F- add the last 2 Santas to the outside ovals.

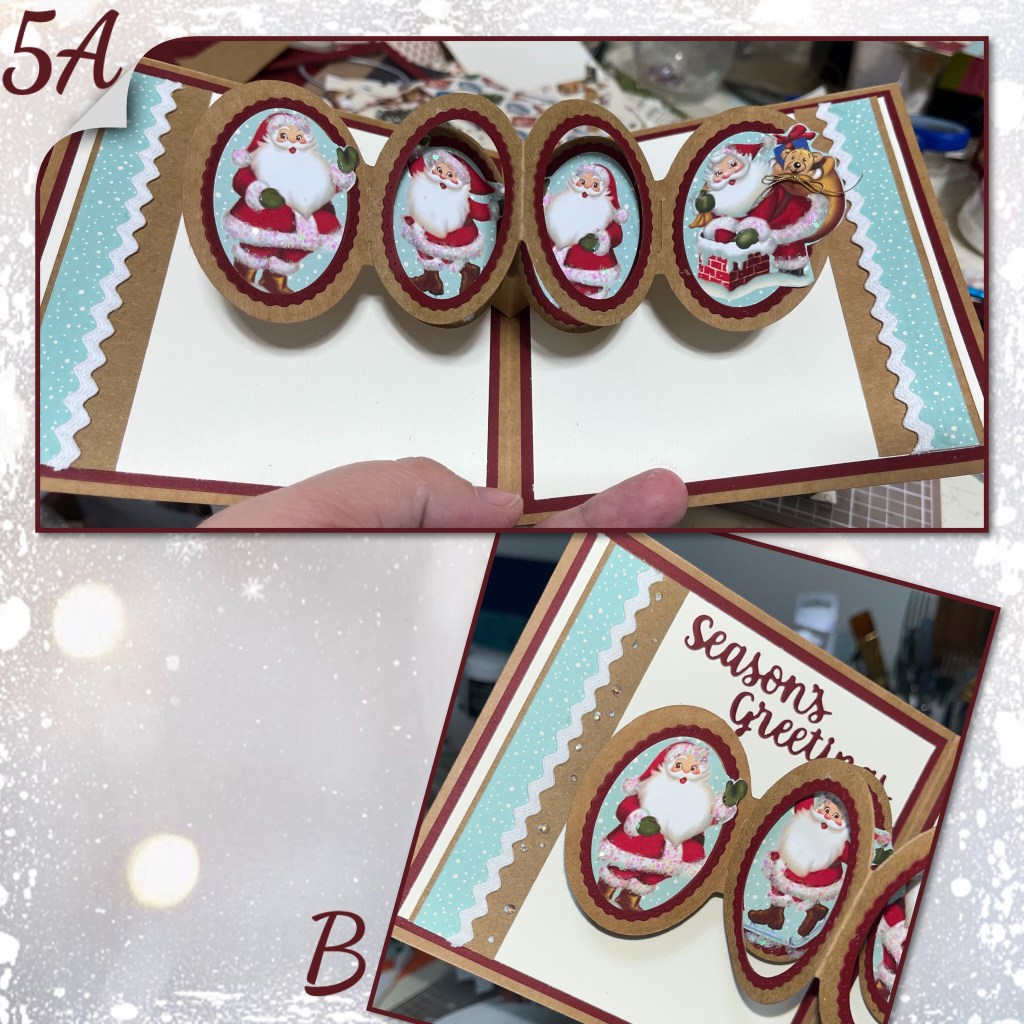
5A- I made borders for each side using strips of Kraft cardstock and scraps of the blue patterned paper that matches the Santa paper background. I added rick rack ribbon for my zigzag element.
B- I added Season Greetingd from Word Set 3 Holiday and I added little gems calling the border as well.
Now back to the front
6A- because I used foam adhesive behind the gifts I needed the frame to be higher so I used 2 pieces of fun foam, glued together
B- make a frame around the pattern paper, then add some of the glitter. Not shown but I put on a square piece of acetate and the red frame.
C- I cut thin strip (slightly thinner than 1/4 “ wide) and wrapped around the outside of the hacker frame. I feel it gives the hacker a finished look.
D- I made another ooooopps, and when I glued down the red frame I didn’t glue it down low enough so some adhesive is showing. I knew I was going to add a ribbon, so I wasn’t too concerned. I add a thin strip of red card stock to cover the glue just incase it is still visible through the ribbon.

7A- can you believe I found this bow in my stash? I don’t even remember making it. But it is perfect. I’m pretty sure I made it when I was practising making fork bows. I wrapped the ends around the back of the shaker panel and add to the card front.
B- I added a few gems to the lower left card front.


Dieset Used
Other Tools used
Glitter is from Walmart
Ribbon is all retired Stampin Up

I like that you and your fellow design team share all the info needed to make your lovely cards. Thank you.
LikeLiked by 1 person