

What is Halloween with out Trick or Treaters, I wanted to make a couple of cute cards, not too spooky as they are for my young grandchildren, so I’m leaning a little to the cute side. I thought it would be fun to put a new spin on these Halloween dies and make them look like they are costumes.
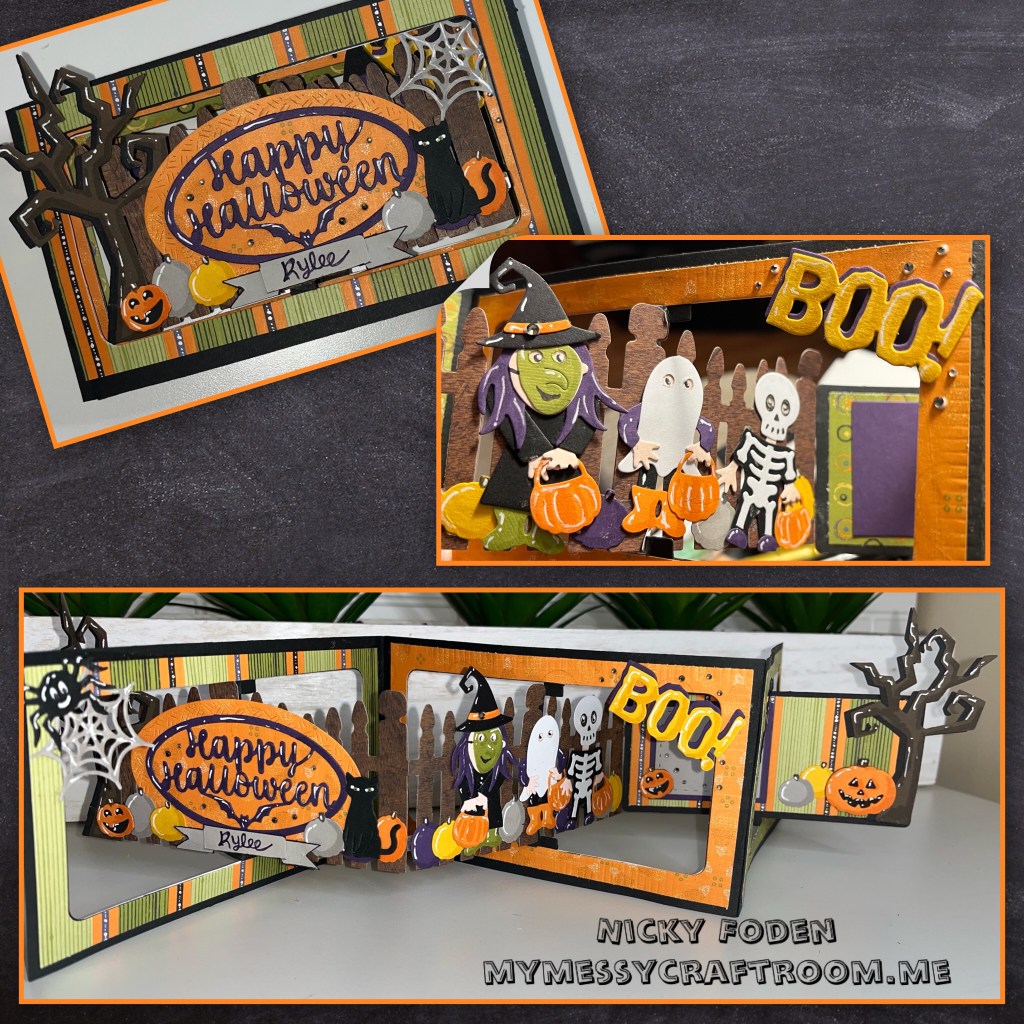
All the fun is in the reveal, to see this card in action please check out my FACEBOOK page, feel free to join if you would like to share your own crafty creations. You can also see a video of this card on my INSTAGRAM page.
I did some mixing and matching of dies to make the trick or treaters
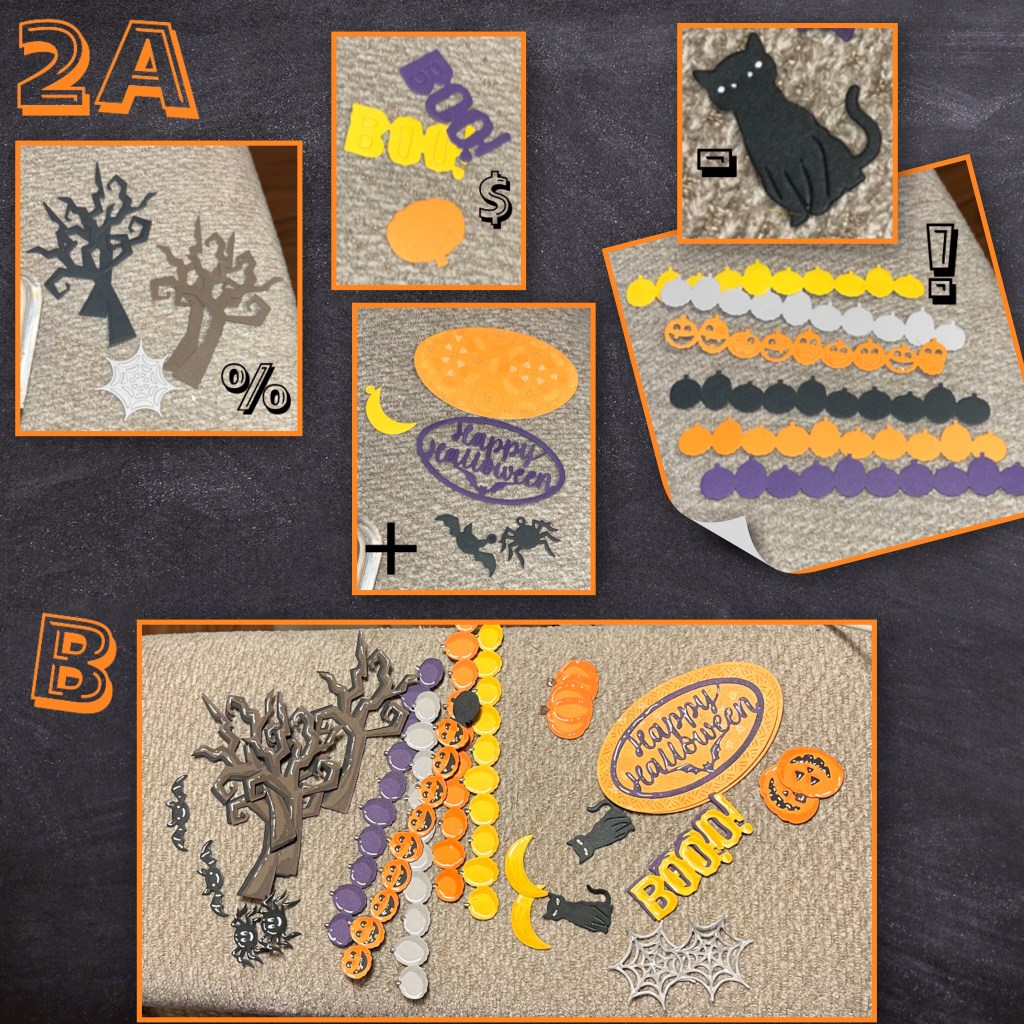
All dies will be listed at the end, I used 1/8” punch for the eye holes in the masks
1A- Witch- I doubled the face and trimmed a bit off the green to make it a mask. Most of the pieces are from the same set.
B- I mixed in some different pieces to make this ghosty, I just used 2 scrap pieces for the legs
C- to make the skeleton costume first I trimmed off the head, hands and feet, I glued the body to black cardstock then just fussy cut around it. I used some scrap of the skin tone to go behind the eyes and to make the neck.
D- because I’m making 2 cards, I doubled them up. I also added shadding with a Versa Mark Marker, and highligts with a white Gelly Roll pen

2A- die cut the some other decorations.
B- I layered the trees, the Boos, and the Oval with the greeting. I added shadding with a Versa Mark Marker, and highligts with a white Gelly Roll pen
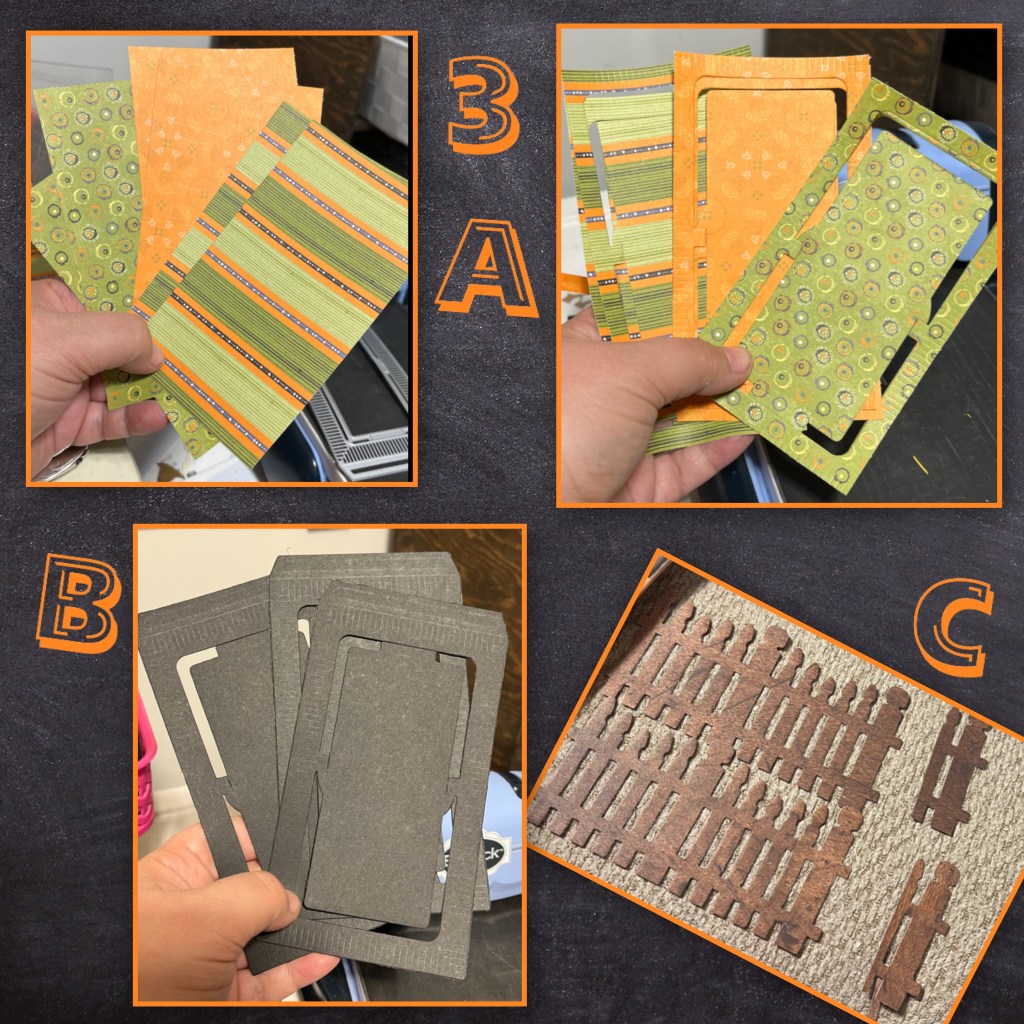
3A- I chose 3 patterned paper from my stash, and die cut them using the Landscape Rectangle Accordion, I cut out the middles and trimmed them in about 1/8” on each side.
B- I die cut 3 Landscape Rectangle Accordion pieces from black cardstock.
C- I diecut 2 sections of fence with the extra pieces for the back from the Fence Add on
4- I started assembling the card base (Karen has a video tutorial on the product page at the link ⬆️ )
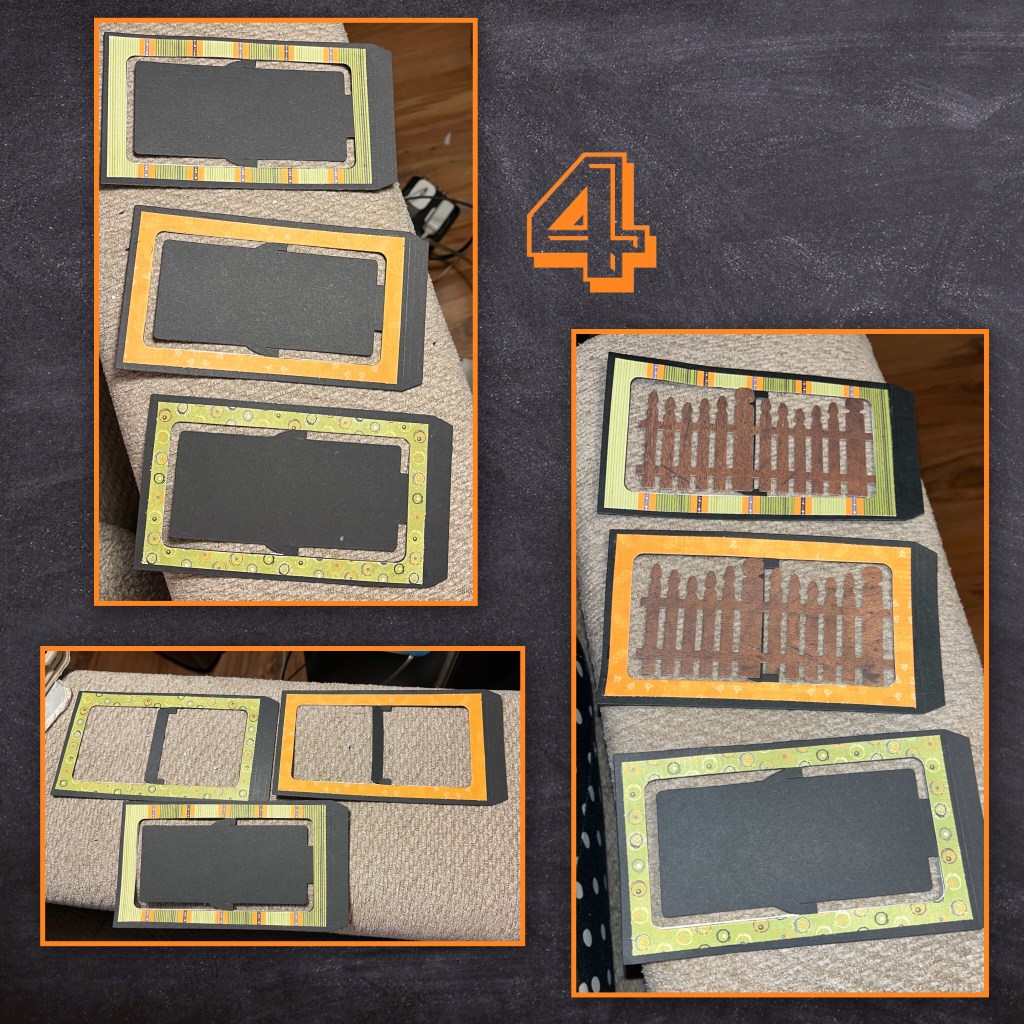
First I attached the panels in the wrong order, because I wanted the orange in the middle and having the green on either side, and then, you would think once I’ve made this same mistake (a previous card) before that I wouldn’t do it again, yet here we are. I should not have attached the frames to the back side of the card panels until after I attached them together, because the tabs covered the paper, so I cut and trimmed new pieces to cover my mistake.

Boo boo # 3 I thought the paper I used to make the fence would be strong enough but I was wrong
5- to add a little stability to the fence I adhered a I thin strip of acetate along the bottom of the fence

6A- I started adding my elements through out the card. Be mindful to add the glue to the slats of the fence, I also did my best to cover as much of the acetate as possible.
B- helpful hint, I did not adhere the actual square for signing yet, BECAUSE it is really hard to sign once it is on, so sign it first then adhere it to the card. (For the finished card photos I just used a small piece of tape to hold in the signing block)

7- I added some itty bitty black gems around the card

8A- I decided to hand write banners so each grandchild will know which card is hers.
B- add the banners to the front of the card under the greeting, making sure it doesn’t hinder the opening and closing of the card.


Dieset Used
O These pieces are hand trimmed
Oval Crosshatch was layered under the “Happy Halloween”
Other Tools Used
Elegant Eggplant marker, retired Stampin’ Up!

I am in total awe and amazement, learning how you created each of the costumed characters. Love this card!
LikeLiked by 1 person
Do you have a tutorial with measurements and how to make the base for this card? I’d love to make something similar
LikeLiked by 1 person
The card base was cut out using the Landscape Rectangle Accordion dieset, follow this link as Karen has a video tutorial on how to assemble https://shrsl.com/3nni5
LikeLike