
Yayyyyyy today is the day. Today is Karen Burnistons sneak peek for her June collection, and to say I have been having soooooo much fun with this release would be an understatement. I hope you all love it as much as I do.
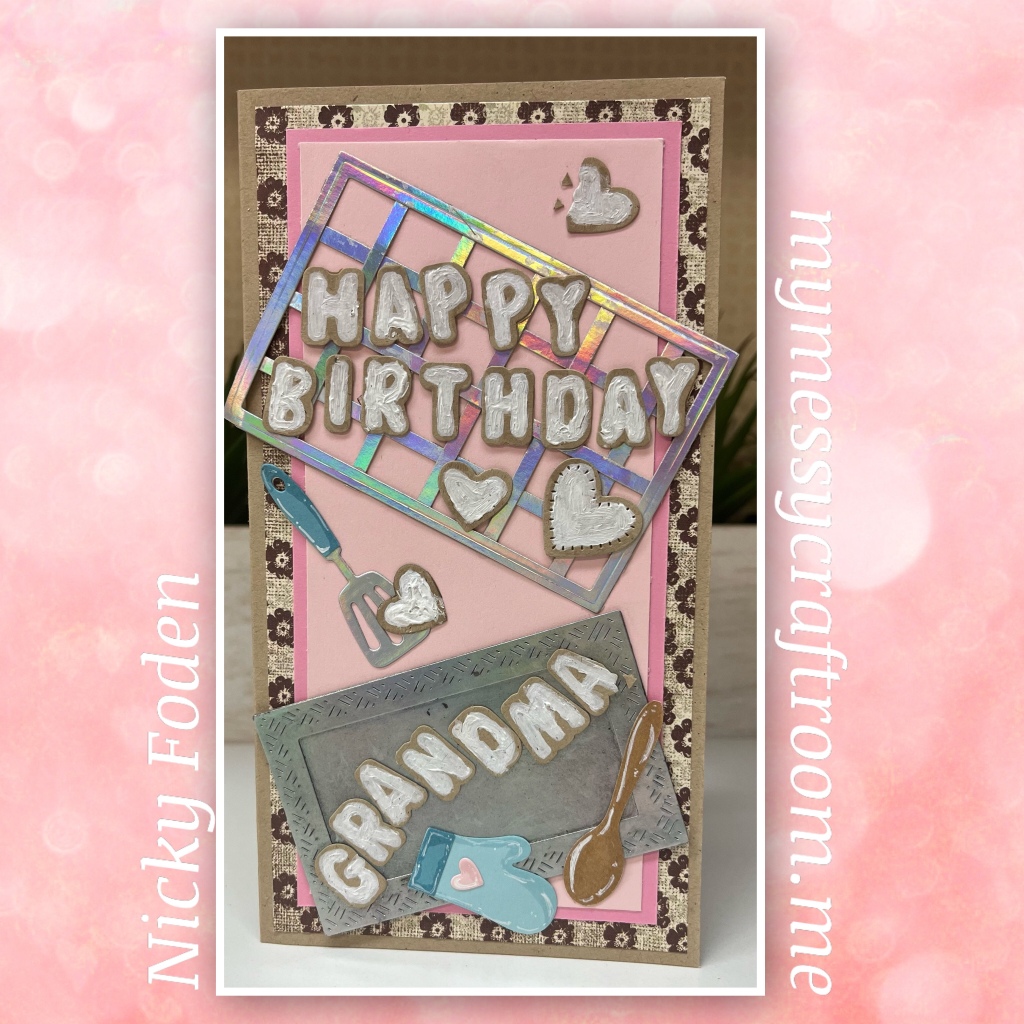
I have been having so much fun with these new dies, I can’t decide which card to post first. As I’m writing this blog post this card is in the running. It is a fun mix of new and previously released dies, and if you like to bake, or have a baking loved one this set is a must. I also will explain how I made some of the other elements that I created to complete the scene.
All the fun is in the reveal, to see this card in action please check out my FACEBOOK page, feel free to join if you would like to share your own crafty creations. You can also see a video of this card on my INSTAGRAM page.
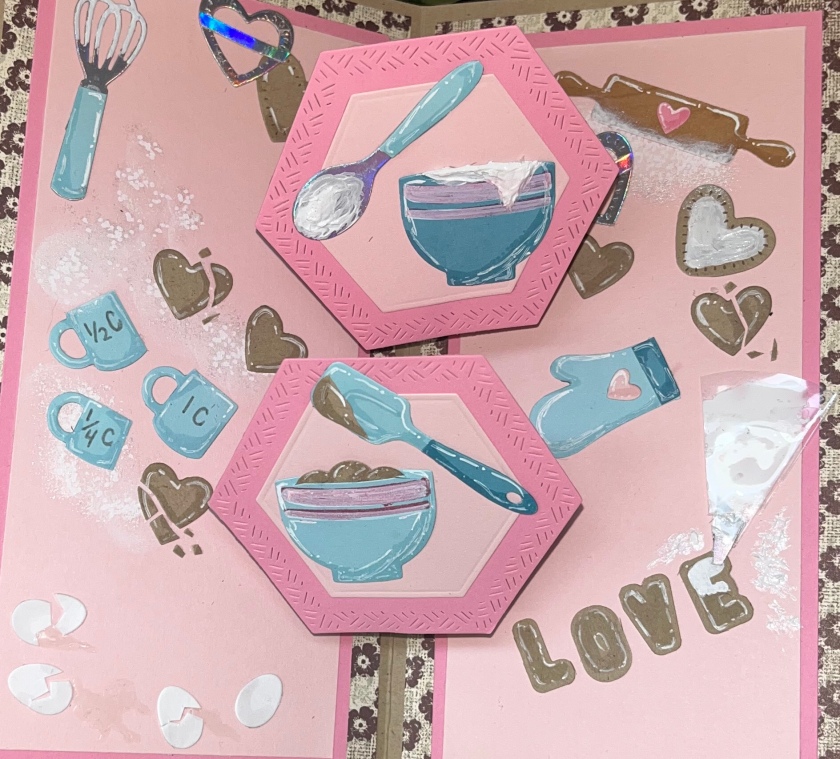
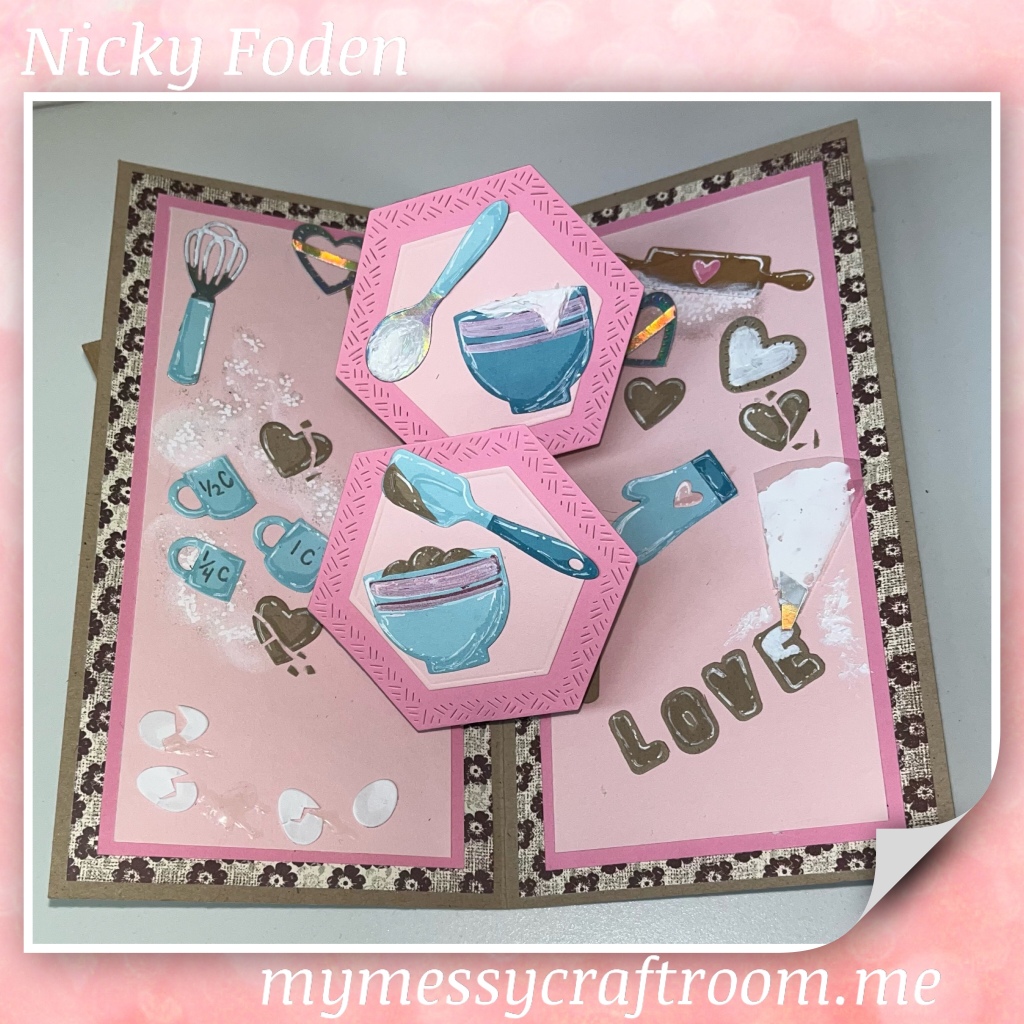
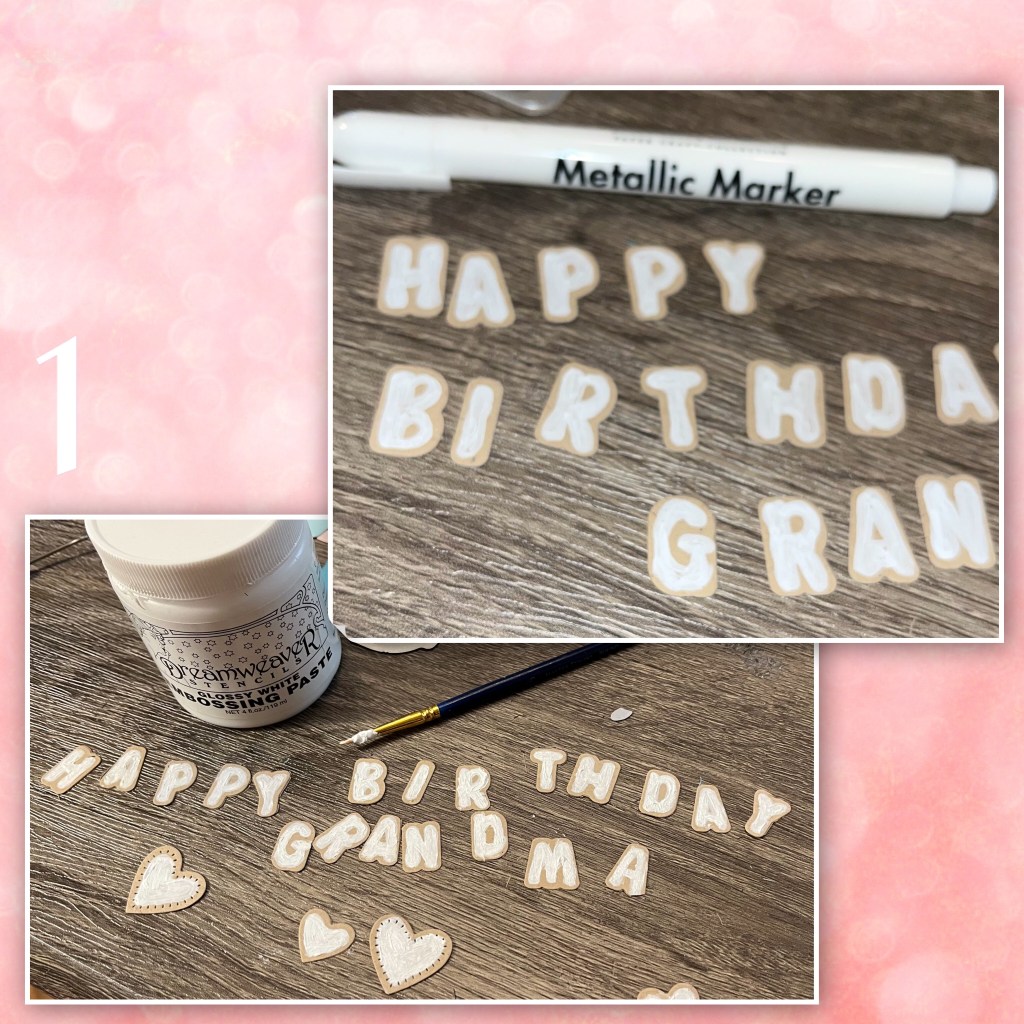
1- to make the word cookies I used the shadow dies from the Mini Alphabet and Numbers . I used the Metallic White marker to colour in the “icing” I chose this marker because the ink sits on top of the cardstock and it fills in nice. I then decided to go over with white embossing paste, and a small paint brush to give it more of an icing look. I just grabbed a couple of hearts, I think from the Heart Collage Pop up.
2a- I die cut all the pieces from the new Baking Charms, also diecut some eggs from the Spring Animals dieset, and 3 mugs from the Coffee Charms dieset. I also cut the word “love” from the Mini Alphabet and Numbers set.
B- I added Shading with a Versa Mark Marker, and highlights with a White gel pen. I trimmed the eggs to make them look like they were cracked. To get the the pink lines on the blue cardstock on the bowls first I used the white metallic marker, then a pink Stampin up marker. I also used the white marker to make some of the utensils look like they have been used. In one of the mixing bowls I used the embossing paste to make it look like icing is slopping out. I used scraps from the cookies to make it look like there is dough in one of the bowls and on one of the spatulas.

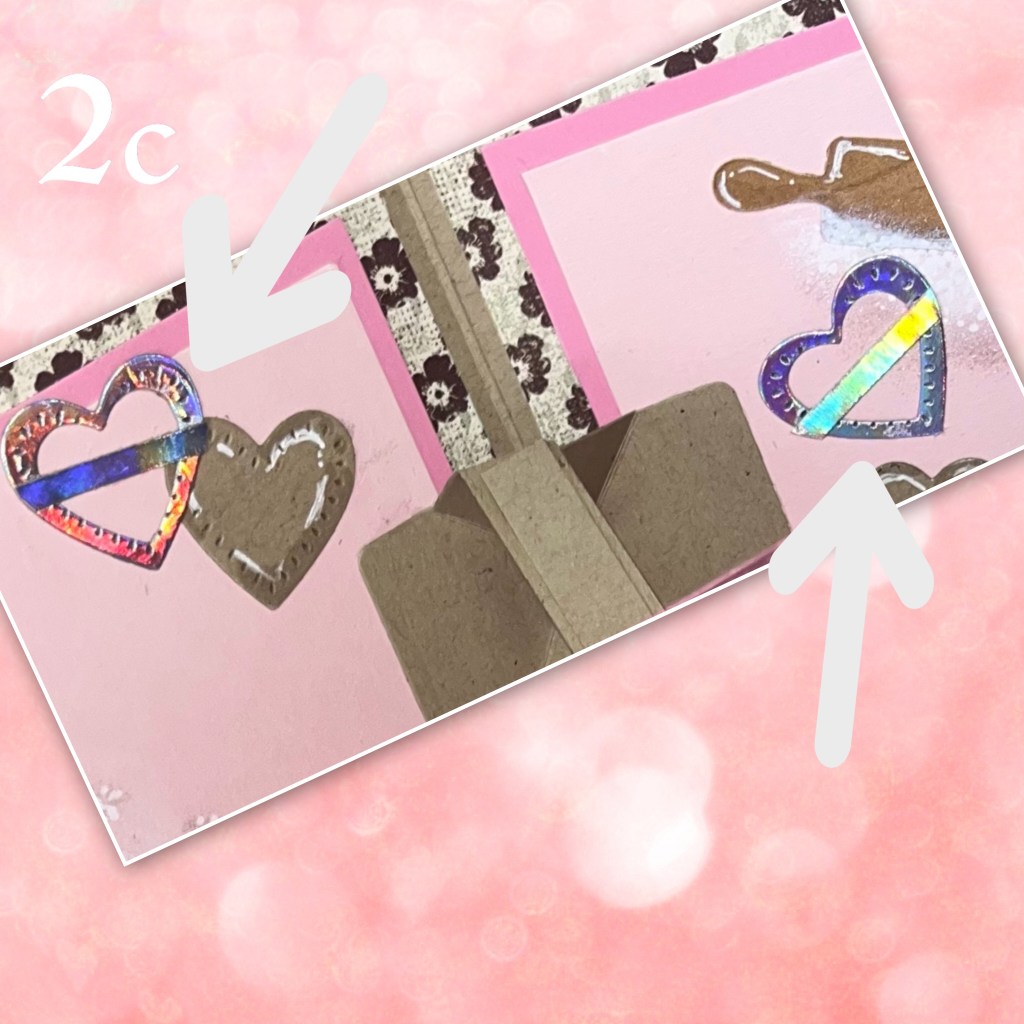
2c- to make the cookie cutters, diecut the larger heart (same one used for cookies) from holographic paper, then die cut the smaller heart out of the middle. I cut a small strip of holographic paper to make the handles.
3- I made the icing bag from scratch. I took a piece of packaging and cut it so the are 2 layers that are only attached on one side. I cut a little piece of holographic cardstock to be the tip, then added the embossing paste between the 2 layers. The paste will hold the layers together once it is dry.

4a- I used the Rectangles Crosshatch to make the cookie sheet and cooling rack out of Holographic cardstock. The large frame on the left was added to the inside rectangle on the right to make the cookie sheet. The frame on the right was used to make a cooling rack. I cut strips about 1/8” to add to the cooling rack as well
B- assemble as shown
C- add cookies as shown.

5- cut the card base and panels (dimensions below) and assemble as shown. I added to the front, back, and inside (back is not shown)the card stock is all from Michaels and the flower paper is from my stash.

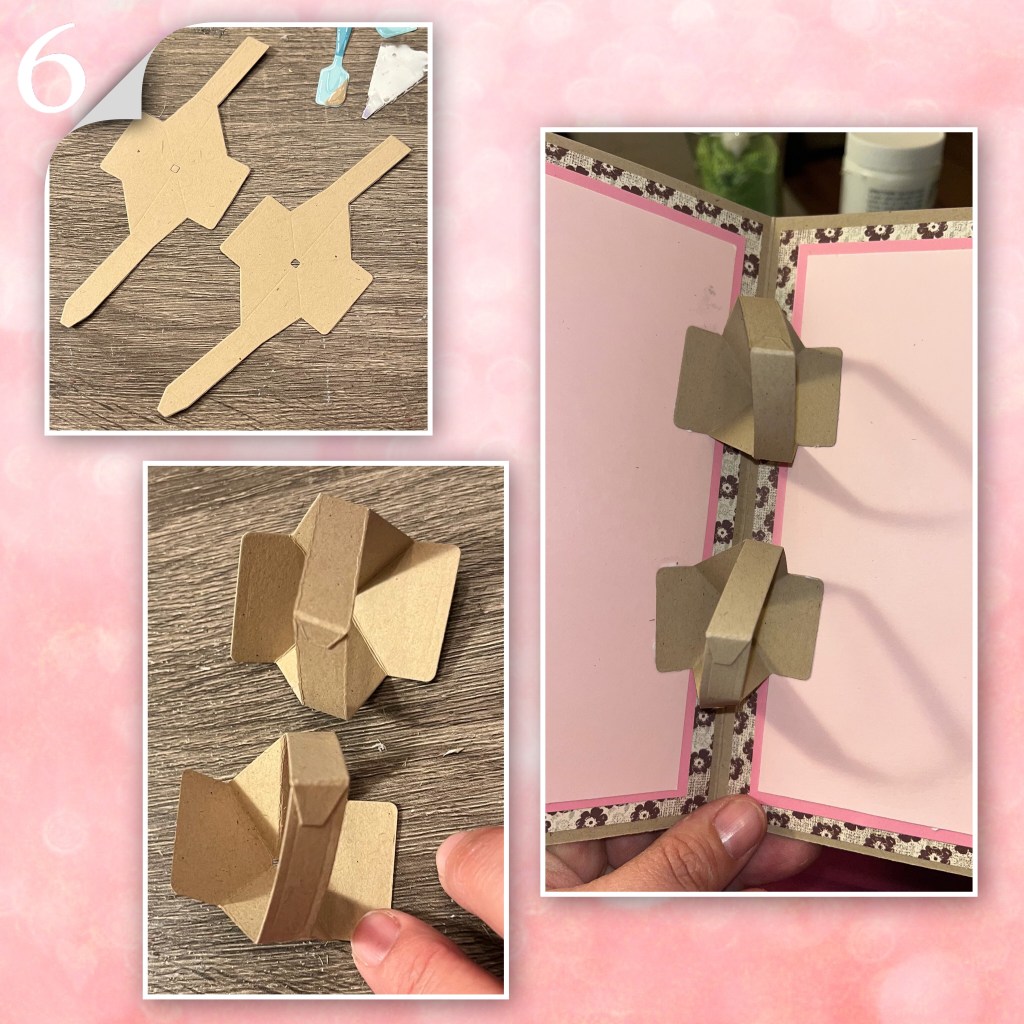
6- die cut 2 of the Twist Panel Pop up mechanisms. fold the score lines and attach the arm as shown. One of the mechanisms I folded backwards, so the mechanism will fold the opposite way. Add to card (Karen will post an assembly video that will be found on the link above)
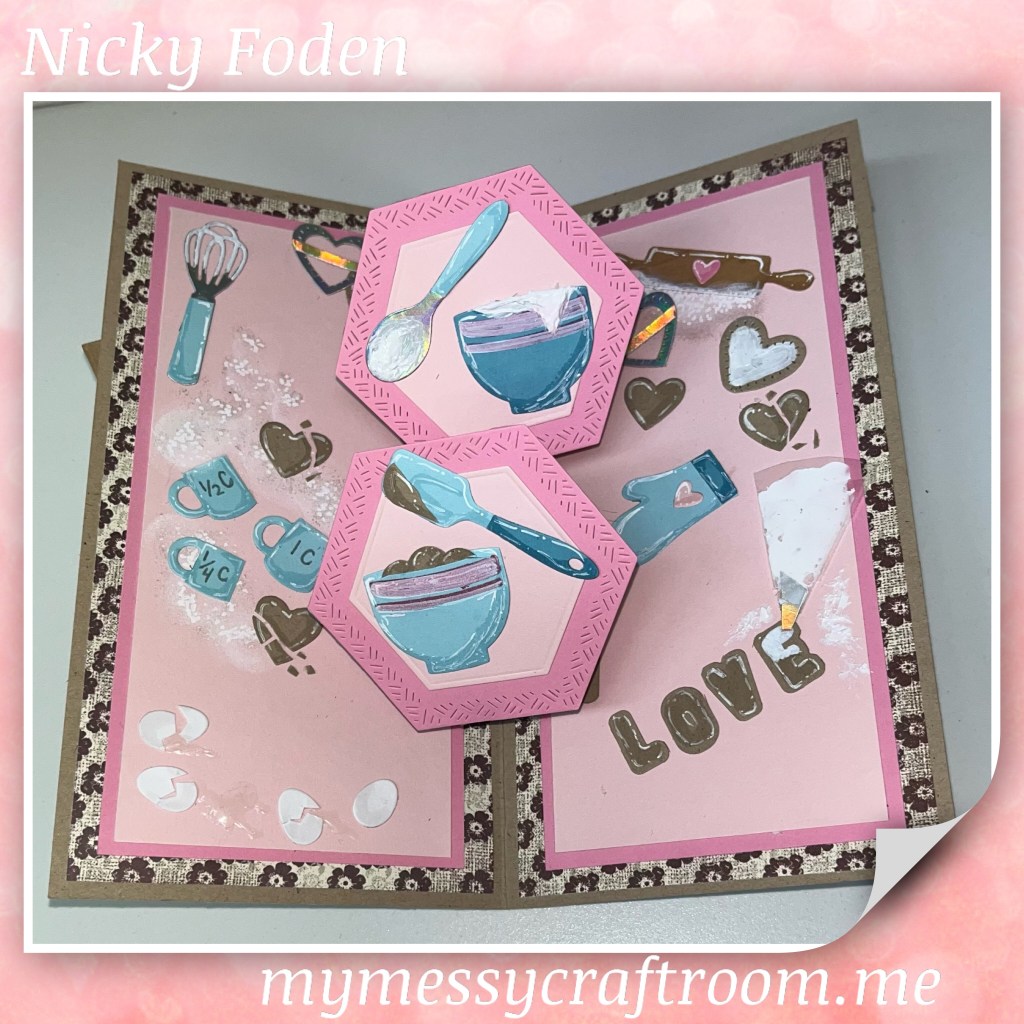
7A- I die cut and layered 2 hexagons from the Hexagon Crosshatch, layered and add to the arms of the mechanism. Make she to test that the card will fold, they may need to be moved if necessary. I added some of the elements as shown.
B- I used 3 coffee cups from the Coffee Charms, I trimmed 2, and labelled them 1c, 1/2 c, and 1/4c. I adhered the cracked eggs and added LINECO Neutral Ph Adhesive to look like egg white (this glue dries and is not tacky). The “flour” that is kind of all over is white craft ink added with a sponge dauber, and I used the white metallic marker to add some dots as well.
C- I added more “flour” around the rolling pin. I added some more remade elements. The word “love” was added to make it look like they were just starting to have icing added.

8- add all these elements to the front.

I thought it would be cute to add some broken cookies as well.

Other Tools used

Fantastic step by step instructions to making tour design. The kinetic movement is a fantastic added feature.
LikeLiked by 1 person
Nicky love this and love the cooking theme too.. great details on your blog as always xx
LikeLiked by 1 person